Four New Art Project Ideas for Grades K-6

Looking for new art project ideas? Here are four new (to me) art project ideas from my fabulous creative colleagues, Kelly and Nancy.

Kelly’s ‘Stained Glass’

'stained glass' sun

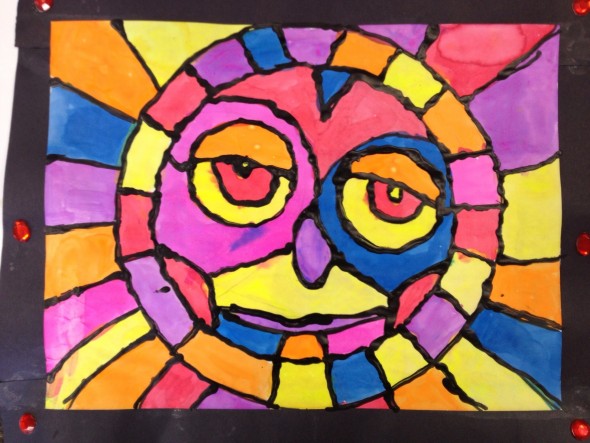
Kelly’s ‘stained glass’ sun made with watercolors and black glue.

Kelly from Skyline School brought these beautiful ‘stained glass windows’ made with fluorescent liquid watercolor and black glue. As a final step, her students rubbed their artwork with baby oil and a cotton ball to make the paper translucent. Primary grades used a paper plate tracer to make the sun. Upper elementary made the geometric window (note: upper grade students used carbon paper to transfer their symmetric designs).

'Stained Glass' window 2

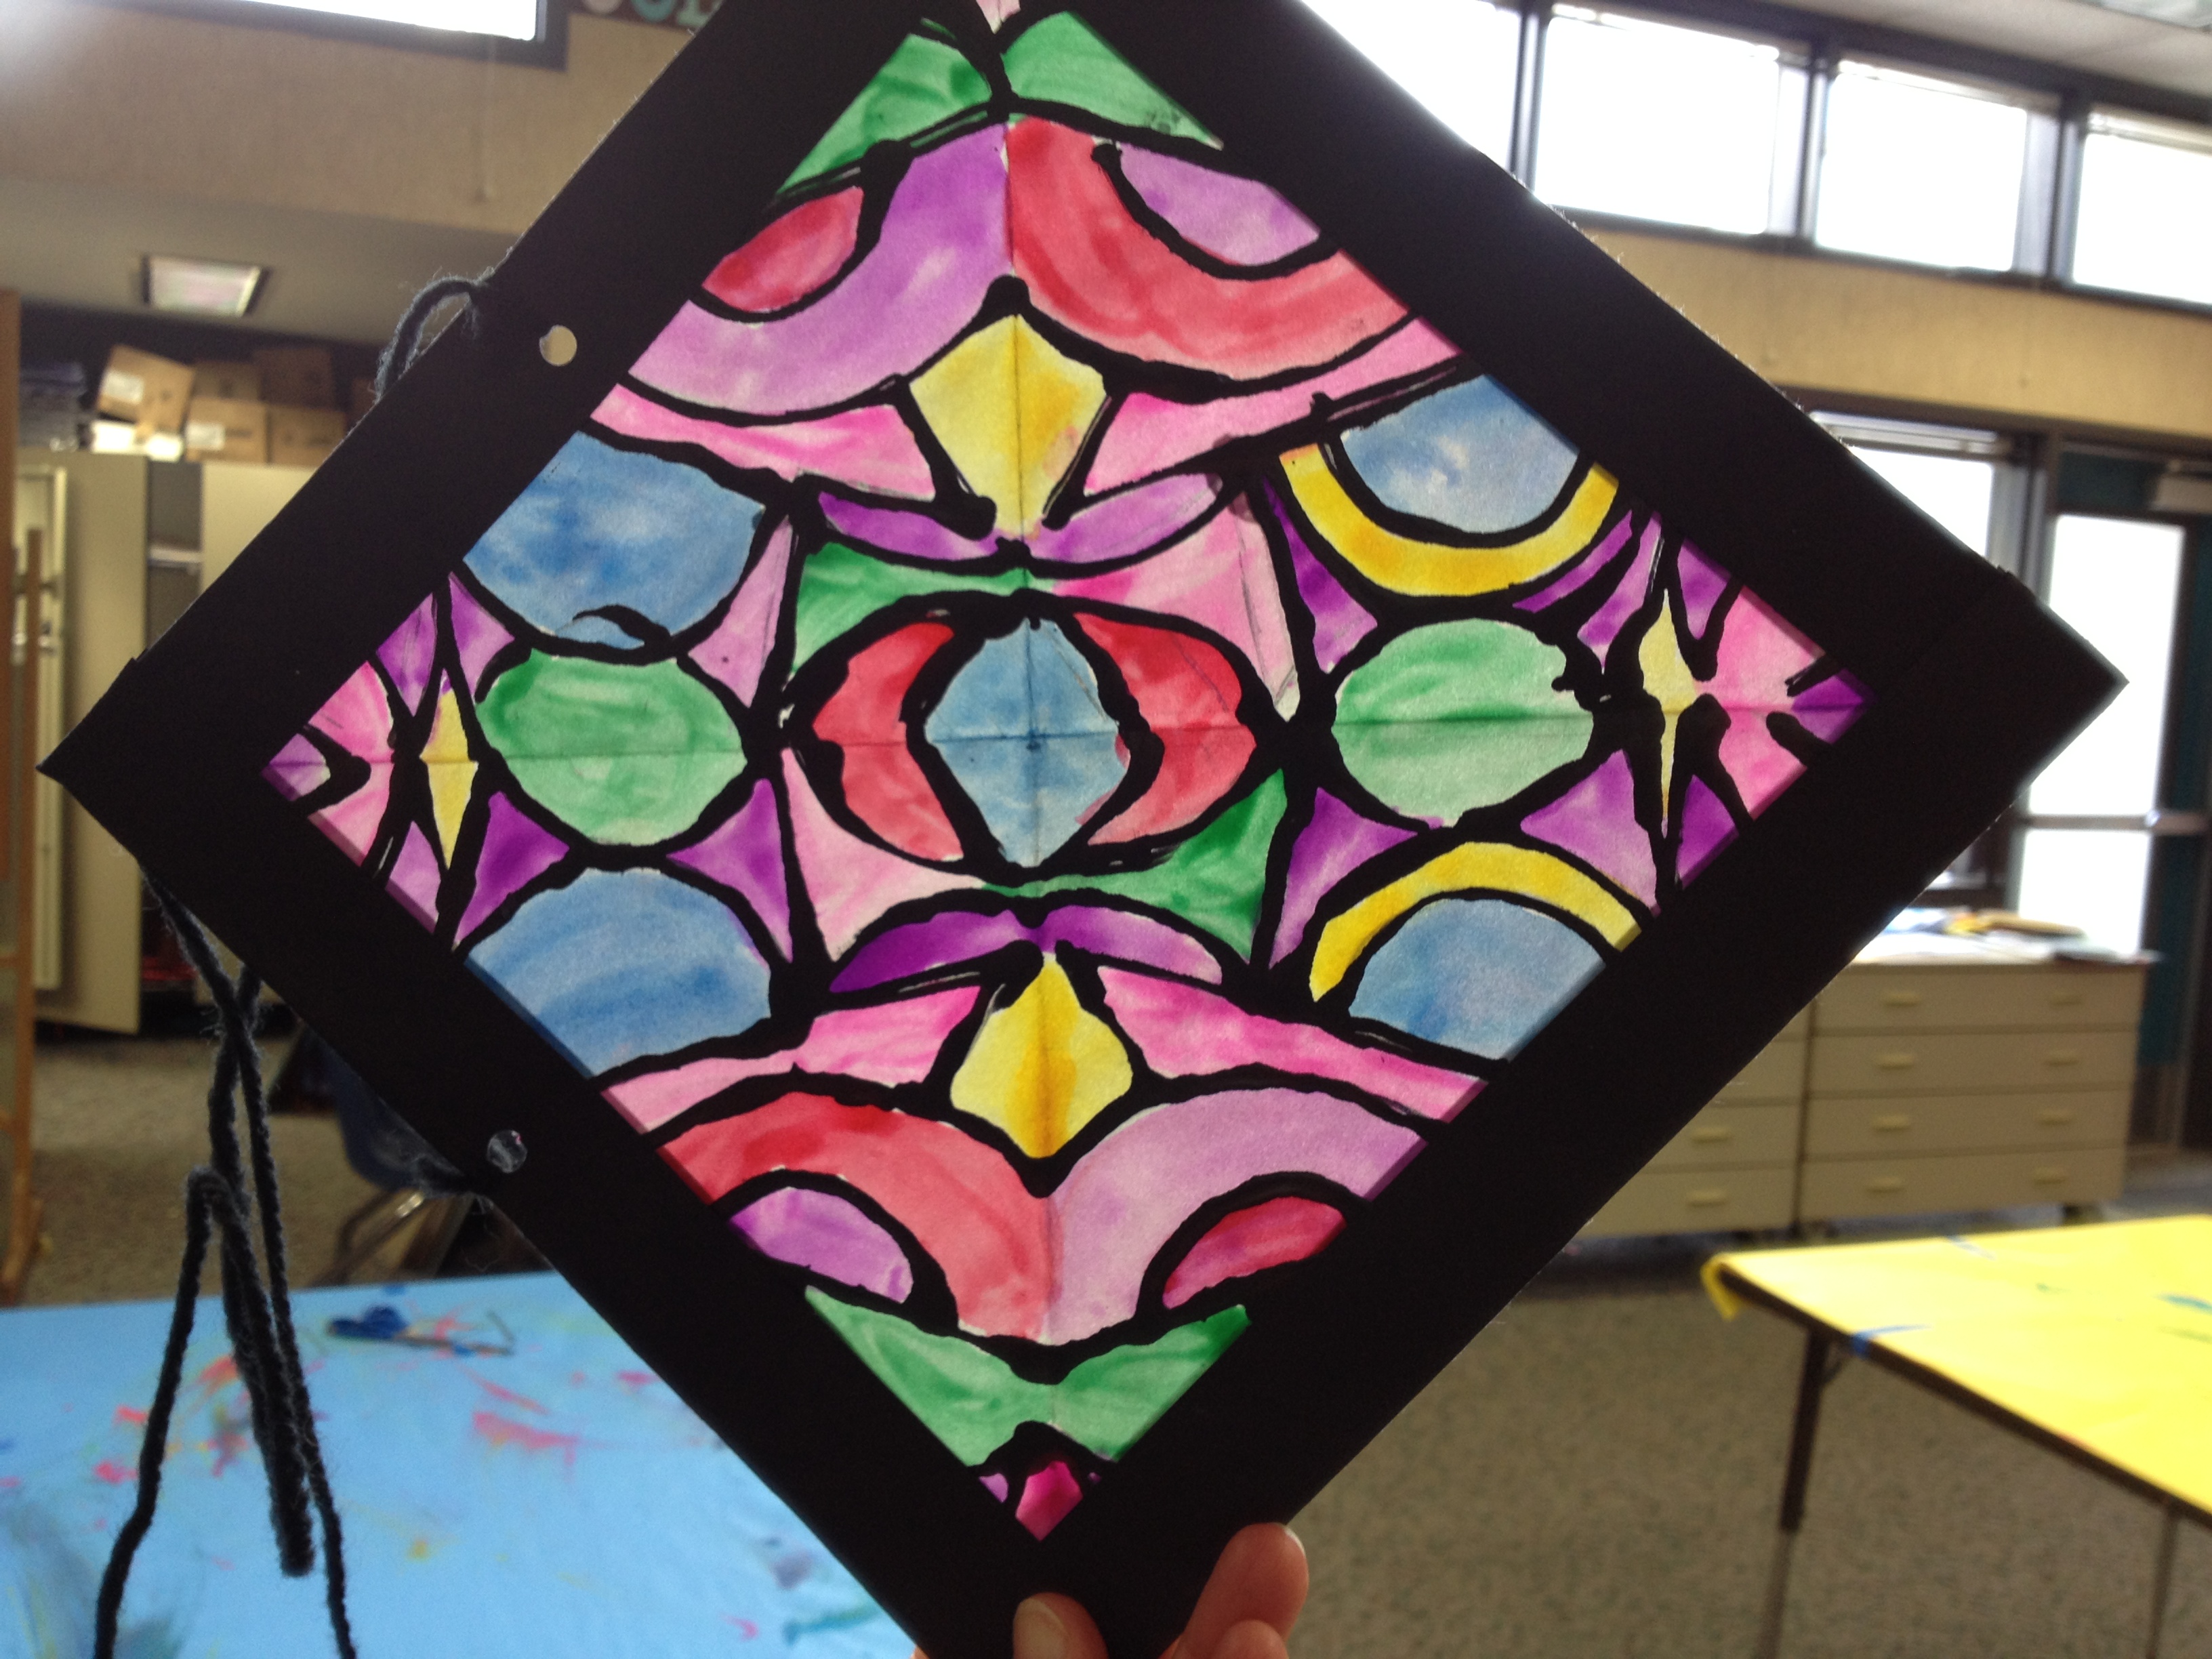
Kelly’s ‘Stained Glass Window’ made with watercolor and black glue.

A New Twist on Monet

Kelly also brought these Monet water-lily paintings. Please zoom in on this painting – the paint texture is so interesting. Kelly didn’t offer a brush – her students applied paint with novelty rings purchased at Oriental Trading. These rings look like little sea urchins. If you try this, Kelly recommends pinching the ring instead of wearing it on her finger. Needless to say, her students LOVED this project!

Monet water lilies painted with novelty ring

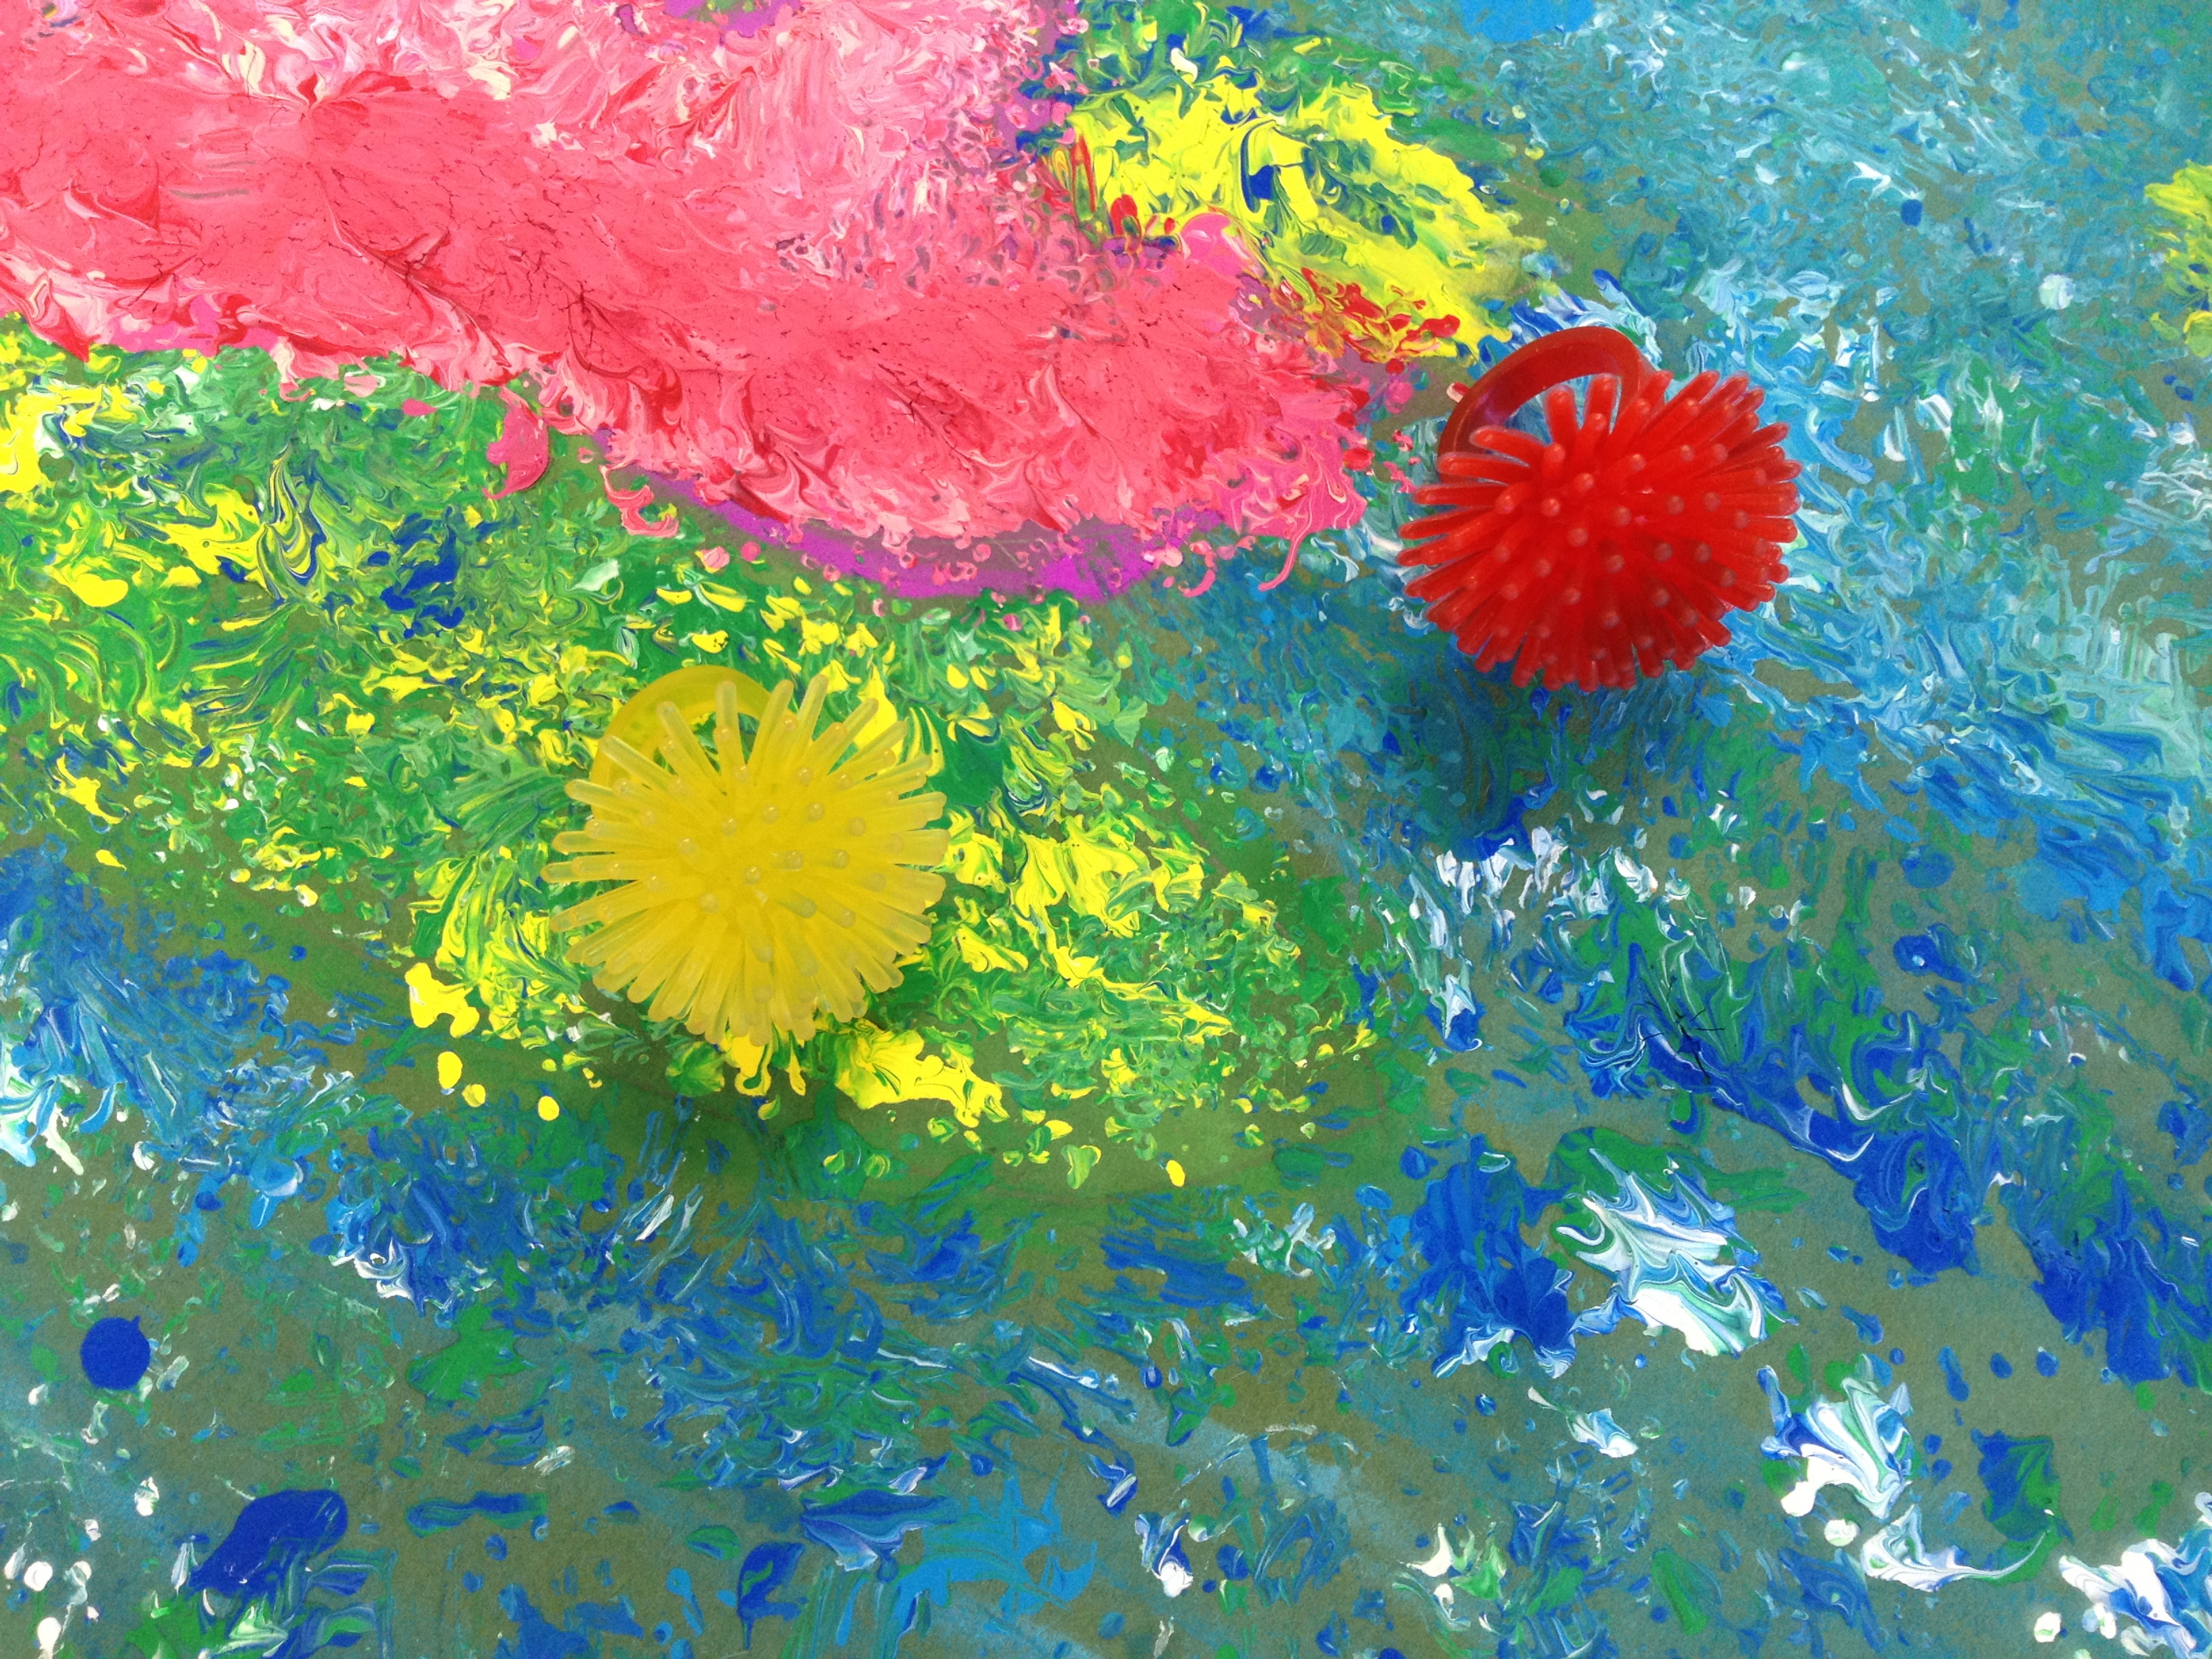
Kelly’ s students painted their Monet-inspired art with a ring from Oriental Trading.

30-Minute Color Mixing

Nancy  teaches art at Solana Highlands School. She brought a color mixing project. Students used two colors plus black and white. After tinting, shading and creating a neutral, they drizzled black glue over the top. I love how much variety her students achieved. Some of these abstract compositions look like animal patterns. LOVE! Even more impressive: Nancy only has 30 minutes with her students. She does a lot of stations and table rotations to fit her projects in the tight time frame.

30-minute color mixing and black glue

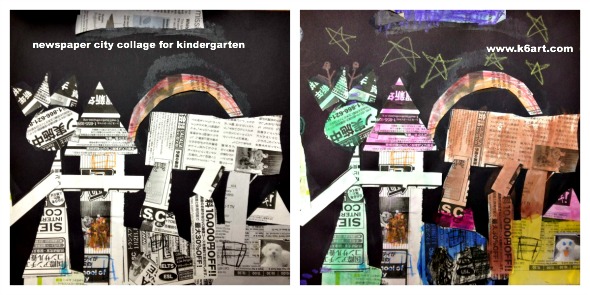
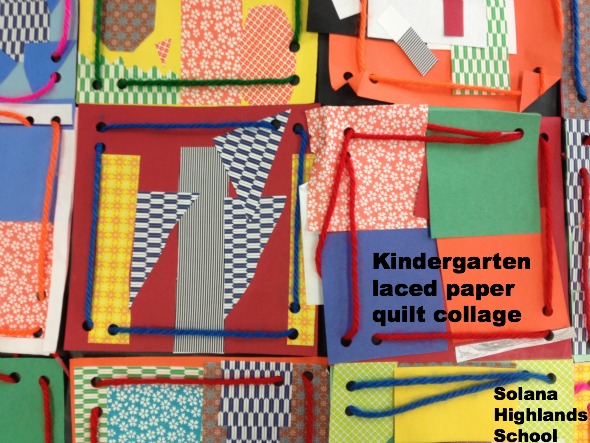
Kindergarten Paper Quilts

Nancy did these paper quilt squares with the kindergarten. The kindergarteners start with a 6″ square of paper. They collage first, then Nancy adds holes with a three-hole punch. Next class, the kindergartener lace the holes. Nancy glues the squares together into a quilt.

kindergarten laced paper quilt collage


As always, I am FLOORED by my colleagues creativity. They always have interesting, challenging, beautiful projects – and they teach them so well. Thanks to Nancy and Kelly for sharing your ideas.


Enjoy!


Newspaper City Collage for Kindergarten

newspaper city collage for kindergarten

Are you looking for a fun collage project for kindergarten? This newspaper city collage project engages students with a discussion about their city, then lets them use their cutting, gluing, coloring and painting skills.

When asked, “What do you see in a city?” kindergarteners named all sorts of things:  houses, roads, tall apartment buildings, garages, and even boats in San Diego harbor. One girl talked about her recent trip to the city hospital, another about what she saw on vacation in New York City.

Materials:

  • black construction paper
  • newspaper
  • scissors
  • glue stick
  • construction paper crayons, plus black crayon
  • watercolor set

Day 1: Cut and glue newspapers. Emphasize shape: squares, circles, triangles, rectangles etc. Add details with crayon.

Day 2: Paint with watercolor.

newspaper city collage assembly

Kindergarteners make cut paper city collages from newspaper, then color with crayon and watercolor. Allow two 40-minute classes.

Aren’t they wonderful?

newspaper city collage 1

newspaper city collage +

newspaper city collage 2

New York City collage before and after crayons and watercolor. Do you see the Statue of Liberty?


As much as the kinders enjoyed the project, I would do things a little differently next time:

  • Use smaller black construction paper . Students had difficulty filling the 12″x18″ paper we used within the class time frame. So this class took three 40 minute classes – I want to shorten it to two.
  • Skip the front page of the newspaper!  It took extra time to eliminate inappropriate ads and articles. Next time I will try the white pages of a phone book, classified ads or financial/stock listings.

This lesson was inspired by this lesson by CCE Art Happenings.

Do you have a favorite collage project for kindergarten?

Princes and Princesses Rule over First Grade

Welcome to the royal art room!  The first grade recently finished their royal self portraits.

First graders create a portrait of themselves as princes or princesses. Allow 3-4 40-minute classes.

Materials:

  • white paper, 12″x18″
  • pencils and erasers
  • self-portrait template (optional)
  • several shades of skin-colored tempera (thinned with water)
  • watercolors
  • Sharpies
  • crayons
  • sequins, ribbons and lace
  • glue

Day 1:

We started out by looking at photos of royal gear: crowns, swords, jewels, and medals. Students began by drawing the face, neck and torso. Then they added crowns and fine clothes. Most drew castles in the background – some even added their ‘royal’ pets!

Day 2:

The skin was painted with thinned tempera. We painted the rest with regular and metallic pan watercolors. Tiny details (such as eyes) were colored in with crayon.

Day 3:

The students outlined the dry art with Sharpies. ‘Jewels’ (sequins), ribbons and lace were glued on for a final touch.


Students outlined their (dry) paintings with Sharpies.

Sequins make fabulous jewels.

Scraps of ribbon and lace make royal clothing extra fancy.

And here are the fabulous results!


A royal knight.

Some students chose to draw themselves as knights.  I wrote about it in this post.

This completed our royal unit for first grade.  Other projects in this unit are the watercolor resist castle and the clay dragon.

This lesson was inspired by an Arts Attack video.

‘Secret’ Rainbow Fish for Kindergarten

secret rainbow fish for kindergarten

Looking for a kindergarten art lesson? Try this line lesson based on the popular book ‘The Rainbow Fish’.

Kindergarteners create watercolor resist line art based on the book ‘The Rainbow Fish’. Allow two 40-minute classes.

Materials:

  • white construction paper 12″x18″ (use paper sturdy enough for watercolor)
  • Sharpies
  • white crayons
  • watercolors: purple, blue and green (cool colors)

Day 1: Draw

Read the book The Rainbow Fish by Marcus Pfister (or listen to it online for free!) Point out the cool colors and name any lines you see.

Using Sharpies, students draw the outline of the fish as a step-by-step. I tell students to draw a large ‘rainbow’ for the back, ‘smile’ for the belly, and triangle for the tail. We divide the body with a few vertical lines.

Kinds of Lines

Each section is filled with a different kind of line.  We use

  • spirals
  • diagonal
  • wavy
  • zig zag
  • vertical
  • horizontal
  • dotted
  • dashed

Add  SECRET (white crayon) lines

Now for the SECRET! Use the white crayon to add more lines around and in-between your black lines (the white lines are hard to see and therefore ‘secret’). For best results, encourage students to press hard with the white crayon. Tell students you will tell them the secret when we paint the fish.

Day 2: Paint

Paint with purple, blue and green watercolors. Listen to the ‘oohs’ and ‘aahs’ as the SECRET lines pop out from the watercolor. It is OK for colors to overlap (the cool colors mix beautifully).


Cool color watercolors and white crayon resist.

If you have extra time after clean up, read The Rainbow Fish again (or try another book in the series such as Rainbow Fish to the Rescue! or Rainbow Fish and the Big Blue Whale).

Enjoy!

Do you have a favorite story book for kindergarten art?

NOTE: This post was updated on 9/2/13.

Clay Sea Rocks

5th graders made clay 'sea rocks'. Allow three 40-minute sessions.

Want an ocean-themed clay project with high success? Super fun? Colorful? Only one firing? And……NO SLIP!

Try this sea rocks lesson plan!

Supplies:

  • clay
  • newspaper
  • white vinegar in small cups
  • Q-tips
  • toothpicks
  • pencils
  • Popsicle stick or other clay tools
  • gallon-size Ziploc storage bags (if more than one session is required)

Day 1:

Look at photos of sea life that attaches to rock.

Coral reef.

For another artist’s take on sea life, view images from Disney movie ‘Finding Nemo’. Look at the sea life on the ocean floor.

Inspiration: colorful sea floor from Disney movie 'Finding Nemo'

Download this clay sea rocks powerpoint from CAEA conference (we think this project was presented by clay educator Barry Bernam around 2005).

It all starts with a pinch pot. Stuff with crumpled newspaper for support and turn upside down. Apply starfish, urchins, coral etc. to top of rock using vinegar to attach.

Vinegar, clay tool, toothpick


If you don’t finish, wrap clay in damp paper towels and seal in Ziploc bag.

Day 2:

Finish adding sea life to rock.


I let them dry for 12 days, then fired on slow setting.

Although no slip was used to attach decorations, only one decoration came off during bisque firing.

Day 3:

We painted with pan watercolors and tiny brushes. Students had option of rinsing off excess paint (they called this ‘fading’). Also could draw on painted ‘rock’ with colored pencil.


I will add shine with a little spray gloss (I use Rust-Oleum Painter’s Touch Spray Gloss ).

A huge thank you to SDAEA’s Carol Catalano Webb, who brought back this lesson from California state conference AND made the YouTube movie. A huge thank you to the clay teacher who created the Powerpoint (we think it was Barry Bernam-please leave a comment if you know Barry!).

Related Posts Plugin for WordPress, Blogger...