Enjoy!


Enjoy!
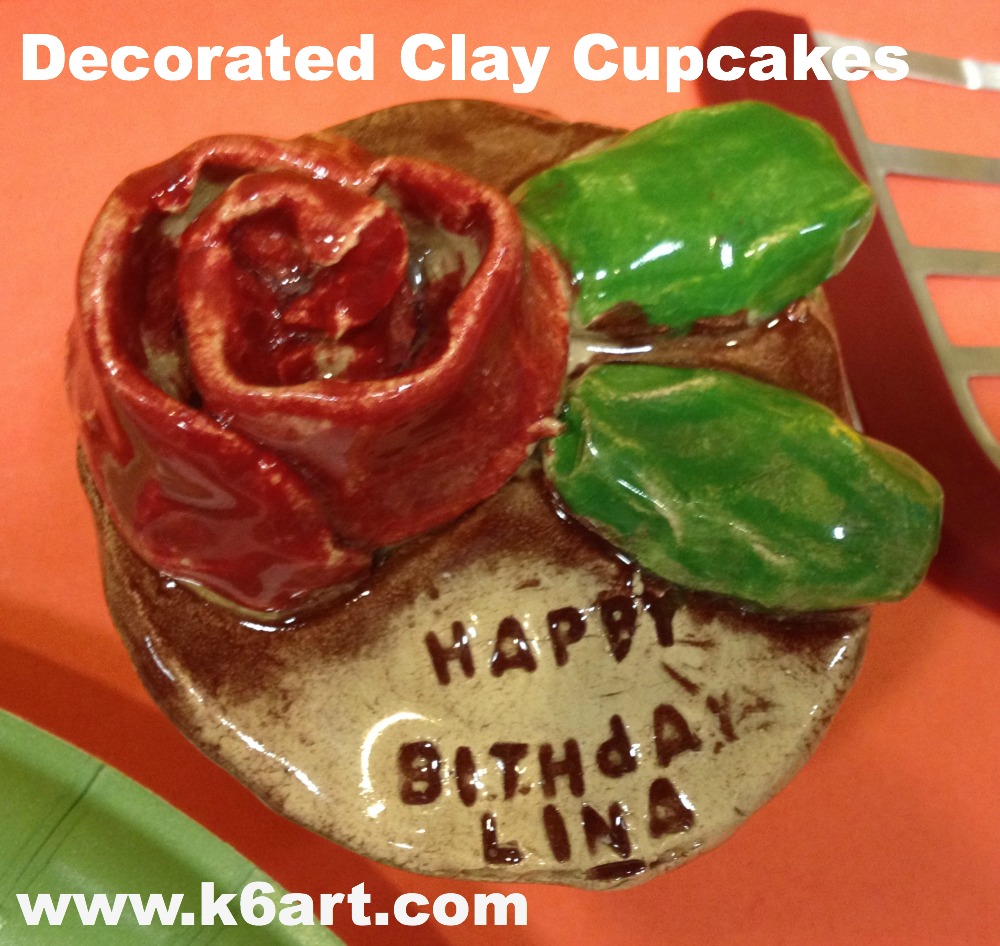
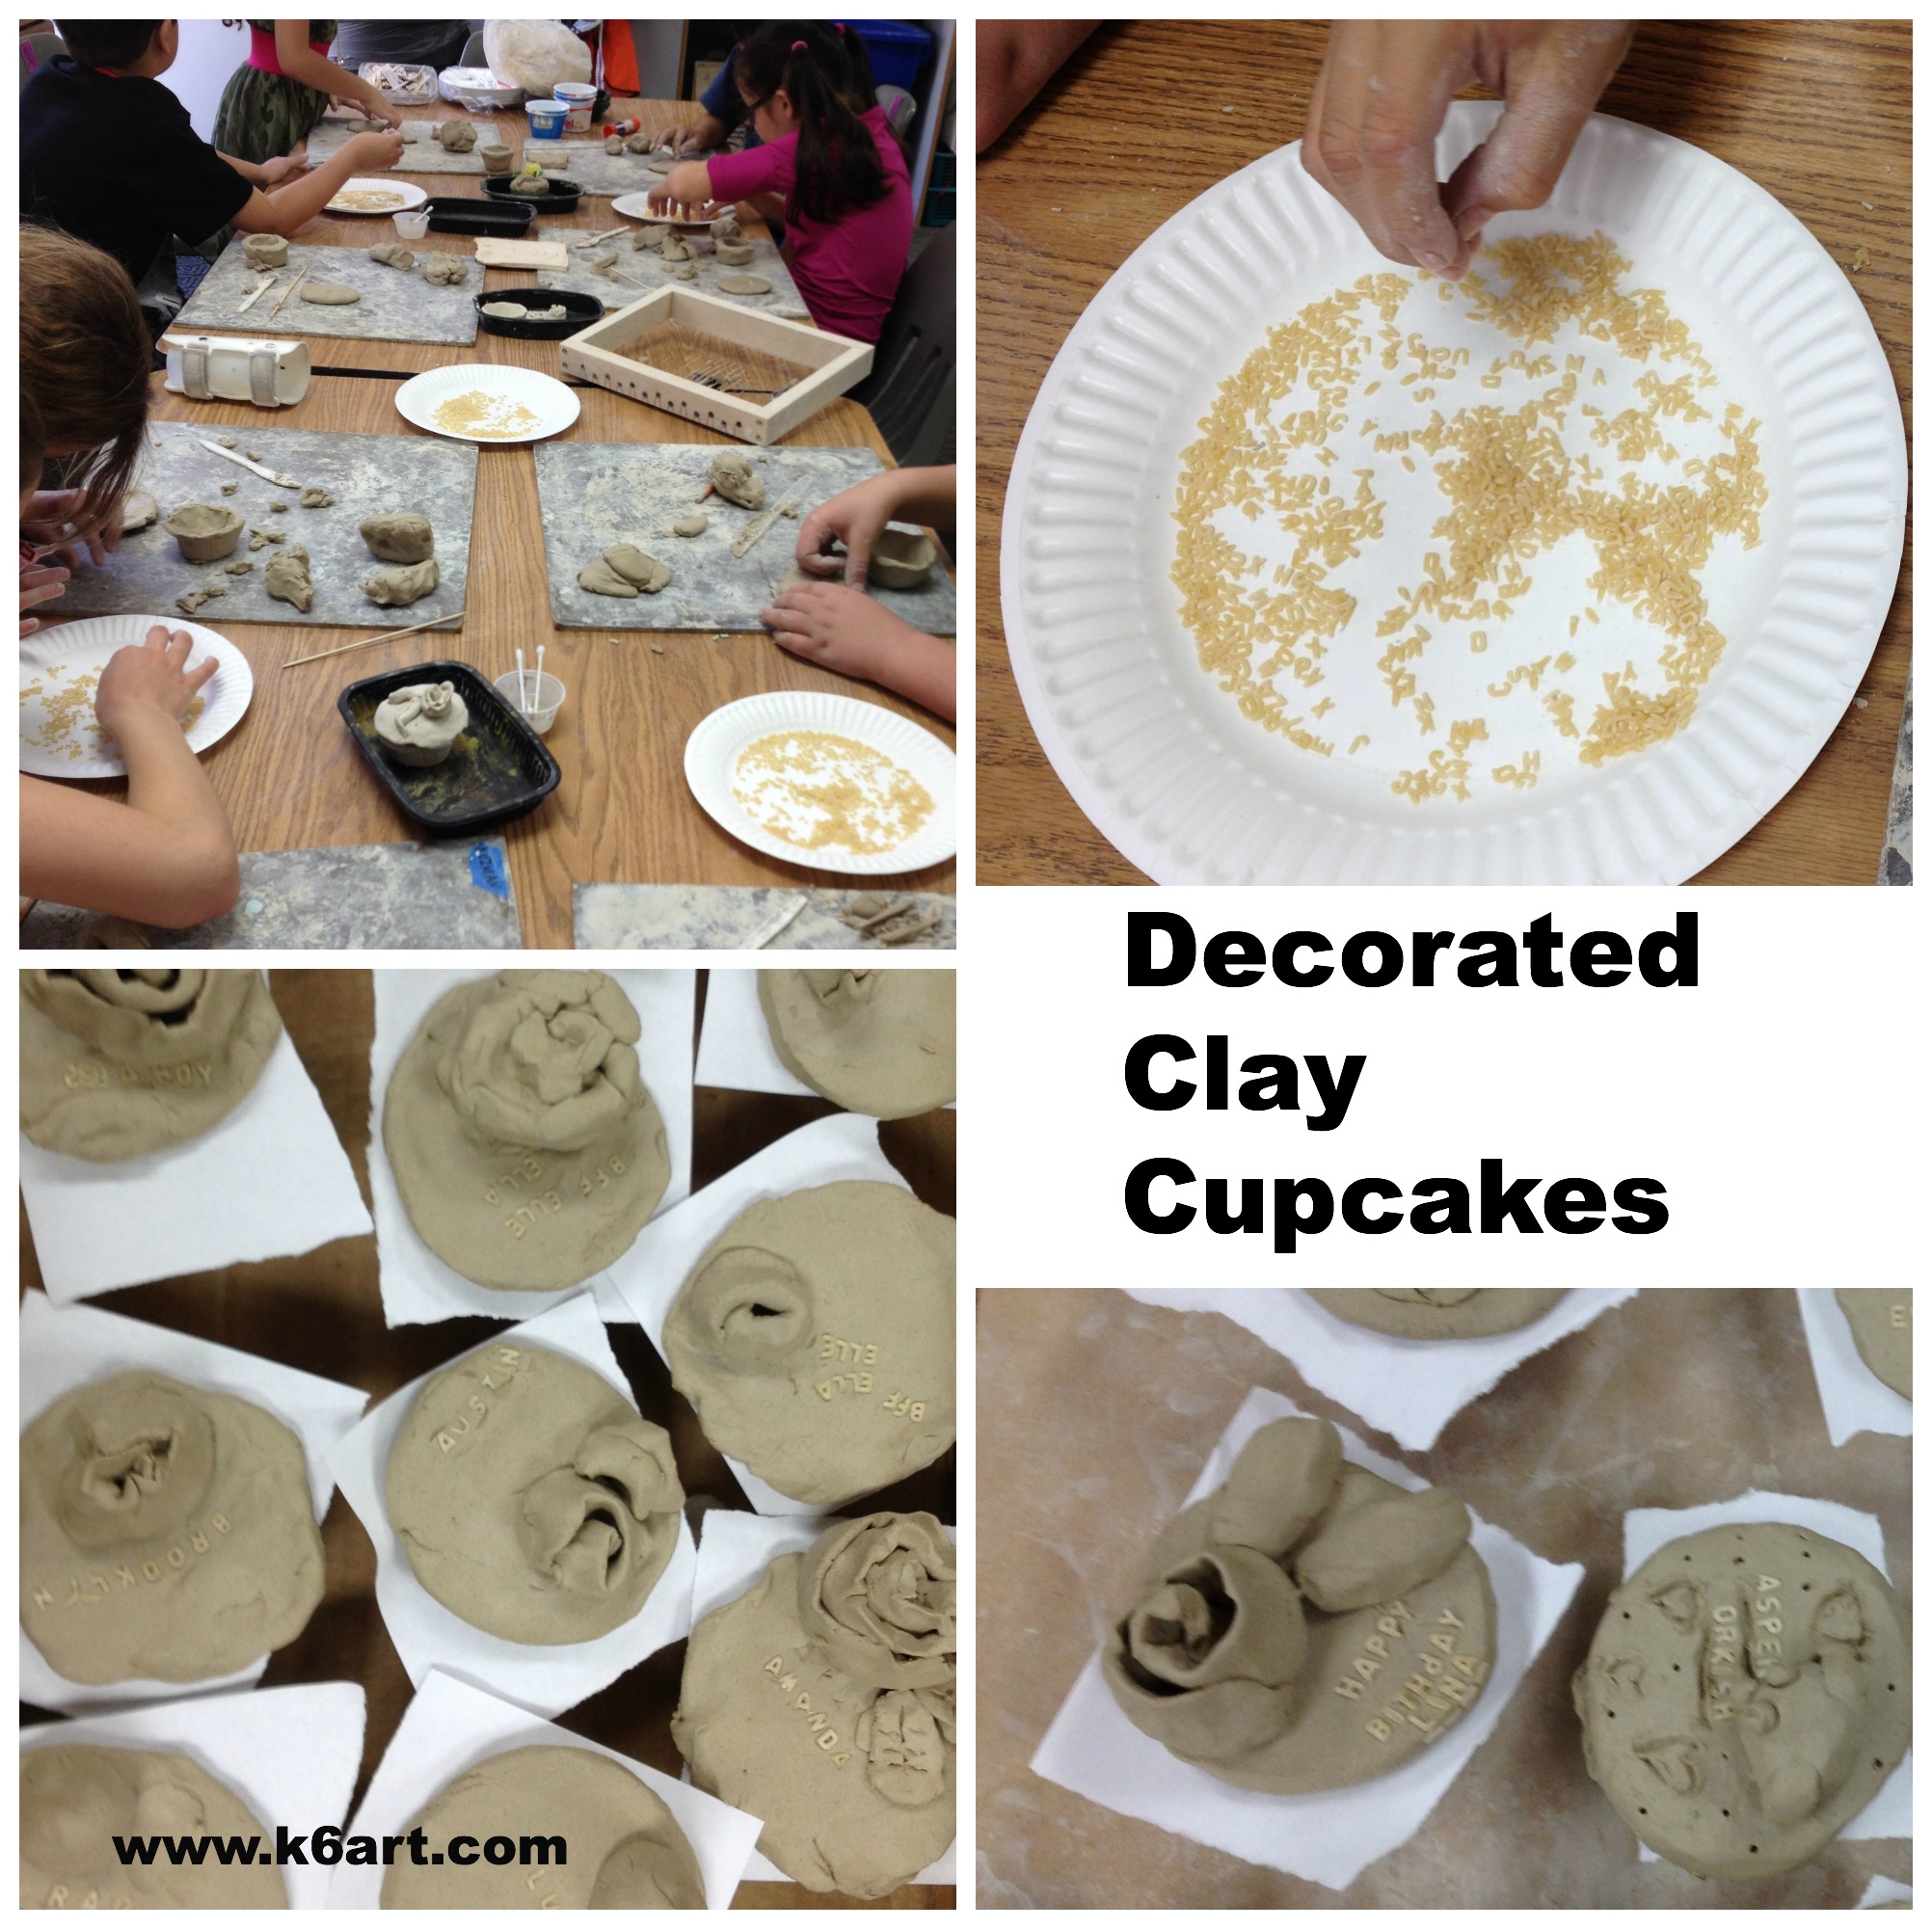
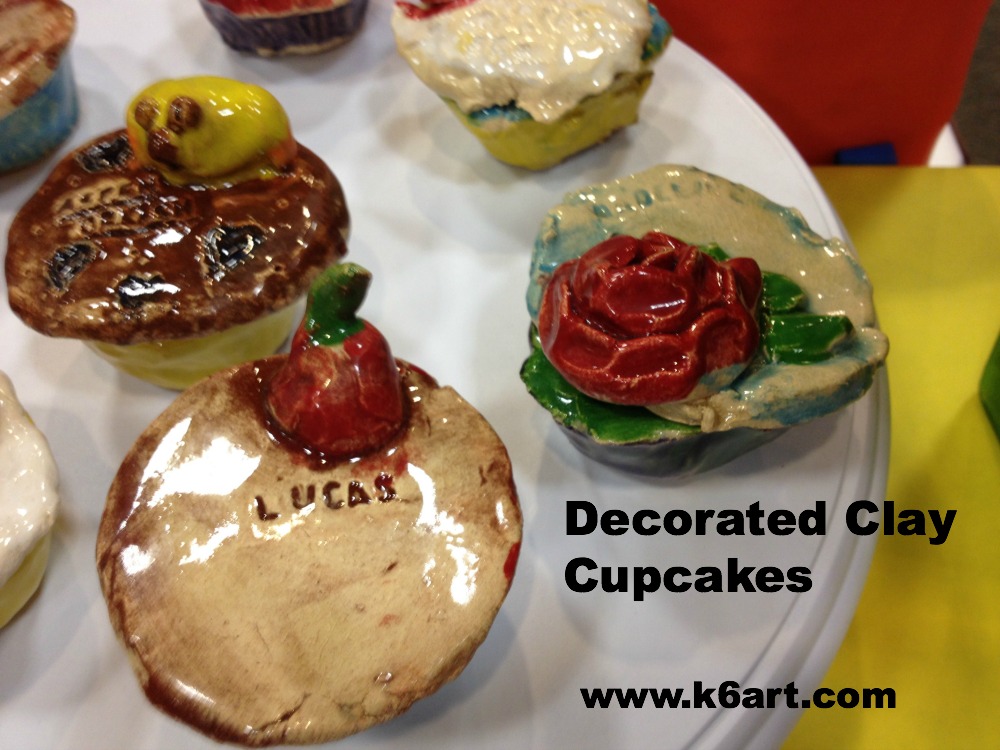
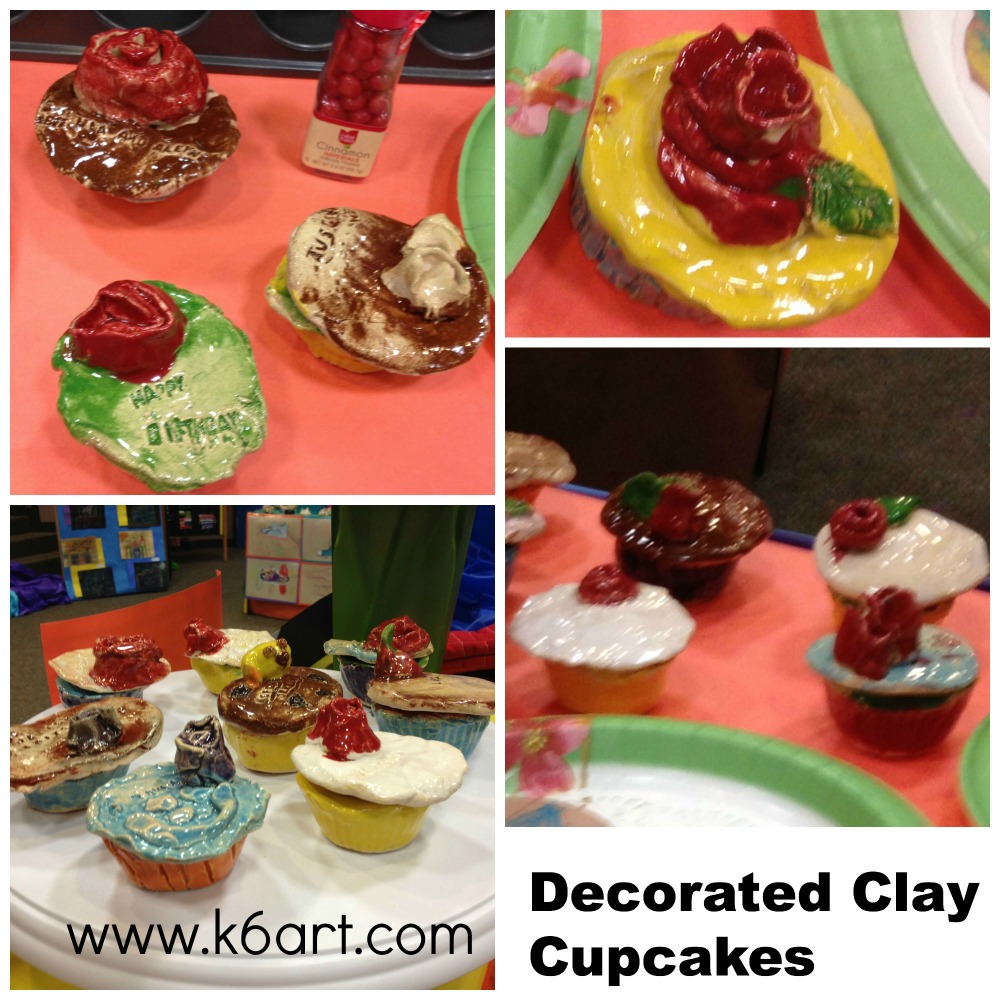
These lidded clay cupcake boxes are extra-special: they feature lettering and clay roses!
Materials:
Give each student a lump of clay and a silicone cupcake form. Create a pinch pot, place it in the silicone form and press the clay all around against the textured sides of the form. If the clay pot is higher than the form, trim the clay with a pin tool or plastic knife. Turn form inside out and remove from clay. Students should write their name on the bottom at this time.
Take some more clay and roll into a ball. Flatten the ball. Invert the top of the cupcake form and place onto of the flattened clay. Trim clay to fit cupcake form. Write student name on one side of the lid.
Want more tips? Check out this clay cupcake post from The Art of Ed.
I saw this great post on making simple clay roses on the smART Class blog. Essentially, you create a coil (rope) of clay, lay it on the table, pinch the top (‘spine’) along the length of the coil, and spiral into a rose. Please see the smART Class blog post for a full photo tutorial.
We attached our roses (and optional leaves) to the lid using vinegar applied with a q-tip. Some students skipped the roses and added other decorations. Variations included a sun, animal, wrapped present, and cherry.
(Note: vinegar is our glue. We use it instead of slip when attaching small clay objects).
Pour some alphabet pasta into a plate. Press alphabet pasta into wet clay. Write a birthday message or anything else. Do not remove (the pasta will burn out in the kiln).
Fire to cone 04.
Glaze the base with three coats of underglaze.
If the lid has text, use a stiff brush to press a dark color of underglaze into text indentations. Wipe off the underglaze. The text should now be legible. Carefully glaze the roses/leaves/decorations with three coats of underglaze. When dry, add 2-3 coats of clear glaze. Fire to cone 06.
Enjoy!
p.s. This would be a nice Wayne Thiebaud lesson!
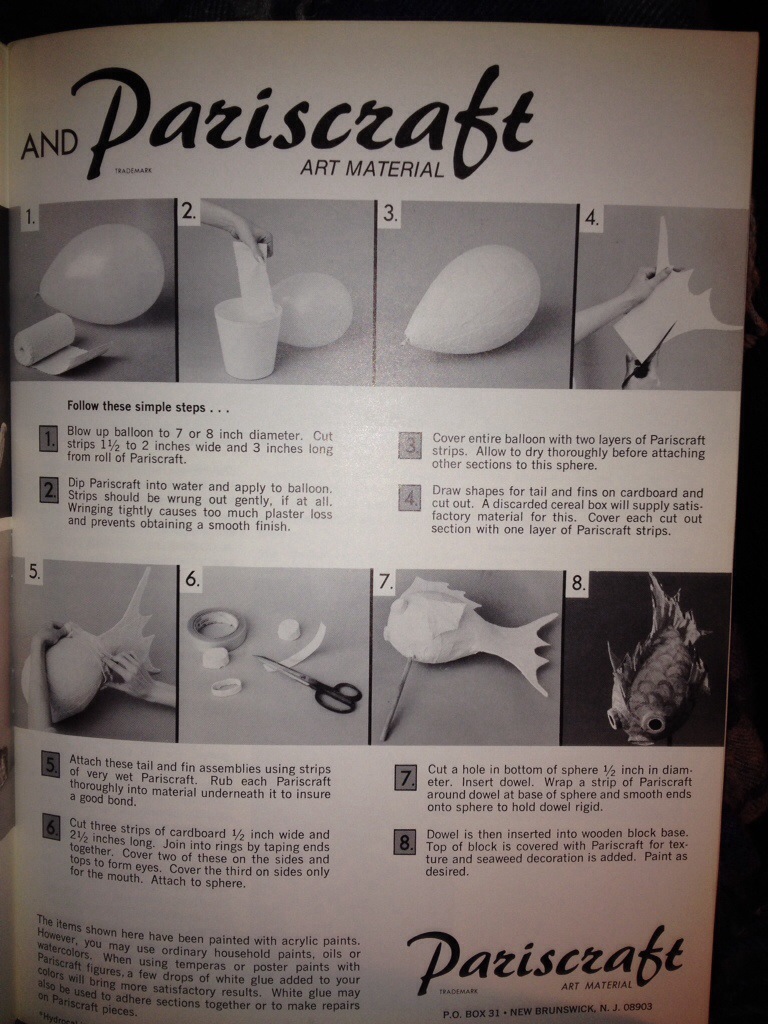
Vintage ad for Pariscraft plaster bandage fish sculpture. School Arts magazine, February 1972.
Check out these instructions for a plaster fish made on a balloon armature. This is an ad for Pariscraft plaster wrap I found in the February 1972 issue of School Arts magazine.
You’ll need the following materials :
Doesn’t it look amazing? Can you imagine a display of these at the art show?
You can still get Paris Craft at Amazon. I have never used this brand – I’ve had great success with Pacon Plast’r Craft plaster wrap. Click here to read my tips for handling plaster wrap in class.
Happy throwback Thursday! Stop by on Thursdays and see what else I’ve found in my stash of vintage art Ed magazines.
Enjoy!
p.s. Remember – never pour plaster water down the drain!
note: this post contains affiliate links

Textured curling ribbon tied in a bow looks great on this wrapped gift. The gingerbread man is trimmed in rick rack.
Need a fun and flexible holiday project? Try making you own collagraph crayon rubbings, using cardboard and scraps. The project takes about one hour and is adaptable to all sorts of holidays like Valentine’s Day and birthdays.
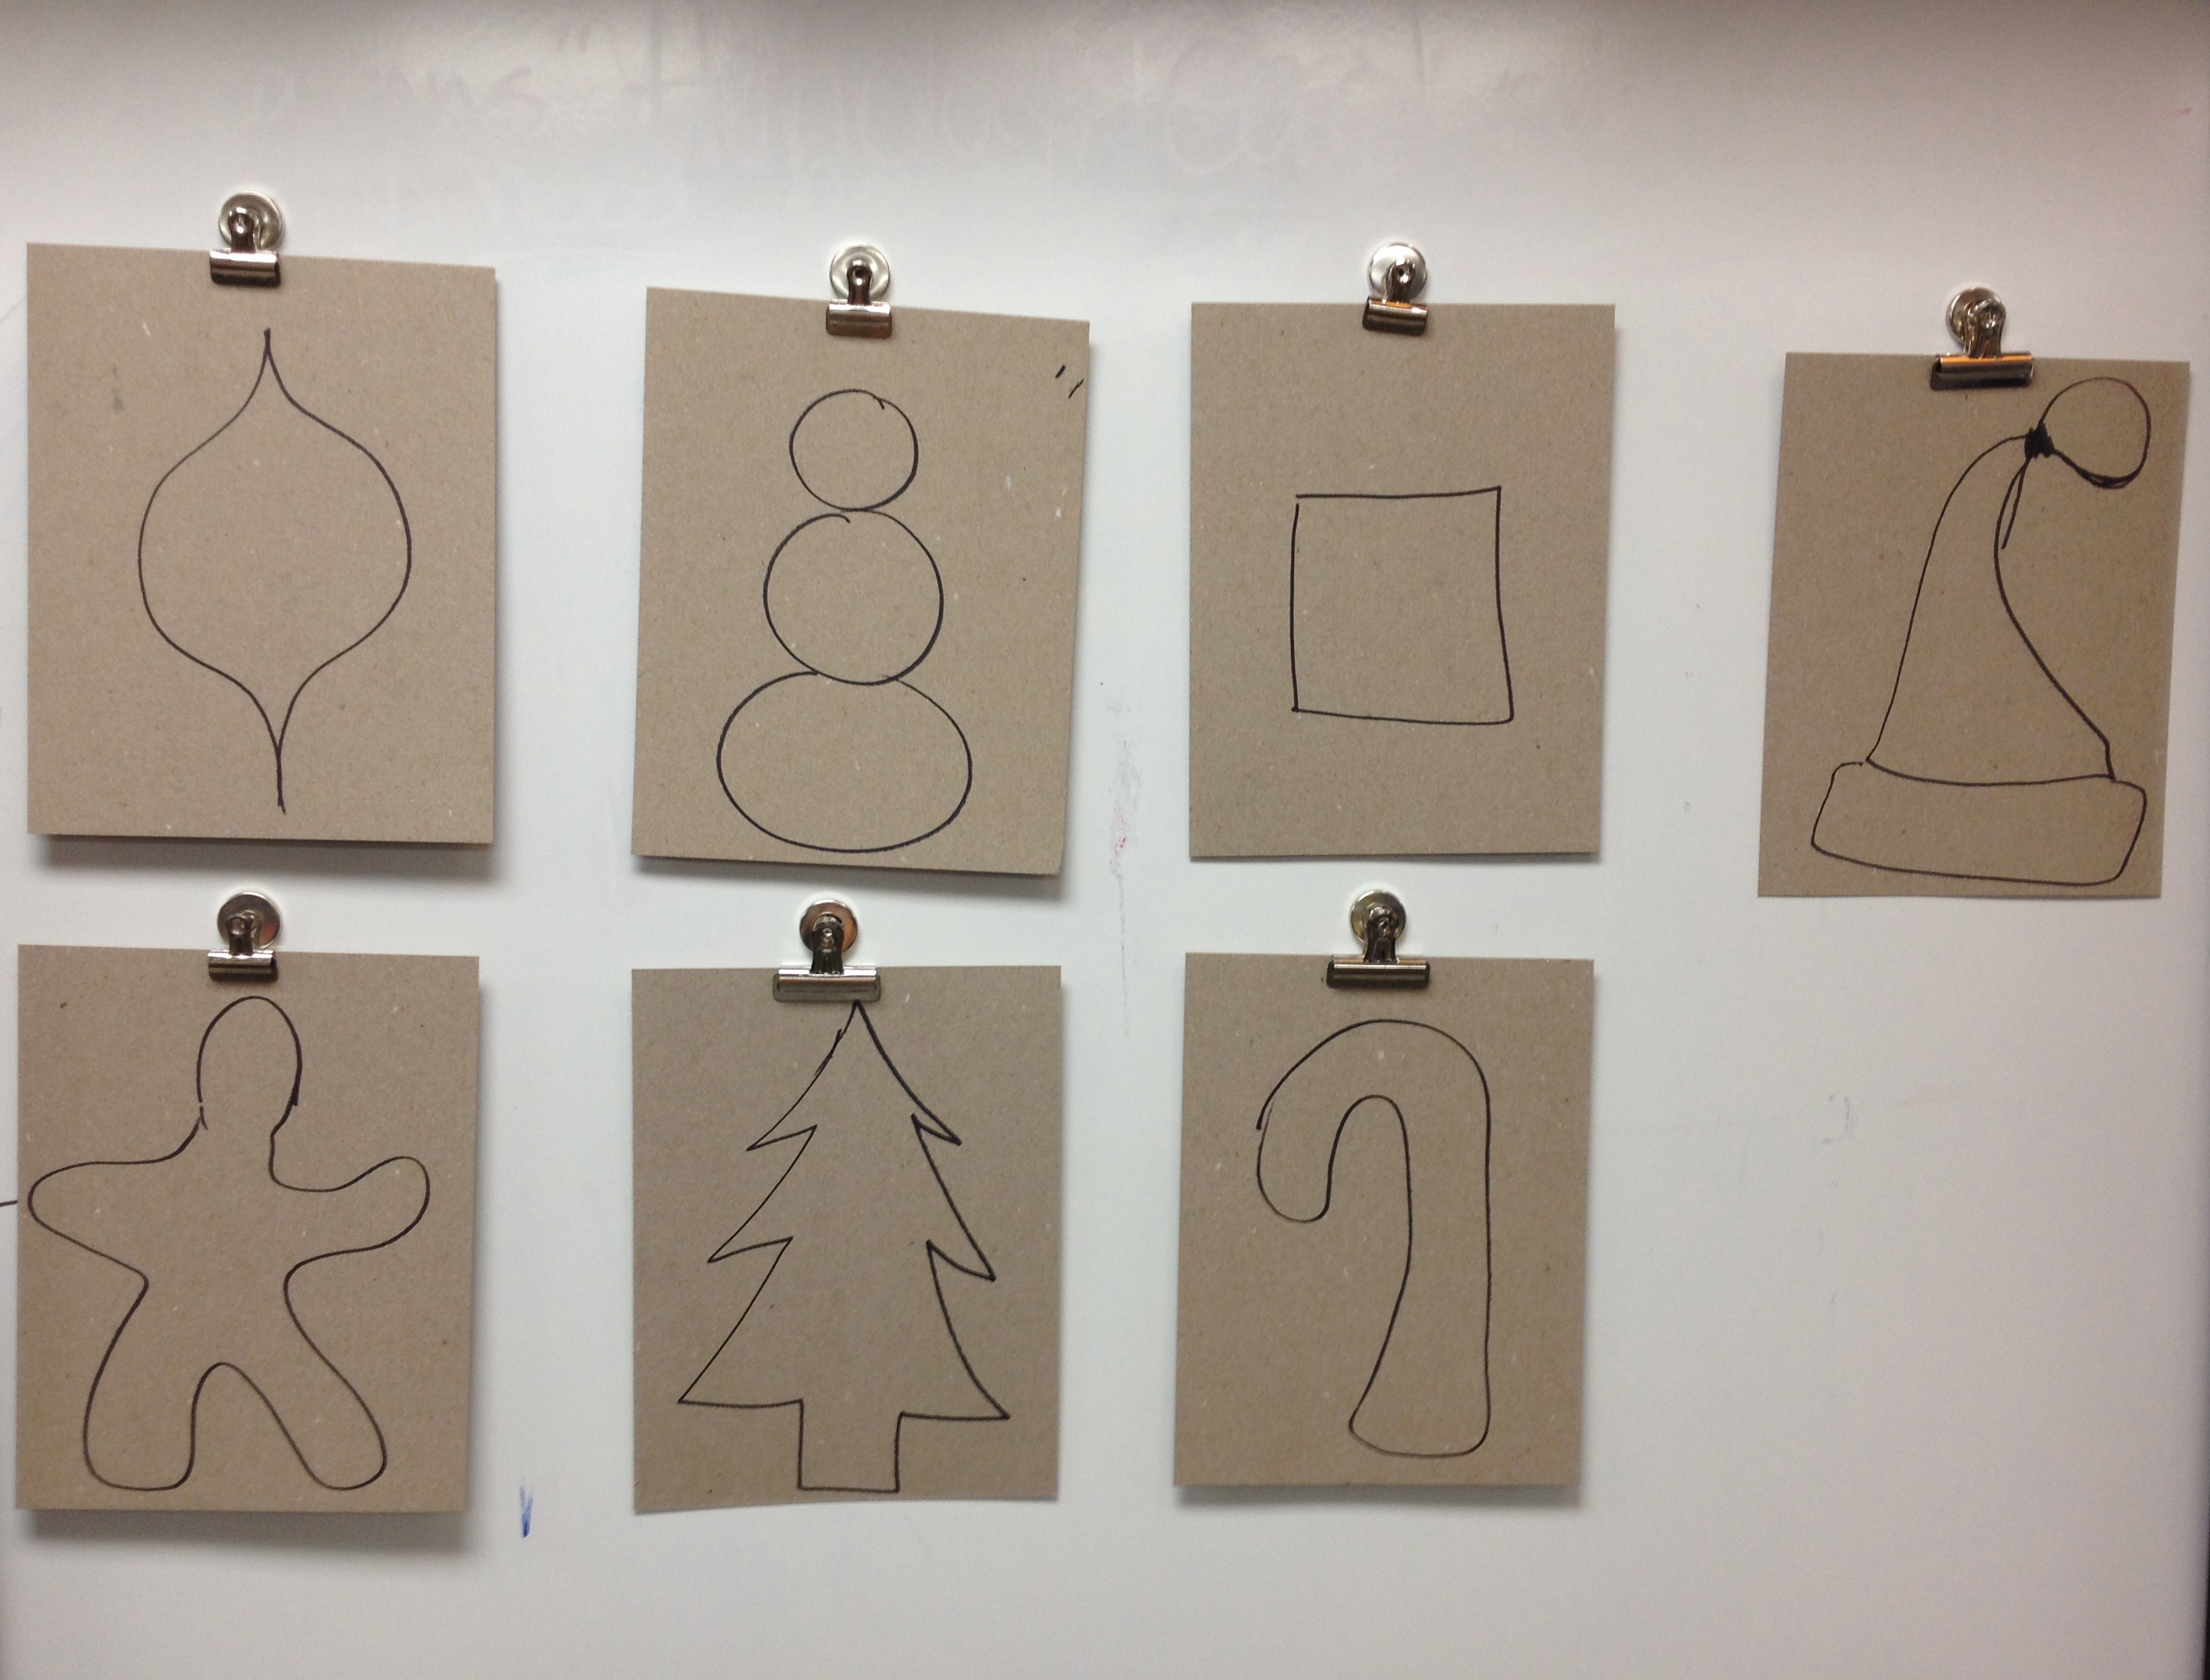
Students drew one holiday shape on cardboard, then cut it out.
Select one holiday shape for the main part of the collagraph. Draw the shape on the first piece of cardboard and cut it out (note: for those students creating their own designs, emphasize that the design needs to be simple and stretched to the top and bottom of the page).
Glue the cut-out shapes to the second piece of cardboard using glue stick. You have now created a collagraph rubbing plate.
Now for the fun!
Cut decorations for your collagraph plate from your cardboard scraps and from fabric trim. Experiment with the craft scissors and the hole punch. Glue these decorations on top of and around your main shape. LAYERING IS GOOD! TEXTURE IS GOOD!
Now flip over the collagraph plate and place it face down on your chair. SIT ON THE CARDBOARD AND COUNT TO 30. (It is so fun to do this step!) Now all the pieces are glued down are we are ready to rub.
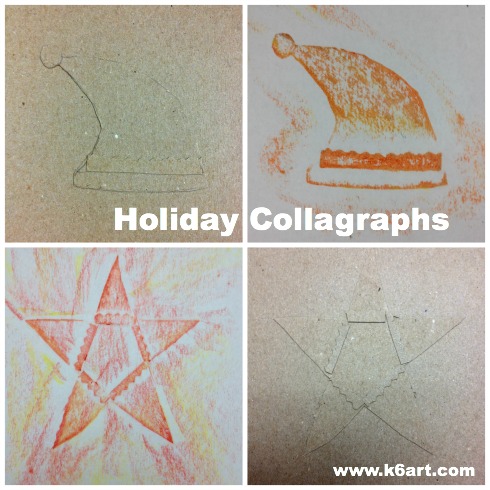
Santa hat and star, decorated with cardboard cut with Fiskar paper edgers.
Place your collagraph face up on the table. Cover with the copy paper. Rub with a peeled crayon (note: it is helpful to have a partner hold the plate while the student rubs). Repeat with another crayon color.
Now trade collagraph rubbing plates with your neighbor. Or rotate tables so everyone comes away with a set of holiday cards.
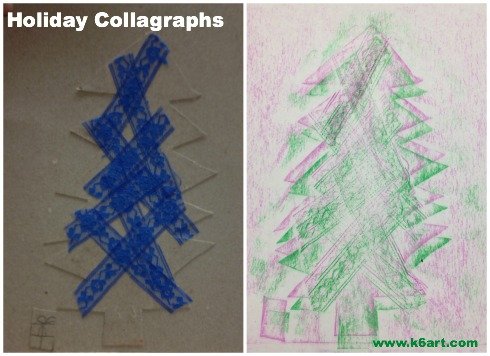
This students glued lace to her tree for texture. She did two rubbings with green and magenta crayons.
This technique would make awesome cards for birthdays – imagine a collagraph layer cake with rick rack candles. Imagine a textured doily rubbing plate for Valentine’s Day cards.
If you want to take this project a step further, you can roll printer’s ink on the collagraph and pull some prints. You can also color or paint the collagraph plate so it become an artwork.
Want more ideas? Check out my previous post on 30-minute collagraph printmaking.
Enjoy!
Do you have a fun way of making holiday cards?
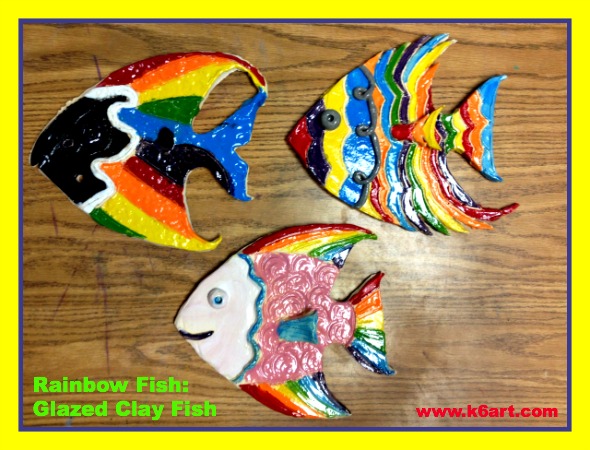
So many fish in the sea!
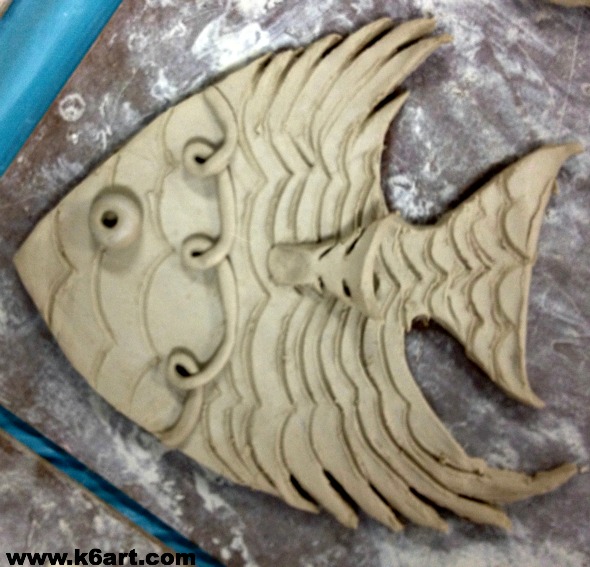
Our sixth grade finished the slab clay fish project. Although I provided a choice of just three templates, students were able to customize them through re-shaping, texture, and glaze. We ended up with a wide variety of fish.
These three rainbow fish started from the same template. Artists scratched lines into the wet clay to make stripes. Later they painted these defined areas. Students who did this technique ended up with neatly glazed fish. Caution: avoid scratching a line across the narrowest part of the tail – it will be more likely to break.
Want to make a rainbow fish? Make shallow lines in wet clay with a skewer. Glaze fired clay – try to stay inside the lines!
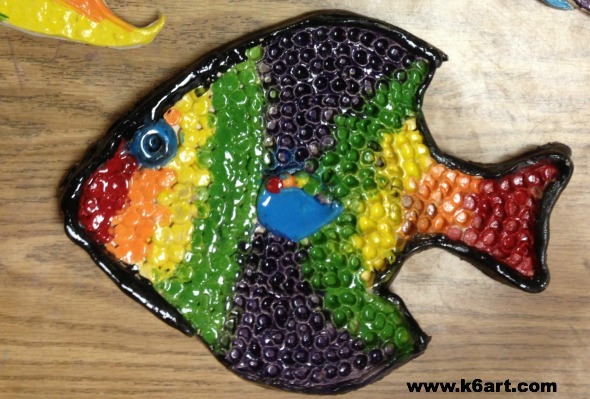
Here is a different rainbow fish. The artist used a different template, then created texture with tiny balls of clay and the eraser tip of pencil. The fish is trimmed with a thin clay coil, which the artist later glazed shiny black.
NICE WORK SIXTH GRADERS!!!
I wrote how to roll and cut the fish here and here. More glazing examples here. More examples next week!