Molas of Panama

The 4th grade studied fabulous, colorful molas. Molas are intricate, multi-layered textiles made by the Kuna Indians, of San Blas Island, Panama.

Panamanian Mola textile. Photo by galenfrysinger.com


Luckily we had a tour guide. Ms O’Brien came to the art room, talked to us about the Kuna and shared her extensive mola collection with us. We are so lucky to have Ms. O’Brien at our school!

This paper toucan mola looks like the one on Ms. O'Brien's shirt

Our resident mola expert! 1st grade teacher Sharon O'Brien lived in Panama for over 20 years.


Kids were fascinated! They loved turning the bright colored molas to the back and looking at the tiny stitches.

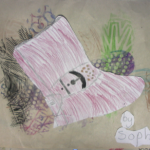
For the art project, we used the lesson plan found in the excellent book Dynamic Art Projects for Children by Denise M. Logan. This year I made (optional!) paper templates enlarged from the drawing aid page in the book. Kids focused on making intricate designs and colors. Art is finished with colorful paper strips glued down to simulate textile cut-outs.

This project was perfect for the 4th graders. Some used the templates, some didn’t. All the student art turned out vibrant and colorful. A highly successful art project.  This is a popular art project for kids around the world!  Click here to see paper molas from some talented Australian kids.
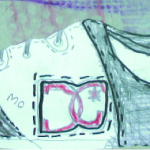
Armadillo mola

Two Part Shoe Art


The fourth grade recently completed their shoe art.  We did a two part project.

Students drew their shoes and took crayon rubbings of the soles

Part 1: shoe drawing. We started with each kid taking off a shoe and putting it on the table. Kids traced the shoe contour onto white drawing paper. Then students moved into observational drawing mode and added the shoe stripes/logos/dots to the drawings. We colored the shoes – kids could use realistic or imaginative colors.

Part 2: sole texture rubbing. Shoe off and on the table!  This time, we did a texture rubbing of the shoe sole.  We used newsprint and peeled crayons.  Kids were encouraged to to multiple rubbings of their shoe in different colors, and then trade shoes with friends.  So much fun!  It was like collecting autographs, but of your friends’ shoes….

Last step: cut out the shoe drawing from part 1 and glue it on the texture rubbing.

Wow!!!  Super successful project.  Just be sure do this one when its dry outside or you will have mud on the tables.

Inspiration for the shoe contour lesson comes from long, long ago, when I was a parent volunteer in Jenny Luce’s art room. The sole rubbing portion of the lesson comes from the book ‘Make Prints!’ by Kim Solga.

Plaster wrap masks for 5th grade

Cat mask under construction

Oh boy!  One of the most anticipated projects of the year is under way. And one of my biggest logistical challenges is under way as well.

The 5th graders are making plaster wrap masks.

We are using Pacon plaster wrap in the 20 lb. box. We started with a dollar store bowl as the armature, and wrapped it in foil.  Next, we applied four layers of wet plaster wrap. Now we are adding the facial features.

I used to make papier-mache masks on a balloon armature, but this year a student has a latex allergy so balloons are out. A blessing in disguise! Plaster wrap dries quickly. It is only week 3 and most students have a good start on their faces.

We have 75 students in three 5th grade classes. We are using up every free inch of my horizontal drying space to accommodate the masks week to week!

Here are some logistical tips:

*Use pre-cut foil to cover the armature. Don’t waste your time cutting foil! I get mine at Costco.

*Cut the plaster strips on the paper cutter. Double up the thickness and go twice as fast.

*Use a dedicated set of ‘plaster scissors’. Don’t bother scraping off the plaster. Use same set every year.

*Use a different color armature for each class.

*Tape off a dedicated drying area for each class.

*Use a big pitcher or watering can to refill the dipping bowls (we use old Cool Whip tubs for dipping bowls).

*Don’t you dare let the kids dump the dipping bowls down the sink at the end of class! Use a 5 gallon bucket and let the sediment settle before pouring off water.

Update: The plaster mask project continues in part two of this series.

Drying masks. Each class/table has a dedicated drying area to speed prep.

Your scissors will get yucky. Use a separate set for this project.


Dollar store bowl makes a nice armature

Cut plaster wrap on paper cutter.

Related Posts Plugin for WordPress, Blogger...