Monster Silhouettes

IMG_3504

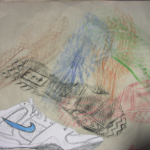
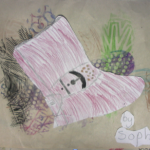
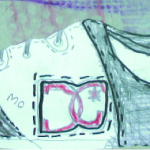
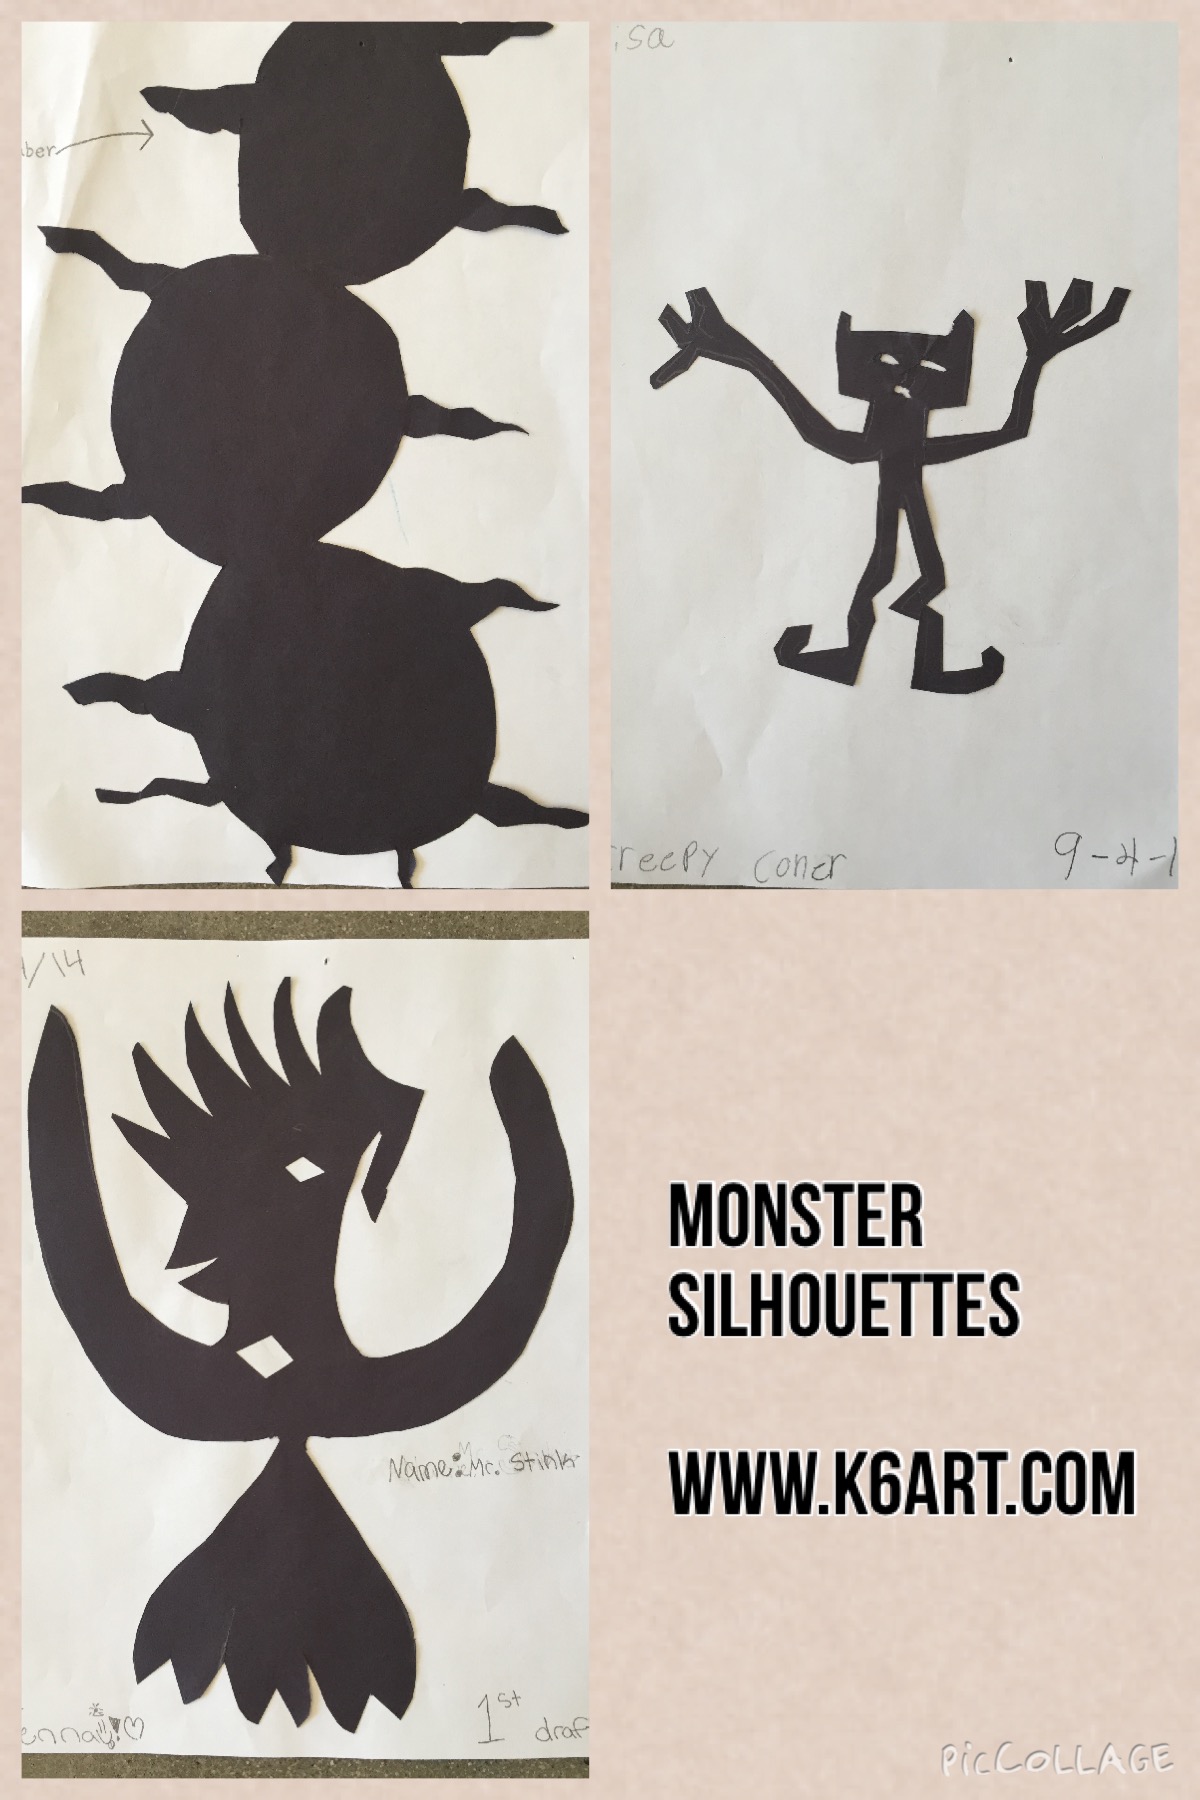
Our fifth graders just created these fabulous monster silhouettes. They learned how contour, organic shape and negative space contribute to an interesting design.

Materials:

  • black construction paper
  • copy paper
  • scissors
  • glue stick
  • pencils, erasers

‘Monster Mash’

Monster Mash

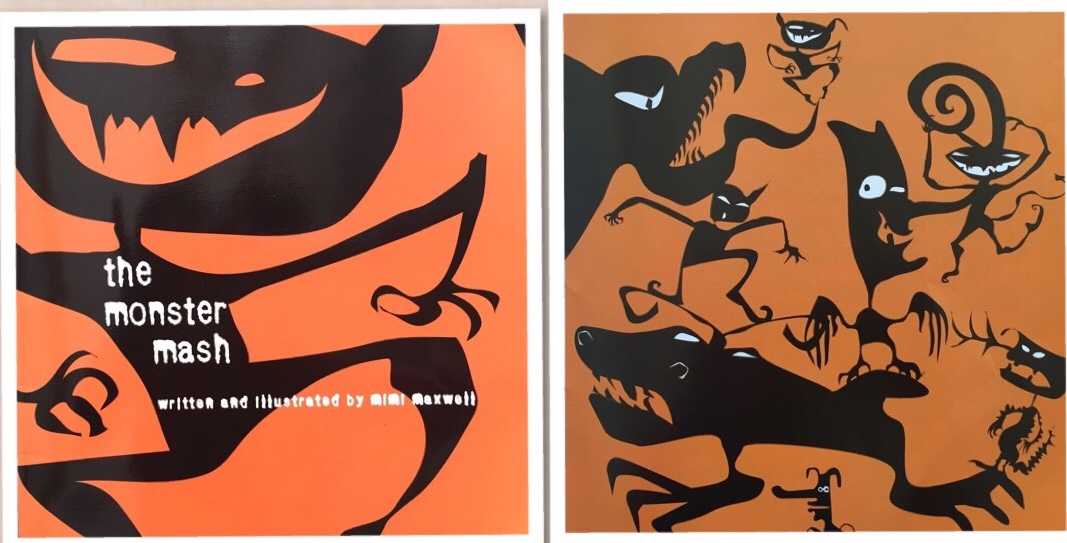
Illustrations from ‘Monster Mash’ by Mimi Maxwell

We began by looking at the illustrations in the book Monster Mash by Mimi Maxwell. The monsters are all in silhouette. We discussed organic (free form) vs. geometric shape. We also noticed the most interesting monsters had pointed or swirling body parts.  Many had cut-outs (aka negative space).

monster silhouettes

Fifth grade monster silhouettes.

IMG_3505

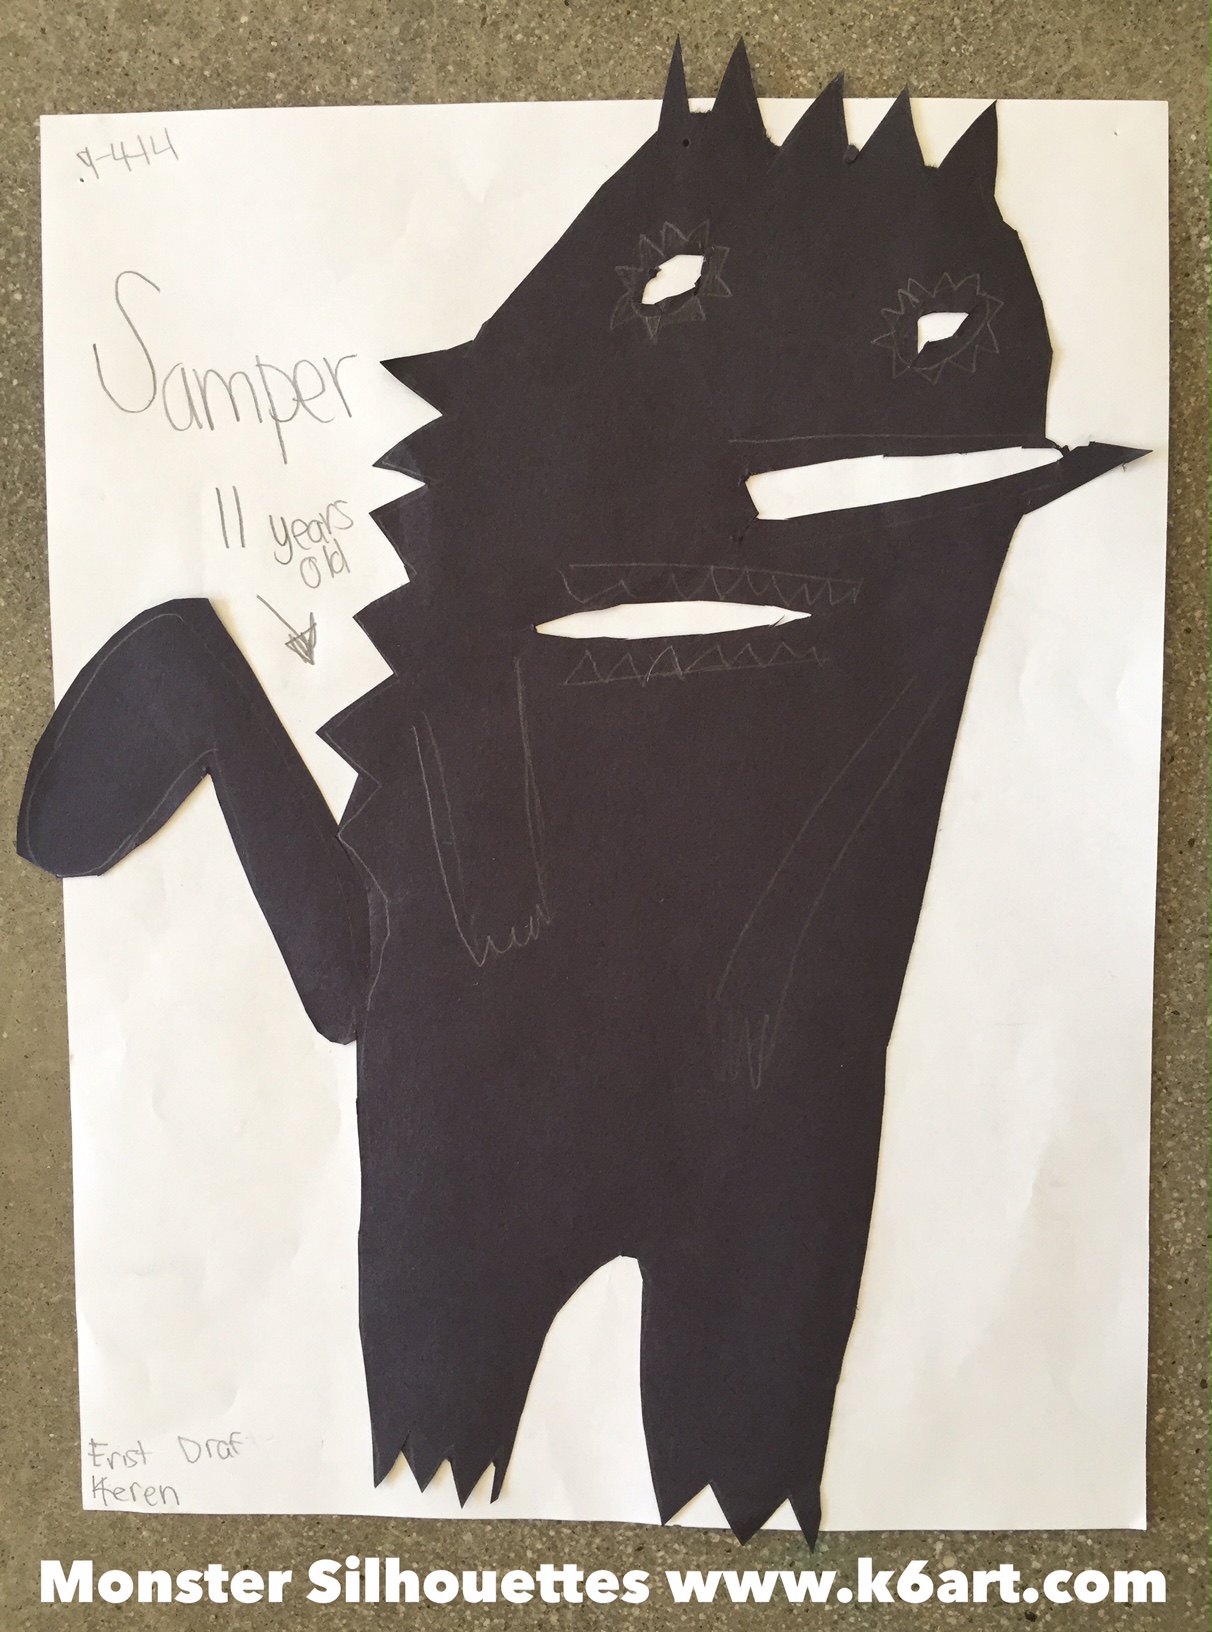
Fifth grade monster silhouette. Allow 90 minutes.

Create the monsters

Students did a couple of thumbnail sketches, then drew their monsters on black paper. Remind your students to design large monsters with interesting body parts and cut-outs. The most common problem is when a student draws a tiny, perfect monster that is too small to cut out.

Use glue stick to mount on copy paper.

I got this great lesson plan from art teacher Grace Hulse. Grace recommends this project as an introduction to a shadow puppet lesson. Click here to see more about Grace’s shadow puppet workshop at NAEA14.

Enjoy!

Calder Wire Sculpture for Fifth Grade

calder wire sculpture pinable

Of all the famous artists we study, students think Alexander Calder is the most fun.  Fifth graders made Calder-inspired wire animal sculptures.

Alexander Calder’s Fish (1944).


5th graders made wire sculptures focusing on contour. Allow 2-3 40 minute sessions.

 Materials:

Notes: When buying wire, the higher the gauge, the thinner and more flexible the wire. The wires below are soft enough for students to cut with our blunt-tip school scissors! Simplify your life and buy pre-cut 18″ floral wire (available at floral suppliers, Wal-Mart and Michaels).


  • spool of  Dick Blick 14-gauge Armature and Sculpture Wire , (cut one 3 ft. piece per student) (note: compensated affiliate link)
  • pre-cut 18″ floral wire, 20 or 22 gauge, ‘bright’ (silver-colored aluminum)
  • pre-cut 18″ floral wire, 26 gauge. I call this super-fine and flexible wire ‘sewing wire’ because it is fine enough to pass through sequins, beads and window screen.
  • embellishments: buttons, beads, sequins, aluminum pot scrubbers, pipe cleaners, aluminum window screen.
  • sketch paper (we use 8.5″x11″ copy paper)
  • markers for sketching
  • optional: Ziploc gallon-size storage bags for storing unfinished work between sessions

We begin by looking at this Calder wire sculpture Powerpoint. Next students sketch a contour drawing of an animal on copy paper. The sketch should touch all four edges of the paper and should be simple. Then students trace the contour with 14 gauge sculpture wire, overlap the ends and twist to secure.

Trace marker sketch with wire.

They can string shorter wires or pipe cleaners with beads, sequins and buttons across the center. Encourage kids to experiment.


We link up the sculptures in a chain (using my favorite paper-clip ‘S’ hooks) and suspend from the ceiling.  Instant group Calder mobile!

Calder’s art is so varied and interesting, you could do an entire unit: a mobile lesson, stabile lesson, a wire sculpture lesson, a circus lesson, even a jewelry lesson.

Do you love Calder’s art? Check out my posts on Calder’s jewelry , Calder wire portraits, and best wire sculptures of 2012.

UPDATE: Calder books to read online for free! Click here

NEW: click here: How to make a Calder mobile!


Note: I am an affiliate of Blick Art Supplies. I have been using Blick Armature and Sculpture Wire for nine years and LOVE it!

UPDATED: 11/23/13

Two Part Shoe Art


The fourth grade recently completed their shoe art.  We did a two part project.

Students drew their shoes and took crayon rubbings of the soles

Part 1: shoe drawing. We started with each kid taking off a shoe and putting it on the table. Kids traced the shoe contour onto white drawing paper. Then students moved into observational drawing mode and added the shoe stripes/logos/dots to the drawings. We colored the shoes – kids could use realistic or imaginative colors.

Part 2: sole texture rubbing. Shoe off and on the table!  This time, we did a texture rubbing of the shoe sole.  We used newsprint and peeled crayons.  Kids were encouraged to to multiple rubbings of their shoe in different colors, and then trade shoes with friends.  So much fun!  It was like collecting autographs, but of your friends’ shoes….

Last step: cut out the shoe drawing from part 1 and glue it on the texture rubbing.

Wow!!!  Super successful project.  Just be sure do this one when its dry outside or you will have mud on the tables.

Inspiration for the shoe contour lesson comes from long, long ago, when I was a parent volunteer in Jenny Luce’s art room. The sole rubbing portion of the lesson comes from the book ‘Make Prints!’ by Kim Solga.

Related Posts Plugin for WordPress, Blogger...