
Here are some fine examples of our annual sixth grade Ancient Egyptian chalk art project. Click here to see more examples from last year.
Materials:
- black construction paper, 12 x 18
- pencils/eraser
- reference photos/drawing aids (see this Pinterest board for ideas)
- chalk pastels, colored and skin tone (for skin tones I like this earthtones pastel set from Blick)
(note: compensated affiliate link)
- black oil pastels
- newspaper to cover tables
- white glue (optional)

Day 1-2
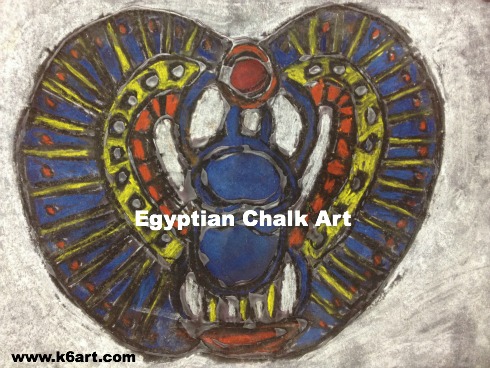
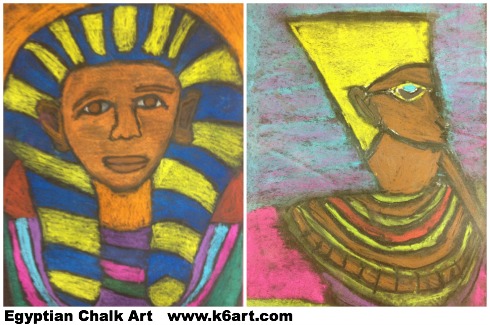
Our sixth grade students study ancient Egypt as part of their ancient civilizations social studies unit. They have a lot of pre-existing knowledge of Egypt. I build on this by showing photos of treasures from King Tut’s tomb, such as scarab jewelry and Tut’s golden sarcophagus. They had heard of the Book of the Dead – now they had the opportunity to look at all the figures in it draw one. We noticed all the figures were stylized: the head drawn in profile, with the eye looking straight ahead.
Students had the option of drawing ancient god/goddess, tomb artifact, or portrait. They (lightly) drew an image using pencil on black paper. Some kids found it easier to use white chalk for the sketch. Then they went over their lines with black oil pastel.
Day 2-3
The students colored in with chalk pastels, and tried to avoid coloring over the black oil pastel lines.
Minimize the mess: encourage kids to tap excess chalk onto newspaper instead of blowing it around.
Day 3
After coloring with chalk pastels, students went over the black lines one more time with oil pastel.
OPTIONAL FOR EARLY FINISHERS: ADD DETAIL WITH WHITE GLUE
I used to teach this as a white glue/chalk pastel project, and had lots of old examples for students to see and touch. A number of kids really liked the glue lines. After completing the project, some students asked if they could add glue lines OVER their artwork as a final step. Surprise! We found out their glue lines dried fairly dark even if they were applied over chalk.

White glue hieroglyphics and outlines.
In the above portraits, one girl added white glue hieroglyphics as a final step. The other outlined her portrait in white glue.
I sprayed the completed chalk art with hairspray to keep the pastels from smearing.
If you do use white glue, don’t make the same mistake I did years ago….
Don’t let them dry on the tables! I tried this once. Some glue blogs seeped through the paper overnight. The next morning I found several artworks glued firmly to the table. I had to pry them off, and repair the rips 🙁 Live and learn!
Enjoy!

Parts of this lesson were adapted from the excellent Arts Attack curriculum.


