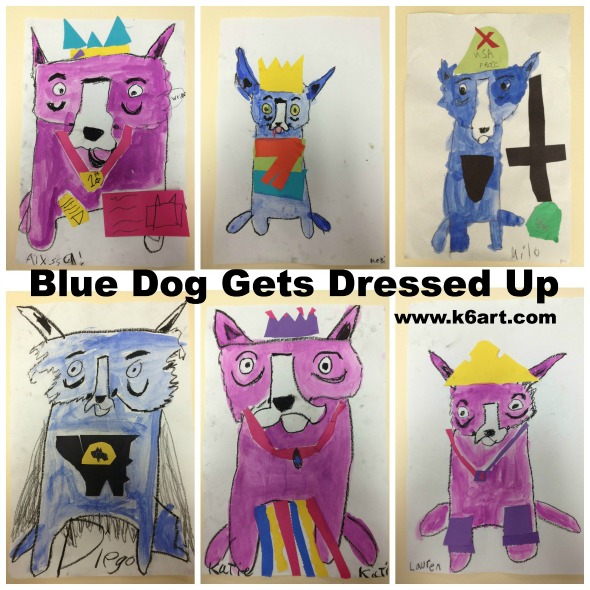
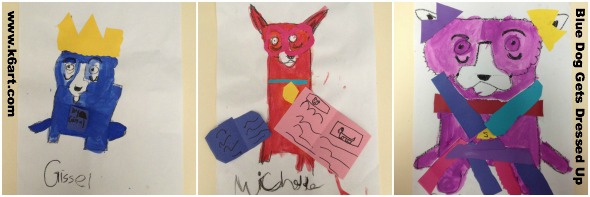
Our first graders learned about artist George Rodrigue’s Blue Dog. They had a fabulous time creating their own blue (or green or magenta) dogs and dressing them up in paper collage. The George Rodrigue Foundation website has every resource you could possibly need. I downloaded the Blue Dog PowerPoint slideshow, and learned the Blue Dog was inspired by Rodrigue’s late dog, Tiffany. The PowerPoint has lots of ‘dressed up’ Blue Dog paintings, including a secret agent dog, hula dog and motorcycle dog. Of course the first graders LOVED that! I also showed students the first few minutes of this video from CBS Sunday Morning.
Now on to the art project!
Materials
white sulphite drawing paper – 12″ x 18″ (or other white paper that is strong enough for painting)
Day 1: Students watched Blue Dog PowerPoint, then did a directed draw of the blue dog using black crayon. Next they painted the dog in a single solid color using tempera cakes. Amazingly, this took only 40 minutes thanks to the easy-to-handle tempera cakes.
Day 2: Students decorated their dogs using scrap paper and glue stick. This was a popular and super successful project with easy clean up. I will definitely repeat next year.
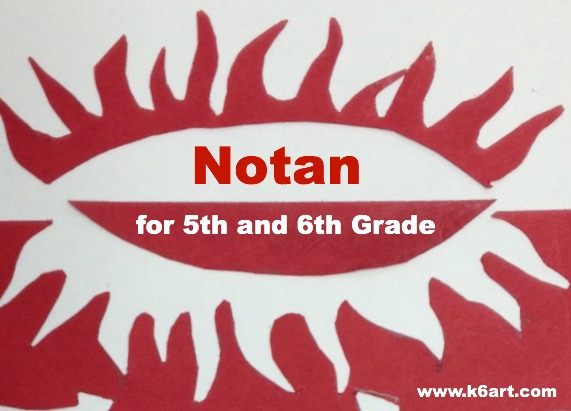
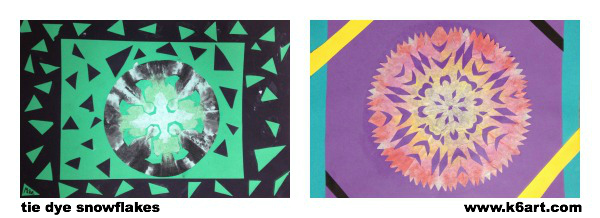
Our 5th and 6th grade students did a quick 40-minute cut paper notan collage project. Our inspiration came from these beautiful notan artworks at the MiniMatisse blog. If you are unfamiliar with notan, it is a Japanese design concept of dark and light. Notan cut paper projects are great for teaching a lot of concepts including contrast, positive and negative space, symmetry, and geometric vs. organic shapes.
This was the very first time I taught notan. I found two really good resources that gave me confidence: 1) a great video that shows the notan process and 2) a great illustration showing single and double cuts.
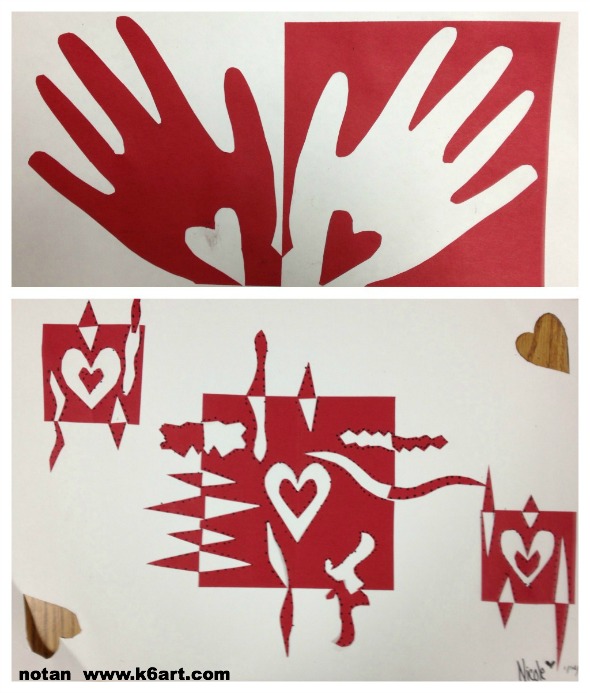
Each student started) with a 6″ square of red construction paper and a white format (background) paper . The minimum assignment was to make four single cuts – one cut from each of the square’s sides. Double cuts were optional (about half the students tried them). Cut pieces could be geometric (hearts were popular) and/or organic shapes.
Our students really liked this project. Some made Valentines and wanted to take them home immediately. I think they turned out great. I also think that their second attempts will be even better. Definitely a project to repeat!
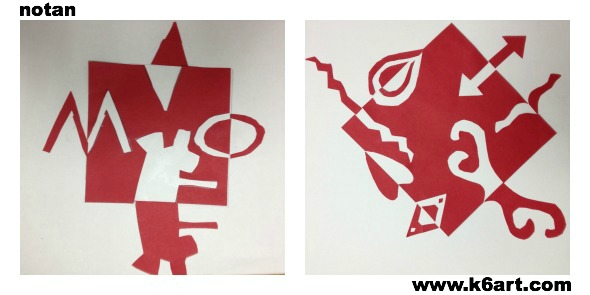
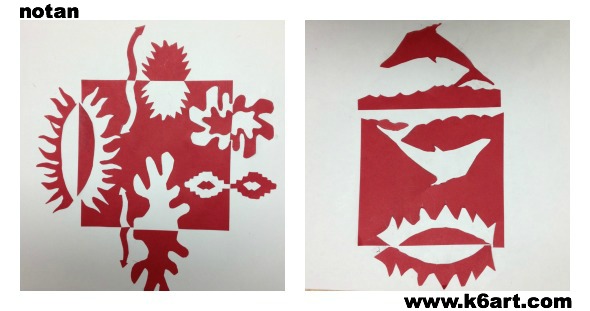
Fifth and Sixth Grade Results:
The next two designs contain cut pieces that were rotated incorrectly. But you know what? I consider the artworks successful. They are beautiful designs, even if they don’t fully fulfill the assignment. They still illustrate the concept of positive and negative space although they are in places asymmetric.
Although we did these red paper notans in honor of Valentine’s Day, they will look great displayed as a group any time of year.
I would LOVE to find an iPad app or interactive website that illustrates notan. If anyone knows of one, please leave a comment!!
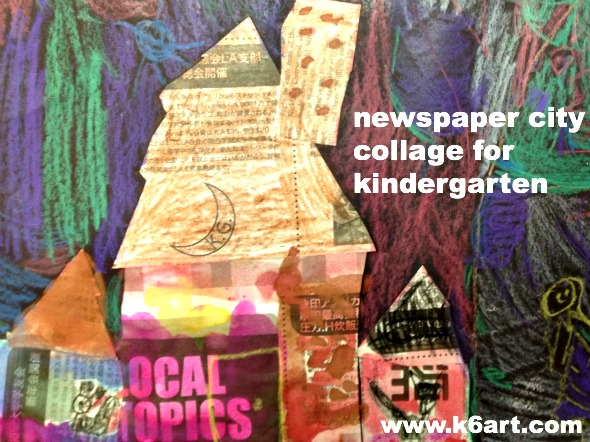
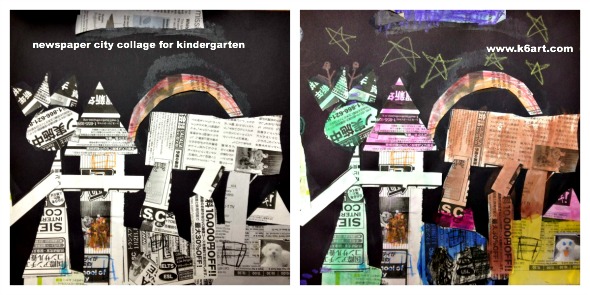
Are you looking for a fun collage project for kindergarten? This newspaper city collage project engages students with a discussion about their city, then lets them use their cutting, gluing, coloring and painting skills.
When asked, “What do you see in a city?” kindergarteners named all sorts of things: houses, roads, tall apartment buildings, garages, and even boats in San Diego harbor. One girl talked about her recent trip to the city hospital, another about what she saw on vacation in New York City.
Materials:
black construction paper
newspaper
scissors
glue stick
construction paper crayons, plus black crayon
watercolor set
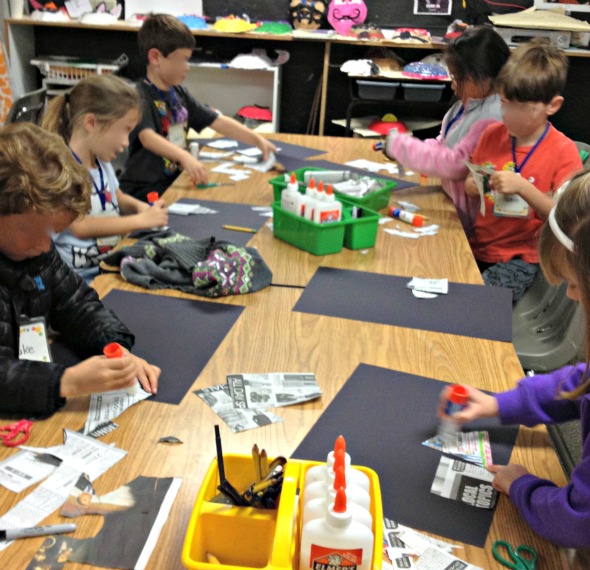
Day 1: Cut and glue newspapers. Emphasize shape: squares, circles, triangles, rectangles etc. Add details with crayon.
Day 2: Paint with watercolor.
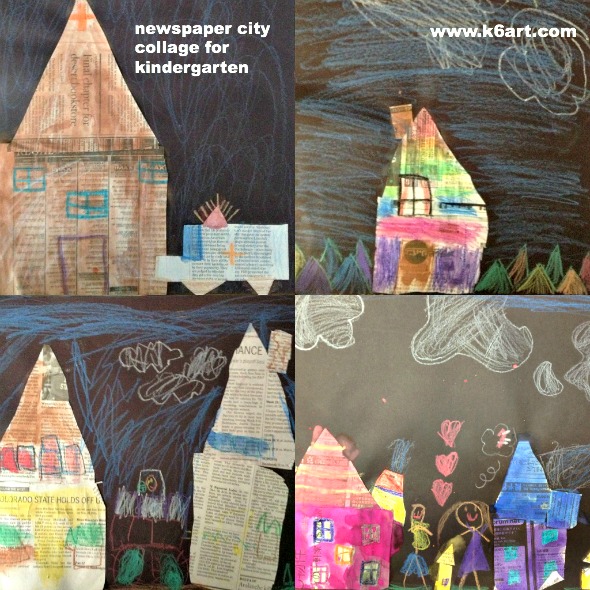
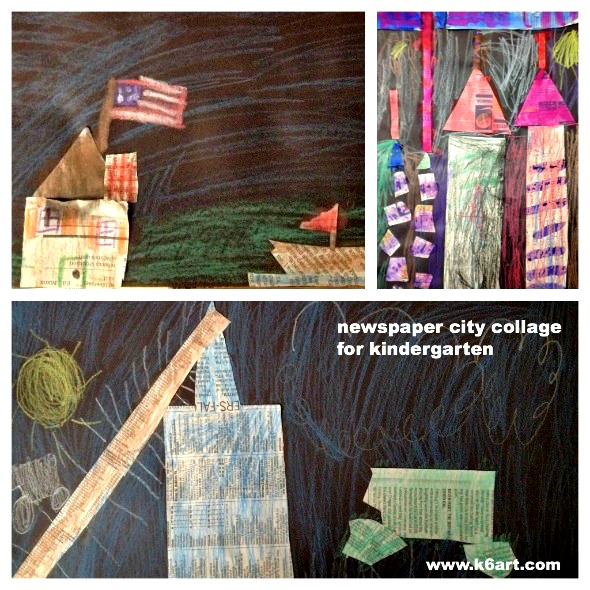
Kindergarteners make cut paper city collages from newspaper, then color with crayon and watercolor. Allow two 40-minute classes.
Aren’t they wonderful?
New York City collage before and after crayons and watercolor. Do you see the Statue of Liberty?
As much as the kinders enjoyed the project, I would do things a little differently next time:
Use smaller black construction paper. Students had difficulty filling the 12″x18″ paper we used within the class time frame. So this class took three 40 minute classes – I want to shorten it to two.
Skip the front page of the newspaper! It took extra time to eliminate inappropriate ads and articles. Next time I will try the white pages of a phone book, classified ads or financial/stock listings.
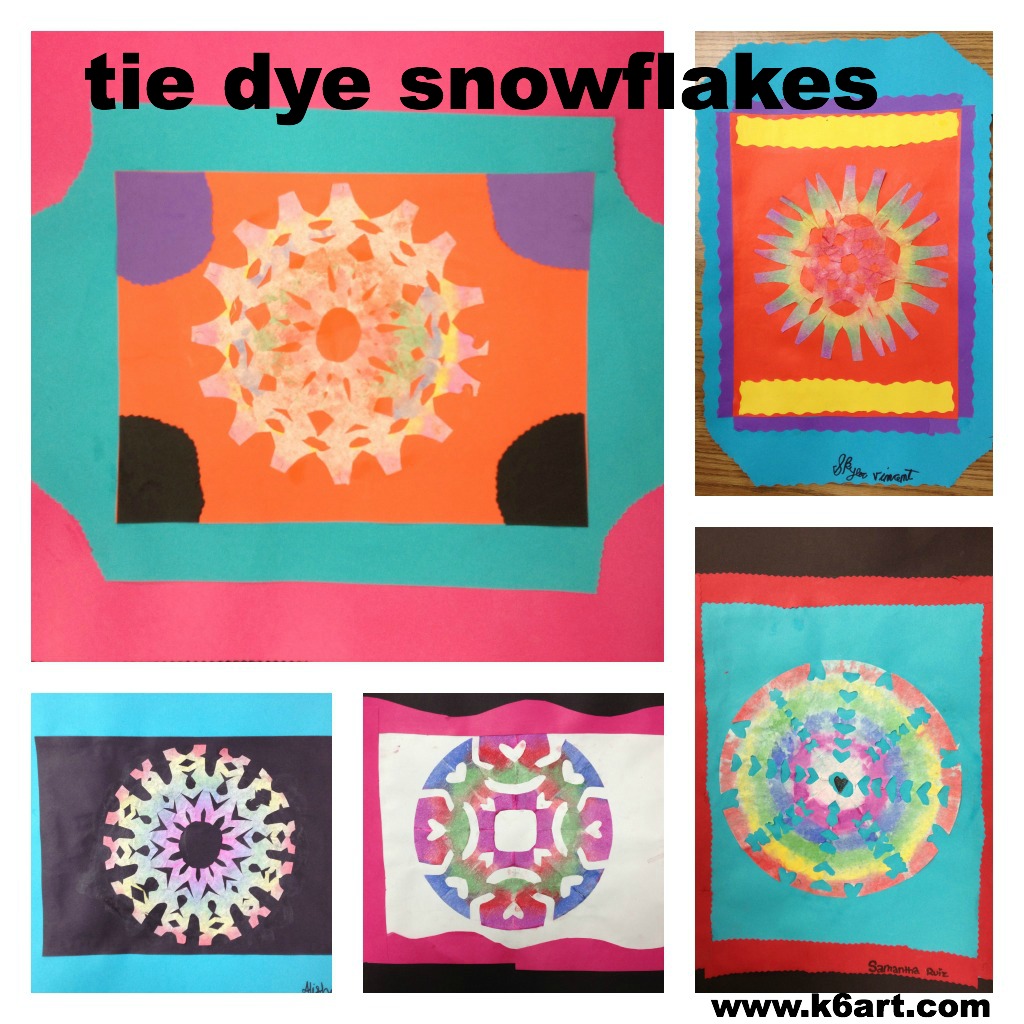
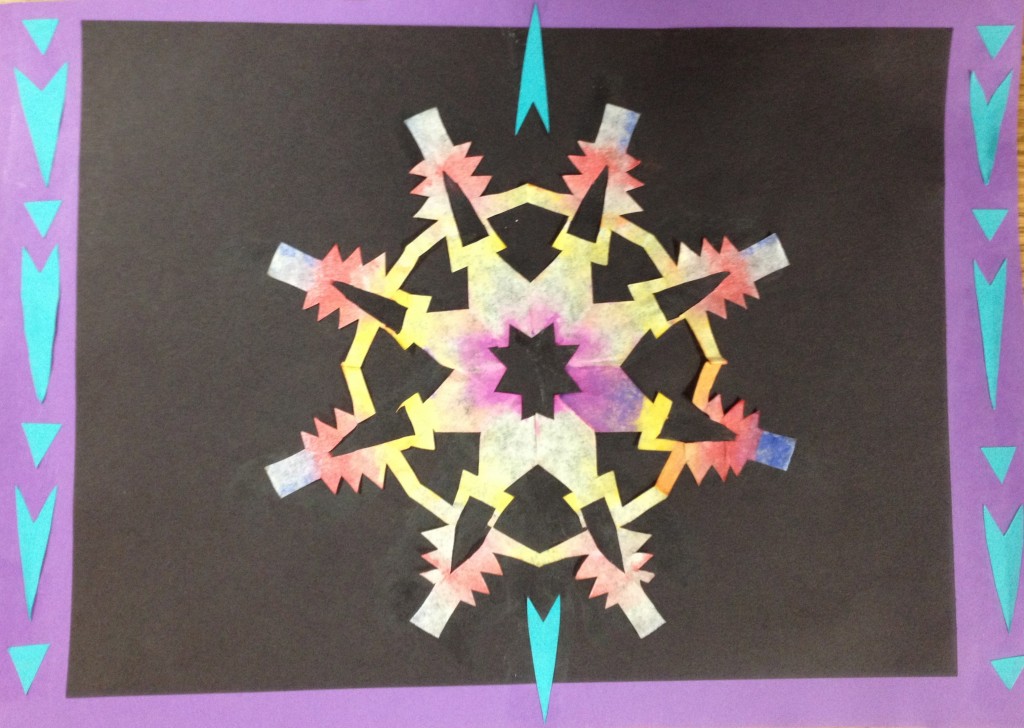
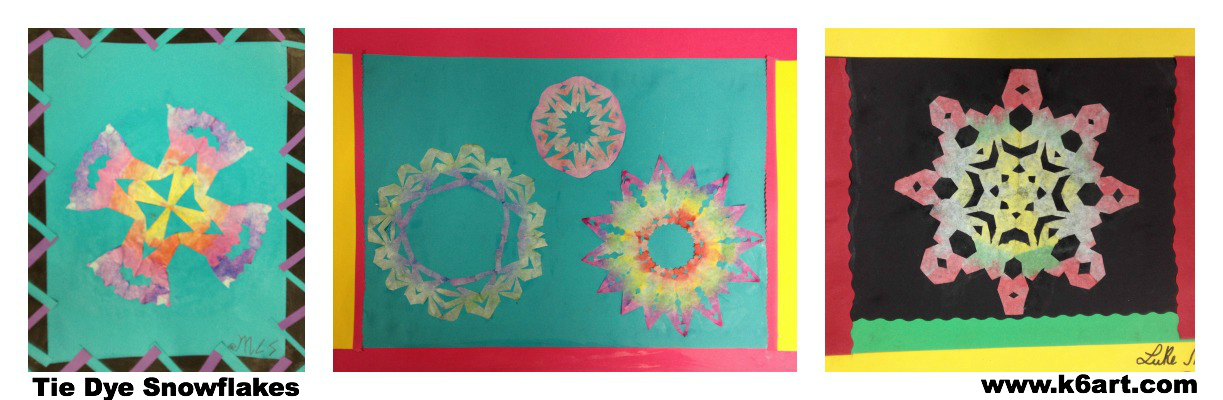
Give your snowflake project a colorful twist – ‘tie dye’ them! Sixth grade just finished their tie dye snowflake collages, made with coffee filters and painted with tempera cakes. This lesson was inspired by this post at A Faithful Attempt blog.
Sixth graders cut and paint coffee filter snowflakes, then use them in a collage. Allow two 40-minute classes.
Day 1:
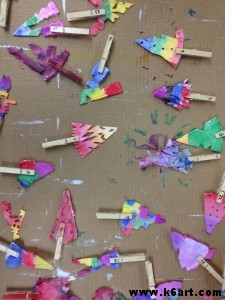
We began by viewing all the excellent student examples on the Faithful Attempt blog. Next, we folded our coffee filter rounds and cut our snowflakes using this method. NOTE: DO NOT OPEN THE PAPERS AT THIS TIME! Students painted their folded snowflakes with tempera cakes, then clipped on a numbered clothespin.
Students were allowed to make multiple snowflakes, so long as the folded flakes could fit stacked up in a single clothespin. One student was able to fit three painted snowflakes in a single clothespin. I let the papers dry on a sheet of cardboard.
Label each snowflake with a numbered clothespin. If you have multiple classes, use a different colored number for each class.
Day 2:
The sixth graders carefully opened their papers. THEY LOVED THE RESULTS! They mounted the snowflakes on construction paper using glue stick (tip – glue down the center first and carefully work your way out to the edges).
I was going to stop the project at that point, when someone asked me if she could double-mat their work. Then someone asked me if he could make a decorative border. I pulled out the ‘fancy’ scissors and the scrap paper bin, and gave them free rein. Our snowflake project turned into a collage project!
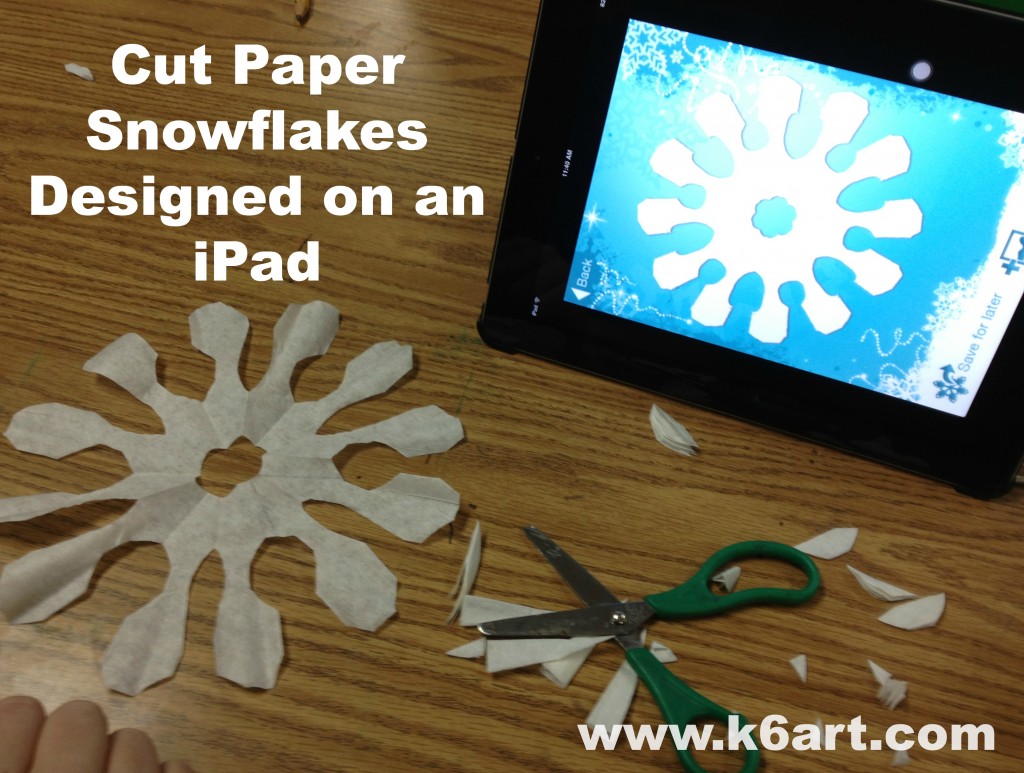
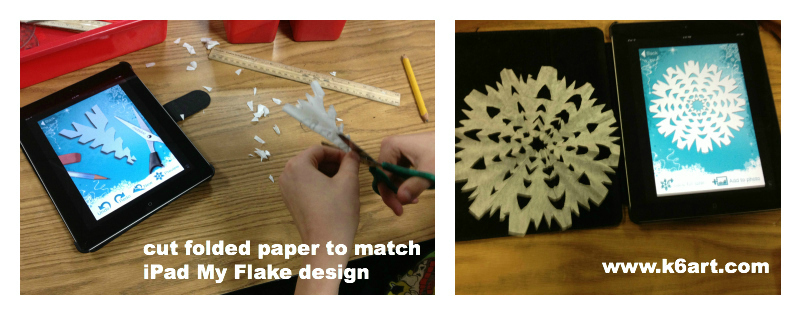
It’s winter! Time for a snowflake project. Our sixth graders just finished their cut paper snowflake projects, with a special twist: all the snowflakes were designed on iPads.
Students designed snowflakes on iPads using the My Flake app, then cut paper snowflakes to match. Allow one 40-minute class.
Materials:
round coffee filters (I got a pack of 150 at my local dollar store)
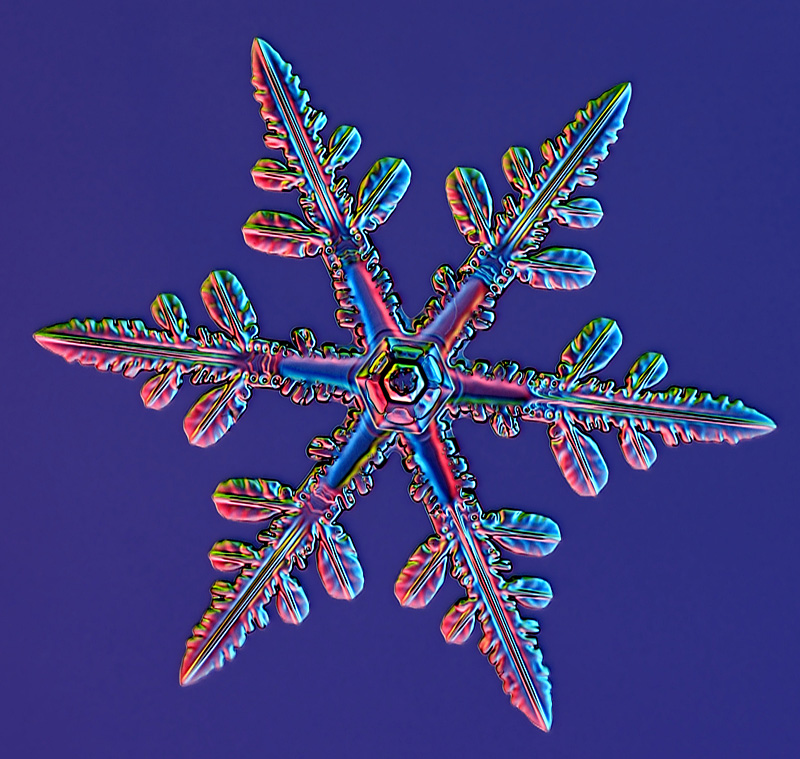
Magnified snowflake photo by Kenneth Libbrecht. Source: scientificamerican.com
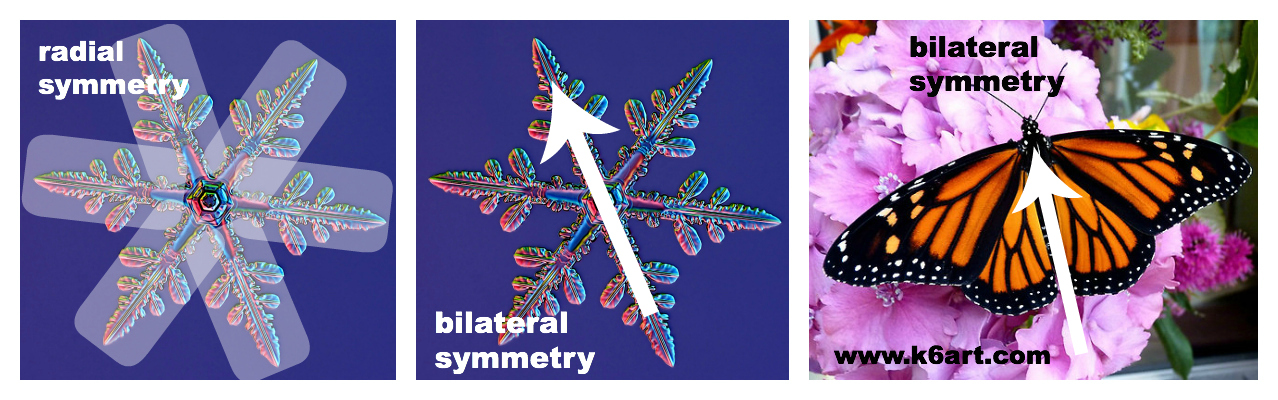
This is a good time to discuss radial and bilateral symmetry. Just like real snowflakes, our iPad and cut paper snowflakes will have radial symmetry, with six identical branches.
Folding the Paper
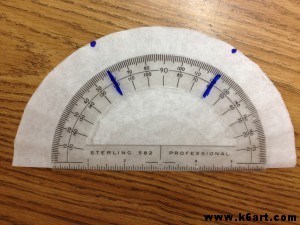
Next we folded our coffee filters in sixths. Students folded the round coffee filters in half, then used a protractor to divide the semi-circle into thirds. See this post from the Heart of Wisdom blog for great directions on folding the coffee filters.
Cut paper snowflakes start with a round coffee filter folded in half, then into thirds. Then one more fold in half to create a skinny wedge.
Designing the Snowflake on the iPad
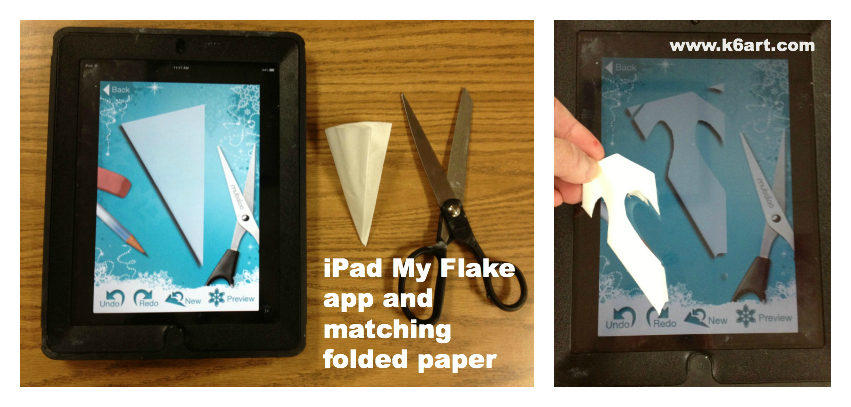
I demonstrated how to use the My Flake app, guiding my finger on the screen to make virtual cuts on the paper image.
Students spent the next five minutes exploring the My Flake app. The app allows them to test out different designs virtually by ‘cutting’ a folded paper image, then previewing the design. They can go back and undo or redo one ‘cut’ at a time, and preview the resulting changes.
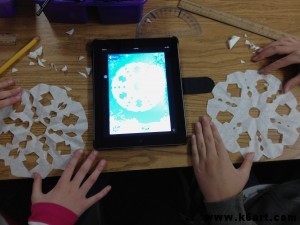
Once the students settled on a final design,they copied their My Flake design on the folded paper, and finally cut the folded paper to match.
Tip: encourage students to try a simple design on their first snowflake, and draw pencil lines lightly.
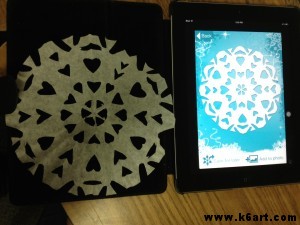
Sixth grade student work:
Matching paper and iPad snowflakes
Mount cut paper snowflakes on construction paper.
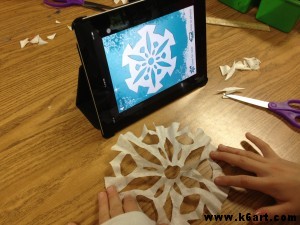
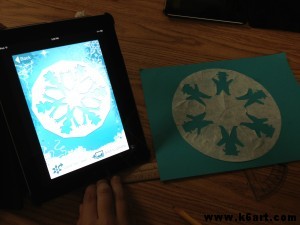
Our school is 1:1 iPads in grades 4-6. However, this project can be done collaboratively in pairs or in small groups. Several students can share an iPad, each adding a virtual cut or two. Then they can all cut the group design (U.S. art teachers – collaboration is a big part of new Common Core standards).
These two students collaborated on an iPad My Flake design, then both cut to match.
On its own, the My Flake app may also be an option for an inclusion activity. Students who cannot easily manipulate scissors may be able to design virtual snowflakes on My Flake and print them out for decorations.
More resources:
If you don’t have an iPad: use the Make a Flake website.
If you are looking for a book to accompany a snowflake project: our librarian likes Snowflake Bentley, the Caldecott-winning book by Jacqueline Briggs Martin about real-life snowflake photographer Wilson Bentley.
Thanks to Dryden Art and Brunswick Acres Art for sharing My Flake and other resources on their blogs. Thanks to N.T., one of our awesome sixth grade teachers, for support on this project.

 Our first graders learned about artist George Rodrigue’s Blue Dog. They had a fabulous time creating their own blue (or green or magenta) dogs and dressing them up in paper collage. The George Rodrigue Foundation website has every resource you could possibly need. I downloaded the Blue Dog PowerPoint slideshow, and learned the Blue Dog was inspired by Rodrigue’s late dog, Tiffany. The PowerPoint has lots of ‘dressed up’ Blue Dog paintings, including a secret agent dog, hula dog and motorcycle dog. Of course the first graders LOVED that! I also showed students the first few minutes of this video from CBS Sunday Morning.
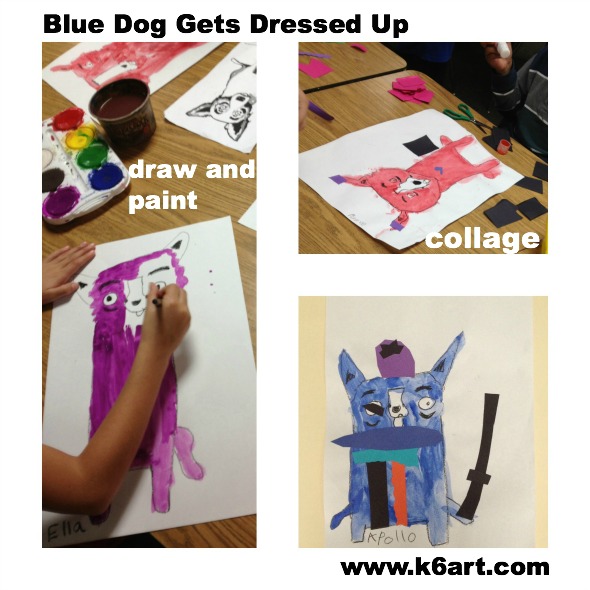
 This was a popular and super successful project with easy clean up. I will definitely repeat next year.