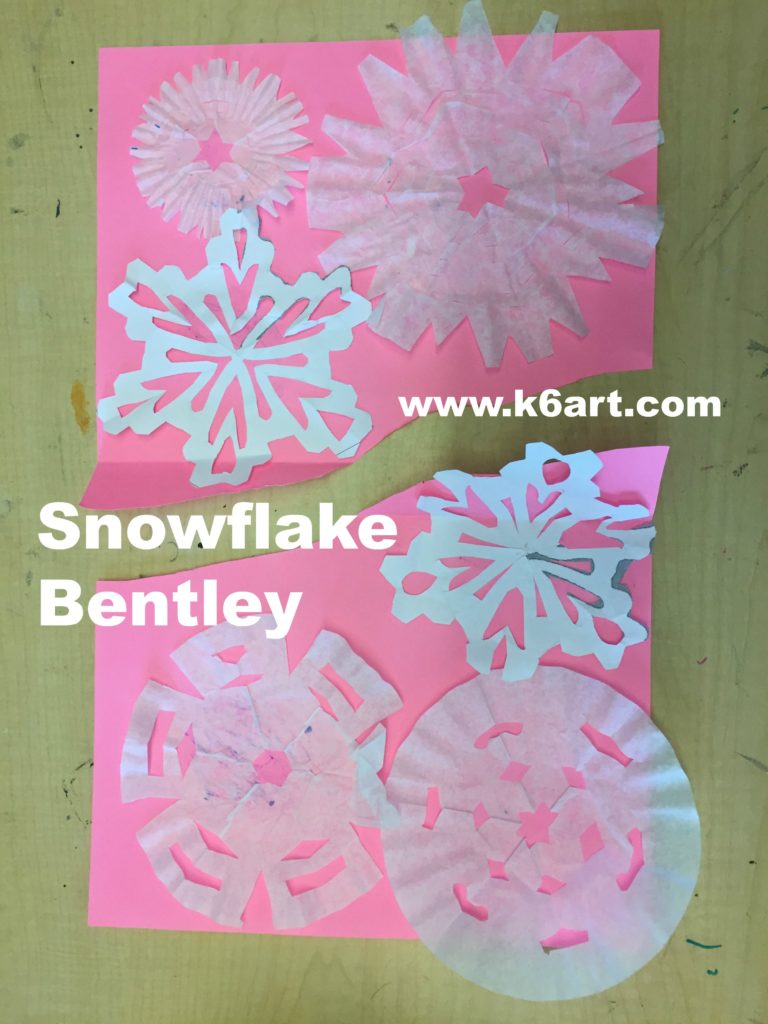
Hello friends! I hope you are all having a great winter. If it’s December, January or February, you can’t go wrong with a snowflake lesson.
Here is my Snowflake Bentley lesson. It’s based on the work of photographer and tinkerer Willson Bentley. Bentley was the first person to photograph individual snowflakes on a microscopic level. Thanks to Bentley, we know that each snowflake is unique and six-sided.
I’m using my new favorite tool, the Smore (www.smore.com) to share it with you. Enjoy!!!
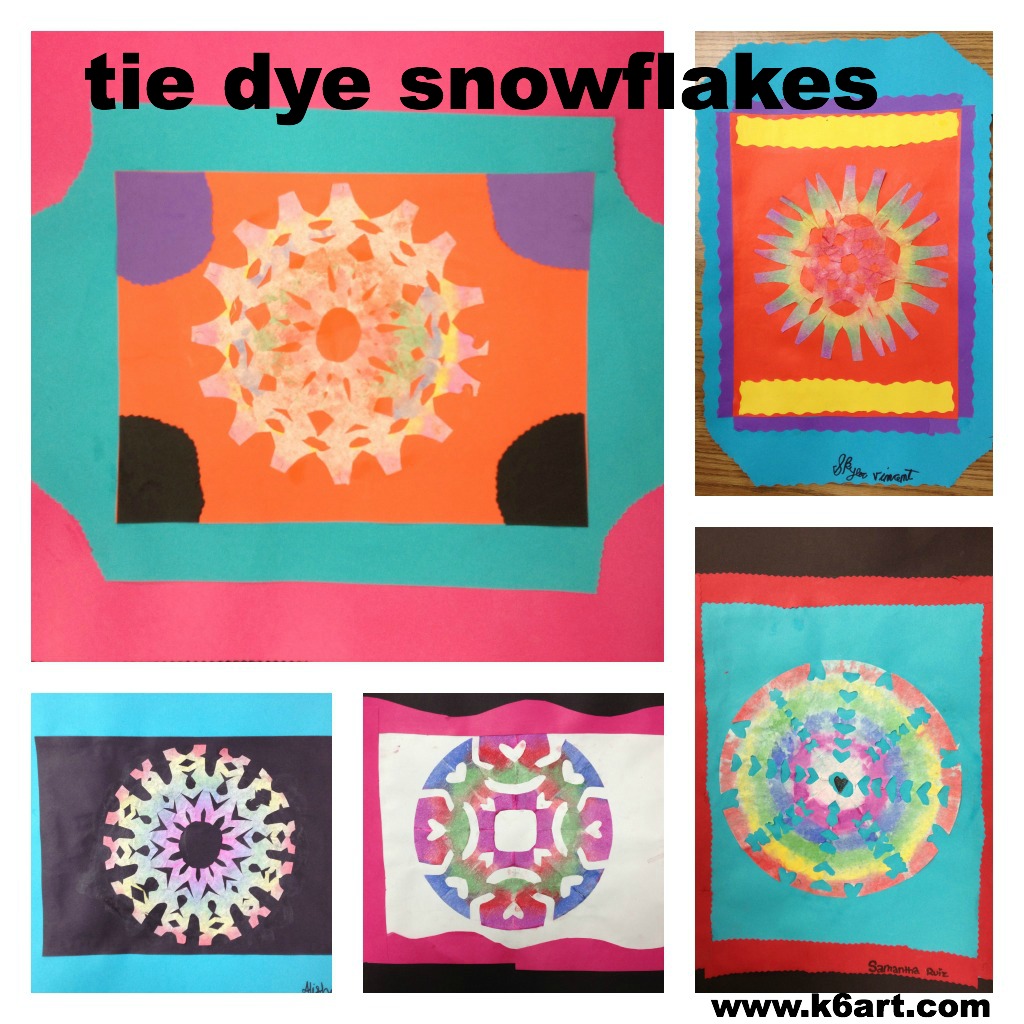
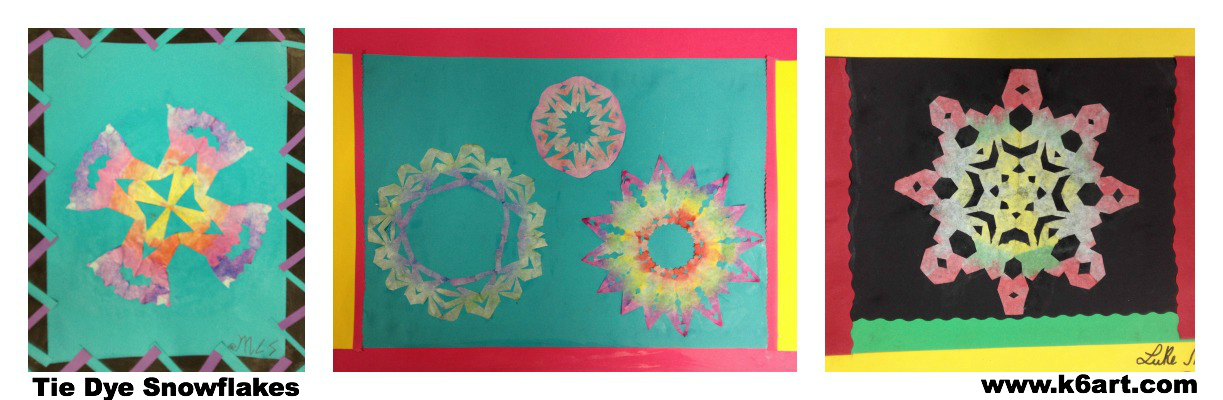
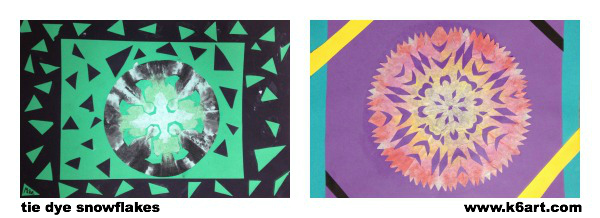
Give your snowflake project a colorful twist – ‘tie dye’ them! Sixth grade just finished their tie dye snowflake collages, made with coffee filters and painted with tempera cakes. This lesson was inspired by this post at A Faithful Attempt blog.
Sixth graders cut and paint coffee filter snowflakes, then use them in a collage. Allow two 40-minute classes.
Day 1:
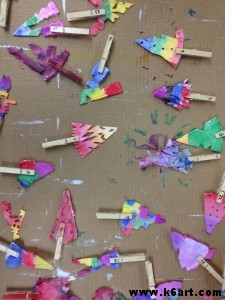
We began by viewing all the excellent student examples on the Faithful Attempt blog. Next, we folded our coffee filter rounds and cut our snowflakes using this method. NOTE: DO NOT OPEN THE PAPERS AT THIS TIME! Students painted their folded snowflakes with tempera cakes, then clipped on a numbered clothespin.
Students were allowed to make multiple snowflakes, so long as the folded flakes could fit stacked up in a single clothespin. One student was able to fit three painted snowflakes in a single clothespin. I let the papers dry on a sheet of cardboard.
Label each snowflake with a numbered clothespin. If you have multiple classes, use a different colored number for each class.
Day 2:
The sixth graders carefully opened their papers. THEY LOVED THE RESULTS! They mounted the snowflakes on construction paper using glue stick (tip – glue down the center first and carefully work your way out to the edges).
I was going to stop the project at that point, when someone asked me if she could double-mat their work. Then someone asked me if he could make a decorative border. I pulled out the ‘fancy’ scissors and the scrap paper bin, and gave them free rein. Our snowflake project turned into a collage project!
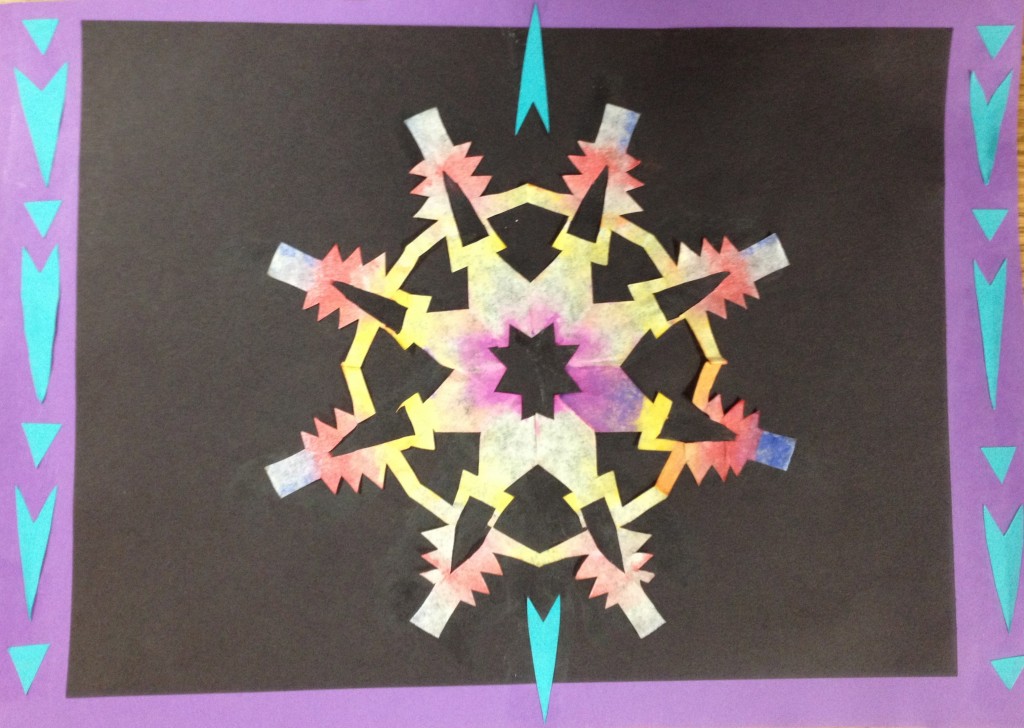
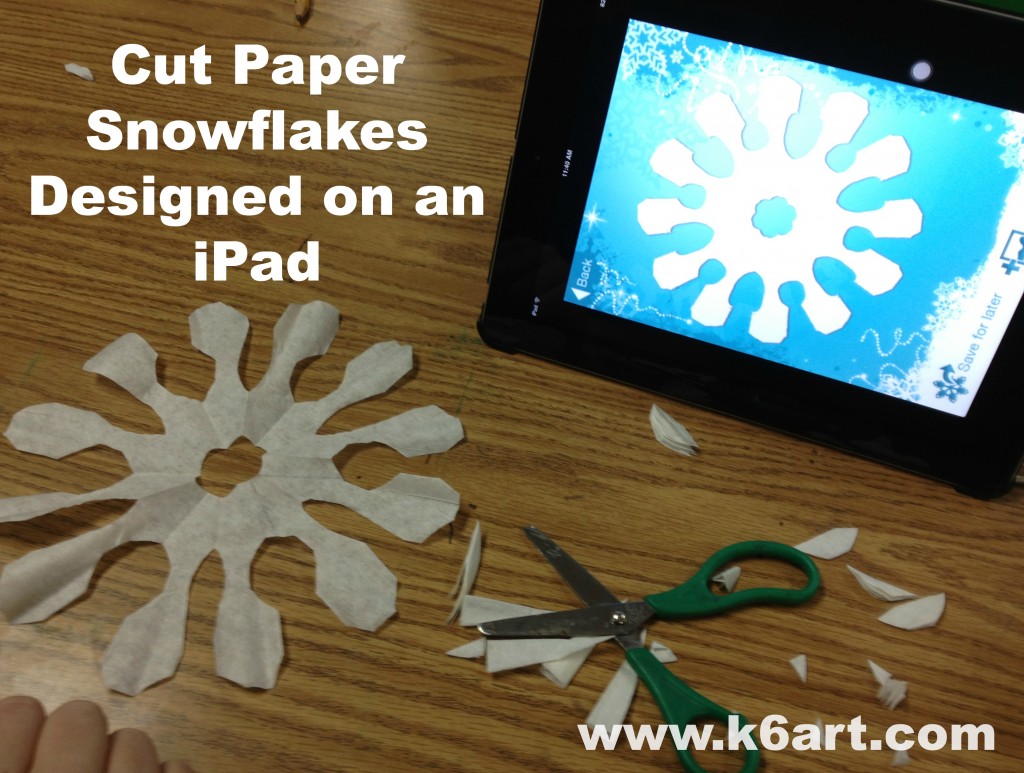
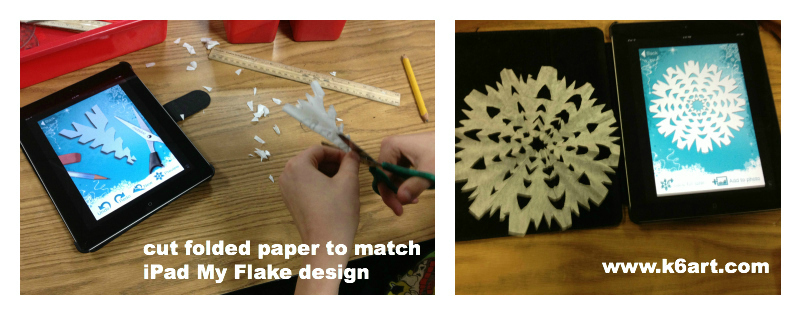
It’s winter! Time for a snowflake project. Our sixth graders just finished their cut paper snowflake projects, with a special twist: all the snowflakes were designed on iPads.
Students designed snowflakes on iPads using the My Flake app, then cut paper snowflakes to match. Allow one 40-minute class.
Materials:
round coffee filters (I got a pack of 150 at my local dollar store)
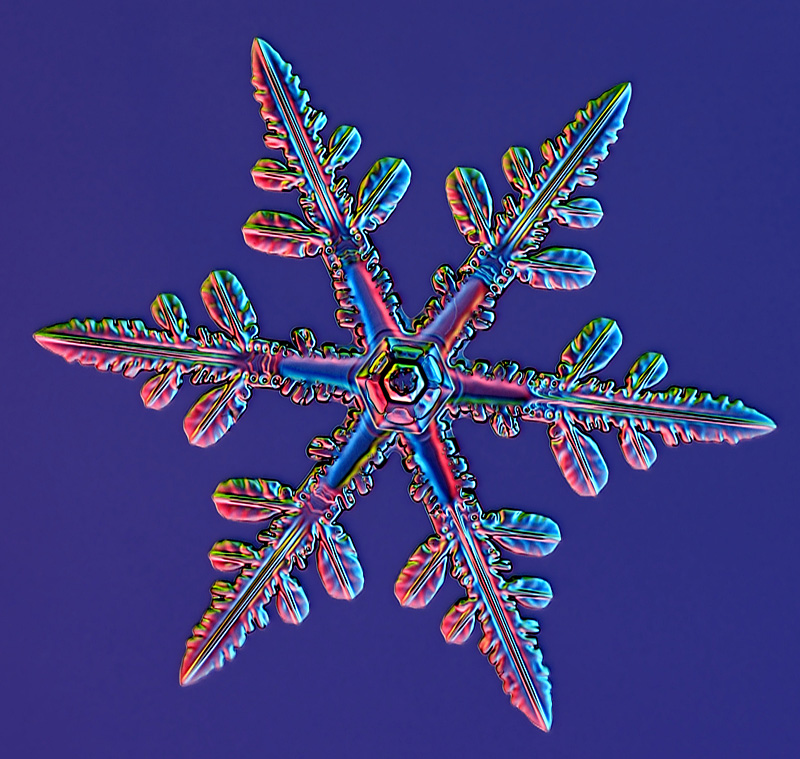
Magnified snowflake photo by Kenneth Libbrecht. Source: scientificamerican.com
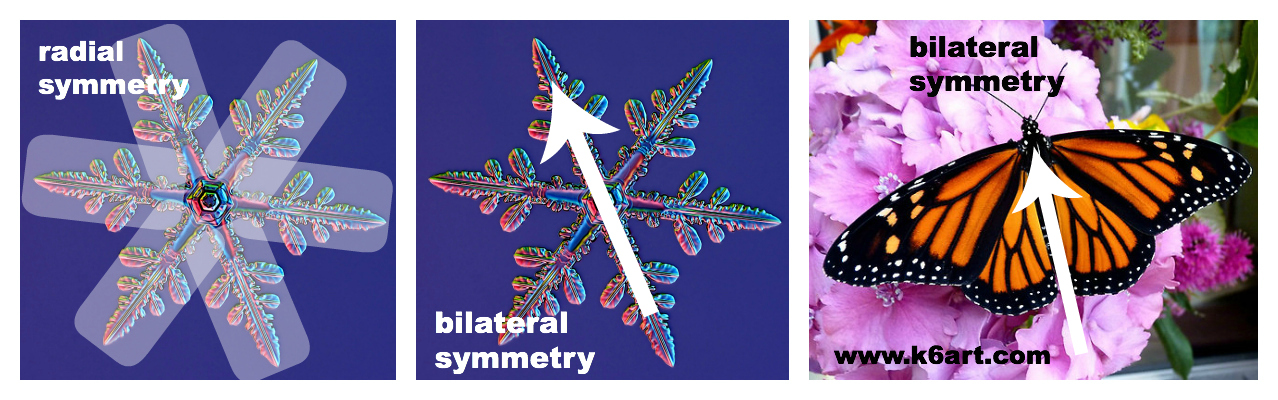
This is a good time to discuss radial and bilateral symmetry. Just like real snowflakes, our iPad and cut paper snowflakes will have radial symmetry, with six identical branches.
Folding the Paper
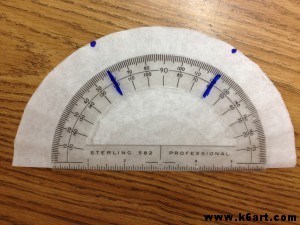
Next we folded our coffee filters in sixths. Students folded the round coffee filters in half, then used a protractor to divide the semi-circle into thirds. See this post from the Heart of Wisdom blog for great directions on folding the coffee filters.
Cut paper snowflakes start with a round coffee filter folded in half, then into thirds. Then one more fold in half to create a skinny wedge.
Designing the Snowflake on the iPad
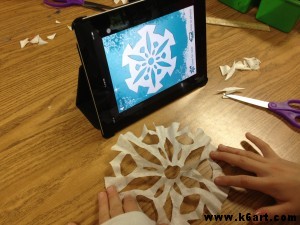
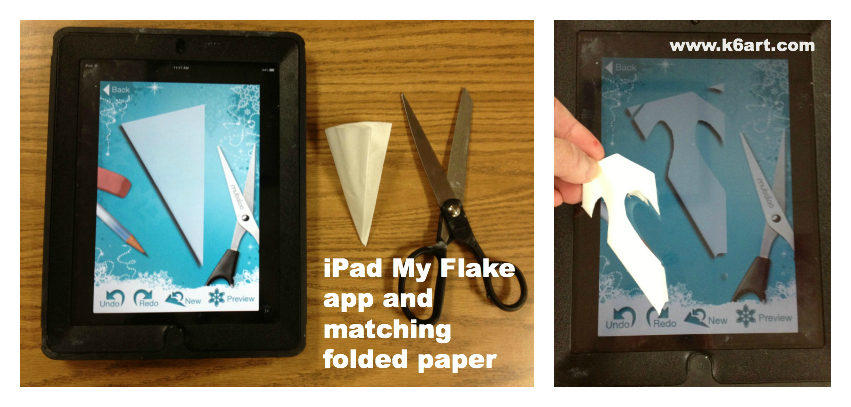
I demonstrated how to use the My Flake app, guiding my finger on the screen to make virtual cuts on the paper image.
Students spent the next five minutes exploring the My Flake app. The app allows them to test out different designs virtually by ‘cutting’ a folded paper image, then previewing the design. They can go back and undo or redo one ‘cut’ at a time, and preview the resulting changes.
Once the students settled on a final design,they copied their My Flake design on the folded paper, and finally cut the folded paper to match.
Tip: encourage students to try a simple design on their first snowflake, and draw pencil lines lightly.
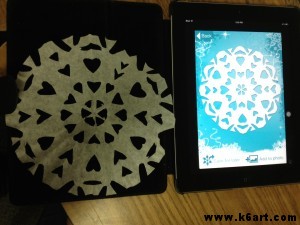
Sixth grade student work:
Matching paper and iPad snowflakes
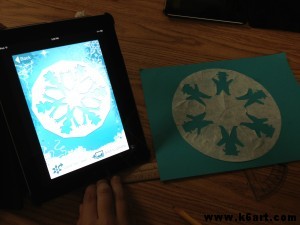
Mount cut paper snowflakes on construction paper.
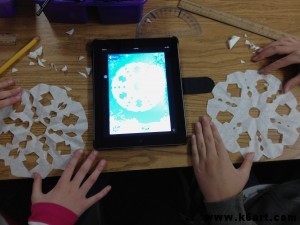
Our school is 1:1 iPads in grades 4-6. However, this project can be done collaboratively in pairs or in small groups. Several students can share an iPad, each adding a virtual cut or two. Then they can all cut the group design (U.S. art teachers – collaboration is a big part of new Common Core standards).
These two students collaborated on an iPad My Flake design, then both cut to match.
On its own, the My Flake app may also be an option for an inclusion activity. Students who cannot easily manipulate scissors may be able to design virtual snowflakes on My Flake and print them out for decorations.
More resources:
If you don’t have an iPad: use the Make a Flake website.
If you are looking for a book to accompany a snowflake project: our librarian likes Snowflake Bentley, the Caldecott-winning book by Jacqueline Briggs Martin about real-life snowflake photographer Wilson Bentley.
Thanks to Dryden Art and Brunswick Acres Art for sharing My Flake and other resources on their blogs. Thanks to N.T., one of our awesome sixth grade teachers, for support on this project.
5th graders used chalk pastels and cut paper stencils to make overlapping hearts.
These beautiful chalk pastel stencils take only one 40 minute session!
Materials:
Chalk Pastels
Stiff brush (we use our old tempera brushes)
scissors
construction paper for background (we used white 9″x12″)
construction paper cut approx. 4″x6″ for making stencils
optional: ready-made stencils
Instructions:
Fold the small rectangle in half. Draw a half heart on the fold and cut out.
Students can use both the positive and negative shapes from homemade stencils.
Color around the edges of the cut out 'window'.
Now take the stiff brush and brush the colored pastel into the stencil ‘window’.
These pink hearts 'stencils' were made on the school die-cut machine.
Lift up the stencil. Students will ooh and aah if they have never tried this process before! Now shift the stencil and repeat the process. Encourage students to overlap.
Now take the positive shape and color the edge with pastel. Place on the background paper, and brush the color outward onto the paper.
Positive shape can be used as a stencil.
Nice composition and color.
We reused our die-cut stencils for three classes. We just colored and colored again around the edges. Tell the students to relax – it’s going to look beautiful.
Students can also color the background.
Another stencil made on the school die-cut machine.
This student used his stencils to make a bird.
This method would be very interesting with cut paper snowflakes or doilies.
Experiment with doilies.
Try a homemade snowflake stencil.
Minimize the mess: ask students to tap their excess chalk pastel dust onto a piece of newspaper.