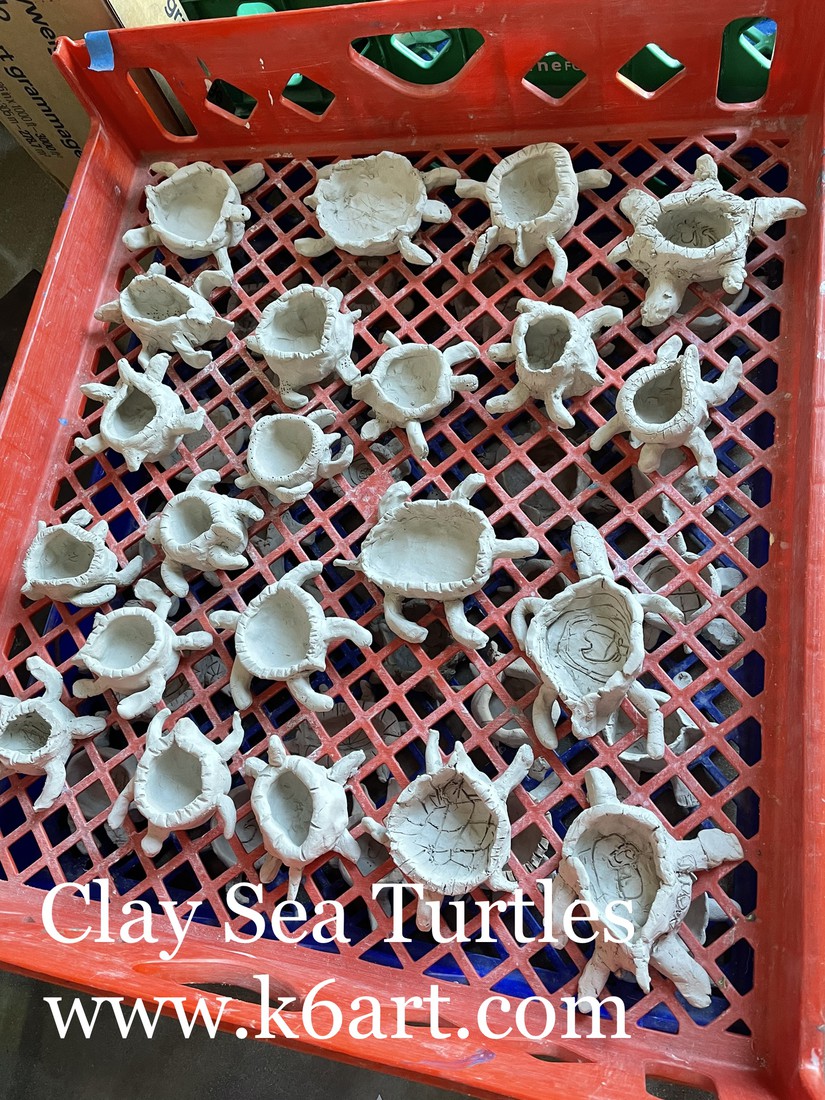
Are you looking for a super-successful clay project for 3rd-5th grade? Our third graders loved making these sea turtle pinch pots. Check out the video tutorial!
I’ve included a short video of our school’s Skutt kiln. I’ve found that young students don’t understand the process that transforms their soft, gray, clay creations into a pale-colored, hard ceramics. I show this video in class to all grades, no matter what clay project I’m doing.
Materials: clay, a popsicle stick, a toothbrush, and water.
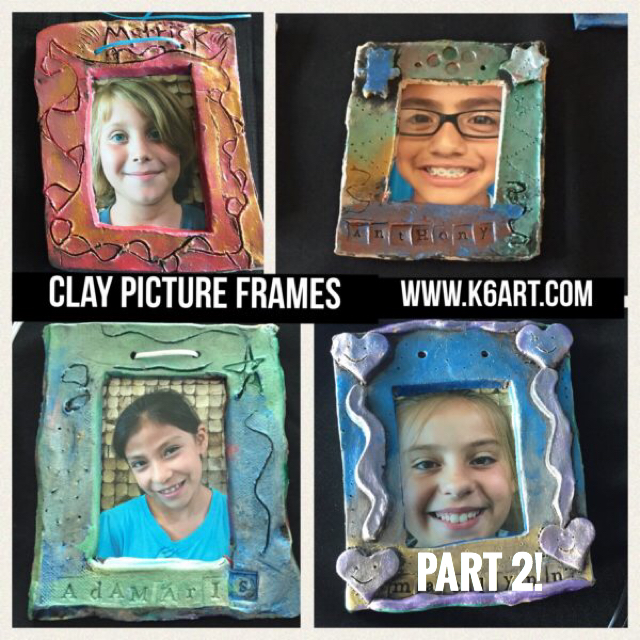
In part one of this lesson, we rolled and cut out clay picture frames. They dried, and I bisque fired them in our school kiln.
In part two, we painted the frames with tempera cake and metallic acrylic paint.
To paint the frames
Materials
Metallic acrylic paint in bright colors, plus silver and gold (like these)
Small plastic cups with lids (salsa cups)
Black tempera cake
Old, stiff brushes
Dishpans, one per table
Prep:
Finger painting station: Put a very small amount of metallic acrylic paint into a salsa cup. Barely cover the bottom. Prepare a cup for each color. Cover the table with paper or tagboard painting mats.
At the other tables: Put a black tempera cake and one old brush per student in a tray. Set it on each table with a dishpan of water.
Directions:
Paint the frames black. Distribute the fired frames. Each student takes a brush, dips in water, and swirls it on the tempera cake until bubbles appear. Paint the front of the frame only, being sure to work the black paint into all the recesses. Use an up-and-down motion to drive the paint into the crevices.
Rinse the frames, either in the dishpan or in a sink. Students can rub with hands and/or scrub with their old brush. Don’t wash all the paint off – the stamped and textured areas should remain black.
Pat dry with a towel, or lay on a newspaper for a few minutes.
Go to the finger painting station. Dip finger in metallic acrylic paint, scrape on edge of salsa cup, and rub on the ceramic in a circular motion. The paint should stay on the surface. TELL STUDENTS TO USE A LIGHT RUBBING MOTION AND TRY TO AVOID GETTING THE COLORED PAINT INTO THE LETTERS AND TEXTURES. These should remain black. To change colors, wipe finger on paper mat and move on. There should be no water at this table!!!
Students can also layer colors. A little silver or gold (or a white or light colored pearl paint) looks great layered over the bright color acrylic.
Feel free to limit your palette to just cool color or just warm color acrylics, plus silver and gold.
These dry almost instantly. They can be assembled with photos and hangers the same day if you have help.
Tips:
To store the metallic acrylics: if there is almost nothing left in the salsa cups, I let them dry out on the table overnight. I stack them the next morning, and stash them until I need them again. Then I just refill according to color. If you have left overpaint and need them soon, spritz each with a little water, cap them and put in an airtight container. Don’t overfill the salsa cups with metallic acrylic. I fill them sparingly and they last a long time.
here is a video of my students using the metallic acrylic technique on another project.
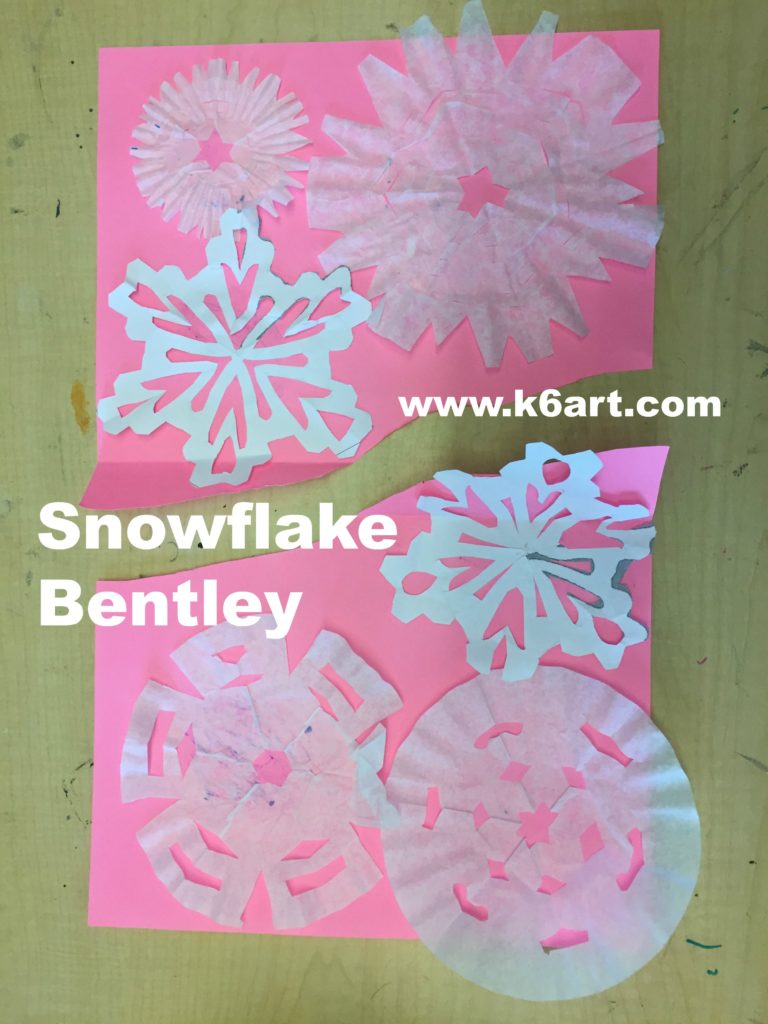
Hello friends! I hope you are all having a great winter. If it’s December, January or February, you can’t go wrong with a snowflake lesson.
Here is my Snowflake Bentley lesson. It’s based on the work of photographer and tinkerer Willson Bentley. Bentley was the first person to photograph individual snowflakes on a microscopic level. Thanks to Bentley, we know that each snowflake is unique and six-sided.
I’m using my new favorite tool, the Smore (www.smore.com) to share it with you. Enjoy!!!
I’m doing shadow puppets with my 5th grade students this fall. The preliminary lesson focuses on creating interesting silhouettes in black paper and simply gluing them down to a piece of white paper.
This was a big hit back with the 5th graders back in 2014. This time around, I’m planning my lessons using the online tool smore.com. I’ve shared my monster silhouette smore ‘flyer’ below.
From a lesson planning perspective, smore.com flyers rock the house. I can quickly assemble a lesson with text, video and photos and project it. I can email it, tweet it and share through my K6art facebook page. I can share it with students who were out and need to make up the lesson.
Check it out:
I learned about the shadow puppet process (and this exact lesson) from master art teacher Grace Hulse at the 2014 NAEA conference. At the very same conference, I learned about smore.com as a means to organize all the resources in my lesson plans.
I will be posting many future lessons organized with the smore.com tool. Let me know if you find them useful.