
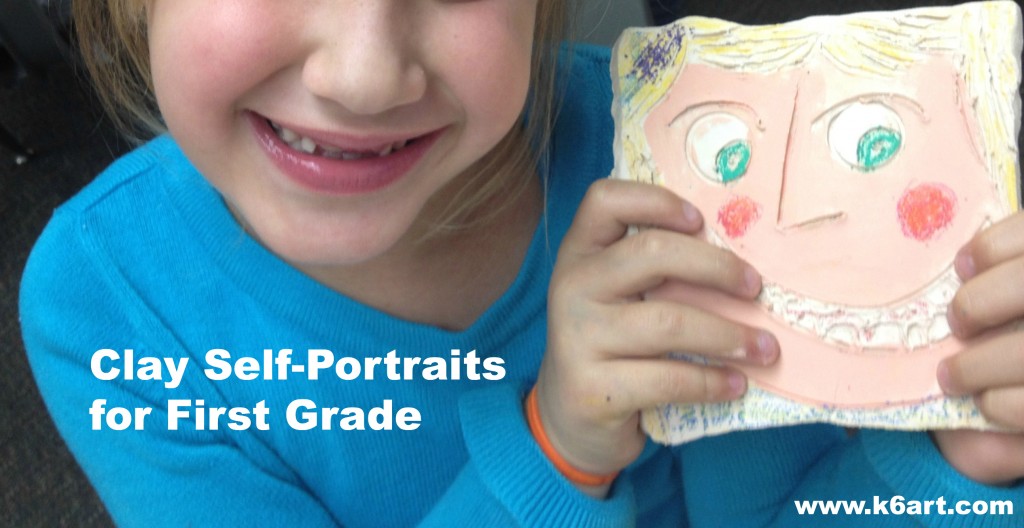
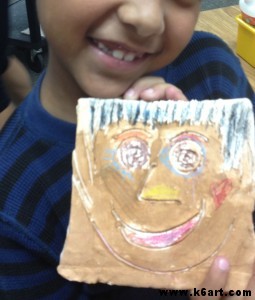
Self-portraits are awesome. Clay is awesome. Put them together and you get a fun projects kids love and parents treasure forever.
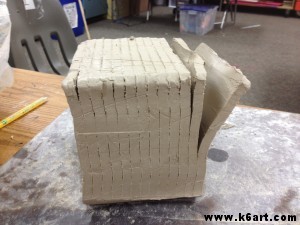
Multi-slab cutter easily slices clay into identical tiles.
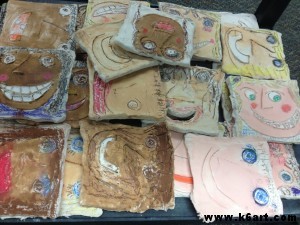
I used a multi-slab clay cutter to slice the clay into tiles. The first graders used bamboo skewers and old glue caps to draw faces on the slabs. Remind students to draw on the clay but not too deeply – don’t cut all the way through!

First graders created self-portraits using clay slabs. Allow two 40-minutes sessions plus drying time.
I let the clay dry for 12 days, then bisque fired.
Now for color!
I saw a fabulous post on no-fire glazing techniques on the Art Smudge blog. The authors used watercolor, chalk pastel, colored pencil and more to finish bisque-fired clay (note: if you work with clay, please check out this post – it is amazing!).
We used Crayola Washable Paint In Multicultural Colors for the skin, and colored pencil and construction paper crayon for other details. A few students used colored chalk for their hair (note: the chalk was messy and will have to sprayed with a fixative – I won’t use chalk next year).
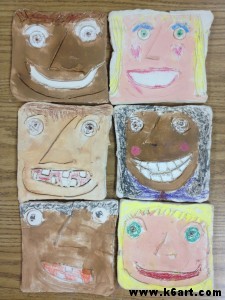
After bisque firing, clay was painted with tempera, then colored with crayons and colored pencil.
We had a range of skin tones to match – the Crayola eight bottle set of skin-tone paints matched pretty well. If anyone can recommend a set of multicultural glazes/underglazes please leave a comment!
Great job first graders!
Do you use glazes or cold finishes for clay?
******Thanks for visiting! Don’t forget to please vote for 2012 Art Ed Blog of the Year, which you can do by clicking this link and voting for K-6 Art! Voting open through December 14, 2012.******


