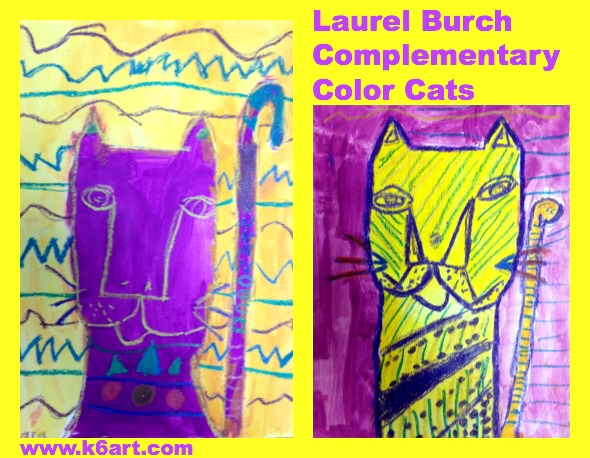
This Laurel Burch-inspired cat art project covers complementary colors, pattern and negative space. Tempera cakes and construction paper crayons are all you need for this project – quick, easy and neat!
Second graders learn about the complementary colors, then draw and paint a cat in the style of Laurel Burch. Allow two 40-minute classes.
Meet Laurel Burch
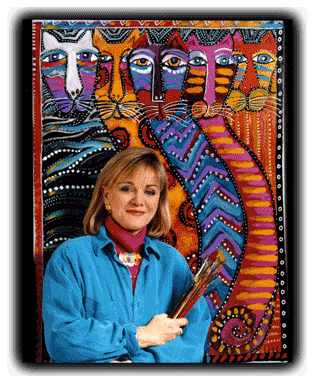
Laurel Burch. Photo source:
Laurel Burch was a self-taught jewelry designer and painter. She was extremely successful despite serious illness. The Laurel Burch website has every resource you could want, including a great biography video and ‘fantastic feline’ slide show. We took a close look at the cat illustrations, and noticed the simple shapes, lines and patterns.
The Complementary Colors
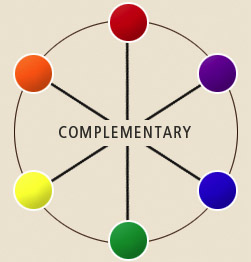
I displayed the color wheel and we discussed the complementary colors (see this post). The complementary colors are directly across from each other on the color wheel.
There are three complement pairs: red/green; purple/yellow; and orange/blue. When two complements are displayed together, the colors contrast and ‘pop’.
The Art Project
Materials:
- white sulphite drawing paper, 9″ x 12″ (or other white paper strong enough for painting)
- primary and secondary color tempera cakes
- brushes
- water
- examples of Laurel Burch cat illustrations
- construction paper crayons
- optional: metallic crayons
(note: this post contains compensated affiliate links)
Day 1: Draw and Paint the Cat
- Choose a complementary color pair.
- Draw the cat using a single construction paper crayon.
- Add eyes and other facial features, but do not add pattern or other detail.
- Paint the inside of the cat one of the complementary colors.
- Paint the negative space (background) in the other complementary color.
- Let dry.
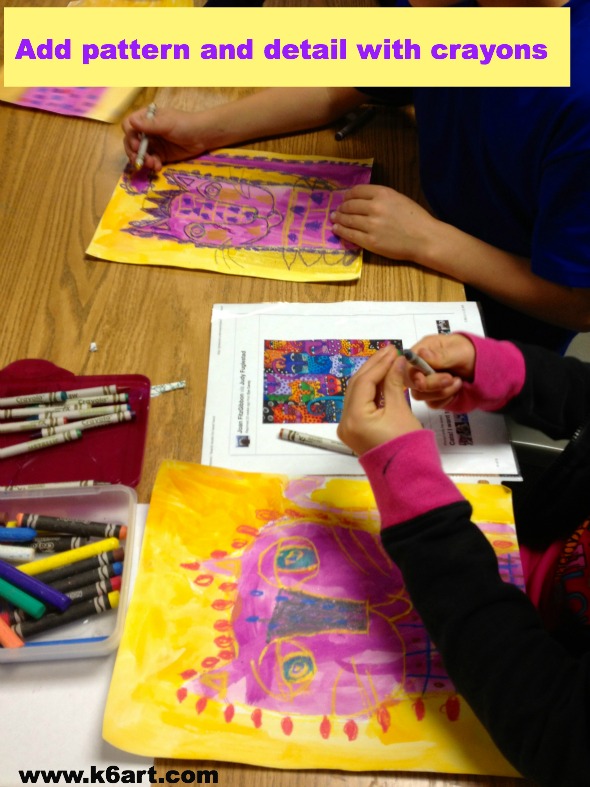
Day 2: Decorate the Cat
- Hand out examples of Laurel Burch cat illustrations and construction paper crayons.
- Look at the patterns and other details on the cats and in the negative space (background).
- Do a quick review of the complementary colors. Ask “What color is your cat? Find a crayon that is a complement of the cat color”.
- Retrace the cat’s original lines with that crayon.
- Use all the colors of construction paper crayons to color in the eyes, add designs and patterns. .
- Optional: add a little sparkle with metallic crayons.
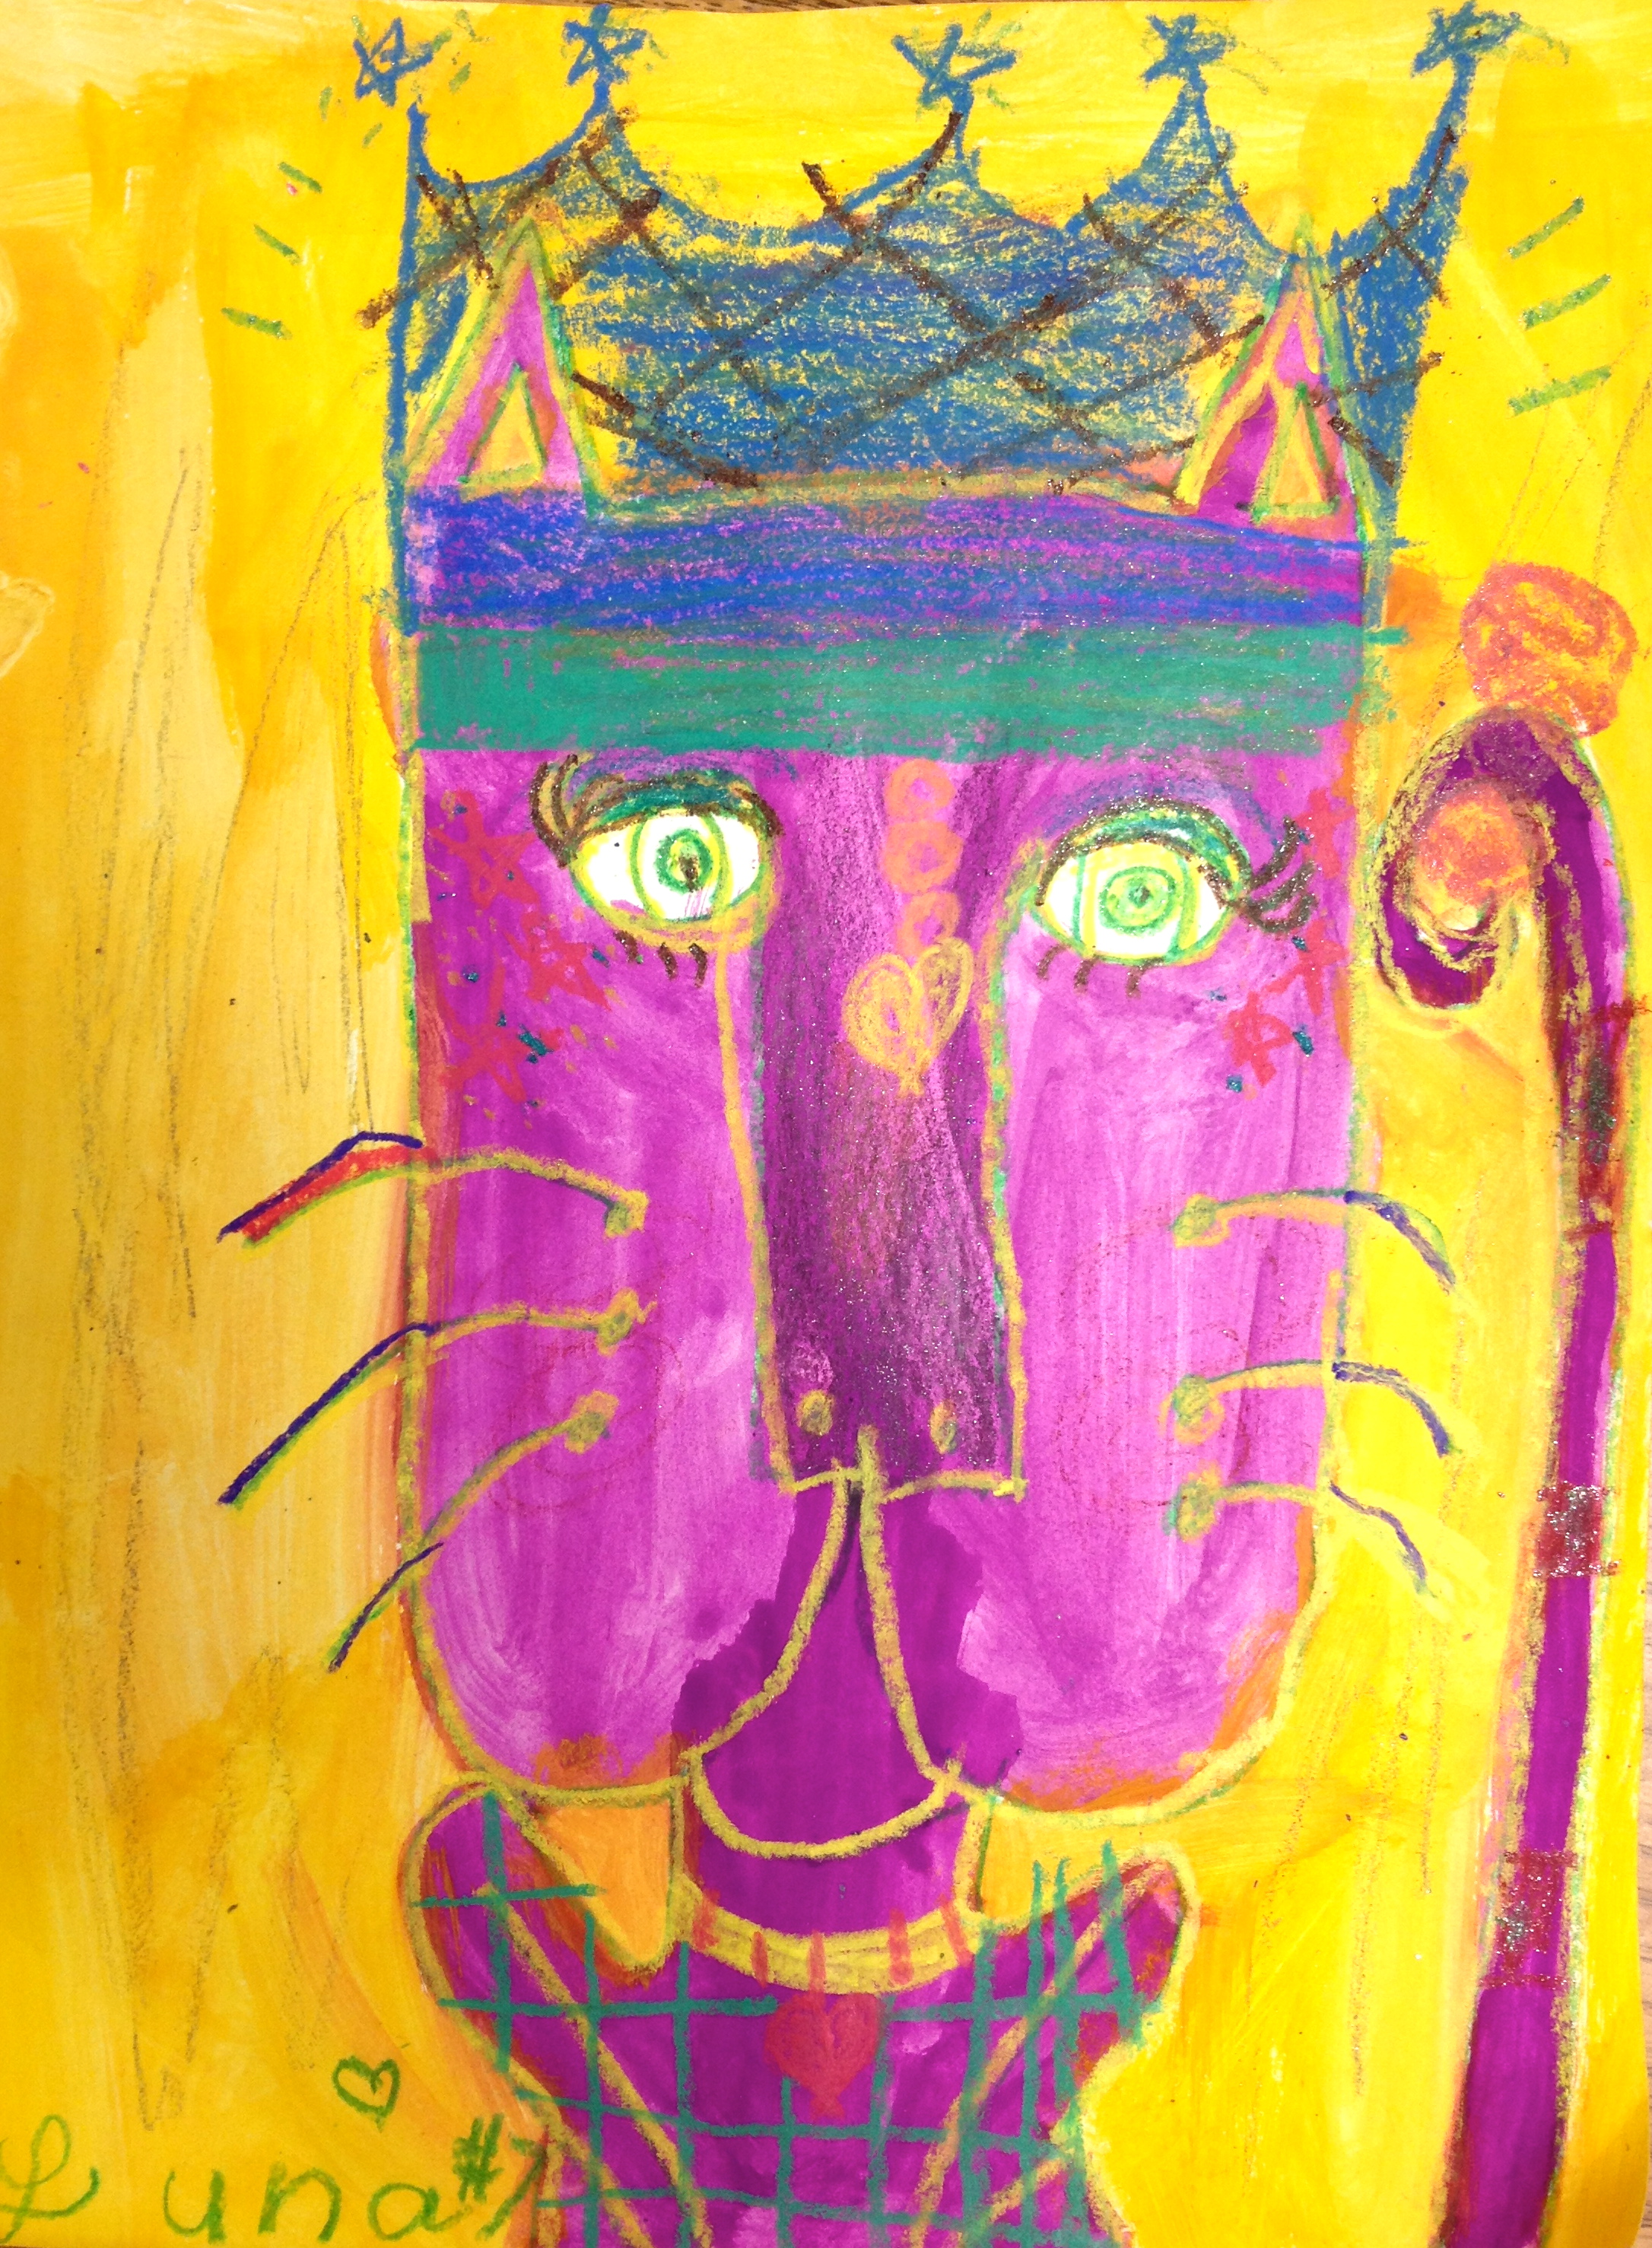
Second Grade Results:
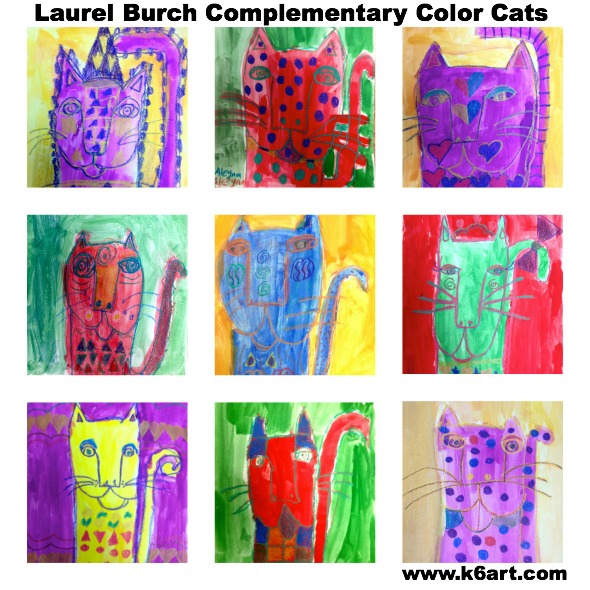
I just love the way the complementary colors pop against each other. I also love how the opaque construction paper crayons pop atop the tempera paint!
I used tempera cakes and construction paper crayons because they were quick to set up and clean up. You could easily substitute regular tempera and oil pastels, or watercolor and regular crayons.
No matter what materials you use, this is a fun and successful project your students will really like.
Enjoy!