Felt Food Collage

felt food collage New Children's Museum

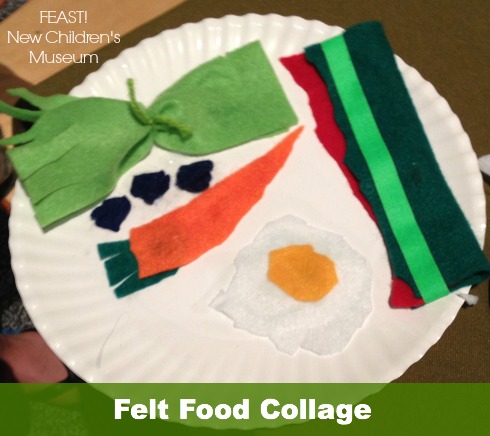
Second grader’s food collage includes a carrot, egg and celery.

Are you looking for an engaging collage project? Try this ‘feast on a plate’ felt food collage project from San Diego’s New Children’s Museum.

I recently toured the Museum’s new food-themed exhibit FEAST: The Art of Playing with Your Food. I found a group of children at an art-making station, happily creating their own collage feasts out of colorful cut felt. I saw felt eggs, bacon, celery, blueberries, and mini-waffles all arranged and glued to paper plates.

Third grader's plate includes bacon and mini-waffles created from felt and other fabric scraps.

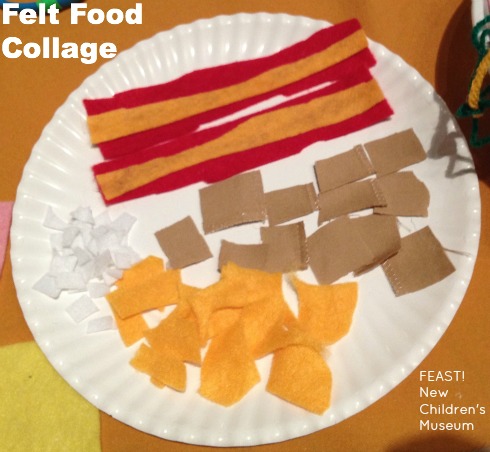
Third grader’s plate includes bacon and mini-waffles created from felt and other fabric scraps.

The New Children’s Museum has this lesson plan online, complete with connections to nutrition, visual arts and common core standards. Click here for the Eat More Art! 60-minute food collage lesson plan.

Food sculptures made by rolling fabric and wrapping with yarn.

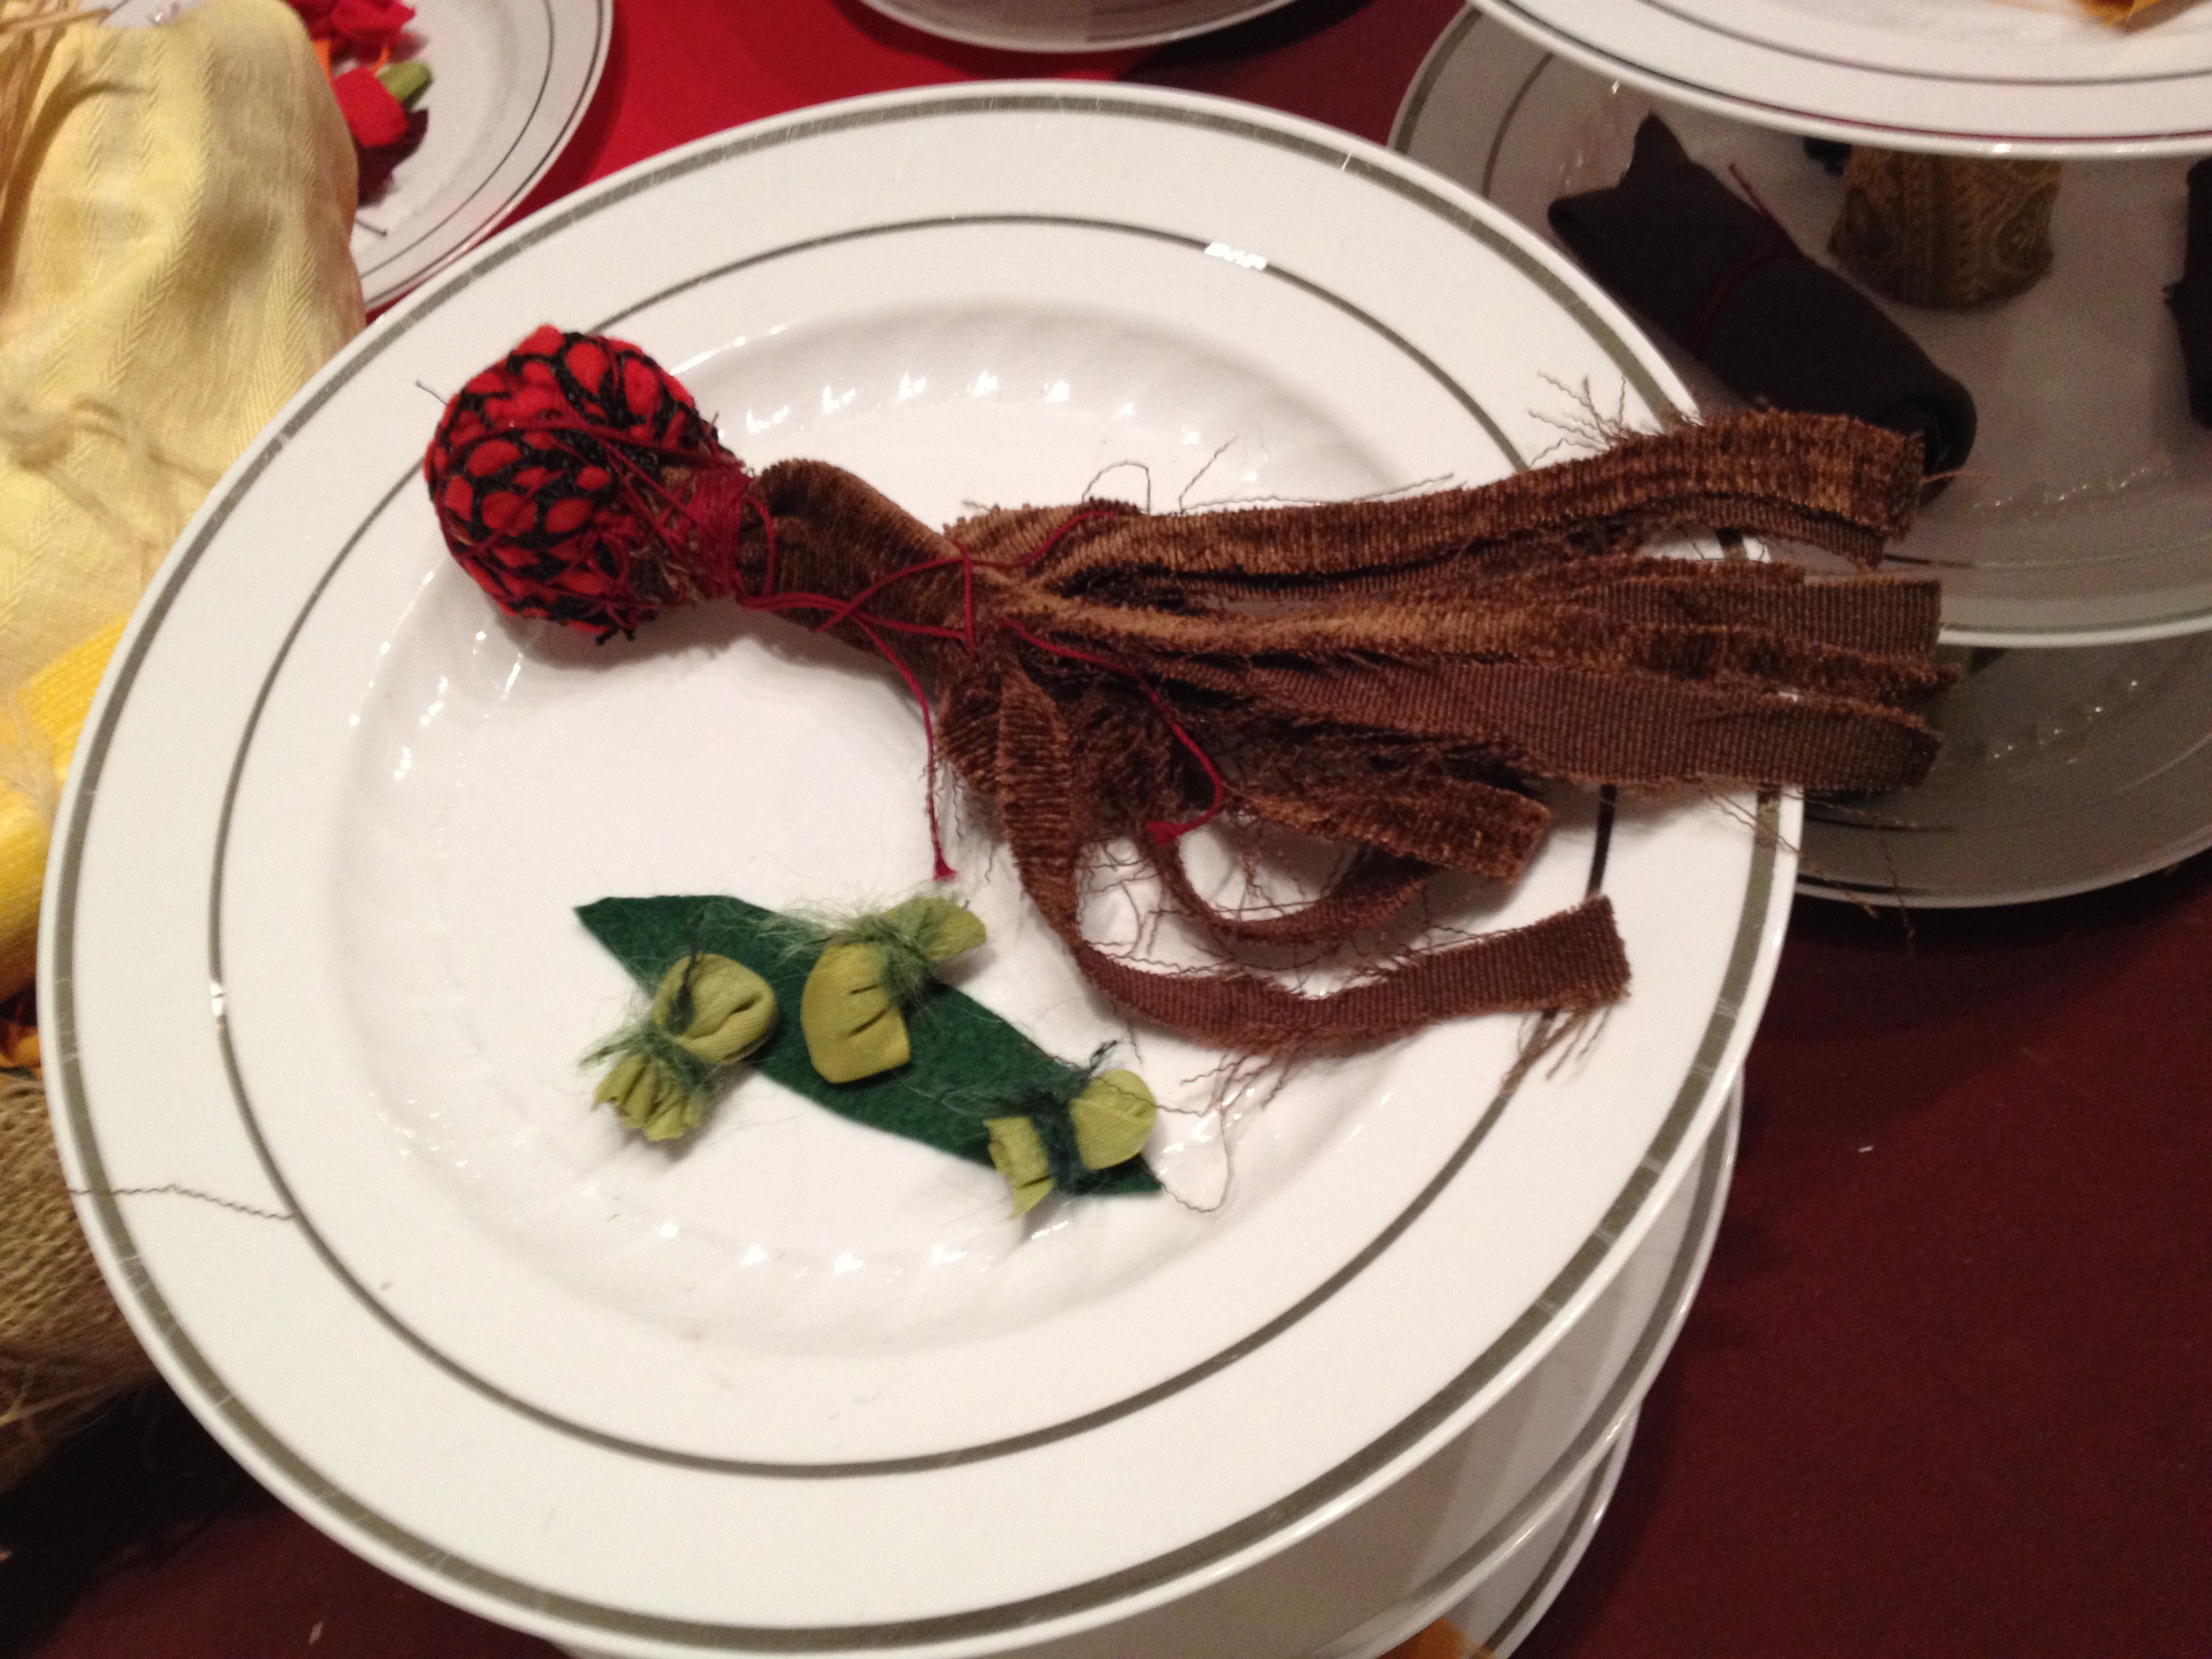
Food sculptures made by rolling fabric and wrapping with yarn (teacher example).

This would be a fabulous idea for a Thanksgiving feast art project!

Whether you are a parent or a teacher, be sure to check out the New Children’s Museum when you visit San Diego. The museum offers art-making activities for children EVERY DAY. I wrote more about the museum in this post and this post.

Enjoy!


Colorful Chameleons

colorful watercolor chameleons


Kids love chameleons! They change color almost like magic. Our second graders just finished a very successful watercolor chameleon project.

Materials:

Day 1: Draw your chameleon

We watched the ‘Super Chameleon’ video on YouTube. The kids were amazed to see the chameleon change colors over and over. Then we took a close look at the chameleon books from our school’s media center. Next it was on to a directed draw. I modeled the basic contour of the chameleon’s head, body, tail and legs. Kids started in pencil, then outlined in Sharpie. They were free to use Sharpie to add their own details (stripes, patterns, dots, spikes) based on their reference photos.

chameleon drawing


Day 2: Color your chameleon

Kids used watercolor pencils dipped in water to color in the chameleons. The watercolor pencils were great for coloring in all the stripes and little spaces. The colors turned out really vibrant! The final step was to paint the background a single color using pan watercolors.

I encouraged everyone to stick to an analogous color scheme for their chameleons. Some kids did, some didn’t, but they all turned out beautiful.  After all, a chameleon can be any color.

blue and green chameleons

three watercolor chameleons

http://www.youtube.com/watch?v=KMT1FLzEn9I

We tried a similar chameleon project last year using Crayola markers: click here to see more results.

Overall this was a popular, super successful project with minimal prep and clean up. It was my first watercolor pencil project, but it won’t be my last.

Enjoy!

Here are two of the books we used for our lesson 

Symmetric Butterflies

symmetric butterflies pinable

Here is a nice butterfly watercolor resist project that teaches symmetry. It was very popular with the kindergarteners and first graders.

Materials:

  • white paper, 9″x12″
  • oil pastels in bright or dark colors (NO yellow, light pink, light blue, white, etc.)
  • rubbing tool – optional (I use the flat side of a beginner pencil)
  • watercolors
  • Optional: scissors, glue stick and colored paper for mounting

Discuss symmetry

Introduce symmetry. We talk about how our faces are symmetric. Then we look at butterflies and identify the line of symmetry.

Create 1/2 butterflies:

Students fold paper in half ‘the short way’ (aka hamburger fold). Do not unfold paper. Using oil pastel, direct students to create a series of dots on ONE folded half. The students then connect the dots to make a 1/2 butterfly.

Now ask students to trace their lines two more times using that same oil pastel. Students should press hard – oil pastel lines should be thick and dark.

Students can add some simple decorations such as shapes and lines to their 1/2 butterflies. Remember, each decoration must be traced a total of three times.

Ready to rub:

Now students close up their papers so the color is on the inside of their ‘books’. Time to rub HARD. I have students stand up so they can put their whole bodies into it! We use the flat side of a beginner pencil for this. You could use the flat side of a popsicle stick as well.

symmetric butterfly instructions

Now open the ‘book’. Students should see a ‘ghost’ image (faint lines) opposite their oil pastel drawing. You will hear oohs and aahs of amazement!

About 75% see the ghost image the first time they try this. If the oil pastel didn’t transfer, it means a) the students didn’t retrace their lines hard enough and/or 3)the students didn’t rub hard enough. I ask neighbors to help their friends out at this point. On their second try, the remaining students all succeeded.

The next step is to retrace the ghost lines with that same color of oil pastel.

Paint

Finally, paint the butterflies with watercolor. Encourage students to keep their butterflies symmetric – match up the paint colors on the right and left sides of the line of symmetry.

Kindergarten and first grade results

symmetric butterflies before and after

Options for finishing the project: cut out the butterflies, mount on construction paper. Or just trim and stick onto your window or bulletin board.

Enjoy!


Easy Chihuly ‘Bellagio’ Ceiling

bellagio ceiling collage


Dale Chihuly is an American artist known for his fanciful, organic-shaped glass sculptures. Here is a group art project inspired by Chihuly’s ceiling installation at the Bellagio in Las Vegas. Our project turned out so well I installed it on my art room ceiling!


Chihuly bellagio


Materials:

  • basket-type coffee filters, various sizes
  • watercolor markers (such as Crayola)
  • spray starch
  • assorted plastic cups and bottles for drying
  • newspaper or other table covering to protect drying surface
  • tag board
  • hole punch
  • hot glue

The Art Project:

Students colored their coffee filters with Crayola markers. We did a quick review of the color wheel before coloring: students should select analogous colors, or use warm or cool color combinations. Avoid complementary color choices – the colors will muddy when sprayed.

Students DO NOT have to color every inch of the coffee filter! Leave some white space – the colors will run together when sprayed with starch.

Spray and Assemble:

Cover a table with newspaper. Set up old plastic tubs, bottles, etc. Invert coffee filter over the tubs and spray with spray starch. The colors will run and blend. Let dry over night.

Hot glue the flat bottoms of the dry coffee filters to a sheet of tag board.  I punched holes around the edge of the tag board, and used T-pins to pin the artwork into my acoustic ceiling tiles.

(Guess what? My ‘Bellagio’ ceiling didn’t set off the motion sensor alarm. Hurray!)

This project was inspired by one of the many projects in the Chihuly unit from Nashville public schools.

More Chihuly Resources:

The Children’s Museum of Indianapolis has an extensive virtual glassblowing interactive for kids.

Watch a variety of Chihuly videos on Yahoo Screen.

Check out my earlier post for a 30-minute group art chandelier.

Enjoy!


30-Minute Chihuly Chandelier

30 minute chihuly chandelier

Dale Chihuly makes fantastic, organic-shaped glass sculptures.  They are in collections all over the world. This summer I saw the Chihuly chandelier at San Diego’s Mingei International Museum and participated in a group art project taught by art educator Jackie Hwang.

Mingei Museum Chihuly Chandelier

Materials:

  • Overhead transparencies (like these  – make sure they are made for photocopiers)
  • photocopier
  • colored permanent markers (colored Sharpies or Art Color permanent markers)
  • scissors
  • pipe cleaners for assembling chandelier
  • UPDATE: single-hole punch
  • UPDATE: OPTIONAL rubbing alcohol and cotton balls

spiral acetate chihuly

Prep:

Jackie photocopied a spiral onto overhead transparencies. She made two sizes of spirals – a full sheet size, and a half sheet size containing two spirals.

The Art Project:

Families colored the spirals and cut them out, then turned them in to Jackie for assembly. Coloring time depended on the complexity of the design (but took FAR less than 30 minutes).

Assembly:

UPDATE: carefully punch each spiral on the tiny dot at the center of each spiral.

UPDATE: OPTIONAL: You may experiment with smearing the spirals with a cotton ball lightly dampened with rubbing alcohol. This will cause the colored sharpie to smear and blend. It’s a different look, and it takes extra time. Totally optional!

Jackie created the chandelier form using a mix of the large and small spirals. She used a couple of pipe cleaners to suspend the spiral clusters.

Jackie’s project is perfect for grades K-6. It would be super for art teachers on a cart, or art teachers that teach at multiple schools. You could fit the photocopied transparencies and all the other materials you need for this project in a tote bag.

Here is a 4-minute video of Dale Chihuly from the CBS morning show

Special Notice for San Diego Teachers and Parents:

  • Teachers: Do you want to take your class to the Mingei Museum? The Mingei provides free admission for all K-12th grade tours as long as they’re scheduled in advance.
  • Parents: The Mingei is free to San Diego county residents and military the third Tuesday of the month. Monthly Family Sundays offer admission and fun activities for just $5/family. Go to www.mingei.org for more details.

Coming up in the next post: two more Chihuly-inspired projects.

What’s your favorite Chihuly project?

Related Posts Plugin for WordPress, Blogger...