Here are some more photos from Art Show 2014. Thanks again to Devan, our art show chair (and party planning/layout genius) and all the AMAZING art show and art room volunteers who put this show together.
Sixth grade foil name art. Click here for lesson plan
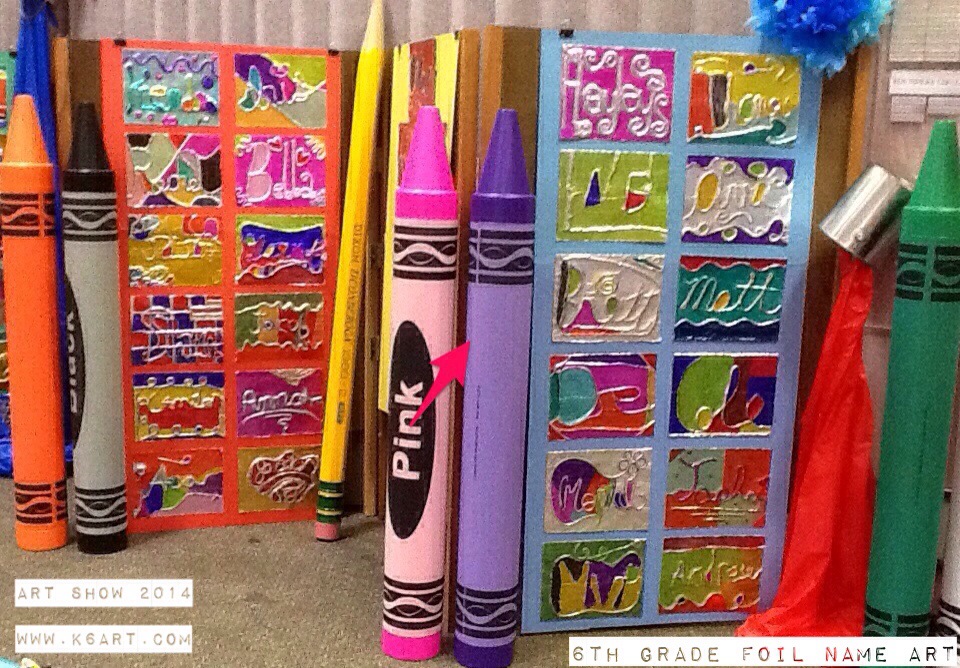
Foil name art (and those awesome decorations!) in the upper grade area.
Primary grade display
First grade clay self-portraits on table top. Click here for lesson. On skirt: marker and foam prints lesson plan at shine Brite Zamorano. Above on wall: baby oil and oil pastel herons. Click here for lesson.
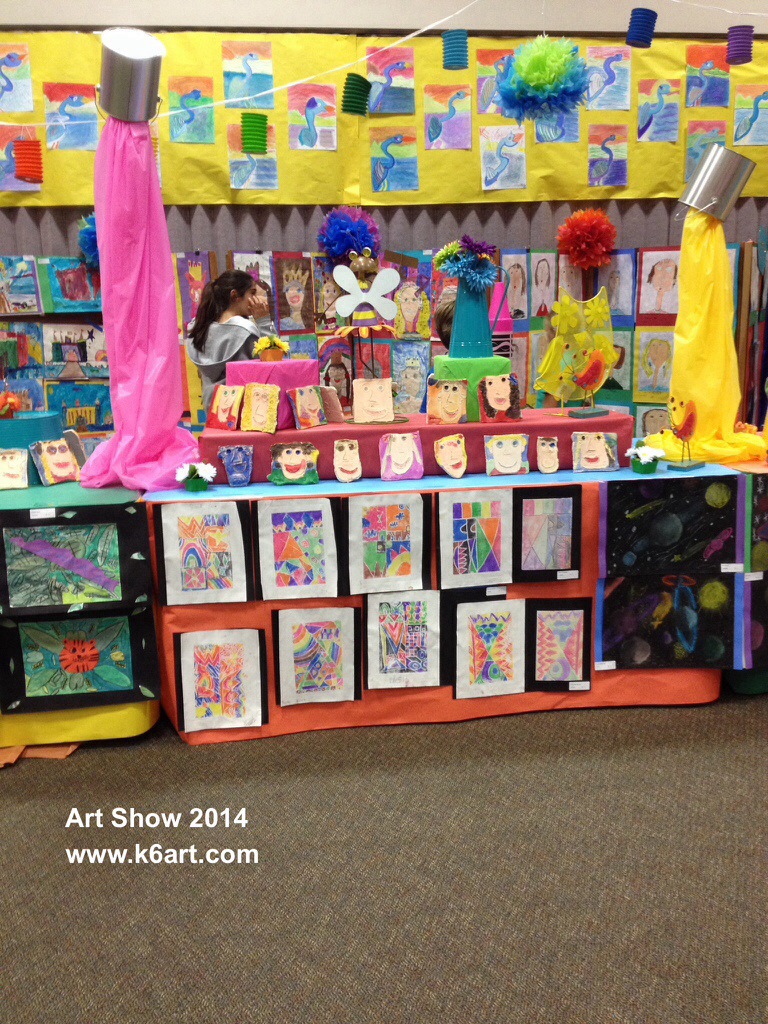
Marker prints, clay faces and great blue herons in the K-3 area.
Kindergarten Kandinsky CD Case Circles Mural
Click here for the lesson plan. The lesson went incredibly well. The mural was mounted on foam core using the 3M clear mounting tape.
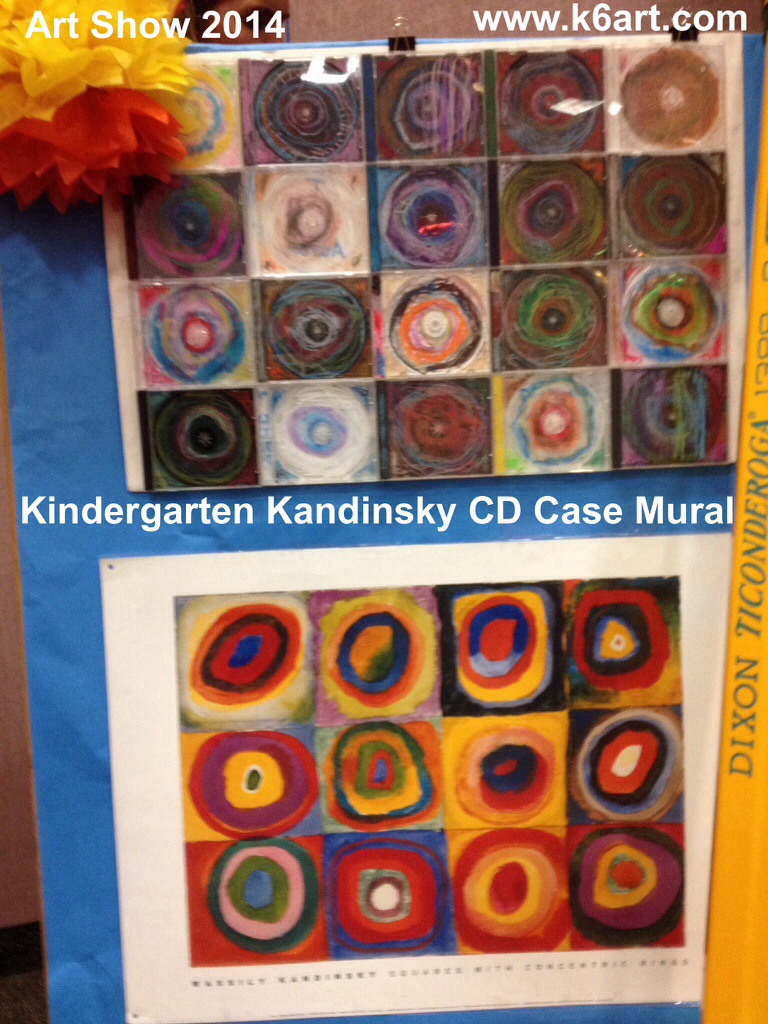
Kandinsky CD case circles mural
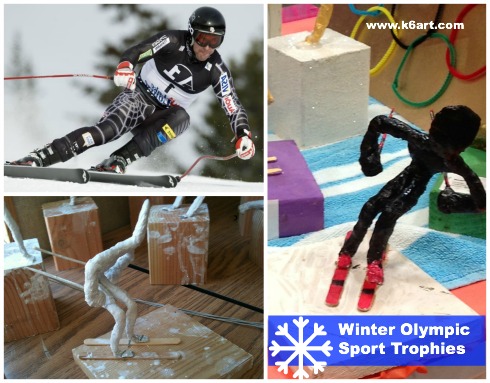
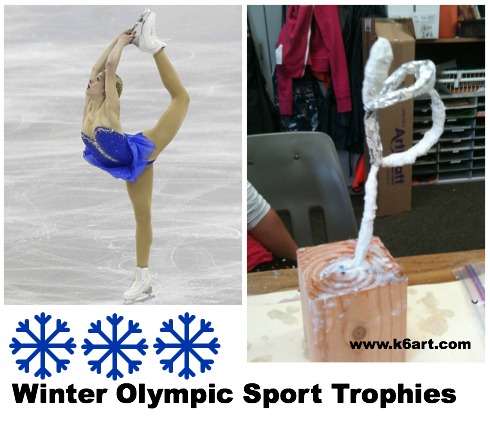
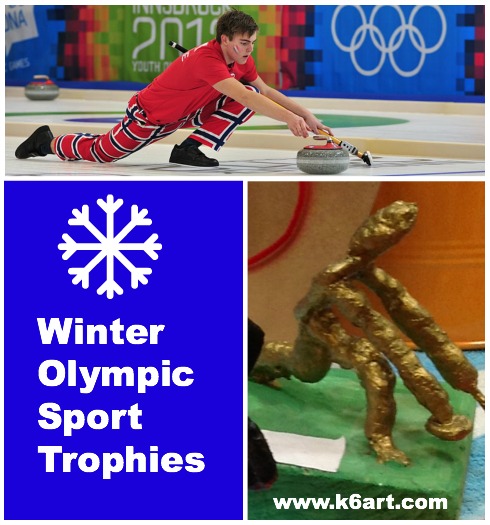
Shoe Art and Sport Trophies:
On the table skirt: fourth grade shoe art. Click here for lesson. This is a 100% successful lesson.
Fifth grade sport trophies. Click here for lesson.
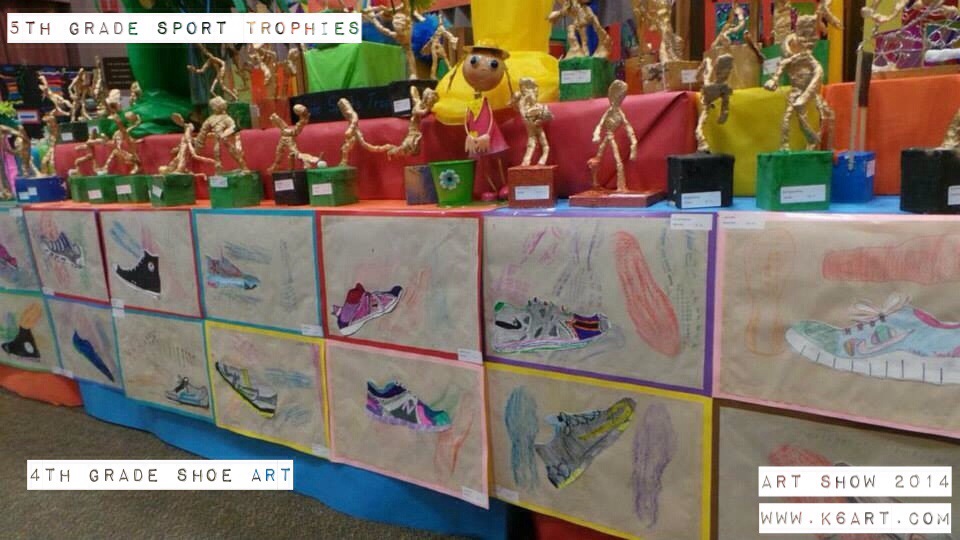
Shoe art and sport trophies in the upper grade area.
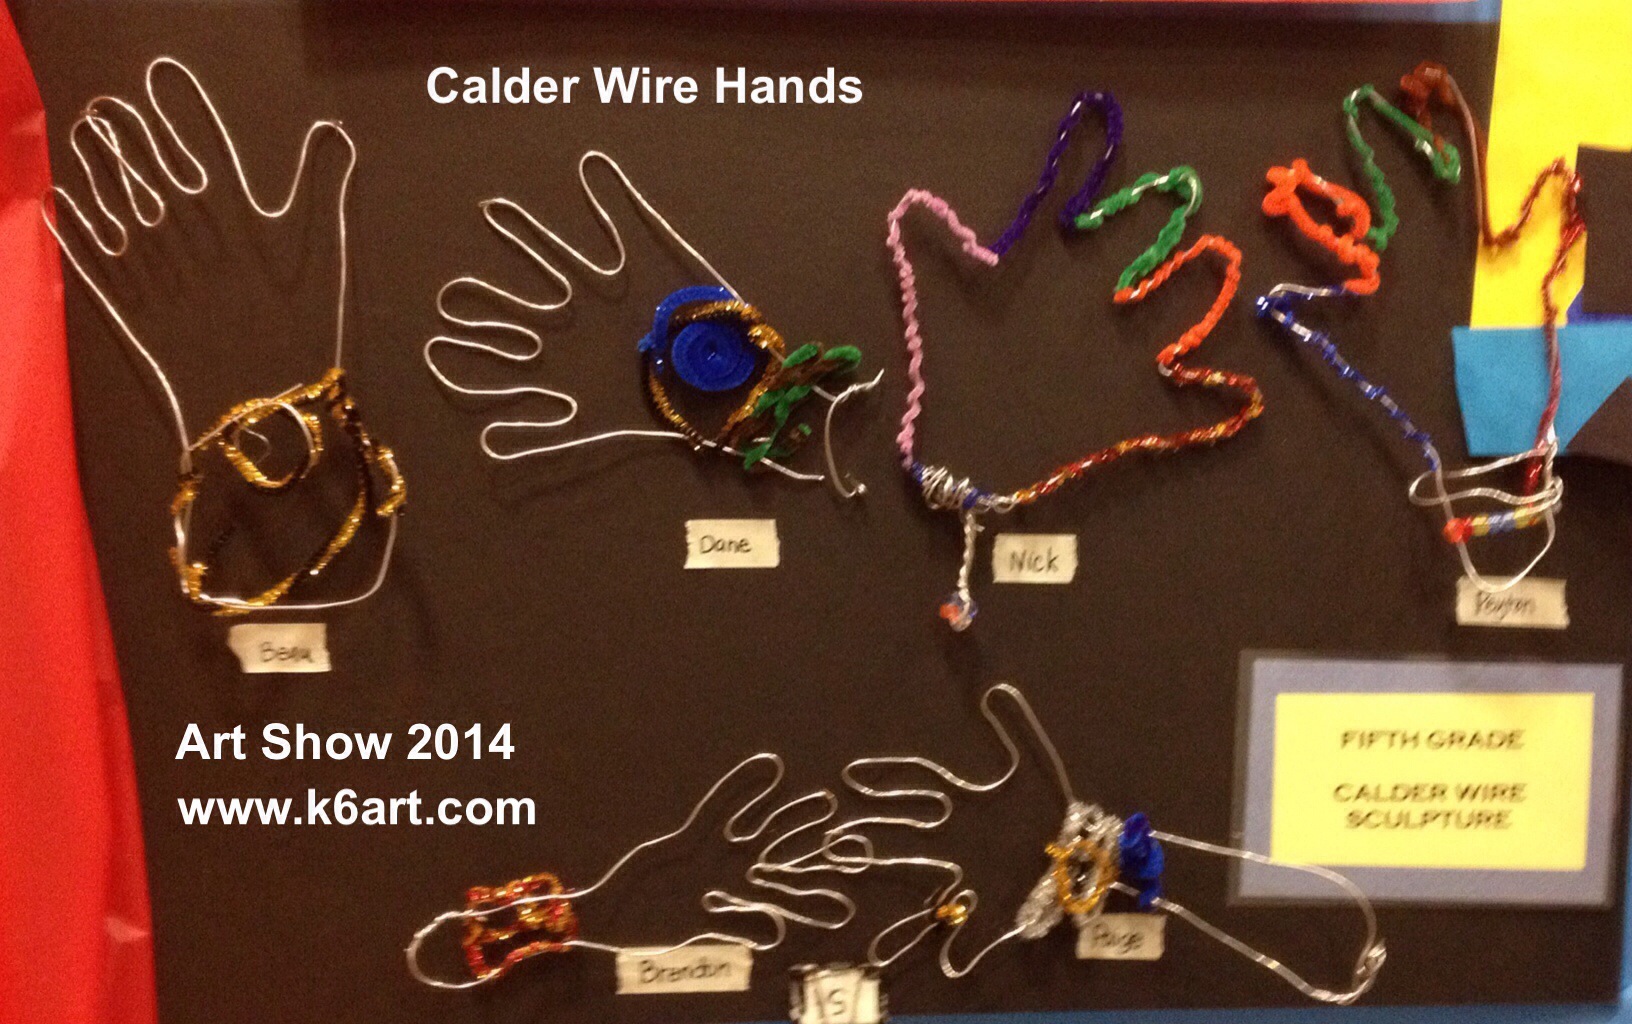
Calder wire hands
Want more pictures? Check out our first post from Art Show 2014. And check out Art Show 2013 and Art Show 2012! Click here for more on Devan’s space-saving displays.
Our volunteers are the best! Our school is blessed to have the help of parents year-round in the art room. We had some amazing, hard-working parents who hung this show in just three days.
It was our last show with Devan as chair. We will really miss her vision and energy. How fortunate we are to have had her help these past four shows.
Enjoy!!!!!

What’s your best tip for a successful art show?