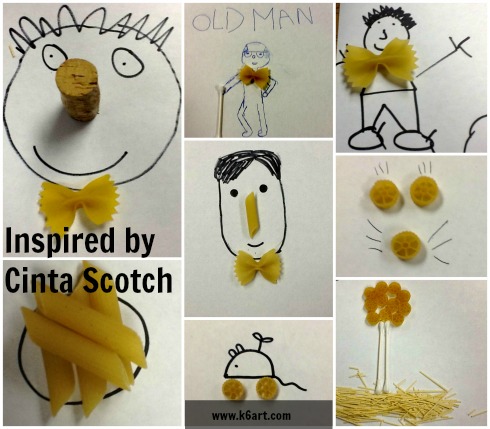
Our sixth graders just finished a quick, highly engaging photography/drawing project.
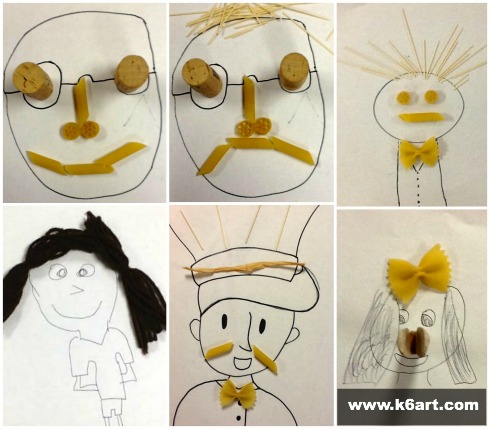
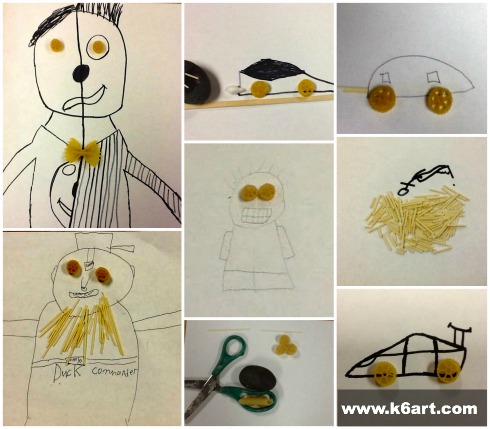
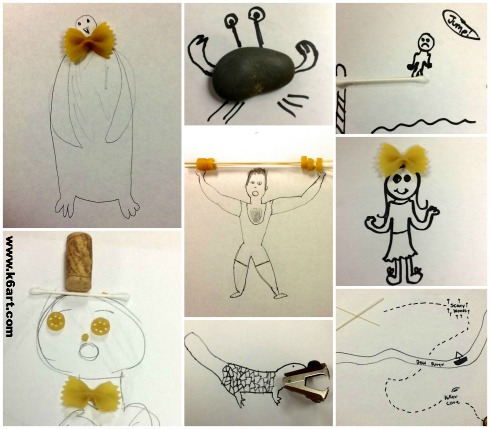
This project was inspired by the work of Ecuadorian artist/art director Javier Perez , also known by the nickname ‘Cinta Scotch’. He uses found objects plus ink to create simple, witty illustrations which he shares with his followers on social media.
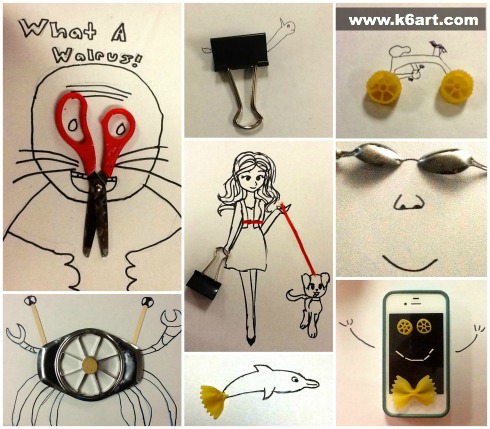
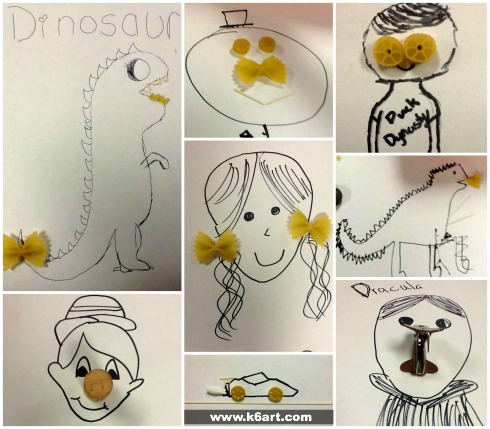
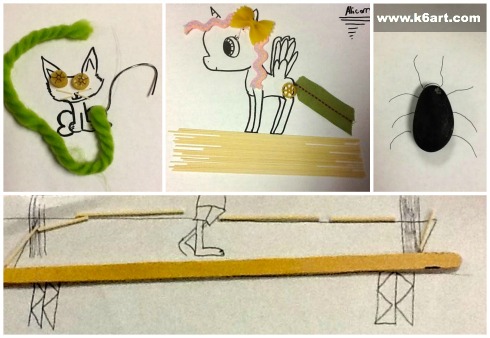
I gave each table copy paper, sharpies, and a bin containing a bunch of random objects (office supplies, pasta, some kitchen tools, corks and other odds and ends). They created these artworks, and photographed them with iPads. Each kid was able to create at least two during a single 40-minute class.
If you want a fun, colorful Valentines day craft project, try Shrinky Dinks!
What? You’ve never tried Shrinky Dinks? They are sheets of thin plastic. You color, cut and bake them. When baked, they shrink to 1/3 the size! They have been popular since the 1970s and kids LOVE them. Watch this brief video to see how they work.
Option 1) Cut each sheet of plastic into quarters (I do this on the paper cutter) and distribute. Students draw a heart, color it on the frosted side with colored pencils, and cut it out themselves. The heart necklace above was made this way.
Option 2) Adult pre-cuts the hearts and distributes. Students color with colored pencils. All the heart pins in the photo above were made this way (with the help of a parent volunteer).
Bake at 325F
Then bake in a toaster oven or regular oven at 325 degrees F for about three minutes. Tip: watch the shrinky dinks through the oven window. They need to curl up and then flatten. Don’t take them out before they’ve flattened! We let them flatten, count to 30 and then remove from the oven.
For this project, one of our teachers brought her toaster oven to school and called her students two by two to watch their valentines shrink. THEY LOVED IT!
Necklace, Pin or Magnet
For a necklace, punch with a hole punch BEFORE baking. For a pin, hot glue on a pin back after baking. You can use magnetic tape or hot glue on a magnet.
Happy Valentines Day!
Enjoy!
Happy Throwback Thursday! Stop by on Thursdays to see ‘old school’ art projects!
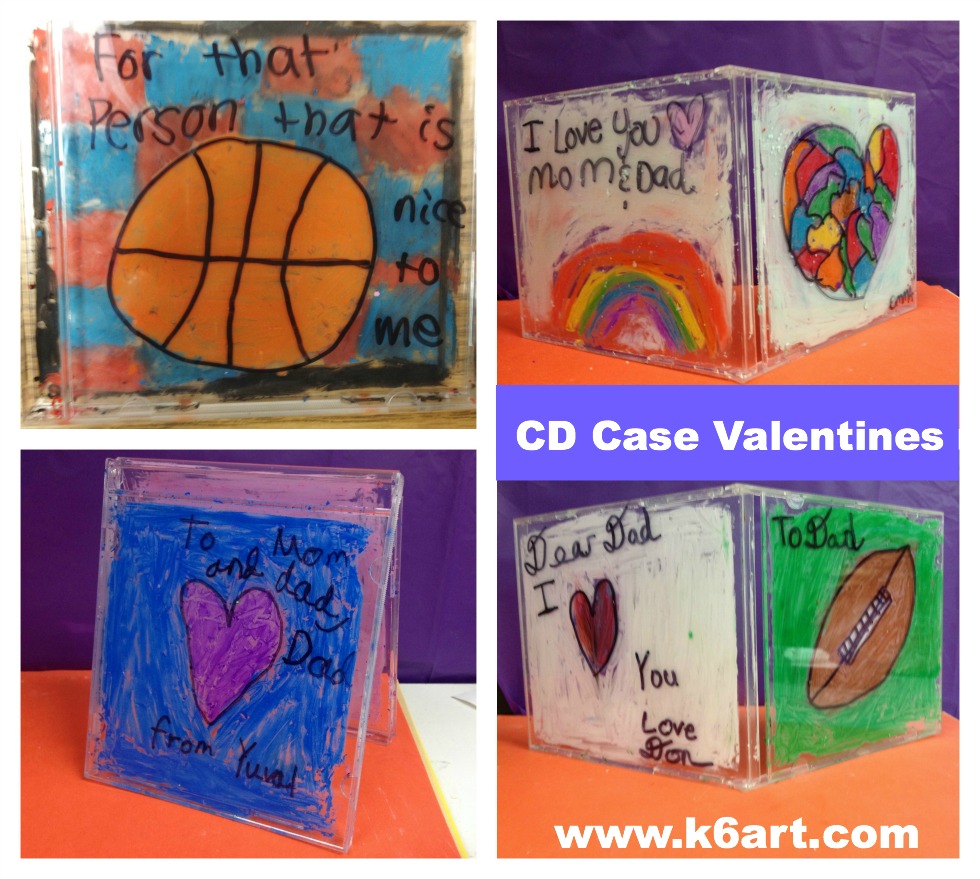
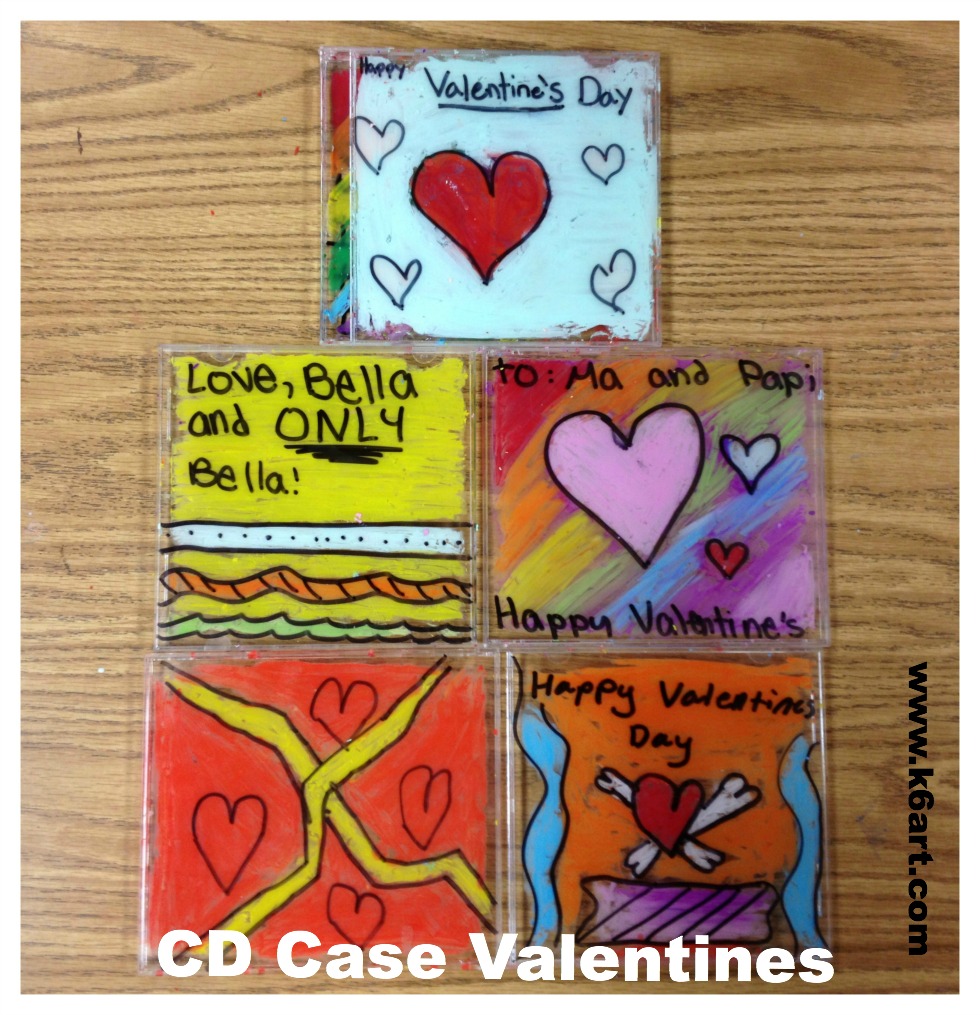
Got old CD cases? Here’s a great way to use them: create greeting cards using oil pastels and Sharpie. Our 5th and 6th graders made Valentines, birthday cards and more during a single 40-minute class.
Materials:
CD jewel cases (trays removed)
oil pastels
Sharpies
rubbing alcohol
baby oil
baby wipes for clean up
Several students made birthday cards. One made a farewell card. Another made a card consoling his father on the Bronco’s loss in the Superbowl.
Sharpie on the Outside, Oil Pastel on the inside
Students start by drawing a design on the front of the CD case using a black Sharpie. Then they open up the case and color the inside with oil pastel. The process is repeated on the back of the case. A lot of students wrote personal messages on the back of the case.
Correcting Mistakes:
It’s easy to fix mistakes. Rubbing alcohol will remove Sharpie. Baby oil will remove oil pastel. Our 5th and 6th graders fixed their own mistakes.
Keep it neat:
CD cases trap the oil pastel-mess on the inside of the case. These greeting cards can travel home without making a mess in the backpack.
At clean up time, wipe down the tables with baby wipes.
EASY! Plus you are keeping those old CD cases out of the dump!
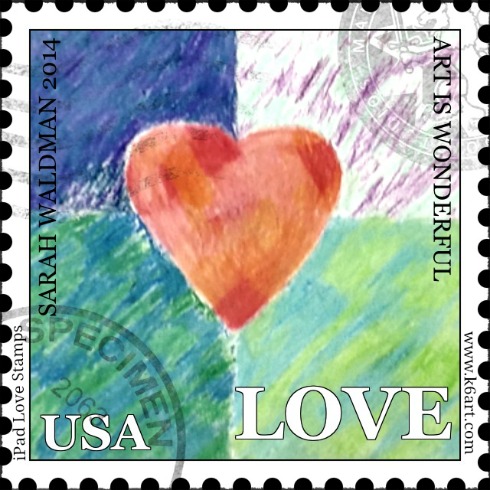
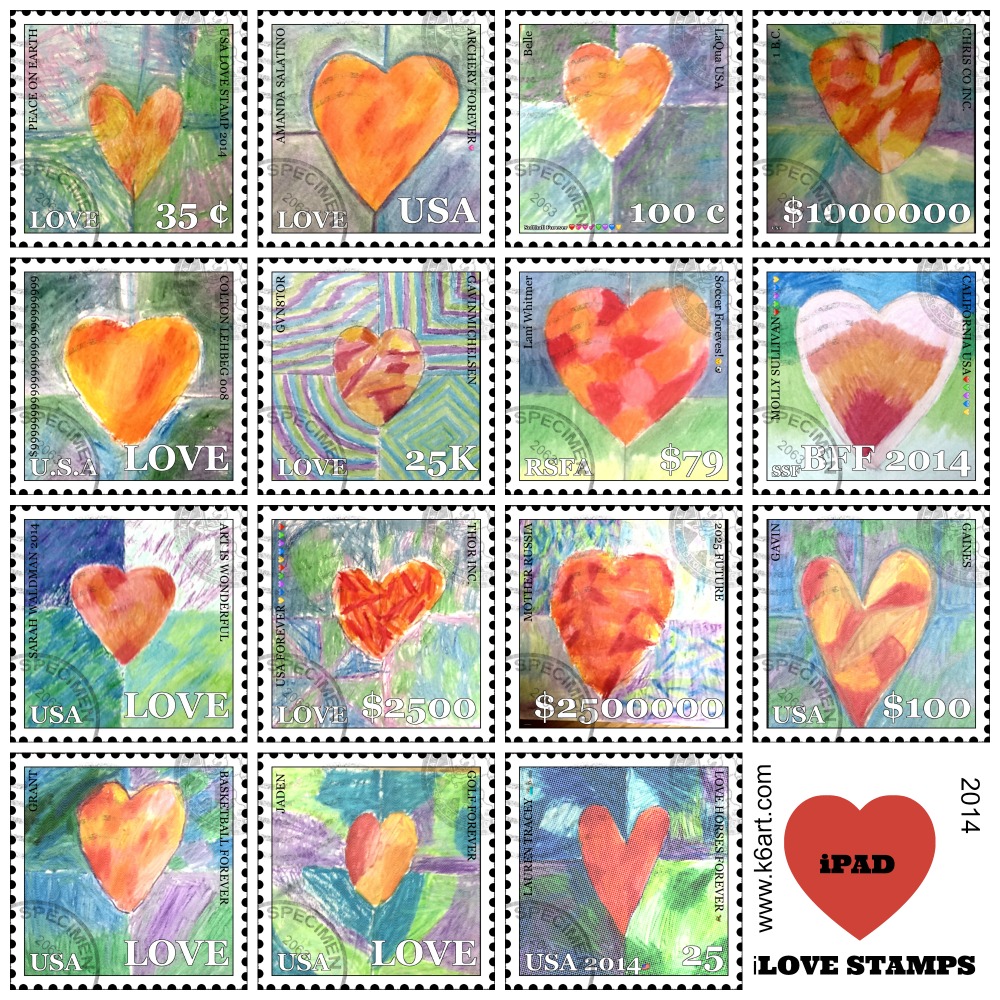
In honor of Valentine’s Day, our fourth graders created iPad LOVE stamps using the free Face on Stamp Booth app.
What are Love Stamps?
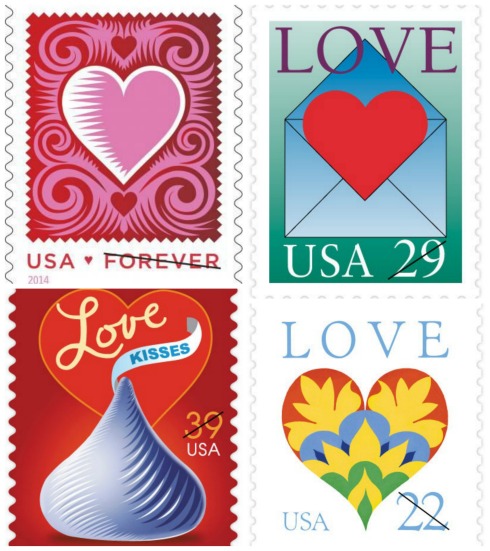
For 40 years, the U.S.Postal Service LOVE stamp series has featured a wide range of subjects, including flowers, Victorian lace, cherubs, swans, candy hearts, and abstract designs. I showed our students the U.S. Postal Service love stamp slide show. Then I told them we would be creating our own LOVE stamps!
The U.S. Postal Service issues an annual Love Stamp. The program began in 1973.
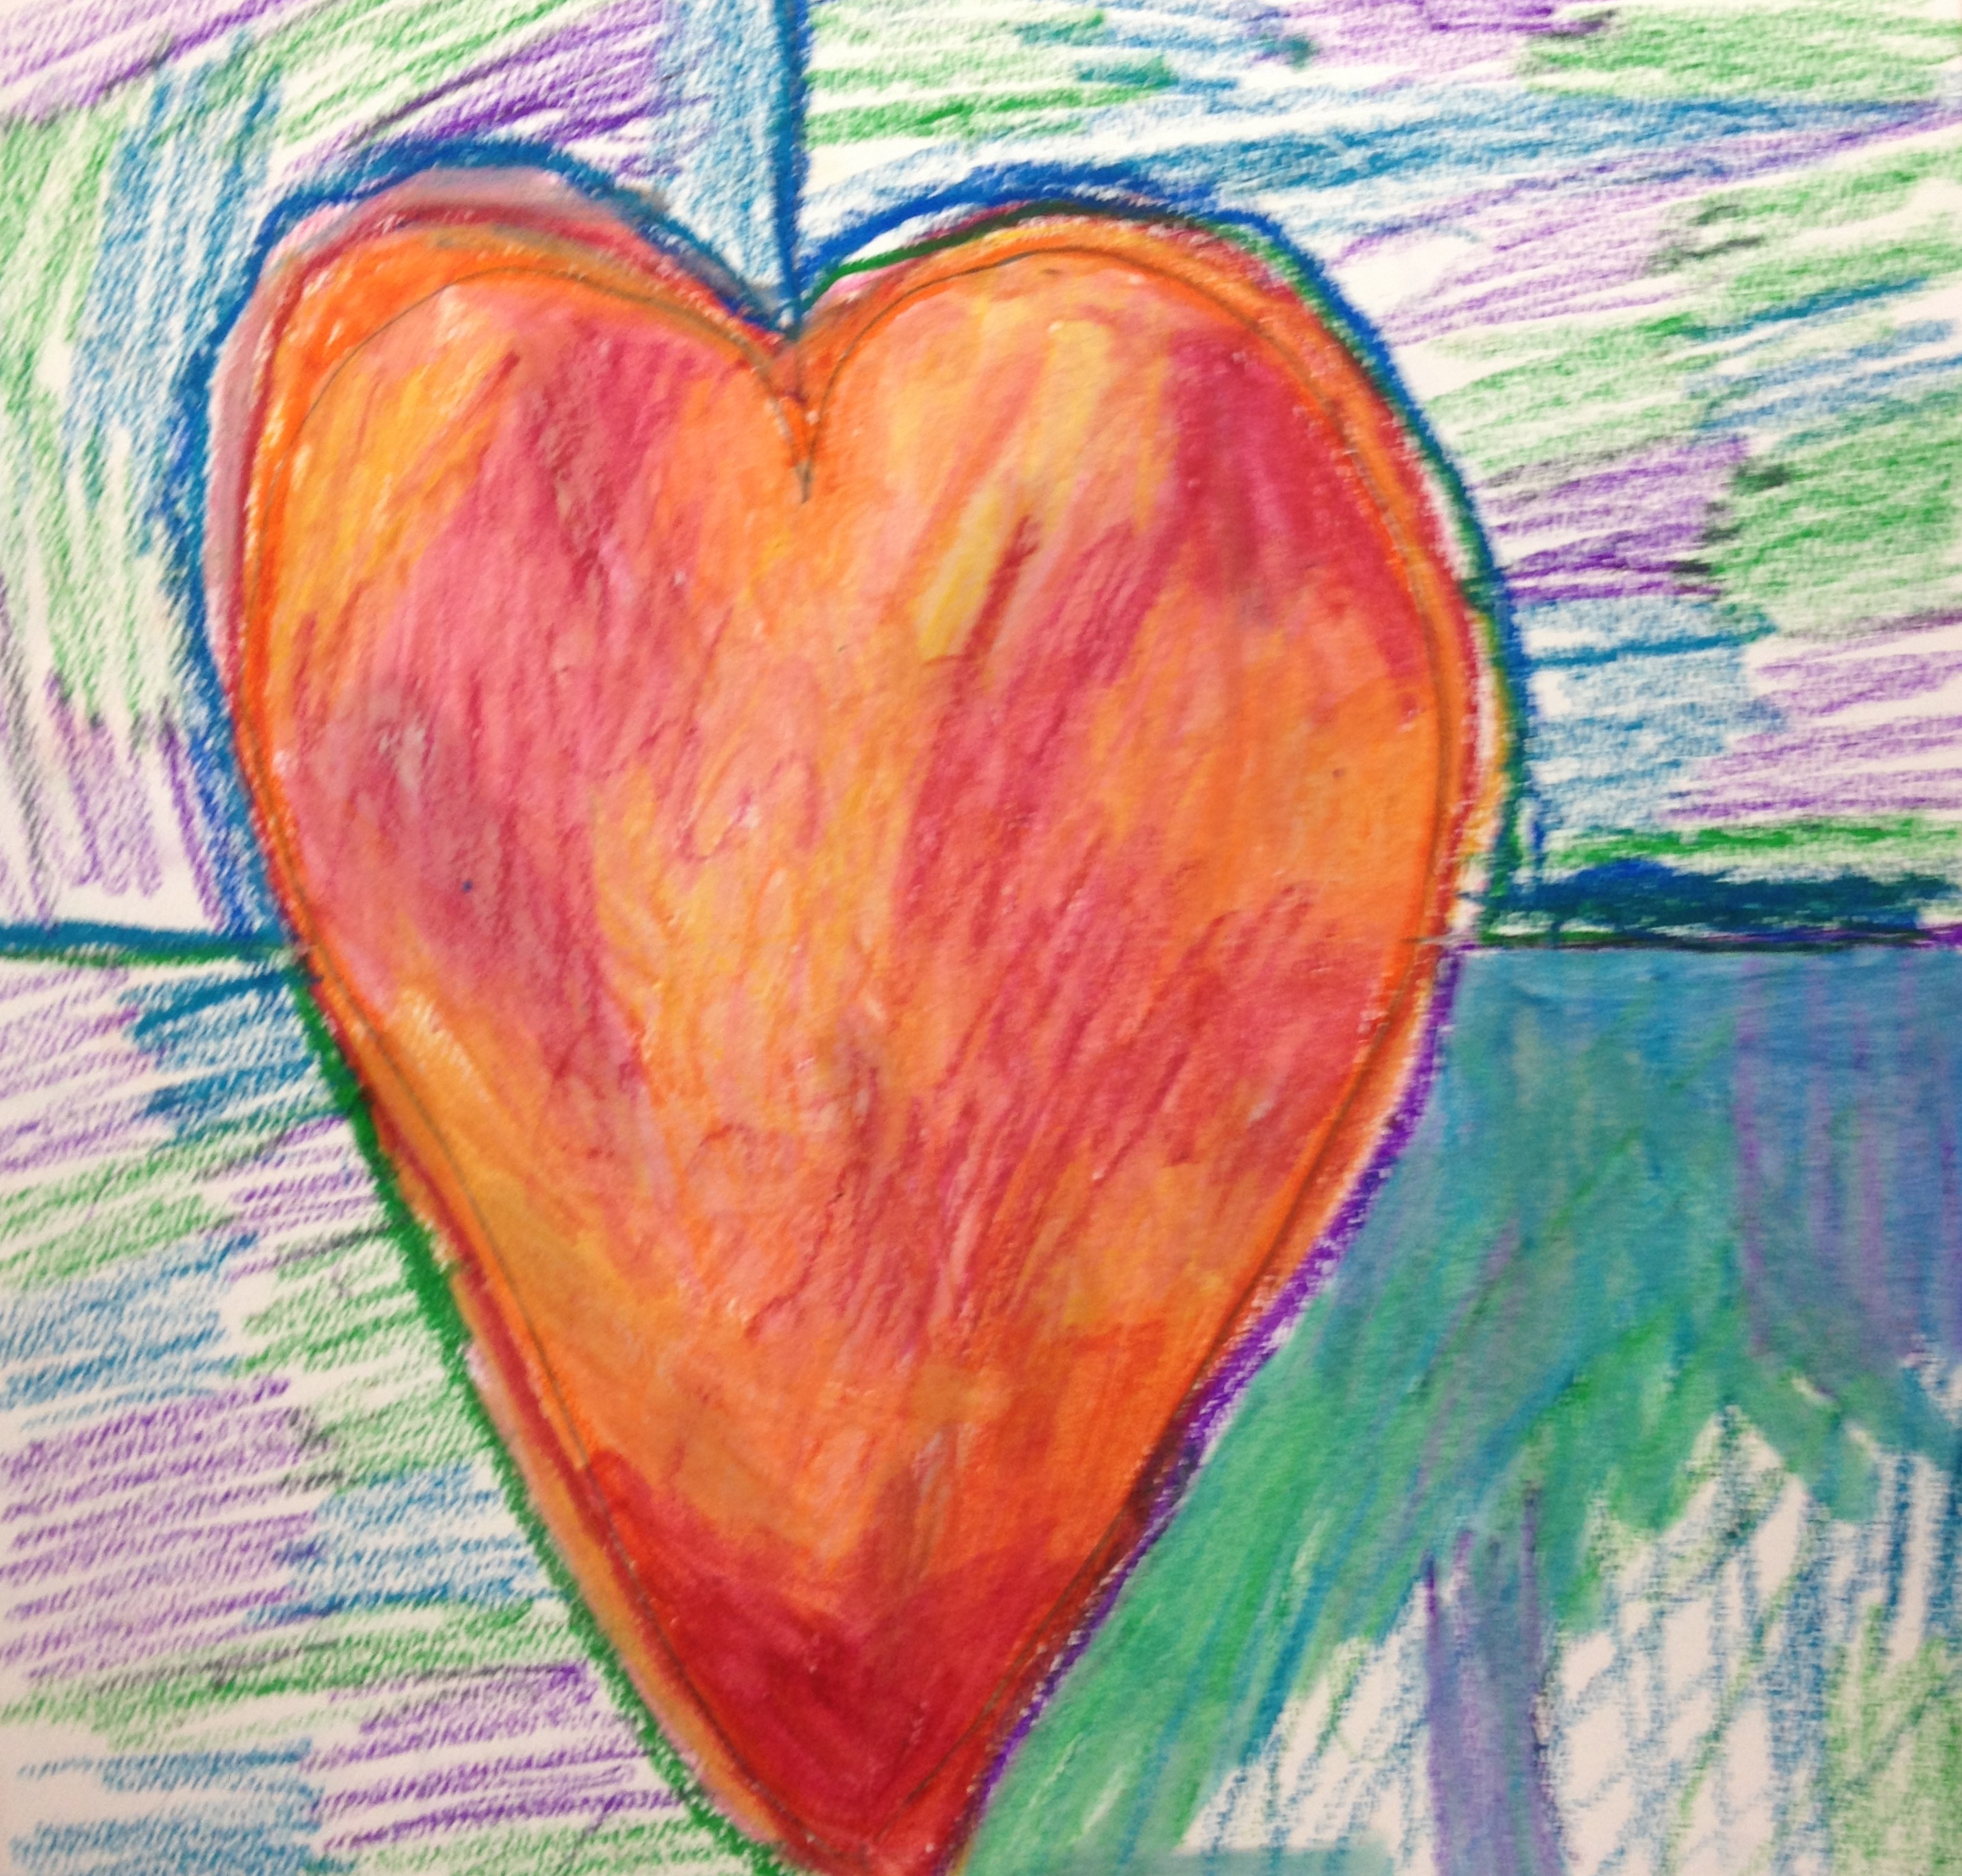
Step 1: Create heart art
Fourth graders used oil pastels to create these hearts.
We started with a fine art project. We used oil pastels to create these hearts. Instructions in my free Jim Dine heart art Keynote. This step took two 40-minute sessions.
Step 2: Use iPads and Face on Stamp app
After the students finished their heart drawings, they photographed their art using the Face on Stamp Booth app. Next they added text. I encouraged students to add text found on real postage stamps, such as USA, Forever, Love, date, and stamp price. A lot of kids added their favorite activities (soccer, archery, golf, cheer, basketball etc.) Click here to see even more iPad Love Stamps in our Artsonia gallery.
Step 3: Create a collage (‘sheet of stamps’)
After completing their iPad love stamps, students emailed them to me. I created a grid of the photos using my computer and the free Pic Monkey collage maker. You could also use an iPad and the free Pic Collage app.
Students uses fine art, free Face on Stamp Booth app plus iPads to create individual ‘Love Stamps’.
End result: wow! Students were very pleased both with their heart art and with their iPad love stamps.
Happy Valentine’s Day!
Enjoy!
Do you have a favorite art project for Valentine’s Day project?
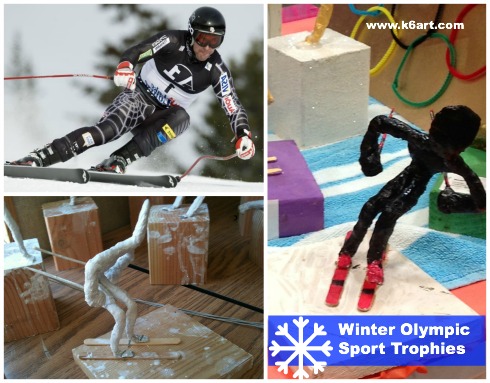
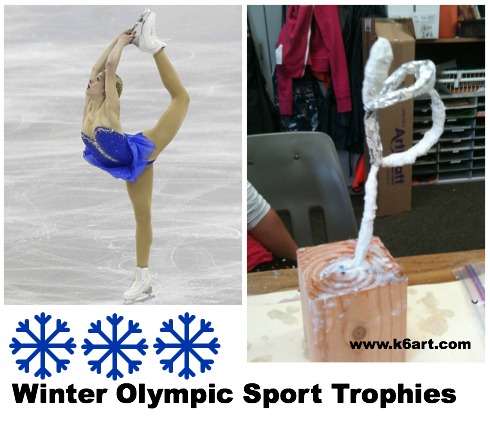
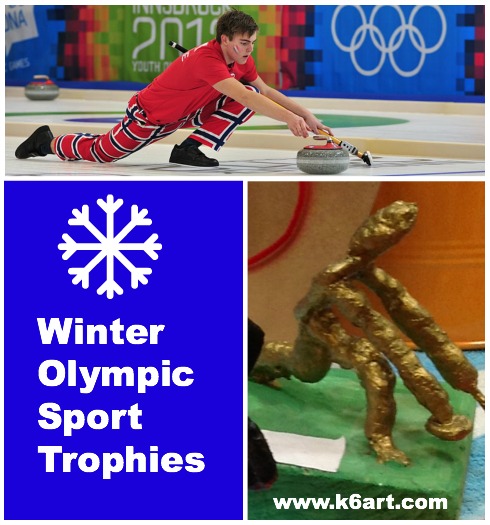
Thinking about a Winter Olympic art project? Why not make your own sport trophy for your favorite Olympic event? Our fifth graders created these sport trophies using floral wire, foil, and plaster wrap. Accessories were made from toothpicks and popsicle sticks. We used acrylic paint or metallic spray paint (everyone can ‘get a gold’ if you use gold spray paint!). Everything was attached to a wooden base. You’ll need reference photos as well.
Click here to see all my links to my favorite sculpture supplies. You can also find the floral wire at Michael’s and my favorite pop-up pre-cut foil at Costco and Smart and Final.
Click here, here, and here to see more examples and the complete lesson plan.
I taught this project to adults as well – they were able to create the unpainted trophies in about an hour. At the elementary level, this took us 6-8 sessions at 40 minutes per class. Middle and high school students with NICE LONG CLASS PERIODS (envy envy envy) should be able to do this in a couple of weeks.
Our students look forward to this project for years. They treasure their trophies for years after. A lot of work, but worth it.