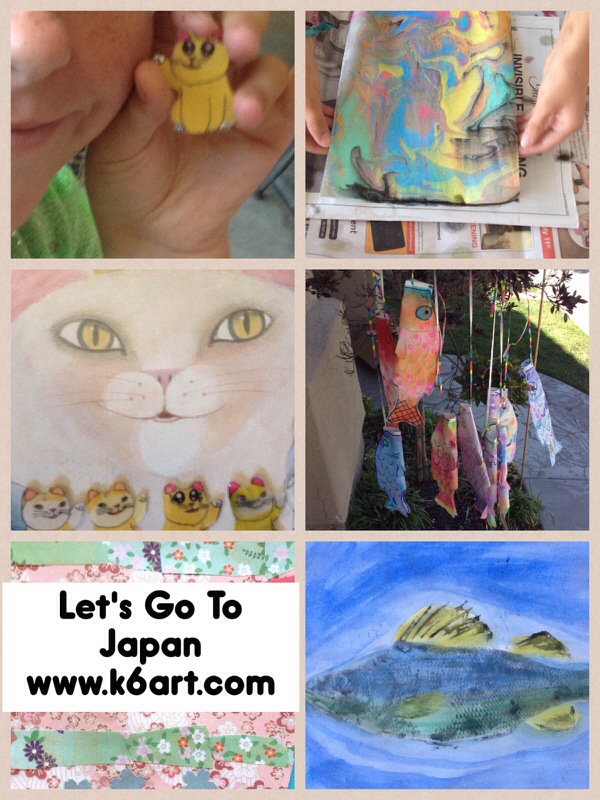
I just finished my annual art and cooking camp. This year’s theme was ‘Let’s Go to Japan’. We did lots of FUN art and cooking projects. All the campers were 9-11 years old.
Here’s a list of all the art and cooking projects we created:
Day one: koi fish kites (koi noburi) and bento box lunch
Day two: suminagashi prints and decorated rice balls bento
Day three: cloisonne collage and Japanese crepes
Day four: gyotaku fish prints and mushi-pan steamed cakes
Day five: Beckoning cat charms and ‘octopus’ bento
In addition, we read a lot of wonderful books about Japan, and practiced Japanese hiragana writing with brush pens.
I’ll be writing a bunch of posts with much more detail, including all the recipes! Check back this week to find out more.
Enjoy!
p.s. Want more art camp ideas? Check out my ‘Let’s Go to Paris’ art + cooking camp series from 2013. Click here to see more.
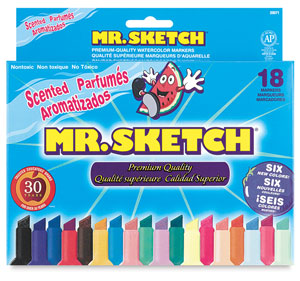
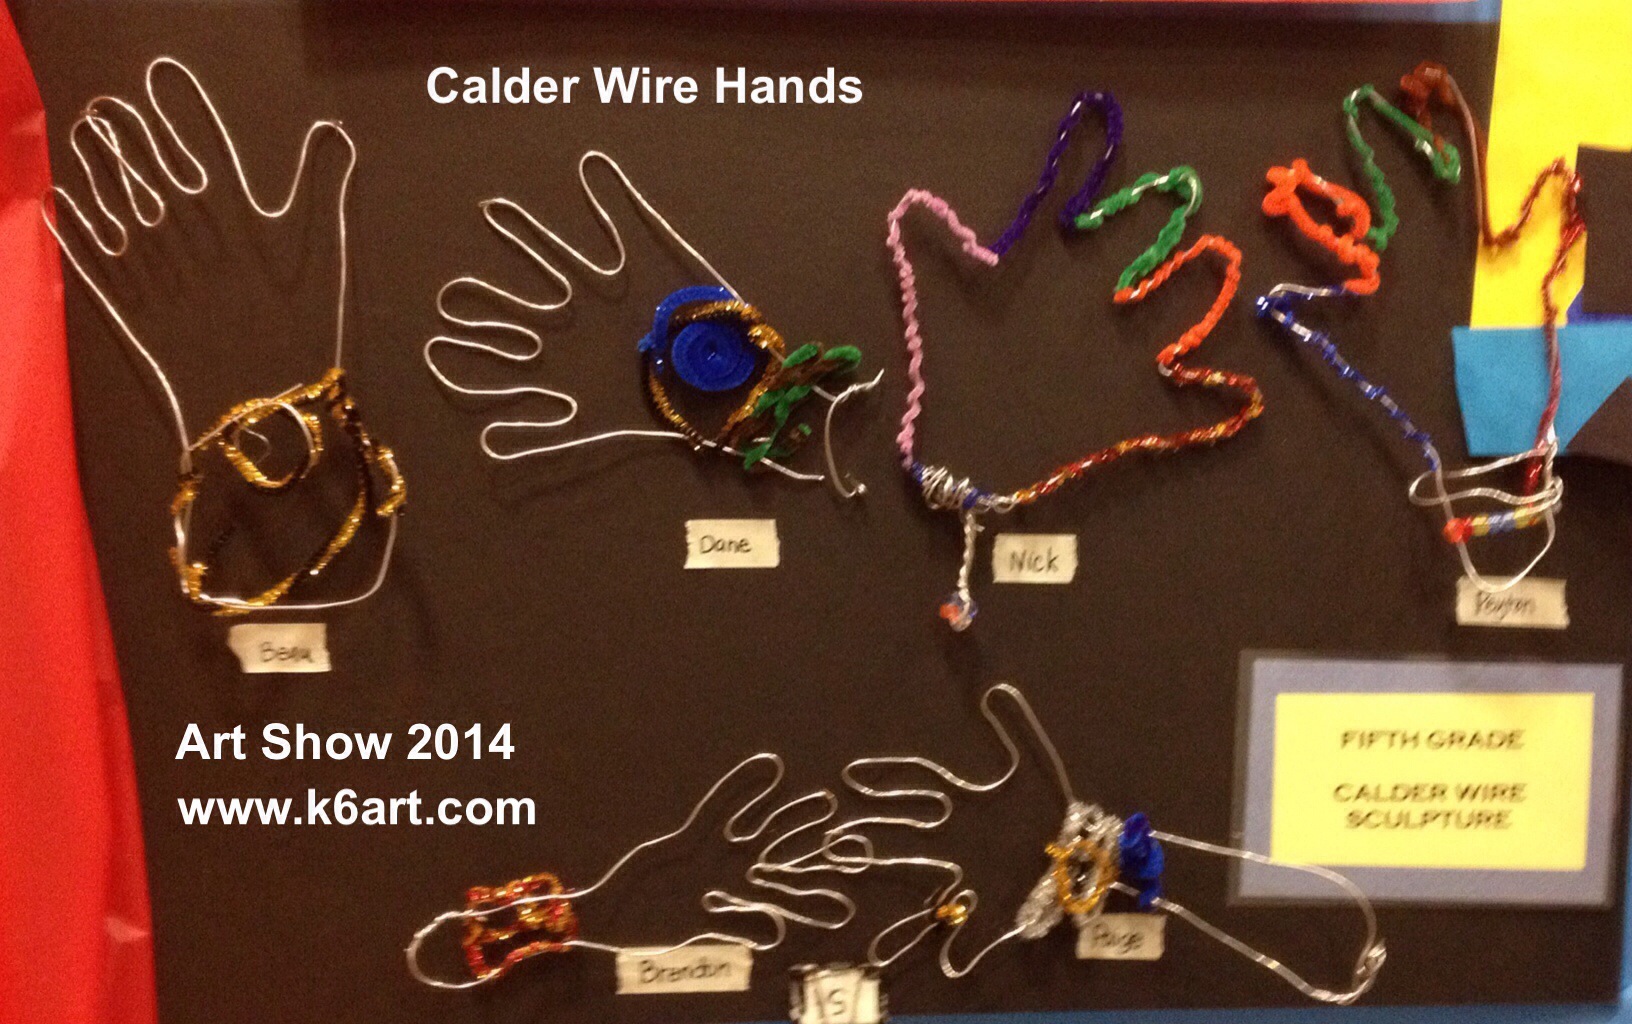
Grab your markers! Show this fabulous video from Handimania and your students will create beautiful 3D hand art. I will use chisel-tip markers (Mr. Sketch brand is good) and Crayola markers next time I teach this project.
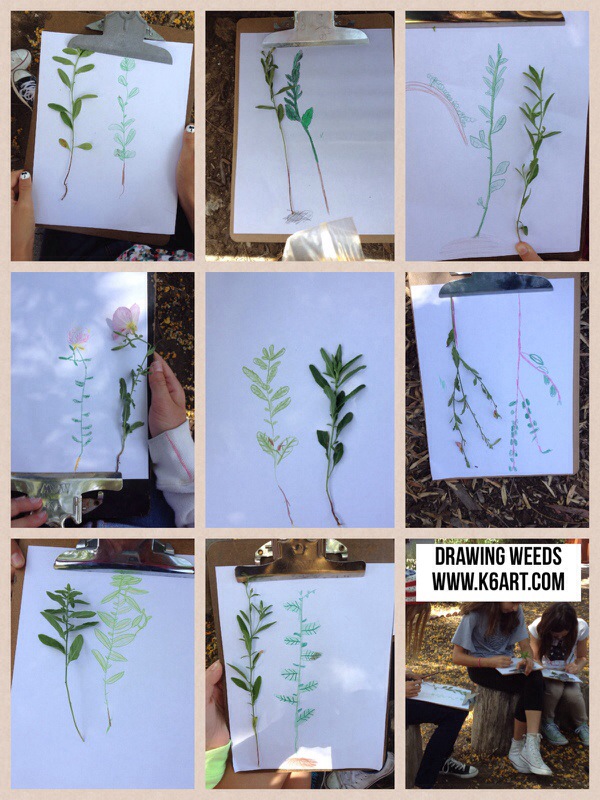
It’s the last week of art class and the weather is lovely. For their final project, the 5th and 6th graders did observational drawings of the weeds in our school garden.
Materials:
Clipboards
Copy paper
Colored pencils
Weeds
Each student picks one weed from the ground. They should try to keep the root intact. Weeds must be no longer than the paper.
Clip paper to board, then clip top of weed to the left side of the board (left-handed kids should clip weed on the right).
Draw a scale drawing of the weed.
Start with a long stem line. Mark leaf placement with short lines alone the stem line. Then draw the contour of the leaves. Look closely at the leaf veins and draw them. Add flowers and roots. Finally, draw irregularities such as bite marks.
What a fabulous way to end the art year. We practiced our drawing skills and weeded the garden path. Bonus!
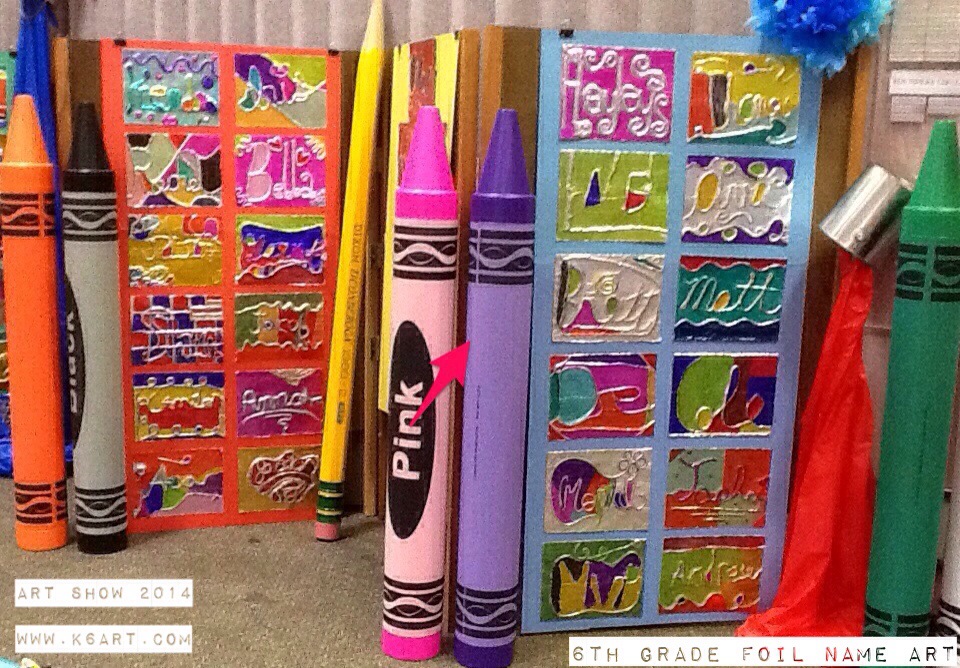
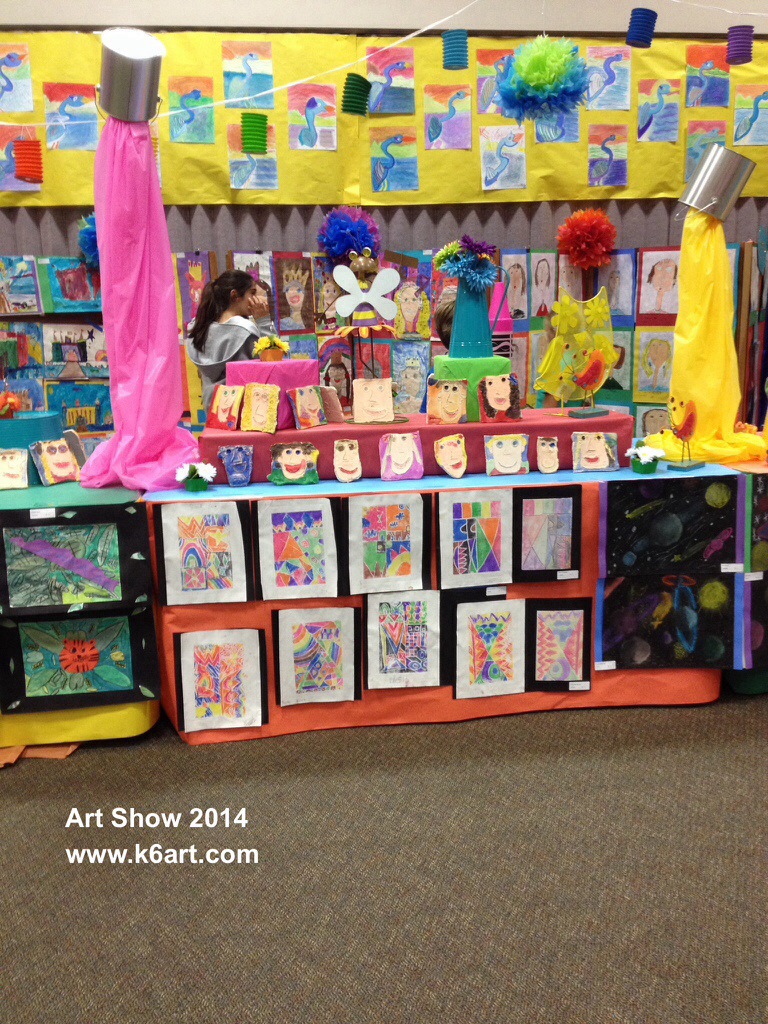
Here are some more photos from Art Show 2014. Thanks again to Devan, our art show chair (and party planning/layout genius) and all the AMAZING art show and art room volunteers who put this show together.
Our volunteers are the best! Our school is blessed to have the help of parents year-round in the art room. We had some amazing, hard-working parents who hung this show in just three days.
It was our last show with Devan as chair. We will really miss her vision and energy. How fortunate we are to have had her help these past four shows.
Our 6th graders did another digital art project this week: a quick artwork inspired by pop artist Roy Lichtenstein. We used iPads, but the good news is you can do this project from a computer just as easily.
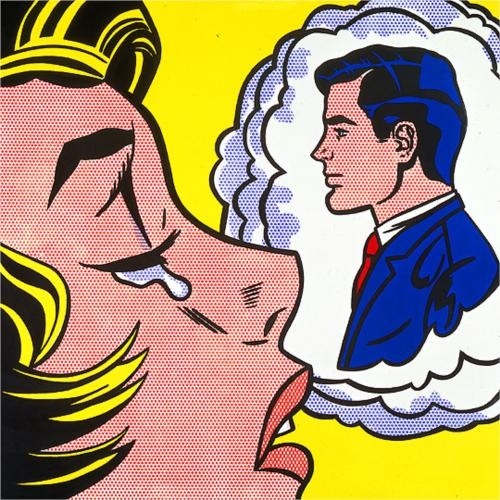
Lichtenstein’s Thinking of Him, 1963.
After looking at Lichtenstein’s 1963 painting Thinking of Him, students used their iPads to do a Google search for Lichtenstein images. They saved their five favorites to the camera roll.
I asked what they noticed about Lichtenstein’s work. Students noticed word bubbles, a lot of blonds and cartoons. I asked them to review their saved images and look for
everyday items
primary colors (red/yellow/blue)
black outlines
dots, especially for flesh tone
We talked about appropriation in art. During the 1960s, Lichtenstein and other pop artists such as Andy Warhol used pre-existing images of everyday objects (i.e. comics) as a starting points in their artworks. I passed out enlargements from old newspaper comics, plus the little wax paper primary color comics from Bazooka bubblegum. I explained that these types of images were well-known back in the early 1960s. Even the dots (known as ‘benday’ dots) Lichtenstein used were appropriated from comic book printing techniques used back in the 1960s.
The digital Art Project
We used the free, online TATE kids dotshop website to create our digital artworks. (note: dotshop is compatible with iPad and computer).
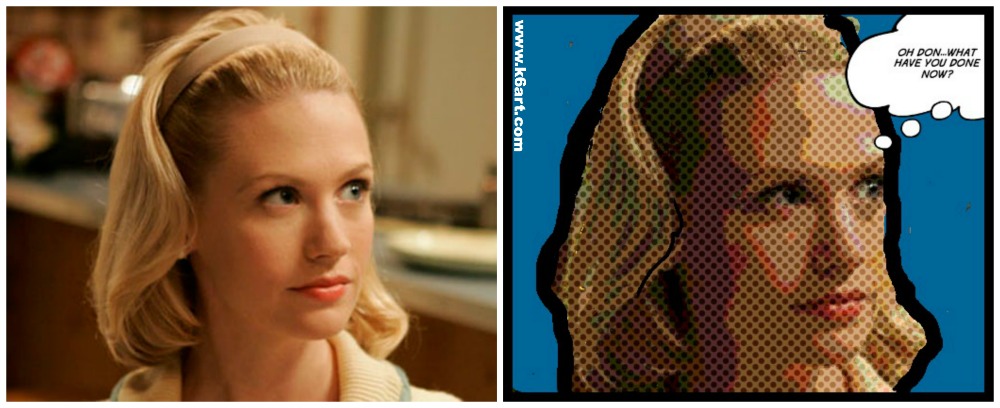
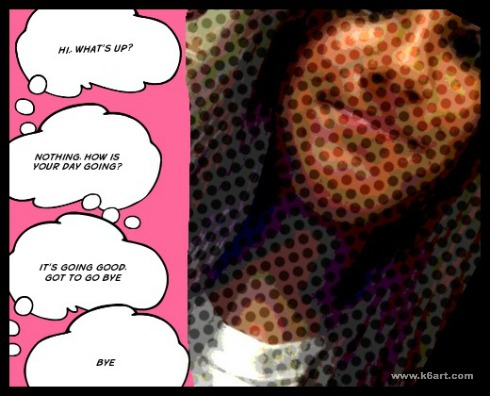
Create a digital Lichtenstein-inspired portrait using TATE kids DotShop. Teacher example. Betty Draper photo via AMC
Steps to create a Lichtenstein-inspired digital artwork:
1.Open TATE Kids
2. a) use the camera option to take a selfie or picture of your friends or b) appropriate a well-known image from the internet (e.g. Betty Draper, Sponge Bob, Arnold Schwartzenegger).
3. Adjust color and benday dot size.
4. Color in the background a solid color
5. optional: outline in black
6. optional: add text.
7 Save within the website, then save to camera roll.
8. Turn in to digital turn in folder on Google Drive (click here to read about how we turn in digital art).
6th grade results
Kenna’s appropriated image, includes dots, pink background and text.
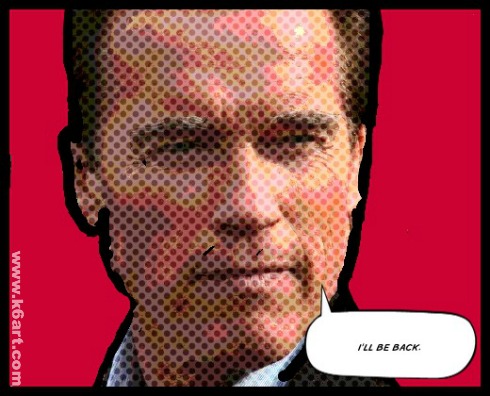
Appropriating an image: Lucas found an image of Arnold Schwarzenegger, added benday dots, colored the background red, and added text.
Enjoy!
Do you have a favorite Lichtenstein-inspired art project?