Colorful Chameleons

colorful watercolor chameleons


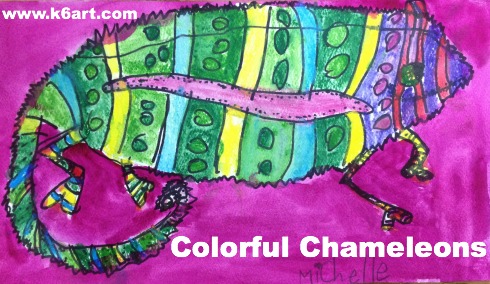
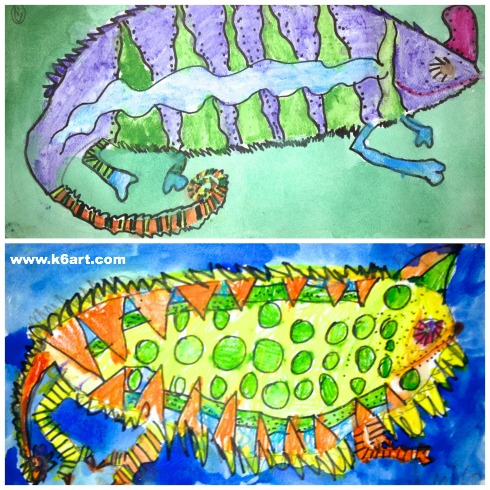
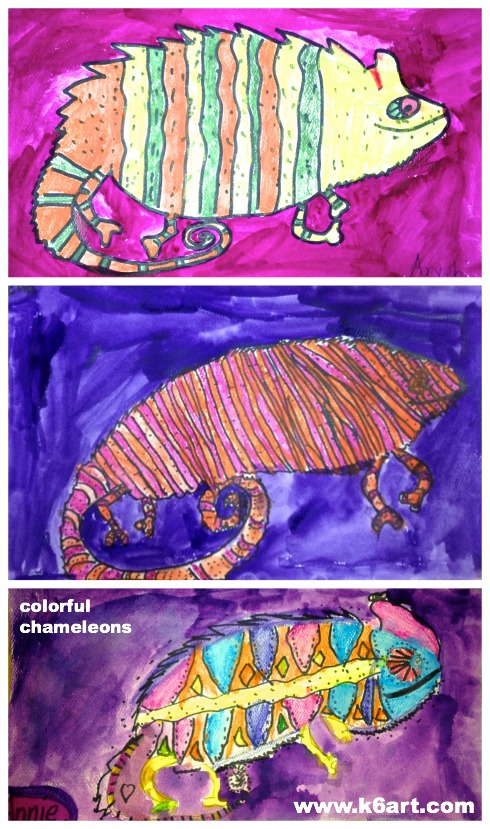
Kids love chameleons! They change color almost like magic. Our second graders just finished a very successful watercolor chameleon project.

Materials:

Day 1: Draw your chameleon

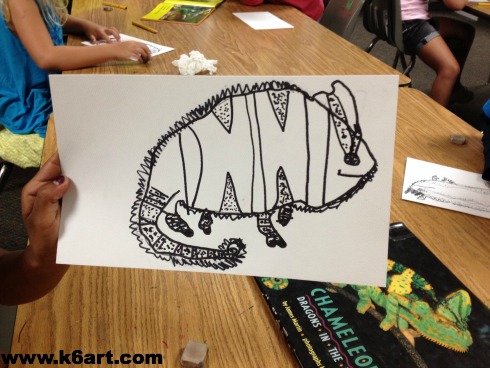
We watched the ‘Super Chameleon’ video on YouTube. The kids were amazed to see the chameleon change colors over and over. Then we took a close look at the chameleon books from our school’s media center. Next it was on to a directed draw. I modeled the basic contour of the chameleon’s head, body, tail and legs. Kids started in pencil, then outlined in Sharpie. They were free to use Sharpie to add their own details (stripes, patterns, dots, spikes) based on their reference photos.

chameleon drawing


Day 2: Color your chameleon

Kids used watercolor pencils dipped in water to color in the chameleons. The watercolor pencils were great for coloring in all the stripes and little spaces. The colors turned out really vibrant! The final step was to paint the background a single color using pan watercolors.

I encouraged everyone to stick to an analogous color scheme for their chameleons. Some kids did, some didn’t, but they all turned out beautiful.  After all, a chameleon can be any color.

blue and green chameleons

three watercolor chameleons

We tried a similar chameleon project last year using Crayola markers: click here to see more results.

Overall this was a popular, super successful project with minimal prep and clean up. It was my first watercolor pencil project, but it won’t be my last.

Enjoy!

Here are two of the books we used for our lesson 

Seurat Pointillist Food

seurat pointillist food: Q-tips, pan watercolor and markers. Very successful!

Fourth grade just finished their Seurat pointillism art project. Our students used pan watercolors, Q-tips and markers to make pointillist food! The project was inspired by this project by Jessica Young at Miss Young’s Artroom.

Materials:

  • pan watercolors
  • Q-tips
  • colored markers (we used Crayola and Sharpie)
  • pencil/eraser
  • white paper, 9″x12″
  • reference photos (I found dessert images on Pinterest)
  • loups or magnifying glasses
  • pointillist note cards (like these – available at walmart.com and galison.com) or books

Day 1: Learn about pointillism

I passed out pointillist notecards and magnifying loups (borrowed from our science lab). It was a lot of fun to see the dots up close.

Next we watched the first half of an AMAZING video: ‘Get to the Point’ – Georges Seurat and Pointillism  by Artrageous with Nate.

Finally  we completed a color mixing worksheet, using marker dots to make the secondary colors.

Use a magnifying glass or loop to examine pointillist art up close


homemade pointillist worksheet

Homemade pointillist worksheet

Day 2: Create dots with Q-tip or marker

Students selected a food reference photo, then lightly sketched their basic food shapes on paper. They had the option of using Q-tip or marker to dot their papers.

(warning: we discovered you can’t erase pencil lines after they’ve been painted with pan watercolor. Remind kids to draw lightly!)
seurat pointillist orange

Day 3: Erase lines, add more dots

Students erased their pencil lines from last week, then added MORE DOTS! Some students added a background – a couple even added pointillist borders.

pointillist sundae


Fourth grade results:


20131015-223638.jpg


This was a VERY popular and successful project! I will definitely repeat.  Are looking for a group pointillism project? Please check out my earlier post for a Seurat mural.

Here’s the cool pointillism video by Artrageous with Nate


This is the first project of our food art series, in honor of the FEAST! exhibit at San Diego’s New Children’s Museum. This year we will be making food art projects at each grade level.

Do you have a favorite food art project?

Related Posts Plugin for WordPress, Blogger...