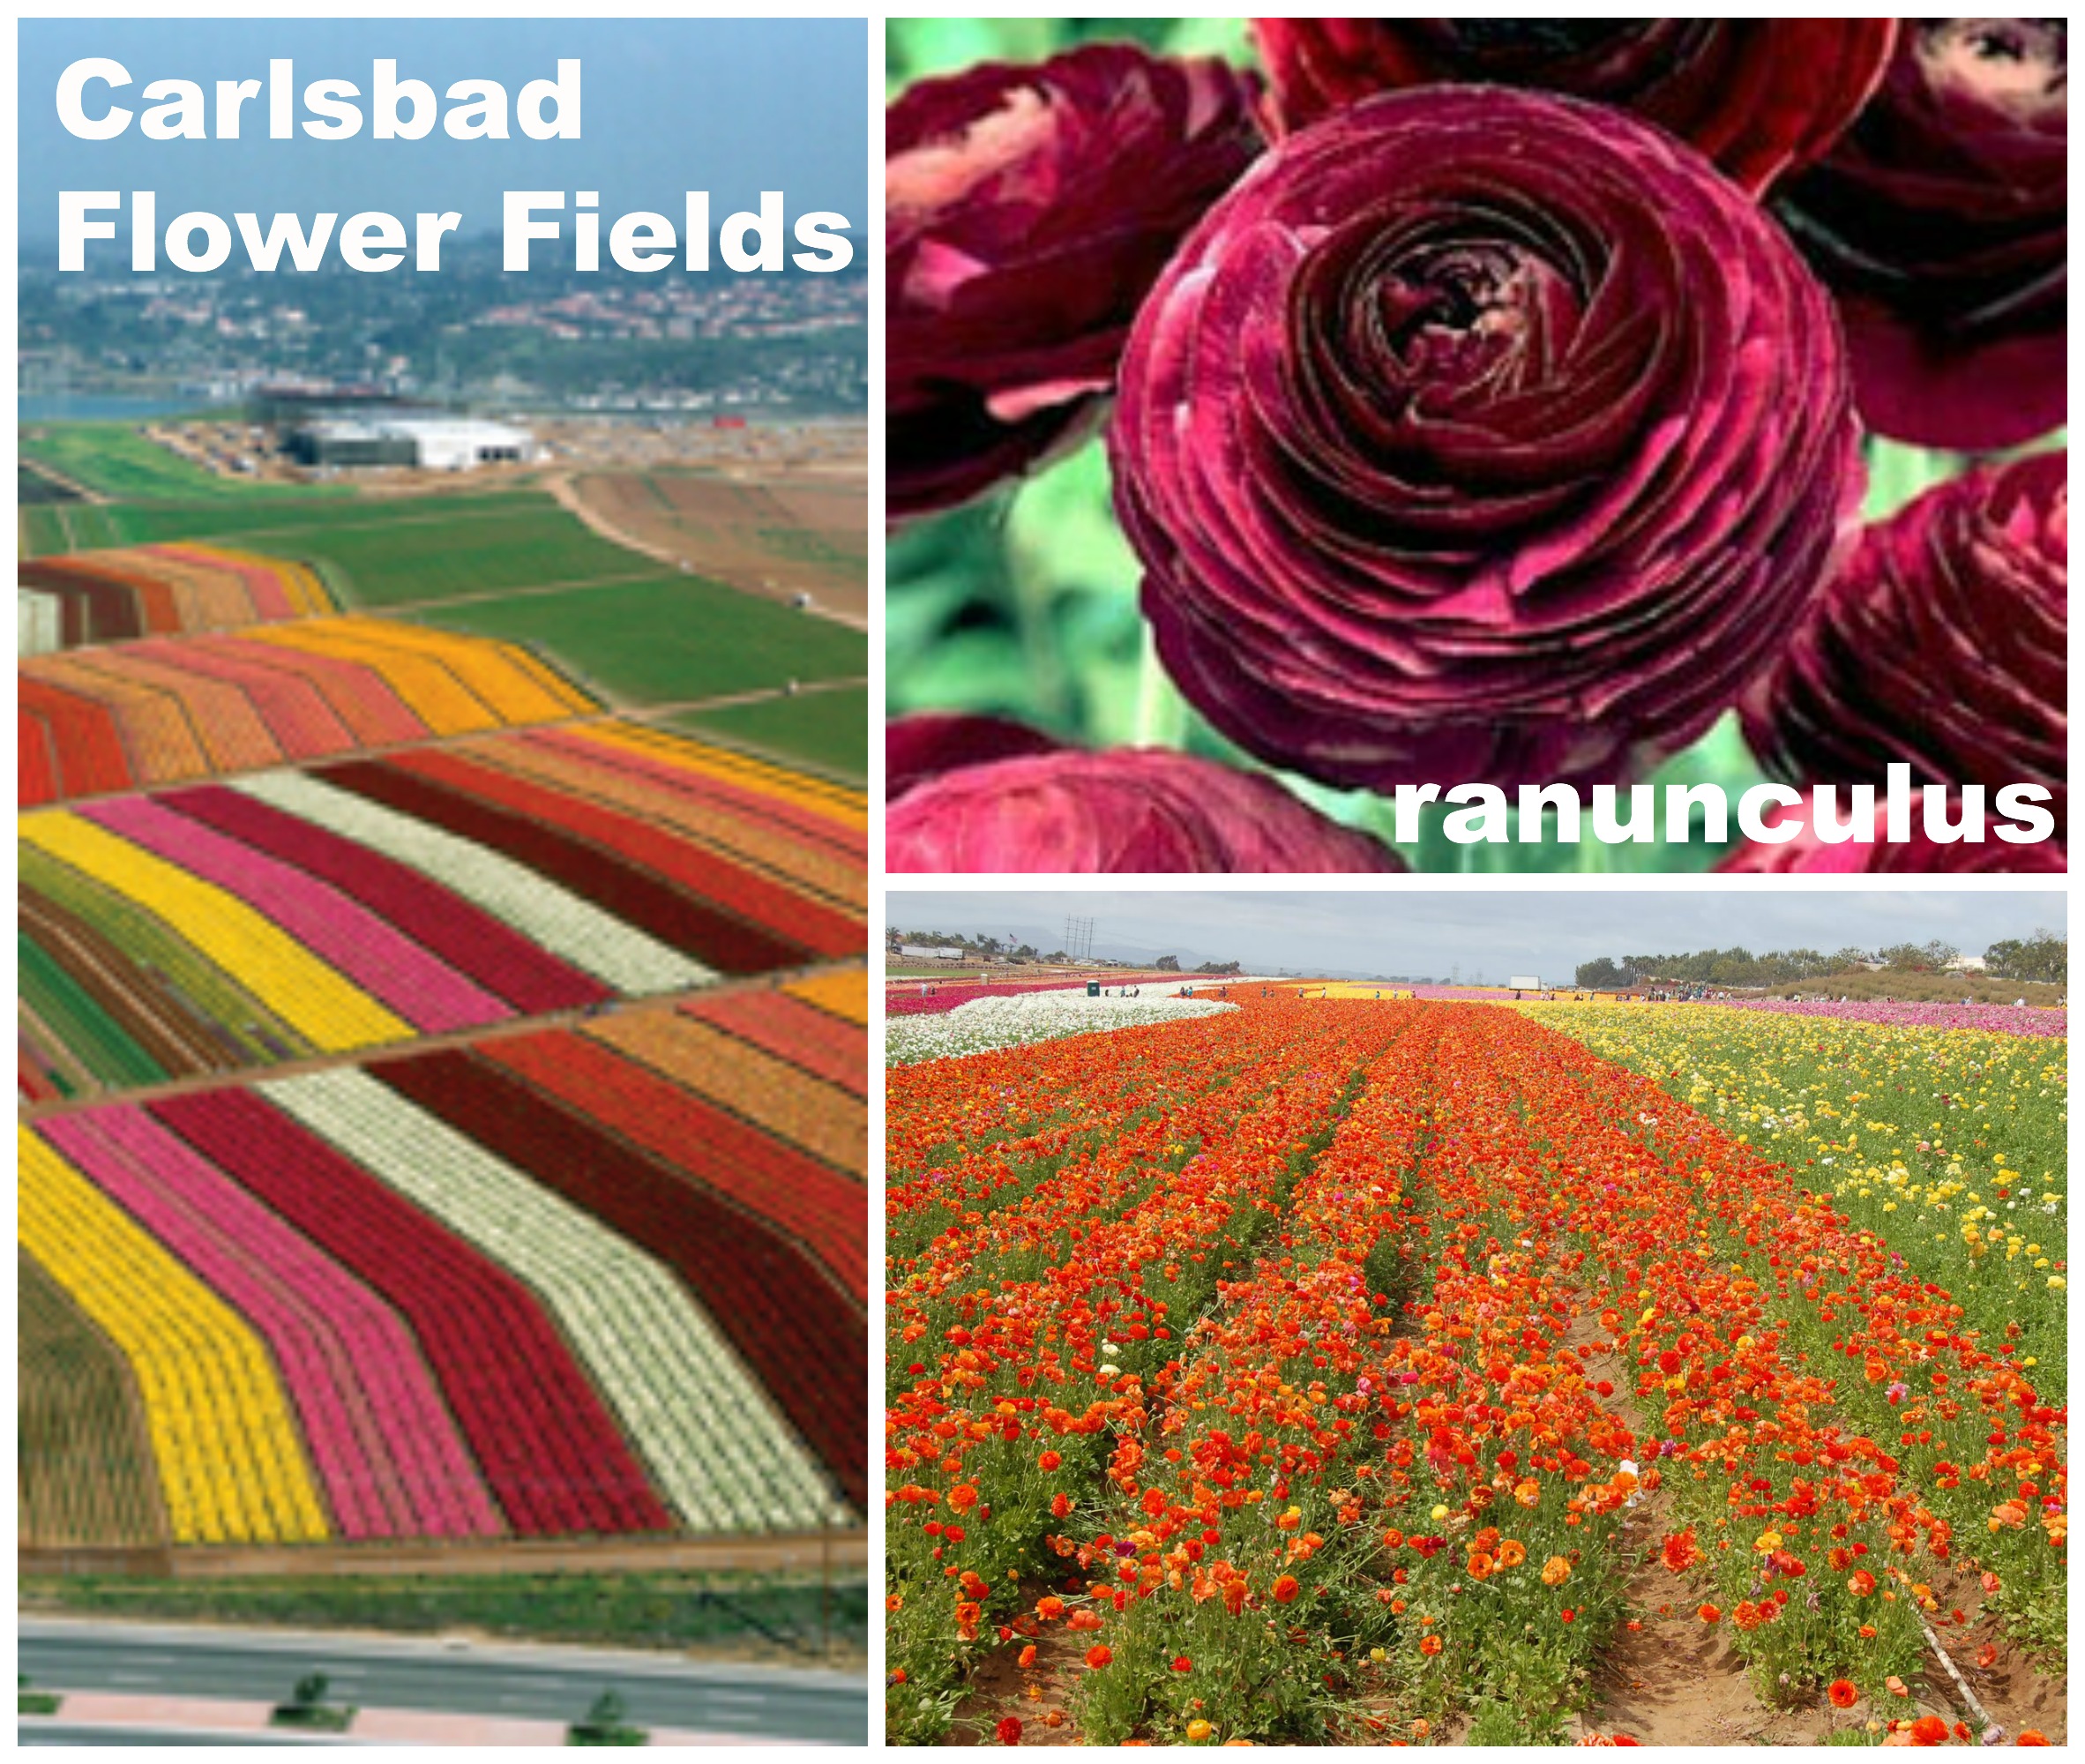
Flower Fields in Carlsbad, CA. Photo sources: bloomingbulbs.com;
The fields are filled with colorful ranunculus flowers. Each spring families throughout San Diego trek to the Flower Fields to admire their beauty. This outing is very popular – a show of hands revealed almost all my 5th and 6th graders had visited the Flower Fields.
We drew the flower fields in one-point perspective to create an illusion of depth. We used colored 9″x12″ construction paper, rulers, pencils and erasers and oil pastels. In this 13 minute video, I demonstrate drawing the horizon line, vanishing point, and orthogonals to create the illusion of depth.
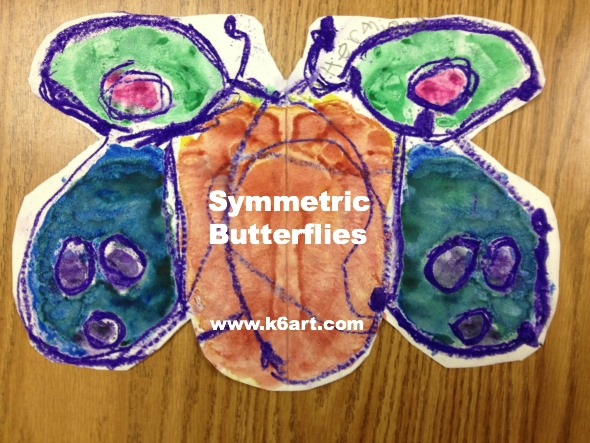
Here is a nice butterfly watercolor resist project that teaches symmetry. It was very popular with the kindergarteners and first graders.
Materials:
white paper, 9″x12″
oil pastels in bright or dark colors (NO yellow, light pink, light blue, white, etc.)
rubbing tool – optional (I use the flat side of a beginner pencil)
watercolors
Optional: scissors, glue stick and colored paper for mounting
Discuss symmetry
Introduce symmetry. We talk about how our faces are symmetric. Then we look at butterflies and identify the line of symmetry.
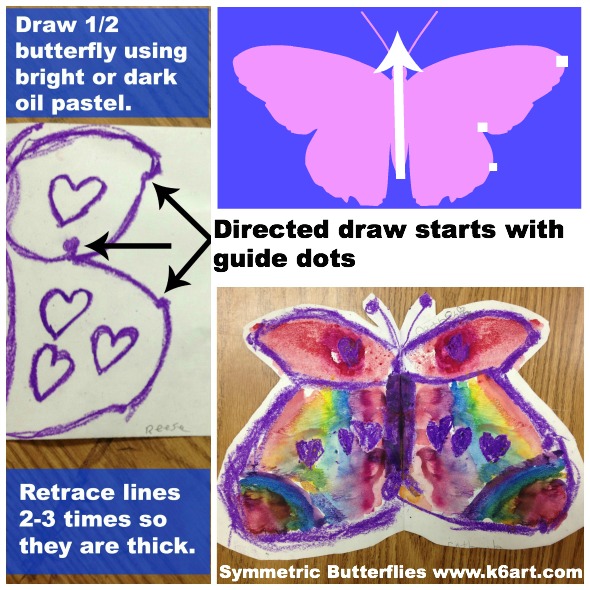
Create 1/2 butterflies:
Students fold paper in half ‘the short way’ (aka hamburger fold). Do not unfold paper. Using oil pastel, direct students to create a series of dots on ONE folded half. The students then connect the dots to make a 1/2 butterfly.
Now ask students to trace their lines two more times using that same oil pastel. Students should press hard – oil pastel lines should be thick and dark.
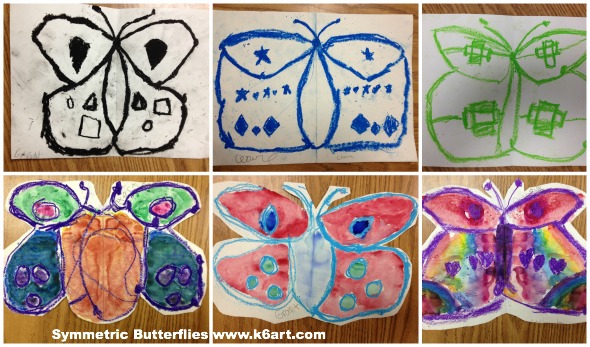
Students can add some simple decorations such as shapes and lines to their 1/2 butterflies. Remember, each decoration must be traced a total of three times.
Ready to rub:
Now students close up their papers so the color is on the inside of their ‘books’. Time to rub HARD. I have students stand up so they can put their whole bodies into it! We use the flat side of a beginner pencil for this. You could use the flat side of a popsicle stick as well.
Now open the ‘book’. Students should see a ‘ghost’ image (faint lines) opposite their oil pastel drawing. You will hear oohs and aahs of amazement!
About 75% see the ghost image the first time they try this. If the oil pastel didn’t transfer, it means a) the students didn’t retrace their lines hard enough and/or 3)the students didn’t rub hard enough. I ask neighbors to help their friends out at this point. On their second try, the remaining students all succeeded.
The next step is to retrace the ghost lines with that same color of oil pastel.
Paint
Finally, paint the butterflies with watercolor. Encourage students to keep their butterflies symmetric – match up the paint colors on the right and left sides of the line of symmetry.
Kindergarten and first grade results
Options for finishing the project: cut out the butterflies, mount on construction paper. Or just trim and stick onto your window or bulletin board.
liquid watercolors in cool colors (purple, blue, green)
kosher salt (optional)
Leaf silhouettes
Session 1:
We looked at the silhouettes of fall leaves. We talked about the variety of leaf shapes. We discussed the difference between the organic leaf shapes and geometric shapes.
Next we created our stencils: students folded their cardstock, and drew a simple 1/2 leaf on the fold (note: don’t bother with a stem in your stencil design).
About 90% of second graders were able to design and cut a simple leaf stencil independently on their first attempt. As an alternative, you could cut stencils for your students.
Once we created the stencils we noticed they were symmetric. We also defined the leaf-shaped hole as the negative space and the leaf piece as the positive space.
Students stenciled multiple leaves . Some swapped stencils with their friends. After stenciling, they added a stem line to each leaf.
Paint leaves with cool color watercolors.
Session 2:
Students painted the leaves with liquid watercolors. They loved to see the oil pastel resist the paint. After painting, they had the option of sprinkling kosher salt on their wet art before placing their art on the drying rack.
Second grade results
Fall leaves with salt added.
Fall leaves with salt added.
The project was extremely successful. The students really enjoyed the process, and reviewed a lot of art concepts.