Decorated Clay Cupcakes

decorated clay cupcakes feature lettering and clay roses and

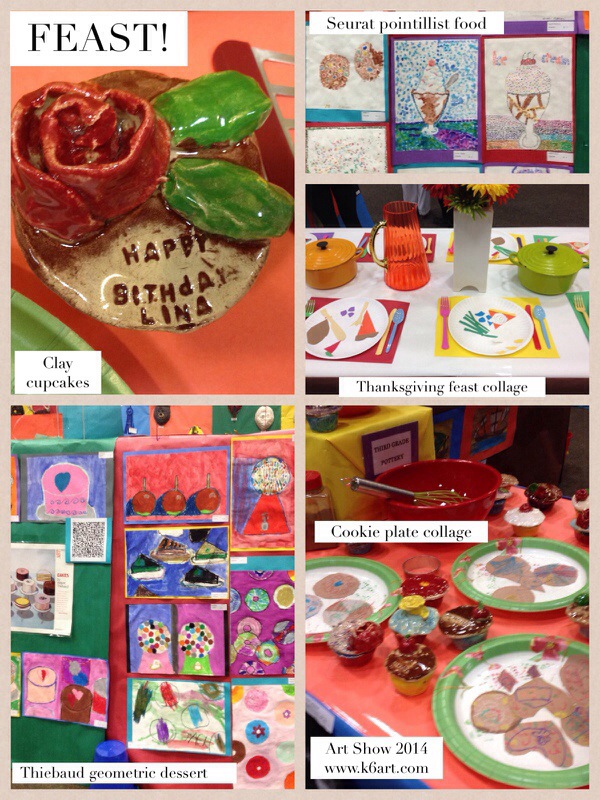
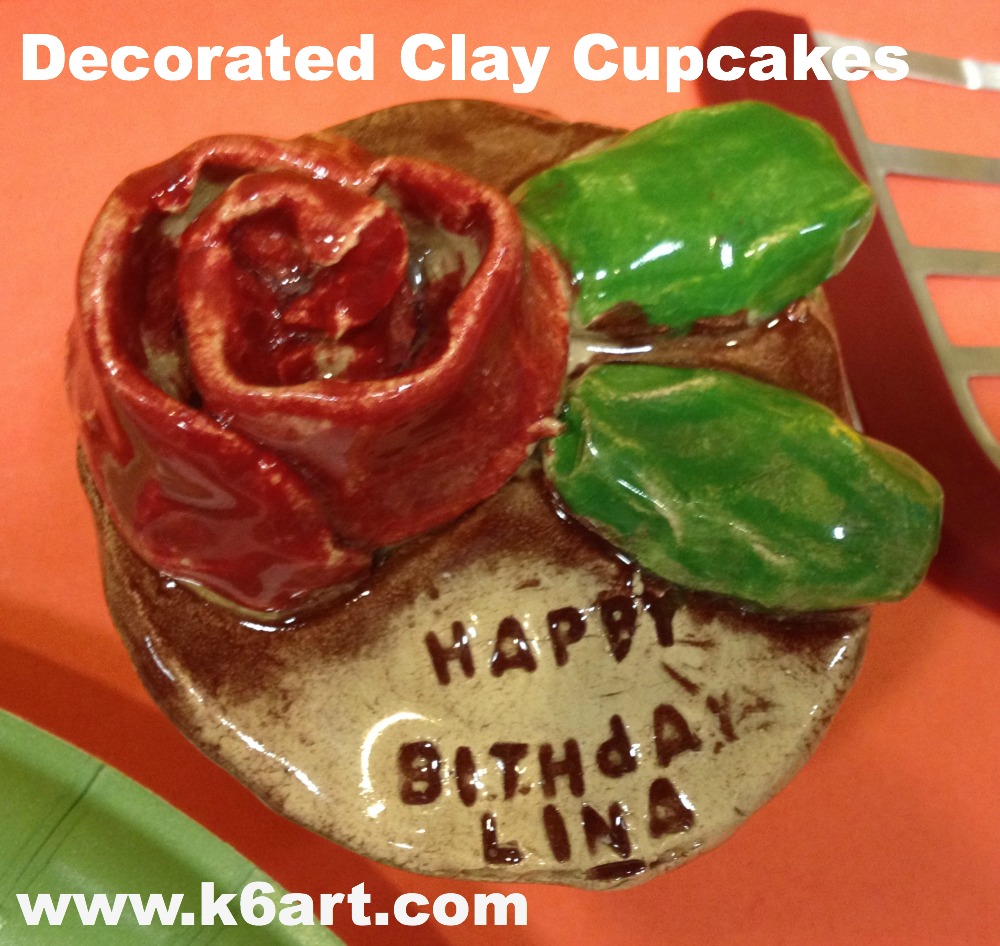
These lidded clay cupcake boxes are extra-special: they feature lettering and clay roses!

decorated clay cupcakes feature lettering and roses

Materials:

  • clay (we used low-fire white)
  • individual silicone cupcake molds (such as Wilton Silicone Baking Cups
    )
  • pin tool or plastic knife.
  • white vinegar
  • q-tips
  • alphabet pasta (I use La Moderna brand from the Hispanic food section at Wal Mart).
  • underglaze
  • clear glaze

Make the cupcake base

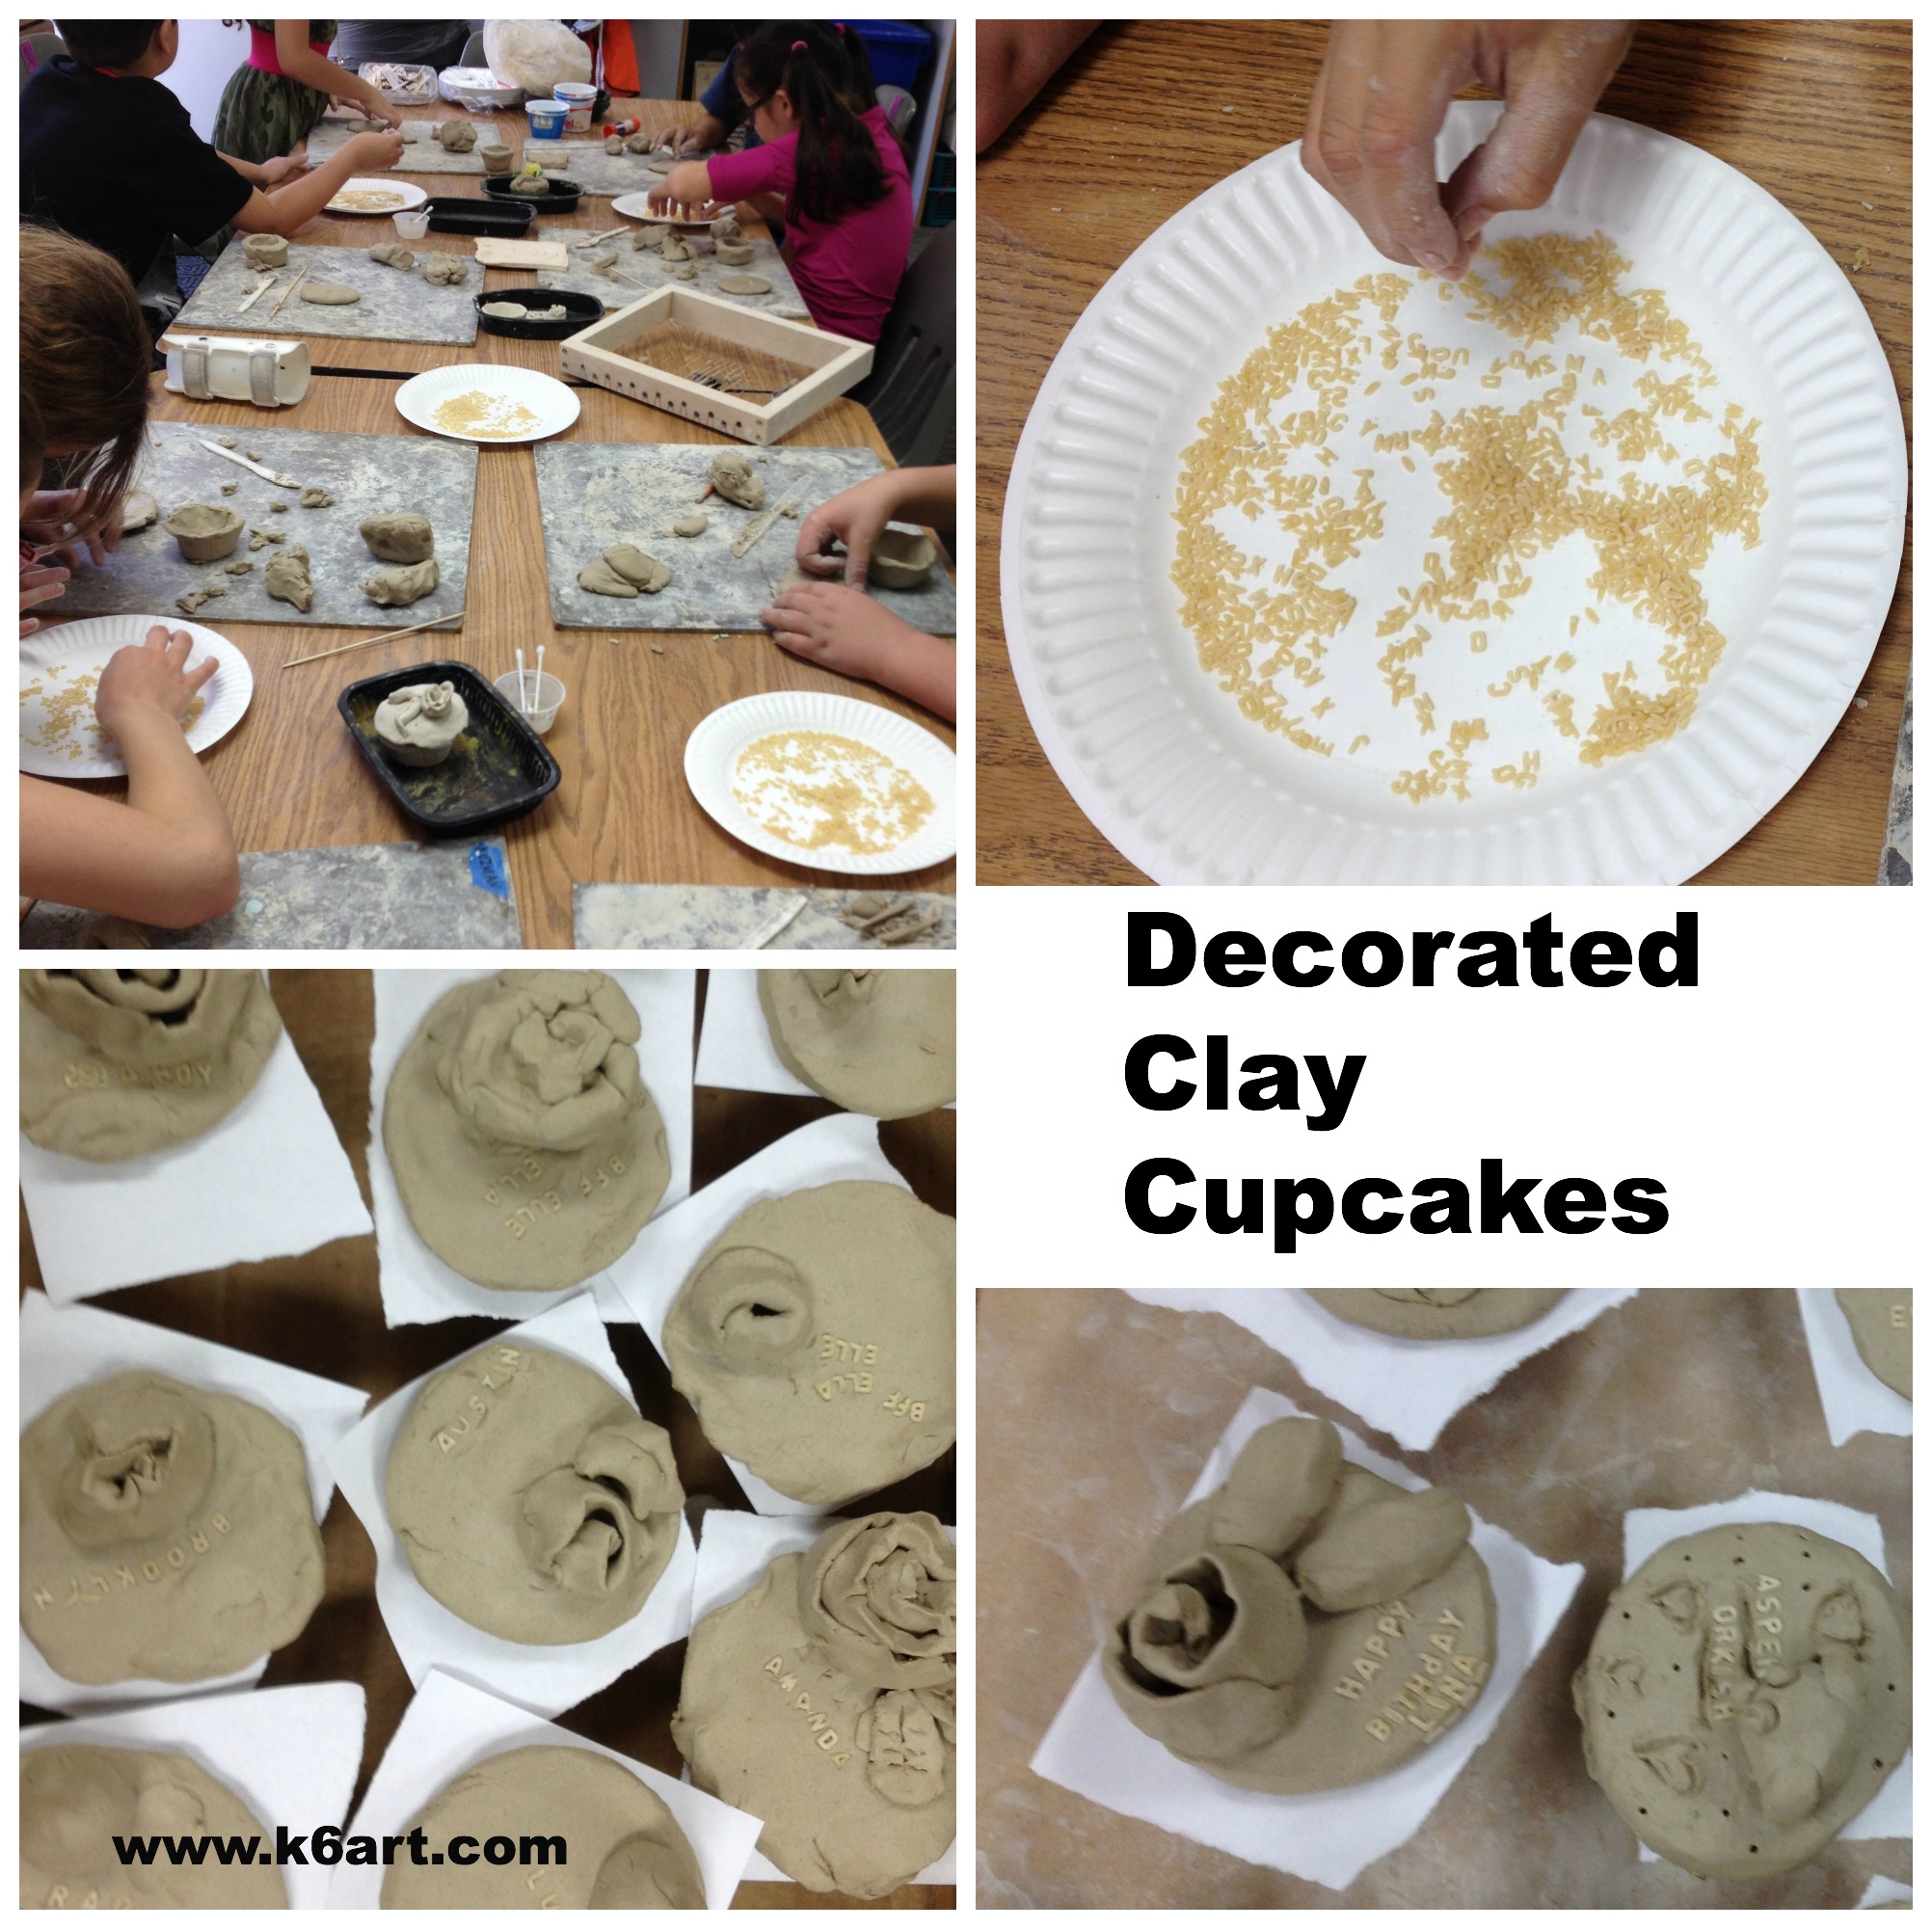
Give each student a lump of clay and a silicone cupcake form. Create a pinch pot, place it in the silicone form and press the clay all around against the textured sides of the form. If the clay pot is higher than the form, trim the clay with a pin tool or plastic knife.  Turn form inside out and remove from clay. Students should write their name on the bottom at this time.

Make the cupcake lid

Take some more clay and roll into a ball. Flatten the ball. Invert the top of the cupcake form and place onto of the flattened clay. Trim clay to fit cupcake form. Write student name on one side of the lid.

Want more tips? Check out this clay cupcake post from The Art of Ed.

Adding roses

I saw this great post on making simple clay roses on the smART Class blog. Essentially, you create a coil (rope) of clay, lay it on the table, pinch the top (‘spine’) along the length of the coil, and spiral into a rose.  Please see the smART Class blog post for a full photo tutorial.

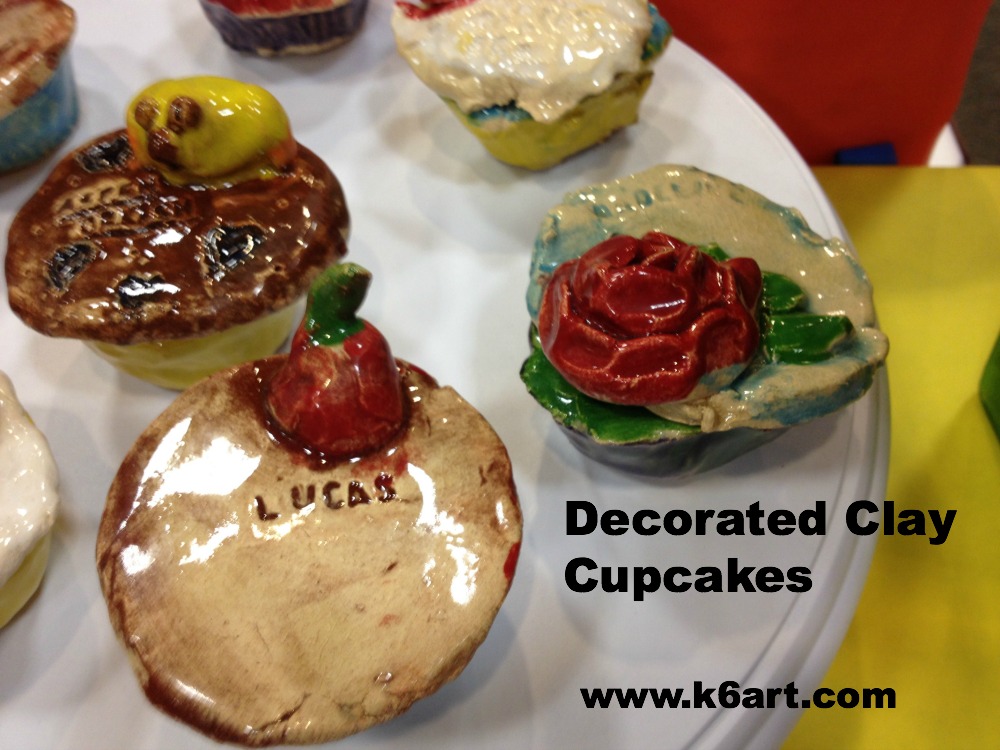
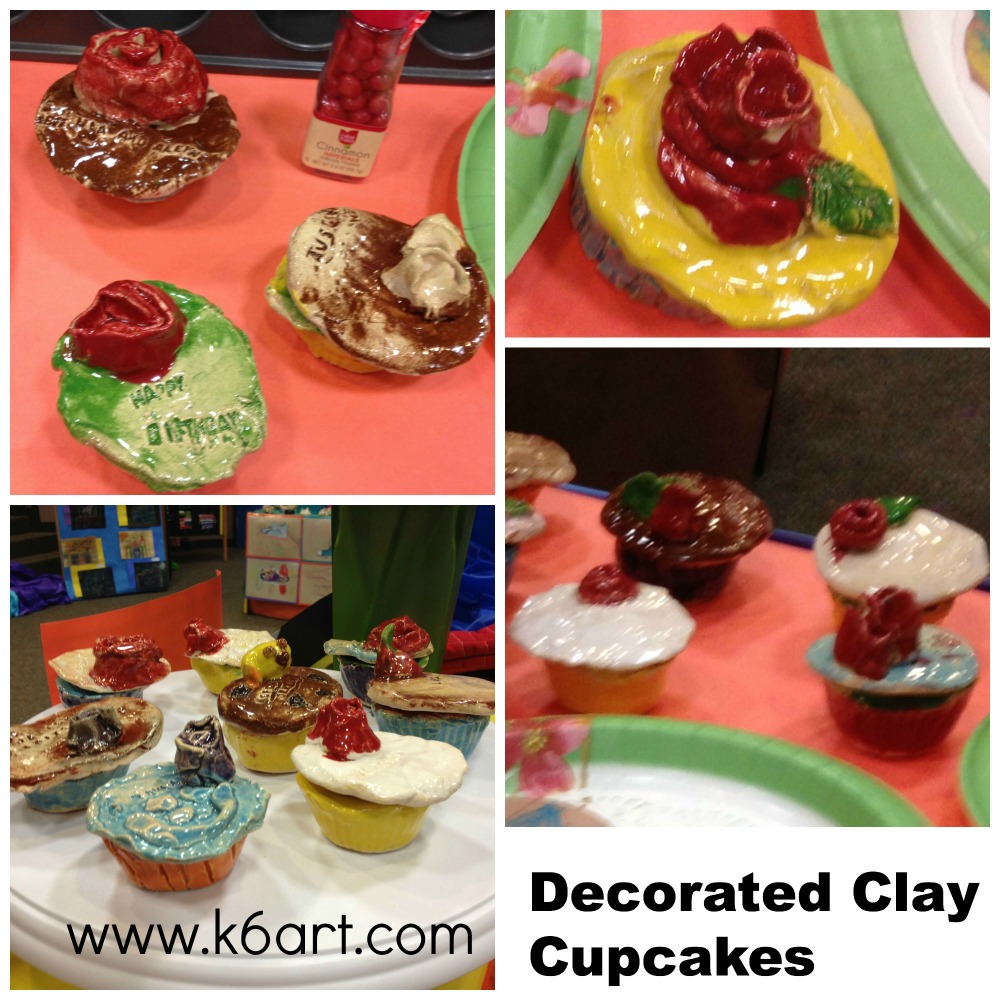
We attached our roses (and optional leaves) to the lid using vinegar applied with a q-tip. Some students skipped the roses and added other decorations. Variations included a sun, animal, wrapped present, and cherry.

(Note: vinegar is our glue. We use it instead of slip when attaching small clay objects).

Adding text

Pour some alphabet pasta into a plate. Press alphabet pasta into wet clay. Write a birthday message or anything else. Do not remove (the pasta will burn out in the kiln).

Fire to cone 04.

decorated clay cupcakes feature text and roses.

Glaze the cupcake

Glaze the base with three coats of underglaze.

If the lid has text, use a stiff brush to press a dark color of underglaze into text indentations. Wipe off the underglaze. The text should now be legible. Carefully glaze the roses/leaves/decorations with three coats of underglaze. When dry, add 2-3 coats of clear glaze. Fire to cone 06.

decorated clay cupcakes at the art show.

Enjoy!

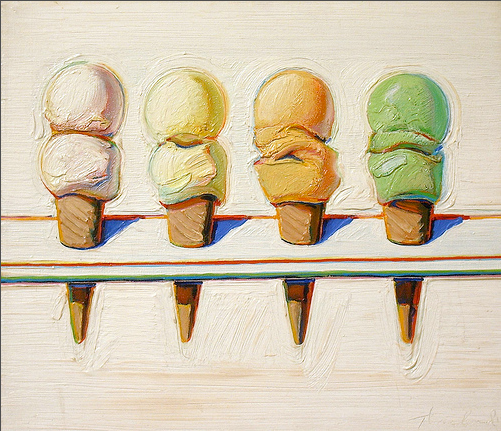
p.s. This would be a nice Wayne Thiebaud lesson!

Art Show 2014: A Rainbow of Color

art show 2014 stage

SSF art show 2014: paint cans spill a rainbow of color down the stairs; Bob Ross painting video plays throughout the evening.

We had our annual art show last week. It was amazing! Over 1000 pieces of art; at least two from each student. This show featured a rainbow theme (designed by Devan, our AMAZING parent volunteer art show chair), a FEAST! food art area, and an iPad photography/digital art showcase.

Rainbow theme:

Devan used real paint cans purchased at Home Depot. The colored ‘paints’ are plastic table cover rolls. The 10 cans on the stage were drilled and hung on monofilament. Hidden PVC pipe stands hold up the freestanding paint cans.

Spilled paint decorations

The show featured Devan’s amazing freestanding paint can decorations.

Giant crayons and a rainbow of color.

Giant crayons and a rainbow of color in front of the plaster masks.

FEAST! Food Art

I taught food art projects in grades K-4. Click here for kindergarten cookie collage, first grade feast collage, second grade Wayne Thiebaud geometric dessert, and fourth grade Seurat pointillist food. Devan decorated the tables with real cooking utensils and ingredients.

Five FEAST! art projects (clockwise from left): clay cupcakes with roses and alphabet pasta; Seurat pointillist food; Thanksgiving feast collage; cooking plate collage; Wayne Thiebaud geometric dessert.

Andy Warhol activity:

We had a coloring contest again this year. I used a blank Campell’s soup can sheet courtesy of E is for Explore blog. Click here to get yours. We used a real soup pot and real cans of Campbell’s soup.

Our interactive coloring contest ties in to the FEAST! unit.

Our interactive coloring contest ties in to the FEAST! unit. Check out the pot of crayons!

iPad Art Showcase:

We put the iPad showcase right up at the entrance. I printed out a few samples of the second grade iPad photography project, then stationed two iPads looping slideshows of our other digital art projects.

This achieved three goals: 1) display student art, 2) advocate for the art program and 3) thank the parents who raised money to bring iPads to our school.

iPad photography print outs, plus looping slideshows at the iPad art showcase.

iPad photography print outs, plus looping slideshows at the iPad art showcase.


Thanks to our PTO and parent volunteers

Our entire art program is made possible by the parents at our school. A big thank you to the art room and art show volunteers for all their hard work during the year and for three CRAZY days hanging the show. We also had the help of a college student, Abby, who spent two weeks observing our art program. The gorgeous room layout and decorations are the vision of our amazing art show chair, Devan, a professional party planner. We are so lucky to have Devan on board.

100% of our art program is funded by our school PTO. Thank you.

Enjoy!

What’s your best tip for a successful art show?

Wayne Thiebaud: Geometric Desserts

Wayne Thiebaud Geometric Desserts

Who loves dessert? Everyone, including second graders. Each year I teach a Wayne Thiebaud-inspired dessert lesson. This year we created compositions focusing on repetition of geometric forms.

Dessert Geometry (and Common Core connections)

Studying Thiebaud's art is an opportunity to incorporate geometry into your lessons. Try and time your lessons to tie into to the math lesson in the general ed. classroom.

Studying Thiebaud’s art is an opportunity to incorporate geometry into your lessons. Try and time your lessons to tie into to the math lesson in the general ed. classroom.

We looked at images of Wayne Thiebaud’s dessert art, and identified shapes and forms. Here are some of the forms we identified:

  • Sphere:  gum balls, scoops of ice cream
  • Right Triangular Prism: pie wedges, cake wedges
  • Square Prism: petit four (see above image)
  • Cylinder: layer cake
  • Rectangular Prism: Jolly Ranchers candy!!! (OK, Thiebaud didn’t paint Jolly Ranchers. A student came up with that one) 🙂

The second grade was studying 3D forms, so I timed the art lesson just after this concept was introduced in the general ed classroom. Click here for the second grade common core geometry standards.  You can also review the first grade common core geometry standards.

Here is a one-minute video I made featuring the geometric forms in Thiebaud’s art:

The Art Project

Materials:

  • light cardboard tracers: triangle, ellipse, circle, rectangle
  • pencils/erasers
  • white paper, 12″x18″
  • oil pastels
  • tempera cakes/water/brushes

Use teacher-made or student-made tracers (we used both). Students traced their templates with a pencil onto the paper. The composition were encouraged to fill the paper with a single type of dessert in a variety of flavors. It was OK to have the dessert coming off the page, and it was also OK to overlap.

(Note: I know some art teachers disapprove of tracers; I think the use of them in this project reinforces the tie-in to geometry and repetition).

Students then colored their desserts with oil pastels, adding details such as sprinkles, cherries, and chocolate swirls. They outlined the desserts with oil pastels. Finally, they painted the background with a single color of tempera cake.

Second Grade results:

Second graders used circle, triangle, and ellipse tracers as a starting point for these artworks.

Second graders used circle, triangle, and ellipse tracers as a starting point for these artworks.

If your administration asks if you incorporate math (or STEM/STEAM) in your lesson plans, teach this one and happily reply ‘yes’. After all, shape and form are elements of art. This art project reinforces geometry in a fun way.

Additional Resources:

I wrote about these other Thiebaud projects on the blog:

The lesson was inspired by this lesson from the Parent Art Docents website.


Enjoy!


Have you ever incorporated math into an art lesson?

Wayne Thiebaud Ice Cream Cones Roundup

wayne thiebaud ice cream cones


Summer is almost here. Why not try a warm-weather twist on Wayne Thiebaud with an ice cream art lesson? Check out these ice cream cone lessons using paint, collage, papier-mache and more.

thiebaud cones

cone collage

Directed Draw/Paint:

  • 1. I discovered an entire Wayne Thiebaud unit at the fabulous Danish Fru Billedkunst (“Mrs. Fine Art”) blog. Click here for her step-by-step ice cream cone drawing diagram.

Our second graders began by folding their paper into quarters. The horizontal fold became the table edge. Students drew two cones on each side of the vertical fold. We used crayons and tempera cakes. Students had the option of painting a background, or cutting out their art and gluing it to construction paper. They looked so beautiful at our school art show (see photo at top of post).

Here are some more interesting ideas for Thiebaud-inspired ice cream fun:

Collage:

  • 2. Miss Young’s Art Room has a simple ice cream collage for kindergarten
  • 3. ARTASTIC! has a torn paper collage that would be great for using up all those paper scraps at the end of the year

Templates:

Group project:

  • 5. Kids Artists has a whole-class painted paper ice cream cone collage.

Papier Mache Sculpture:

  • 6. Phyl’s There’s a Dragon in My Art Room blog has an awesome papier-mache ice cream cone sculpture project using a paper water cone, newspaper, masking tape and art paste.

More resources

My Wayne Thiebaud Powerpoint includes repetition of simple shapes, variety, use of thick paint, horizon line and shadow.

I always show my ancient (circa 2000!) Behind the Scenes with Wayne Thiebaud [VHS] – it includes Mr. Thiebaud drawing an ice cream cone. Oh, why can’t I find a DVD or digital version??

Wayne Thiebaud video from CBS

Whatever project you choose, your students are bound to have fun!


Enjoy!


Do you have a favorite ice cream cone project?

Kindergarten Birthday Cake

We all know kindergarteners love birthday parties. Cake, presents, decorations – what’s not to love? So it was no surprise that this  birthday cake art project was super-popular with the kinders.

Day 1:

Kindergartens started by viewing my birthday cake powerpoint  (note: if art class is before lunch your students will say they are hungry!). We discussed the lines and shapes we saw on the cakes, and in the frosting and decorations.

Cake drawing emphasizes lines and shapes.

Kinders drew the cakes with crayon. I emphasized that they didn’t have to color the large areas with crayon because we would paint the cakes next week. However, they should use crayon to color in the small areas such as candles, flames, balloons, numbers, etc.

Day 2:

We added cut paper birthday gifts with glue stick, then painted with regular and metallic pan watercolors.

Kindergarteners painted their crayon drawings with regular and metallic pan watercolors. Allow two 40-minute sessions.

Completed birthday cakes:

This would be a great end-of-the-year lesson to celebrate all the ‘summer’ birthdays that occur when school is out of session. This could also be a nice project for a Wayne Thiebaud lesson.

How about adding a book to the project? When I was little, Dr. Seuss’ Happy Birthday to You! was one of my favorite books and I still remember reading it on my 6th birthday (I also remember Baskin-Robbins clown cones plopping all over the back yard at the birthday party, but that is another story).

I’d love your suggestions on a book to read along with this project.

Do you have a special birthday-themed book for primary students?


Related Posts Plugin for WordPress, Blogger...