Isn’t it wonderful when you have time to make your own art? I experimented with mono printing this week as part of my homework for the Artsy Book Club. I used Shrinky Dink shrinkable plastic for my printing plate. It worked beautifully as a plate, plus I got to shrink it in the oven after I was done!
Materials:
- Shrinky Dinks Shrinkable Plastic – 8 x 10 inches – Set of 10 – Frosted Ruff n’ Ready
- Reeves Watersoluble Wax Pastel Set – 24 color
- watercolor paper
- copy paper for sketching
- dish pan of water
- towel for blotting paper
- oven
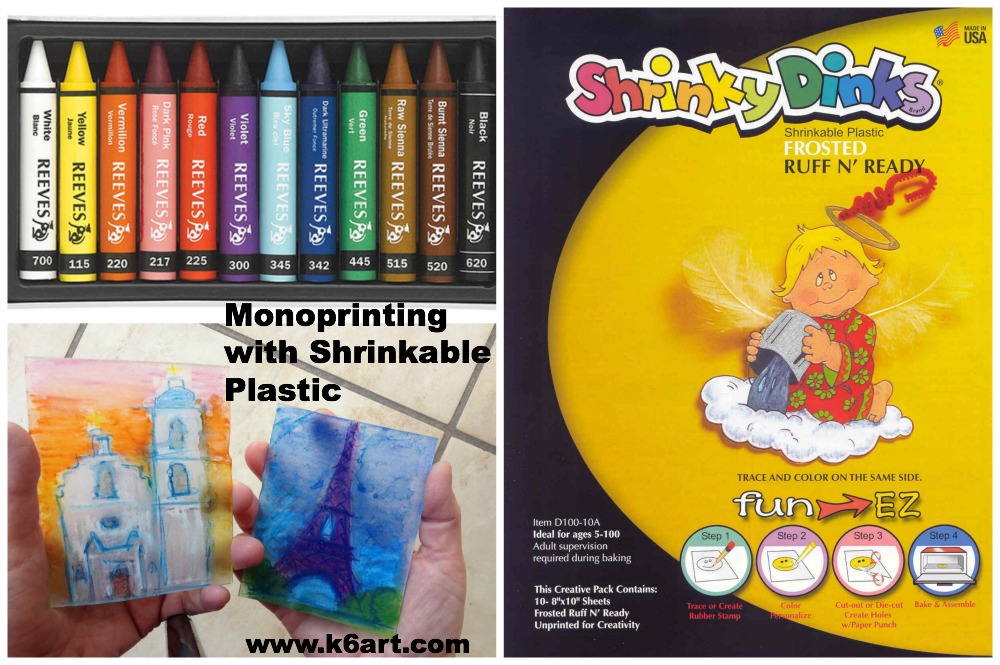
You’ll need wax pastels, frosted Shrinky Dinks, watercolor paper, and an oven.
Directions:
- Make a sketch on copy paper
- Place the shrinkable plastic (AKA the printing plate) on top of the sketch
- Trace sketch with wax pastel, then color background/negative space
- Brush plastic with wet paintbrush to blend colors
- Dampen paper in dish pan of water, blot in towel
- Place dampened watercolor paper on plastic
- Rub
- Pull the print
- Add more wax pastel (in select areas) to the wet print.
You can re-use the full size shrinkable plastic plate over and over; just re-color for every new mono print.
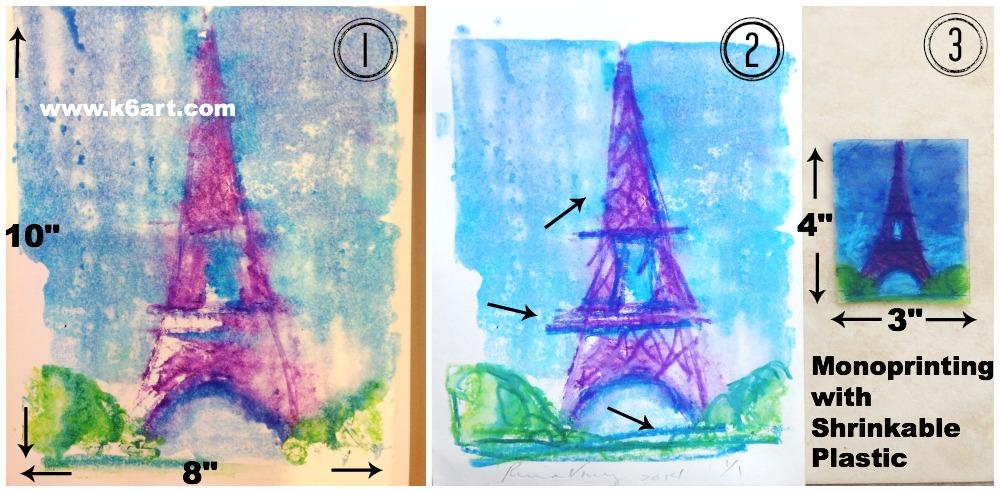
1. Monoprint onto watercolor paper. 2. Rework wet print with wax pastels 3. Rework plastic plate and shrink in oven.
Shrink the printing plate
Ready for even more fun? When you are done printing, re-color the Shrinky Dink printing plate and shrunk it in the oven.
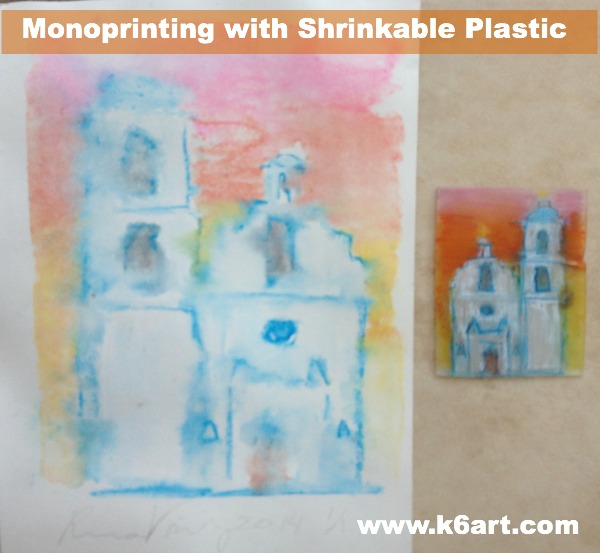
Yes, that’s right: I shrunk my printing plate in the oven. It’s beautiful! The colors are concentrated and rich. Just follow the directions on the Shrinky Dink package.
This mono print was made with watercolor pencils onto a scrap of dampened mat board. Time to shrink the printing plate!
Monoprinting with watercolor pencils
I used Reeves Watercolor Pencils to trace an impressionist painting onto my frosted Shrinky Dink plate. Then I printed onto a scrap of dampened mat board.
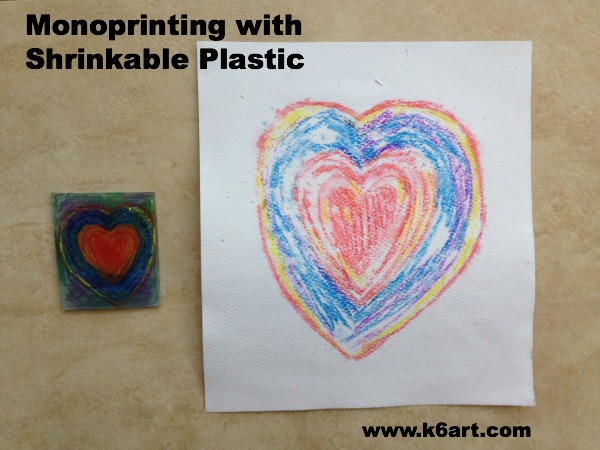
The printing plate started as a 1/4 sheet (4″x5″) of Shrinky Dink plastic. After printing, the plate shrunk to 1.5″x2″ Student work.
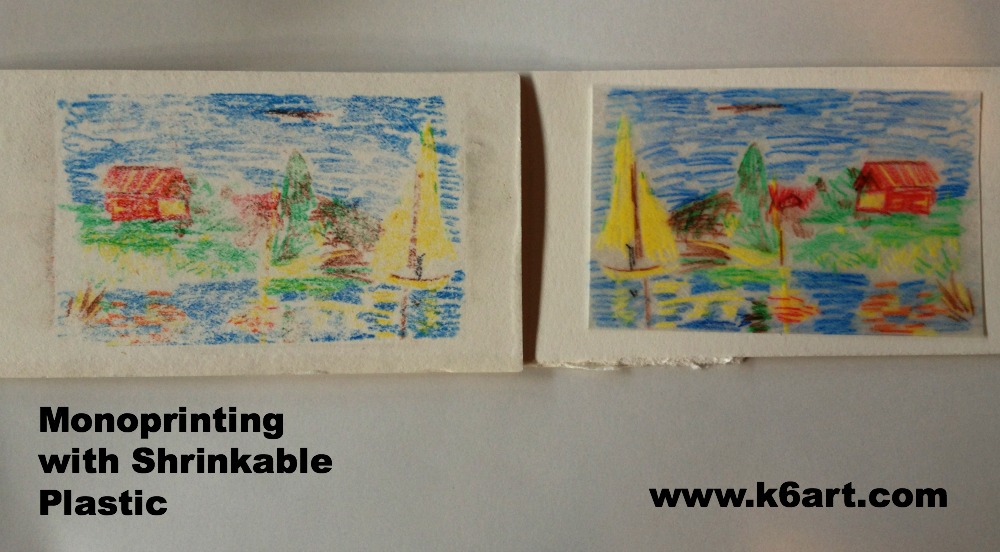
Try a mini monoprint with the kids
I used a full 8″x10″ sheet of Shrinky Dink plastic for my architectural mono prints, and I had to shrink each plate individually. This is not practical at school. Instead, try a 1/4 sheet of shrinkable plastic for the printing plate. I can shrink about 7 at a time on a full size cookie sheet. This is also a great way to use up scraps of watercolor paper.
Relax and enjoy the process…
These mono prints are somewhat experimental. You never know exactly what you’ll get. Try not to get caught up in perfectionism. If a print is less than perfect, rework it.
Thanks to Col Art for the samples of Reeves Watercolor Pencils and Reeves Wax Pastels. Thanks to awesome art teacher/blogger Cassie Stevens for creating our Artsy Book Club!
Enjoy!

What is the weirdest printing project you’ve ever tried?
note: this post contains affiliate links.