Warm and Cool Color Clay Rattles: 100% Success!

Warm and Cool Clay Rattles

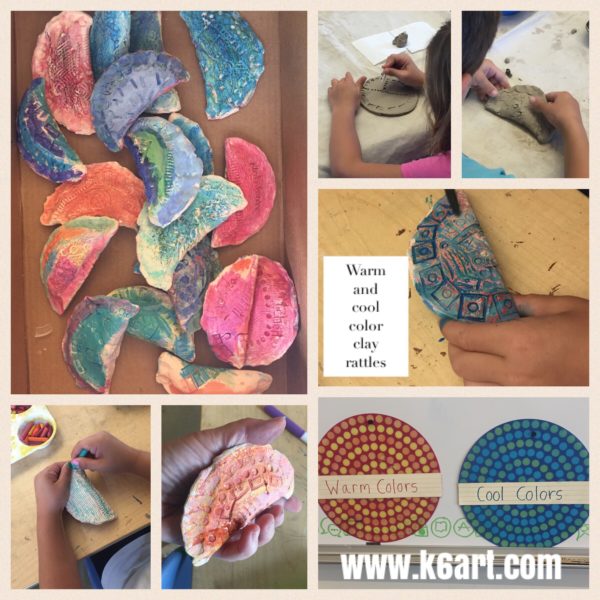
If you are looking for a super-successful clay lesson for Kindergarteners-second grade, you’ve come to the right place. These functional clay rattles only requires a single bisque firing, and are finished with a fast and easy warm and cool color process. Students, parents and teachers loved them. I’ve included an instructional video at the end of this post – all my kindergarten students watched it and created the rattles independently.

Materials:

To create the rattles:

  • Clay
  • Rolling pin and slats (or slab roller)
  • Circle template or bowl to trace
  • Pin tool
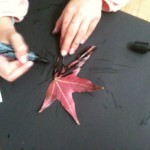
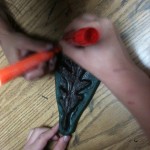
  • Texture tools (we used LEGO)
  • Toilet Paper
  • Toothbrushes and water bowls
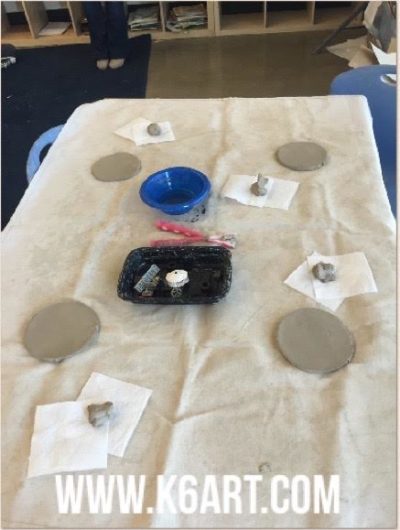
Prep:

Roll the slab and cut the circles. Cover the tables. Each table should have a tray of LEGO, one toothbrush for every two students, and small water dish. They also need a couple of squares of toilet paper and a little scrap clay.

table set up

Process is in my instructional video. This was a very effective video: 100% of KINDERGARTENERS did this project correctly and independently the first time. I strongly recommend showing this.

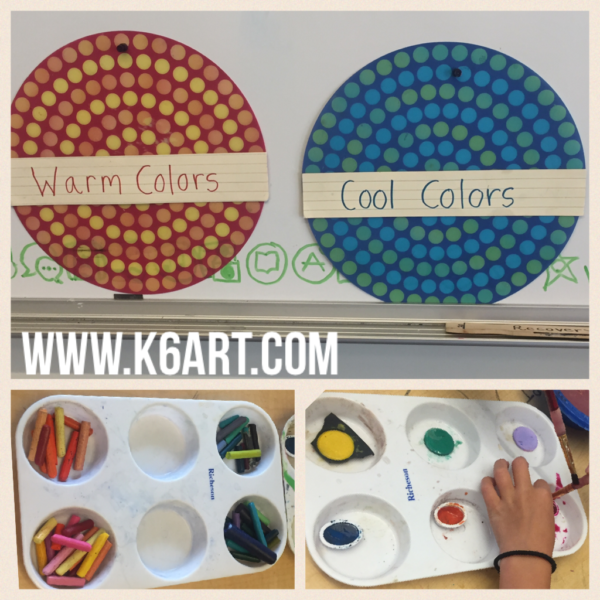
Coloring the rattles:

Materials:

  • crayons/construction paper crayons, sorted into warm and cool colors
  • individual pans of water color
  • brushes and water cups

Process:

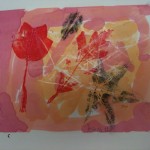
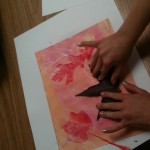
Students scribble on the textured ceramic with their crayons. Ideally, one side could be cool color crayons and the other warm. Then they paint over the crayons with (ideally), the opposite color scheme. This was kindergarten….some did it, some didn’t, but they all looked great.

This was a great end of year project: all my water colors had just about run out. Yet we had enough for this project. I sure look tired in this video, though. Typical for end of year…

Set-up for coloring the rattles

Enjoy!

Do you have a sure-fire clay project for kindergarten?

Have you tried creating instructional videos?

Warm and Cool Color Fall Leaves

It’s fall – time for a fall leaf project! This lesson takes just two 40-minute sessions and covers:

  • warm and cool colors
  • stenciling
  • organic shapes
  • positive and negative space
  • symmetry

Materials:

  • cardstock, cut into rectangles
  • pencils and erasers
  • scissors
  • white construction paper
  • oil pastels in warm colors (red, orange, yellow) (note: compensated affiliate link)
  • liquid watercolors in cool colors (purple, blue, green)
  • kosher salt (optional)

Leaf silhouettes


Session 1:

We looked at the silhouettes of fall leaves. We talked about the variety of leaf shapes. We discussed the difference between the organic leaf shapes and geometric shapes.

Next we created our stencils: students folded their cardstock, and drew a simple 1/2 leaf on the fold (note: don’t bother with a stem in your stencil design).

About 90% of second graders were able to design and cut a simple leaf stencil independently on their first attempt. As an alternative, you could cut stencils for your students.

Once we created the stencils we noticed they were symmetric. We also defined the leaf-shaped hole as the negative space and the leaf piece as the positive space.

Students stenciled multiple leaves . Some swapped stencils with their friends. After stenciling, they added a stem line to each leaf.

Paint leaves with cool color watercolors.

Session 2:

Students painted the leaves with liquid watercolors. They loved to see the oil pastel resist the paint. After painting, they had the option of sprinkling kosher salt on their wet art before placing their art on the drying rack.

Second grade results

Fall leaves with salt added.

Fall leaves with salt added.

The project was extremely successful. The students really enjoyed the process, and reviewed a lot of art concepts.

This lesson was inspired by  this post on Kids Art Market and this post on Use Your Colored Pencils.

Do you have a favorite fall leaves project?

Watercolor Marker Fall Leaf Prints

Second graders use watercolor markers to make colorful leaf prints. Allow two sessions.

The second graders just completed their annual fall leaf project. This year I used fall leaves to introduce second graders to the warm colors and printmaking in a two-part lesson.

Day 1: rub and paint

We discussed the warm colors and looked at some real fall leaves. Kids did leaf rubbings with real leaves and white crayons on white paper, and then painted over the paper with red, orange and yellow watercolors.

Day 2: watercolor marker printing

Today kids inked the backs of freshly fallen fall leaves with black watercolor markers and printed them on the colored paper. We used red and orange markers on rubber leaf stamps (similar to those used for gyotaku).

Allow time for extra time at the sink for hand washing.

What a hit!  All the kids loved the printing process. The second grade teachers LOVE the completed art as well and are trying to nab it for Thanksgiving place mats.

If you’ve never tried printmaking with watercolor markers, give it a try. There is almost no prep time and minimal clean up. You’ll be thankful!

I use Mr. Sketch watercolor markers. You could use any brand of water-based marker, but be sure they are very moist.


Related Posts Plugin for WordPress, Blogger...