Japanese Gyotaku Fish Prints

20140714-215156.jpg

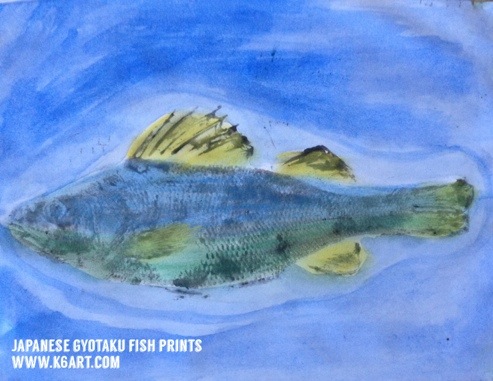
Gyotaku means ‘fish rubbing’ and is a printmaking technique traditionally used by Japanese fishermen to record their catches. It was the perfect project for my Japan-themed art camp.

We began by watching this brief video of Hawaiian gyotaku artist/fisherman Naoki.

The campers were really excited to start!

Materials:

  • rubber Gyotaku Fish Printing Replicas (or fresh real whole fish).
  • black tempera cake, water and stiff brush
  • copy paper
  • paper towels
  • chalk pastels
  • watercolors

(note: this post contains compensated affiliate links. Which means if you buy the rubber fish, I get a small commission. The rubber fish rock, BTW. They last forever, and you can share them with other teachers).

Instructions
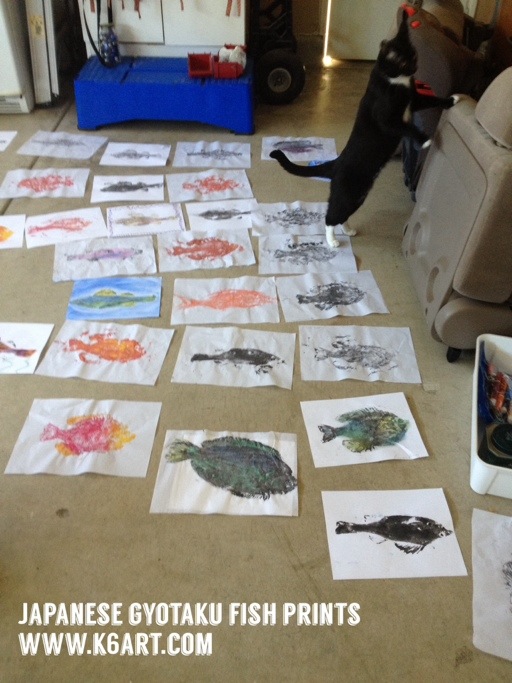
20140714-215533.jpg

We tried printing with thin Japanese paper and with copy paper. The thin paper wrinkled and copy paper stayed smooth. We also tried printing with liquid orange tempera.

Paint the fish with black tempera cake. Cover fish with copy paper and rub (don’t wiggle the paper!). Pull the print.
If the fine details (such as scales) don’t show, try Naoiki’s method: re-coat the fish and then pounce with a balled up paper towel to remove some paint. Cover with copy paper and take another print. Let dry.

Color the print with chalk pastels

In the video, Naoki hand-colors his gyotaku prints with watercolors. We used chalk pastels to add color to our fish. Campers blended the pastels with their hands or with tissues.
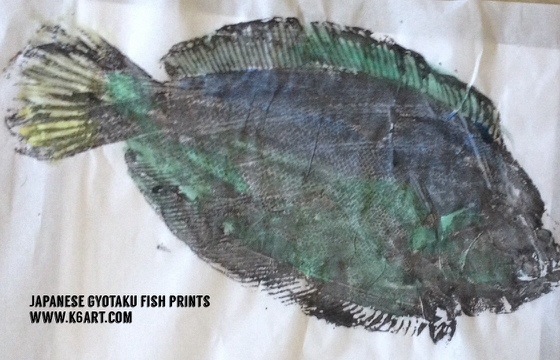
20140714-214632.jpg

I love how they turned out!

Campers also had the option of painting or decorating the negative spaces with watercolor. I really think they did a nice job.

The project was inspired by this post at the Fine Lines blog.

Enjoy!

This project was taught in my Japan-themed art + cooking camp. Each day we made an art project and a cooking project.
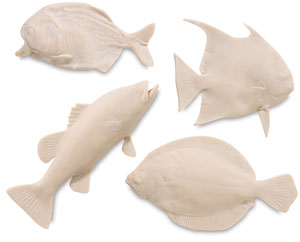

Gyotaku Fish Printing Replicas

from: Blick Art Materials

Modigliani Portraits of Mom


Modigliani portraits of mom

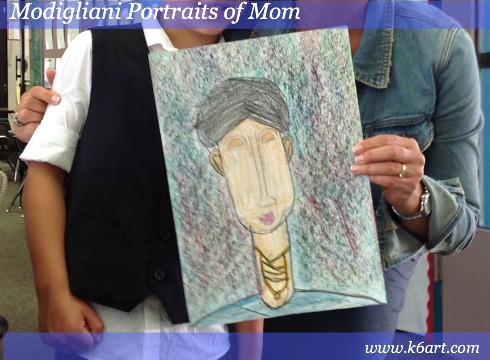
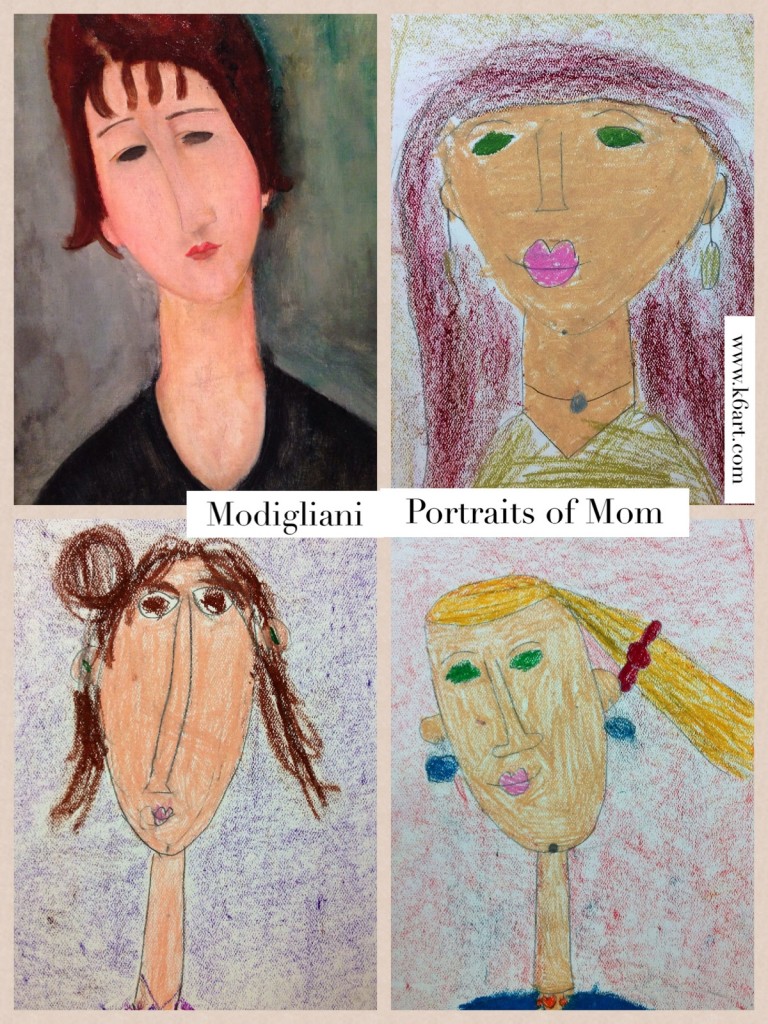
Our first graders just completed their Mother’s Day project – portraits of their Moms in the style of Amadeo Modigliani.

Day 1: Learn about Modigliani’s style; practice drawing.

We talked about how the artist’s style included almond-shaped eyes, long skinny noses, tiny lips, and long thin necks. Click here for my Modigliani powerpoint. Students did a practice drawing of Mom on copy paper.

I didn’t focus on Modigliani’s life as much of it was tragic. Click here to learn a bit more about Modigliani’s life.

Day 2: Draw portrait, color with oil pastel

We drew our portraits on watercolor paper using pencil. We colored with oil pastels. I offered several skin color options.  Students were encouraged to rub two colors of oil pastel in the background.

First grade results:

IMG_1796


I taught this project before – click here to see more examples of student work. This project would work really well for Father’s Day – Modigliani made many portraits of men.

Educate the parents

This year I sent the classroom teachers an explanatory email with images of Modigliani’s work and a link to his biography. The email will go home in the weekly classroom newsletter. (Why? Last year a mother commented she didn’t understand her gift – when I explained she said she had never heard of Modigliani).

Here is a 2-minute video of Modigliani’s portraits of women.

Enjoy!

iPad Blended Self-Portrait


iPad blended self portrait

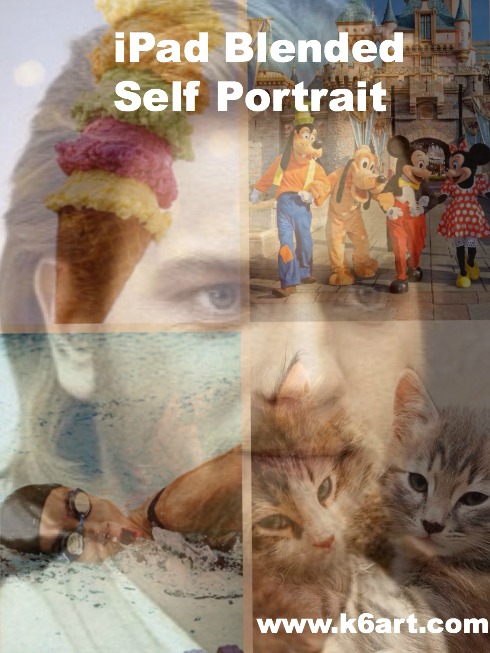
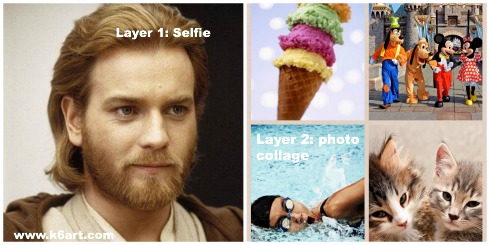
Our 6th grade did some quick blended self portraits using their iPads and two free apps: Pic Collage and Sketchbook X. The goal of the lesson was to learn the layers, free transform and opacity tools in Sketchbook X.

Obi-wan's favorite pet, vacation, activity and food are combined into a layered self portrait.

Obi-wan’s favorite pet, vacation, activity and food are combined into a blended self portrait. Allow one 40-minute class.

Step 1: Pic Collage App: create a photo collage of your favorite things

Students had to find four images representing

  • a pet (or dream pet)
  • favorite vacation (or dream vacation)
  • favorite food and
  • favorite activity or sport

The Pic Collage app allows students to add photos directly from the web without a Google image search. The students arranged them in a grid template, then saved to the iPad camera roll.

Step 2: Sketchbook X App: working with layers and free transform

In Sketchbook X, students created two layers. Layer one was used to shoot a selfie, and layer two was used to import the photo collage from the camera roll. For many students it was necessary to use the free transform tool to resize the photos to fill the screen. .

Step 3: Sketchbook X app: Adjust the opacity to reveal the blended self portrait

Students used the opacity slider in the first layer to reduce opacity and reveal the photo collage layer underneath.

I create a 10 minute video tutorial of the process.

Students saved their completed portraits to their camera roll, then turned them in to me electronically via Google drive.  Click here to read about how students turn in digital art.

Notes:

  •  Instead of finding photos on Google image, use students’ personal pet and vacation photos. Students could bring them to class as printed photos, or digitally via Google drive.
  • Want to skip Sketchbook X? Combine your photos with free photo blending apps, such as  iBlendy2 or Photoblend.
  • Video tutorial recorded with the AirServer app for Mac.

Enjoy!

Flipped Art Room – What I Learned at NAEA14

One of the best sessions I attended at NAEA14 had to be Meranda Dawkins ‘Flipping the Art Classroom’. Not familiar with flipped classrooms? Essentially, the teacher creates a video lesson which is viewed by the students at home. The next day, students come to school and do the assignment.

Meranda creates her own instructional videos and  does a ‘modified’ flipped art room: although she sends the lesson link home, she shows the videos at the beginning of class. After viewing, Meranda puts the video on mute and loops it during the rest of class.

This is great way to catch up a kid who was absent, or to help kids who don’t pay attention very well. It also benefits the art teacher who teaches the same lesson to multiple classes: you won’t leave anything out no matter how many classes you teach.

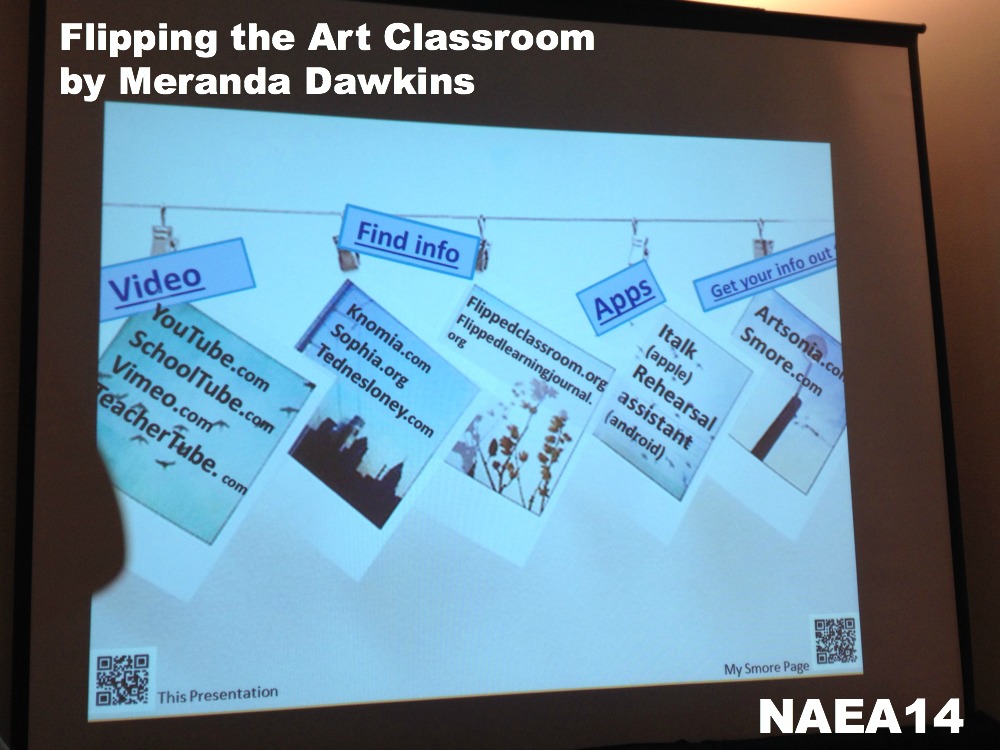
flipping the art classroom by meranda dawkins

Slide from Meranda Dawkins NAEA14 session. Scan the QR code at lower right to see all of Meranda’s lessons on smore.com

The big eye-opener for me was Meranda’s use of Smore to organize and send out her lessons. Smore.com is an online flyer design website.  I thought Smores were just a way to put out cute classroom newsletters. Not true! Meranda embedded images of Degas, a vocabulary check list and two instructional videos in this Smore.

Enjoy!

Have you ever flipped a lesson?

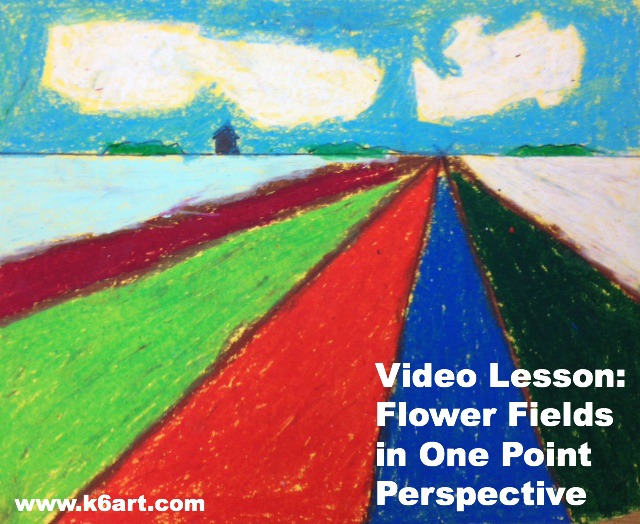
Video Lesson: Flower Fields in One-Point Perspective

flower fields in one point perspective

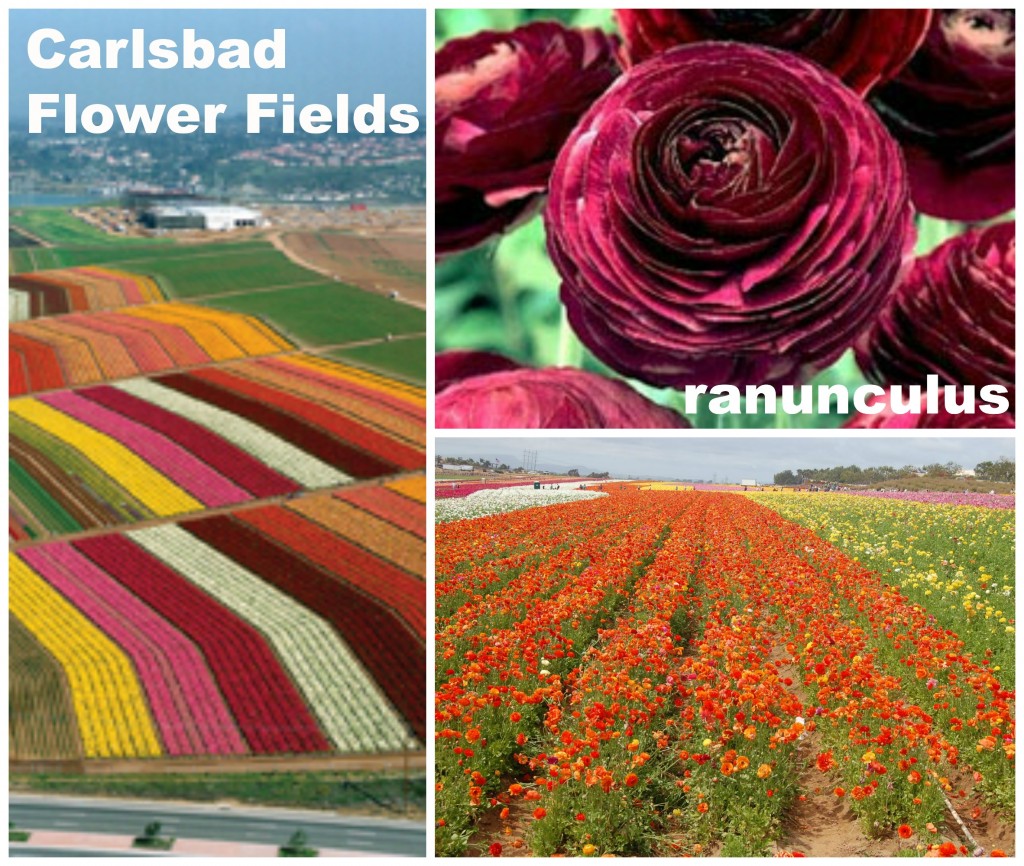
Spring is here. This month the beautiful Flower Fields in Carlsbad, California burst into bloom.

Flower Fields in Carlsbad, CA. Photo sources: bloomingbulbs.com;

Flower Fields in Carlsbad, CA. Photo sources: bloomingbulbs.com;

The fields are filled with colorful ranunculus flowers. Each spring families throughout San Diego trek to the Flower Fields to admire their beauty. This outing is very popular – a show of hands revealed almost all my 5th and 6th graders had visited the Flower Fields.

We drew the flower fields in one-point perspective to create an illusion of depth. We used colored 9″x12″ construction paper, rulers, pencils and erasers and oil pastels. In this 13 minute video, I demonstrate drawing the horizon line, vanishing point, and orthogonals to create the illusion of depth.

Thanks to Hope Knight at Mrs. Knight’s Smartest Artists for this lesson. For similar lessons using markers check out this post on A Faithful Attempt and this post on Kids Artists.

Enjoy!

Related Posts Plugin for WordPress, Blogger...