Here is an art project that teaches students about texture, is lots of fun and is perfect for both distance learning and the classroom.
Enjoy!
-Rina

Here is an art project that teaches students about texture, is lots of fun and is perfect for both distance learning and the classroom.
Enjoy!
-Rina
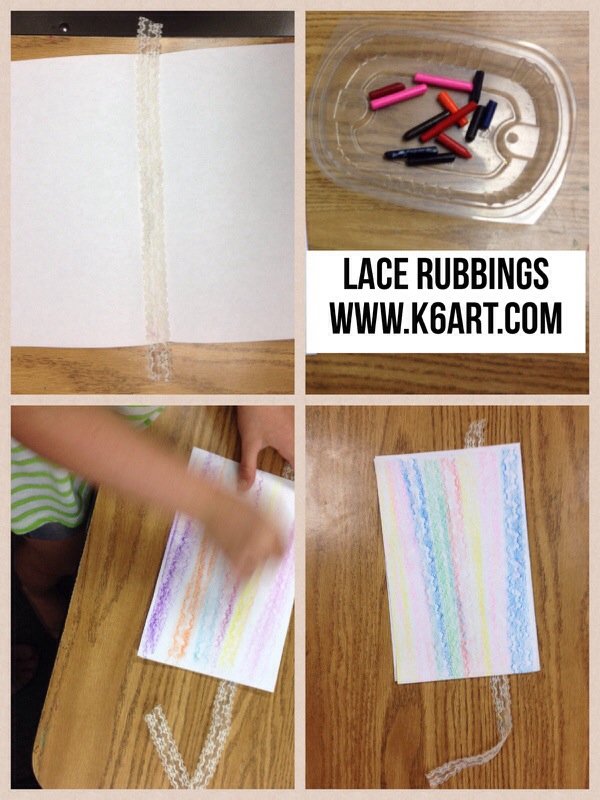
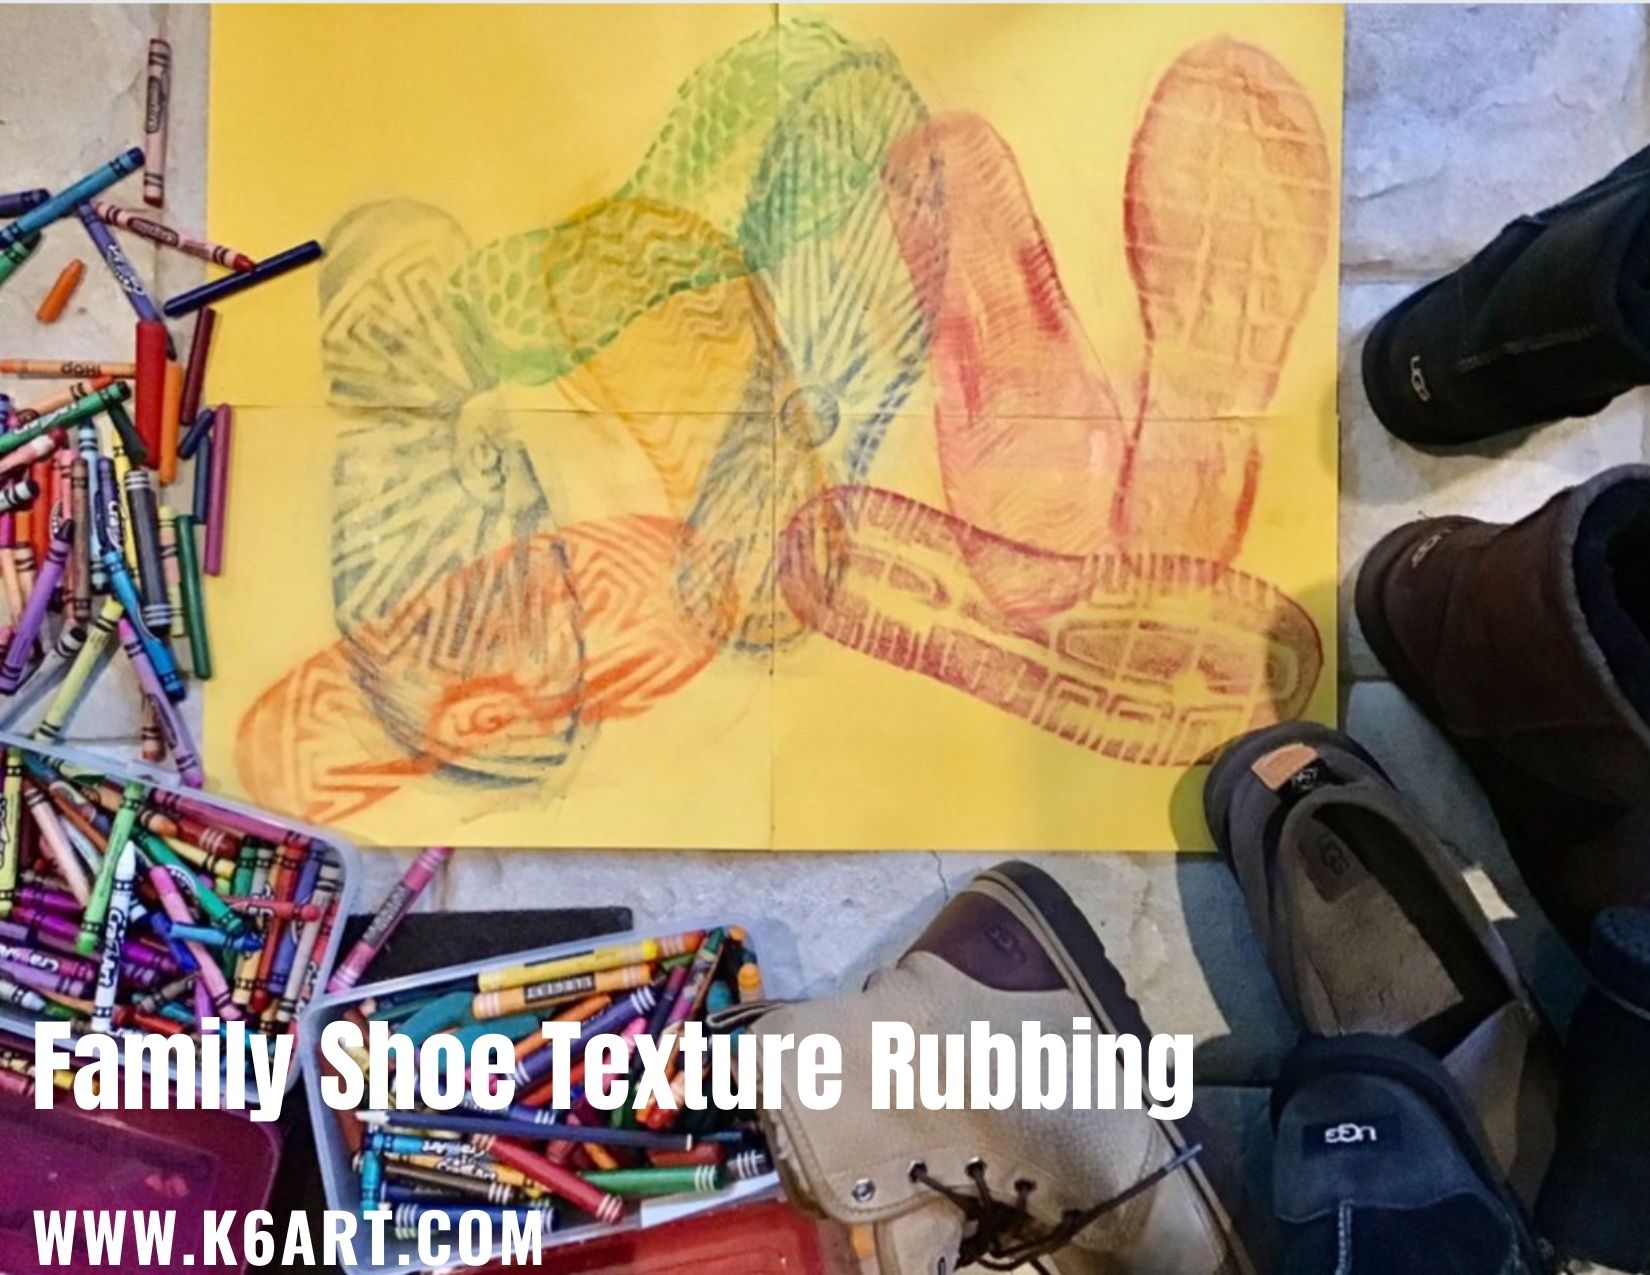
Here’s an easy end-of-year art project that has no clean up yet teaches about texture.
Materials:
Copy paper
Pieces of lace, approx. 14″ long
Peeled crayons – variety of colors
First we talk about physical texture. Students run their fingers along the lace. They described the lace as ‘bumpy’ or ‘rough’. Next we folded the copy paper horizontally (‘hamburger’) and sandwiched the lace inside, parallel to the crease. Students closed their papers and rubbed the covered lace with a peeled crayon.
The kindergarteners and first graders were AMAZED when the lace texture appeared on the paper. We opened the papers, scooted the lace over an inch or so, and repeated the process with a variety of peeled crayons. Within a few minutes, students had a lovely striped lace paper.
Physical vs Visual Texture
We had a quick discussion about physical and visual texture. Students ran their hands over their crayon art. How did the paper feel? Did it feel the same as the lace? The bumpy lace has texture you can feel. This is physical (tactile) texture. The rubbing has texture we can see but not feel. .This illusion of texture is called visual texture.
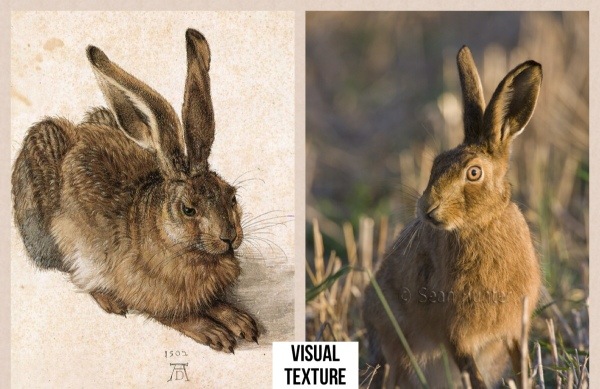
I showed students a laminated poster of Durer’s hare. I instructed them to close their eyes and imagine petting the rabbit’s soft fur. They agreed the artists had done a great job painting the hare so that the fur looked real (visual texture). I let them touch the laminated card – it just felt like smooth plastic. The art just had visual, but not physical texture.
We went on to create crayon rubbings of other textured items such as cardboard coffee sleeves and pennies. They loved rubbings – one student said it was the best thing we did all year.
Enjoy!

What’s your best end-of-year art project?
Want to introduce your students to texture? Try a texture collage project.

Collage and Construction in Grades 1-4 by Lois Lord, 1970 edition.
I found great instructions in the book Collage and Construction in Grades 1-4 by master art teacher/author Lois Lord. You’ll need large paper for the background format, glue, stapler and scissors, plus ‘materials of contrasting texture’:
Rough textured materials include corrugated cardboard, burlap…used sandpaper, wood shavings, egg-crate dividers, excelsior, and orange, onion and potato sacks.
Contrasting soft -textured material include pieces of fabric such as velvet; scraps of fur; cotton; bits of sponge; and feathers…
Materials with smooth textures include shiny metallic papers bought or salvaged from Christmas wrappings, chewing gum, and other packets.
–Collage and Construction in Grades 1-4, p.10.
Lucky you – you get to actually watch Ms. Lord teach this collage lesson. Please enjoy ‘Collage: Exploring Texture’, filmed back in 1961.
http://vimeo.com/33304500
Not only to I love Ms. Lord’s teaching style, I love how she organized her collage supplies by texture and how she distributed the supplies. I wish she had been my teacher! Although this film was produced back in 1961, it is still inspiring.
You may have noticed Ms. Lord’s students used jars of liquid paste applied with a brush. It reminded me of this no-spill paint cup filled with glue at the collage station at San Diego’s New Children’s Museum. The cups come with lids so you can cap them up at night. You will need to soak the brushes in water after use. (note: this may be a good use for the brushes that come with your pan watercolor sets). Want more glue options? Click here and here to see other glue cups in the classroom.
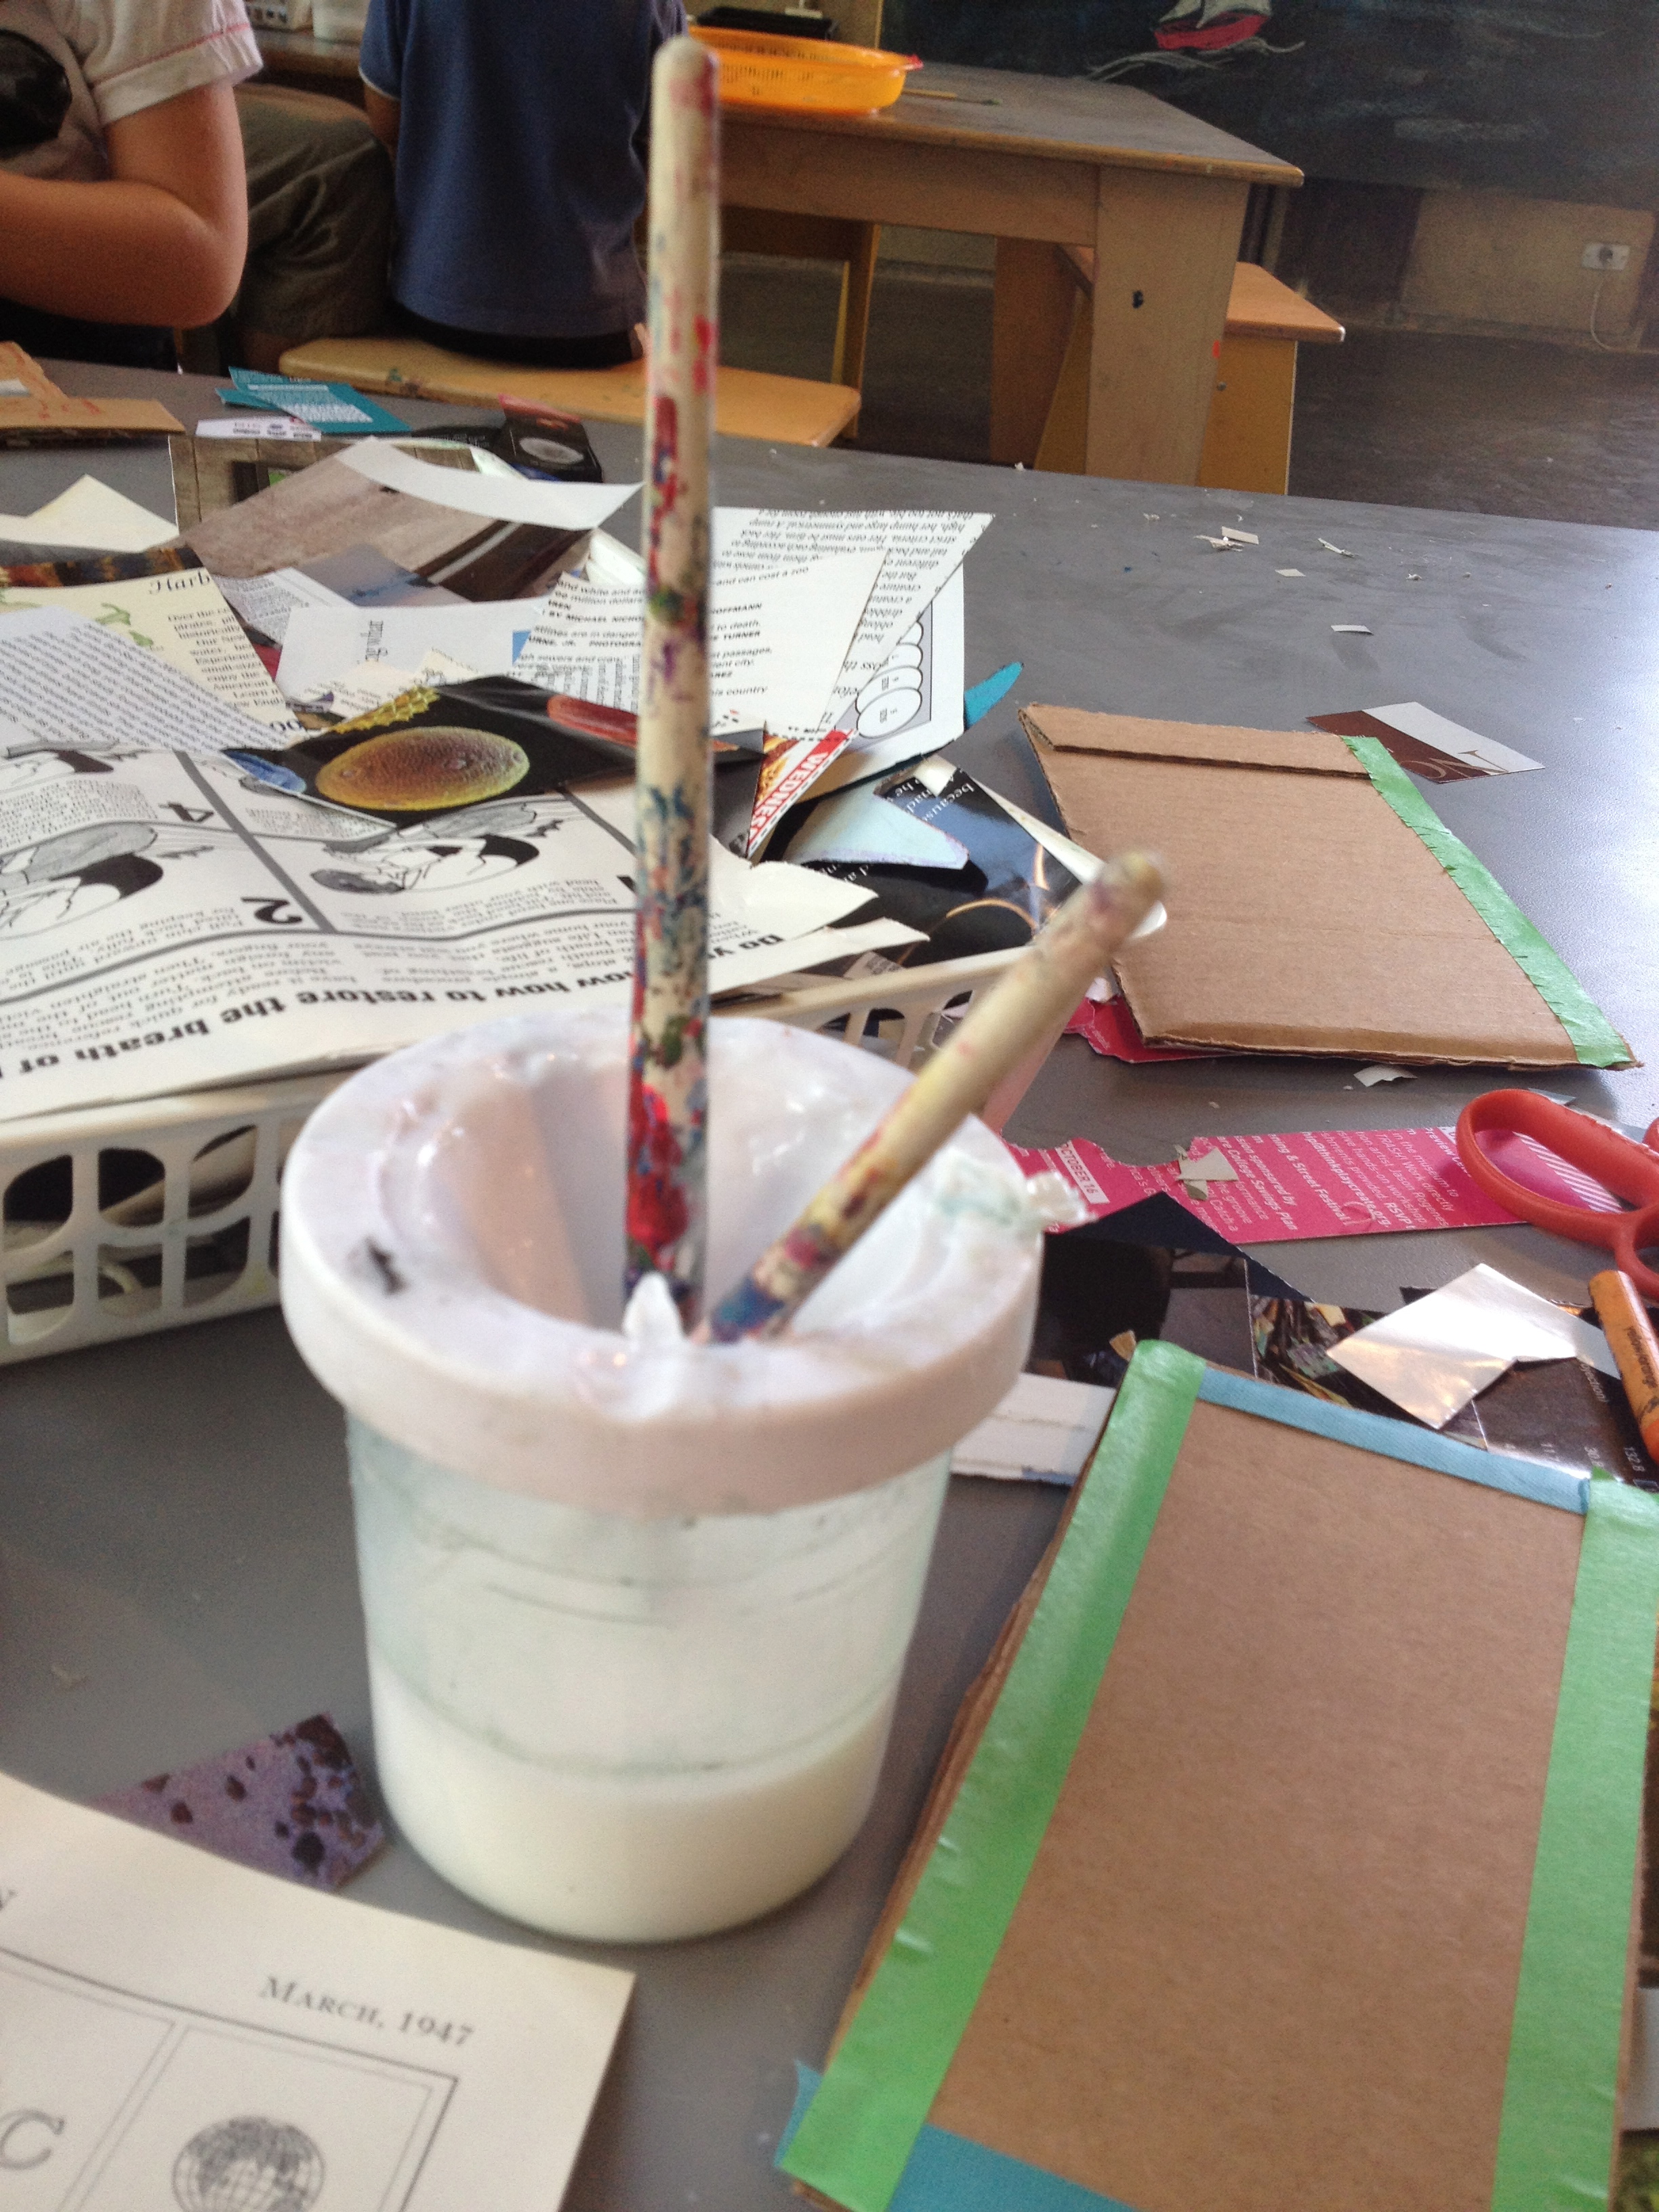
White glue in spill-proof paint cup at San Diego’s New Children’s Museum.
Thanks to Wendy Apfel for sharing this excellent video on Vimeo.
Enjoy!
Happy Throwback Thursday! Stop by next Thursday to see what I’ve discovered in my vintage art education collection.

Textured curling ribbon tied in a bow looks great on this wrapped gift. The gingerbread man is trimmed in rick rack.
Need a fun and flexible holiday project? Try making you own collagraph crayon rubbings, using cardboard and scraps. The project takes about one hour and is adaptable to all sorts of holidays like Valentine’s Day and birthdays.
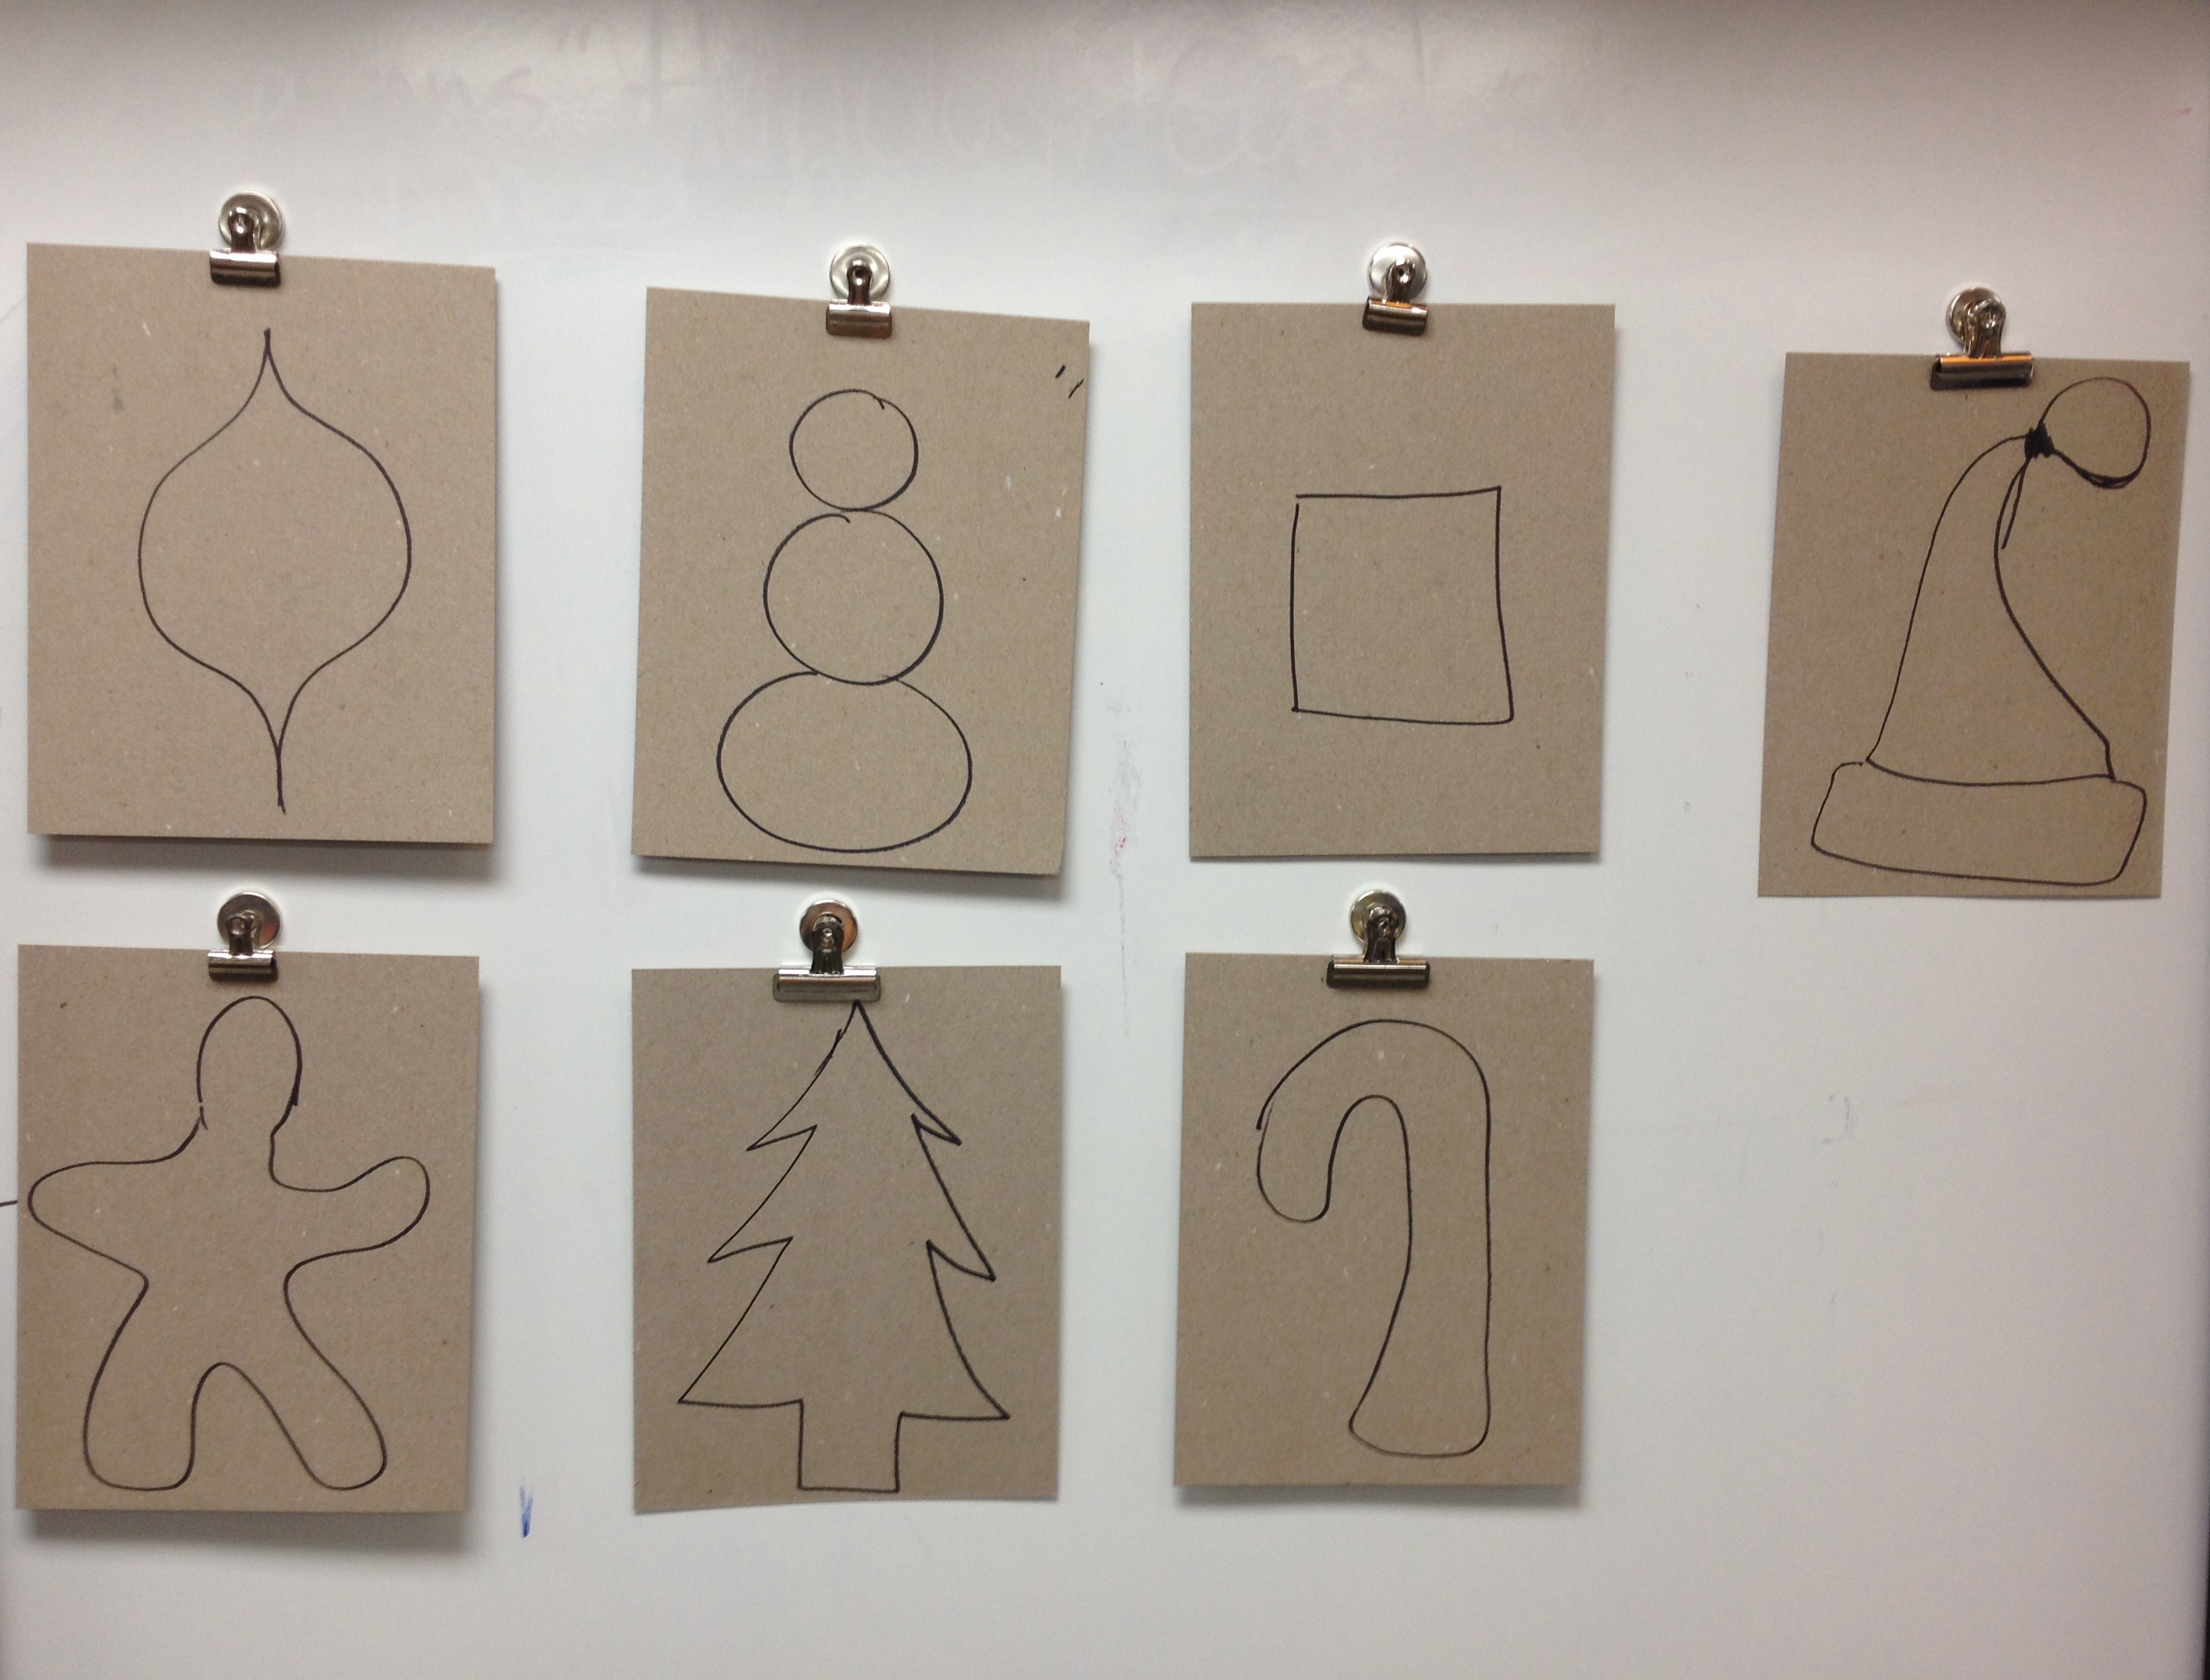
Students drew one holiday shape on cardboard, then cut it out.
Select one holiday shape for the main part of the collagraph. Draw the shape on the first piece of cardboard and cut it out (note: for those students creating their own designs, emphasize that the design needs to be simple and stretched to the top and bottom of the page).
Glue the cut-out shapes to the second piece of cardboard using glue stick. You have now created a collagraph rubbing plate.
Now for the fun!
Cut decorations for your collagraph plate from your cardboard scraps and from fabric trim. Experiment with the craft scissors and the hole punch. Glue these decorations on top of and around your main shape. LAYERING IS GOOD! TEXTURE IS GOOD!
Now flip over the collagraph plate and place it face down on your chair. SIT ON THE CARDBOARD AND COUNT TO 30. (It is so fun to do this step!) Now all the pieces are glued down are we are ready to rub.
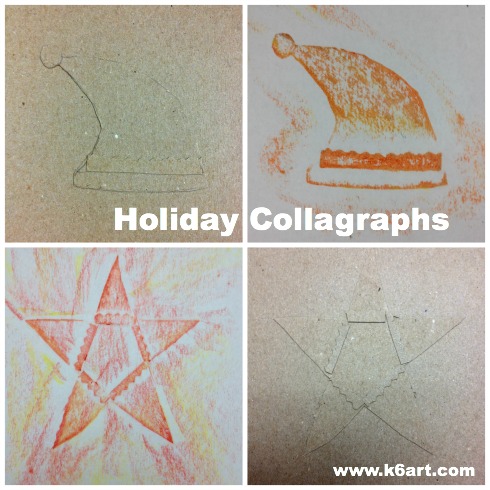
Santa hat and star, decorated with cardboard cut with Fiskar paper edgers.
Place your collagraph face up on the table. Cover with the copy paper. Rub with a peeled crayon (note: it is helpful to have a partner hold the plate while the student rubs). Repeat with another crayon color.
Now trade collagraph rubbing plates with your neighbor. Or rotate tables so everyone comes away with a set of holiday cards.
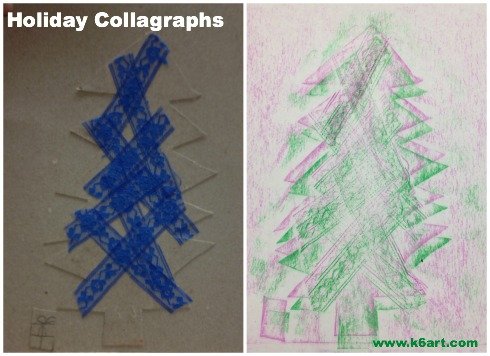
This students glued lace to her tree for texture. She did two rubbings with green and magenta crayons.
This technique would make awesome cards for birthdays – imagine a collagraph layer cake with rick rack candles. Imagine a textured doily rubbing plate for Valentine’s Day cards.
If you want to take this project a step further, you can roll printer’s ink on the collagraph and pull some prints. You can also color or paint the collagraph plate so it become an artwork.
Want more ideas? Check out my previous post on 30-minute collagraph printmaking.
Enjoy!
Do you have a fun way of making holiday cards?

Want to try a printmaking project that is quick, fun, versatile and inexpensive? Try collographs.

Maxi Moraga leads collograph workshop in NCM’s art education room.
I took Maxi Moraga’s fabulous collograph workshop last month at San Diego’s New Children’s Museum. This workshop tied in to the NCM’s current exhibition, TRASH, so we used lots of recycled/discarded items to create our printing plates.
Materials:
We began by creating printing plates. We collaged various items to our cardboard rectangles (note: Maxi strongly encouraged us to use glue stick). Here are some of the plates:

Collograph plates. Yarn is simply wrapped around the plate.


Tip: after completing plate, ask students to flip plate upside down on their chairs and sit on them for 60 seconds! Now your plate is really glued down and ready to print.
Next, we applied printer’s ink to our plates using these mini-brayers and recycled plastic trays. I love that the tray has a lip to keep the brayer constrained. Great when you are printing with young children!

Apply printer’s ink with a brayer.
We didn’t use a press. We simply put the paper over the inked plate and rubbed the paper carefully with our hands.
Options:

My favorite piece is the masking tape collograph made with corrugated cardboard.

Because of the emphasis on recycled materials, this would be a nice Earth Day project as well!
Whether you are a parent or a teacher, be sure to check out the New Children’s Museum when you visit San Diego. The museum offers art-making activities for children EVERY DAY. I wrote more about the museum in this post.
Do you have a favorite printmaking project?
UPDATE: 12/16/13: Check out my new post – ‘Holiday Collagraph Crayon Rubbings’
Enjoy!
![]()