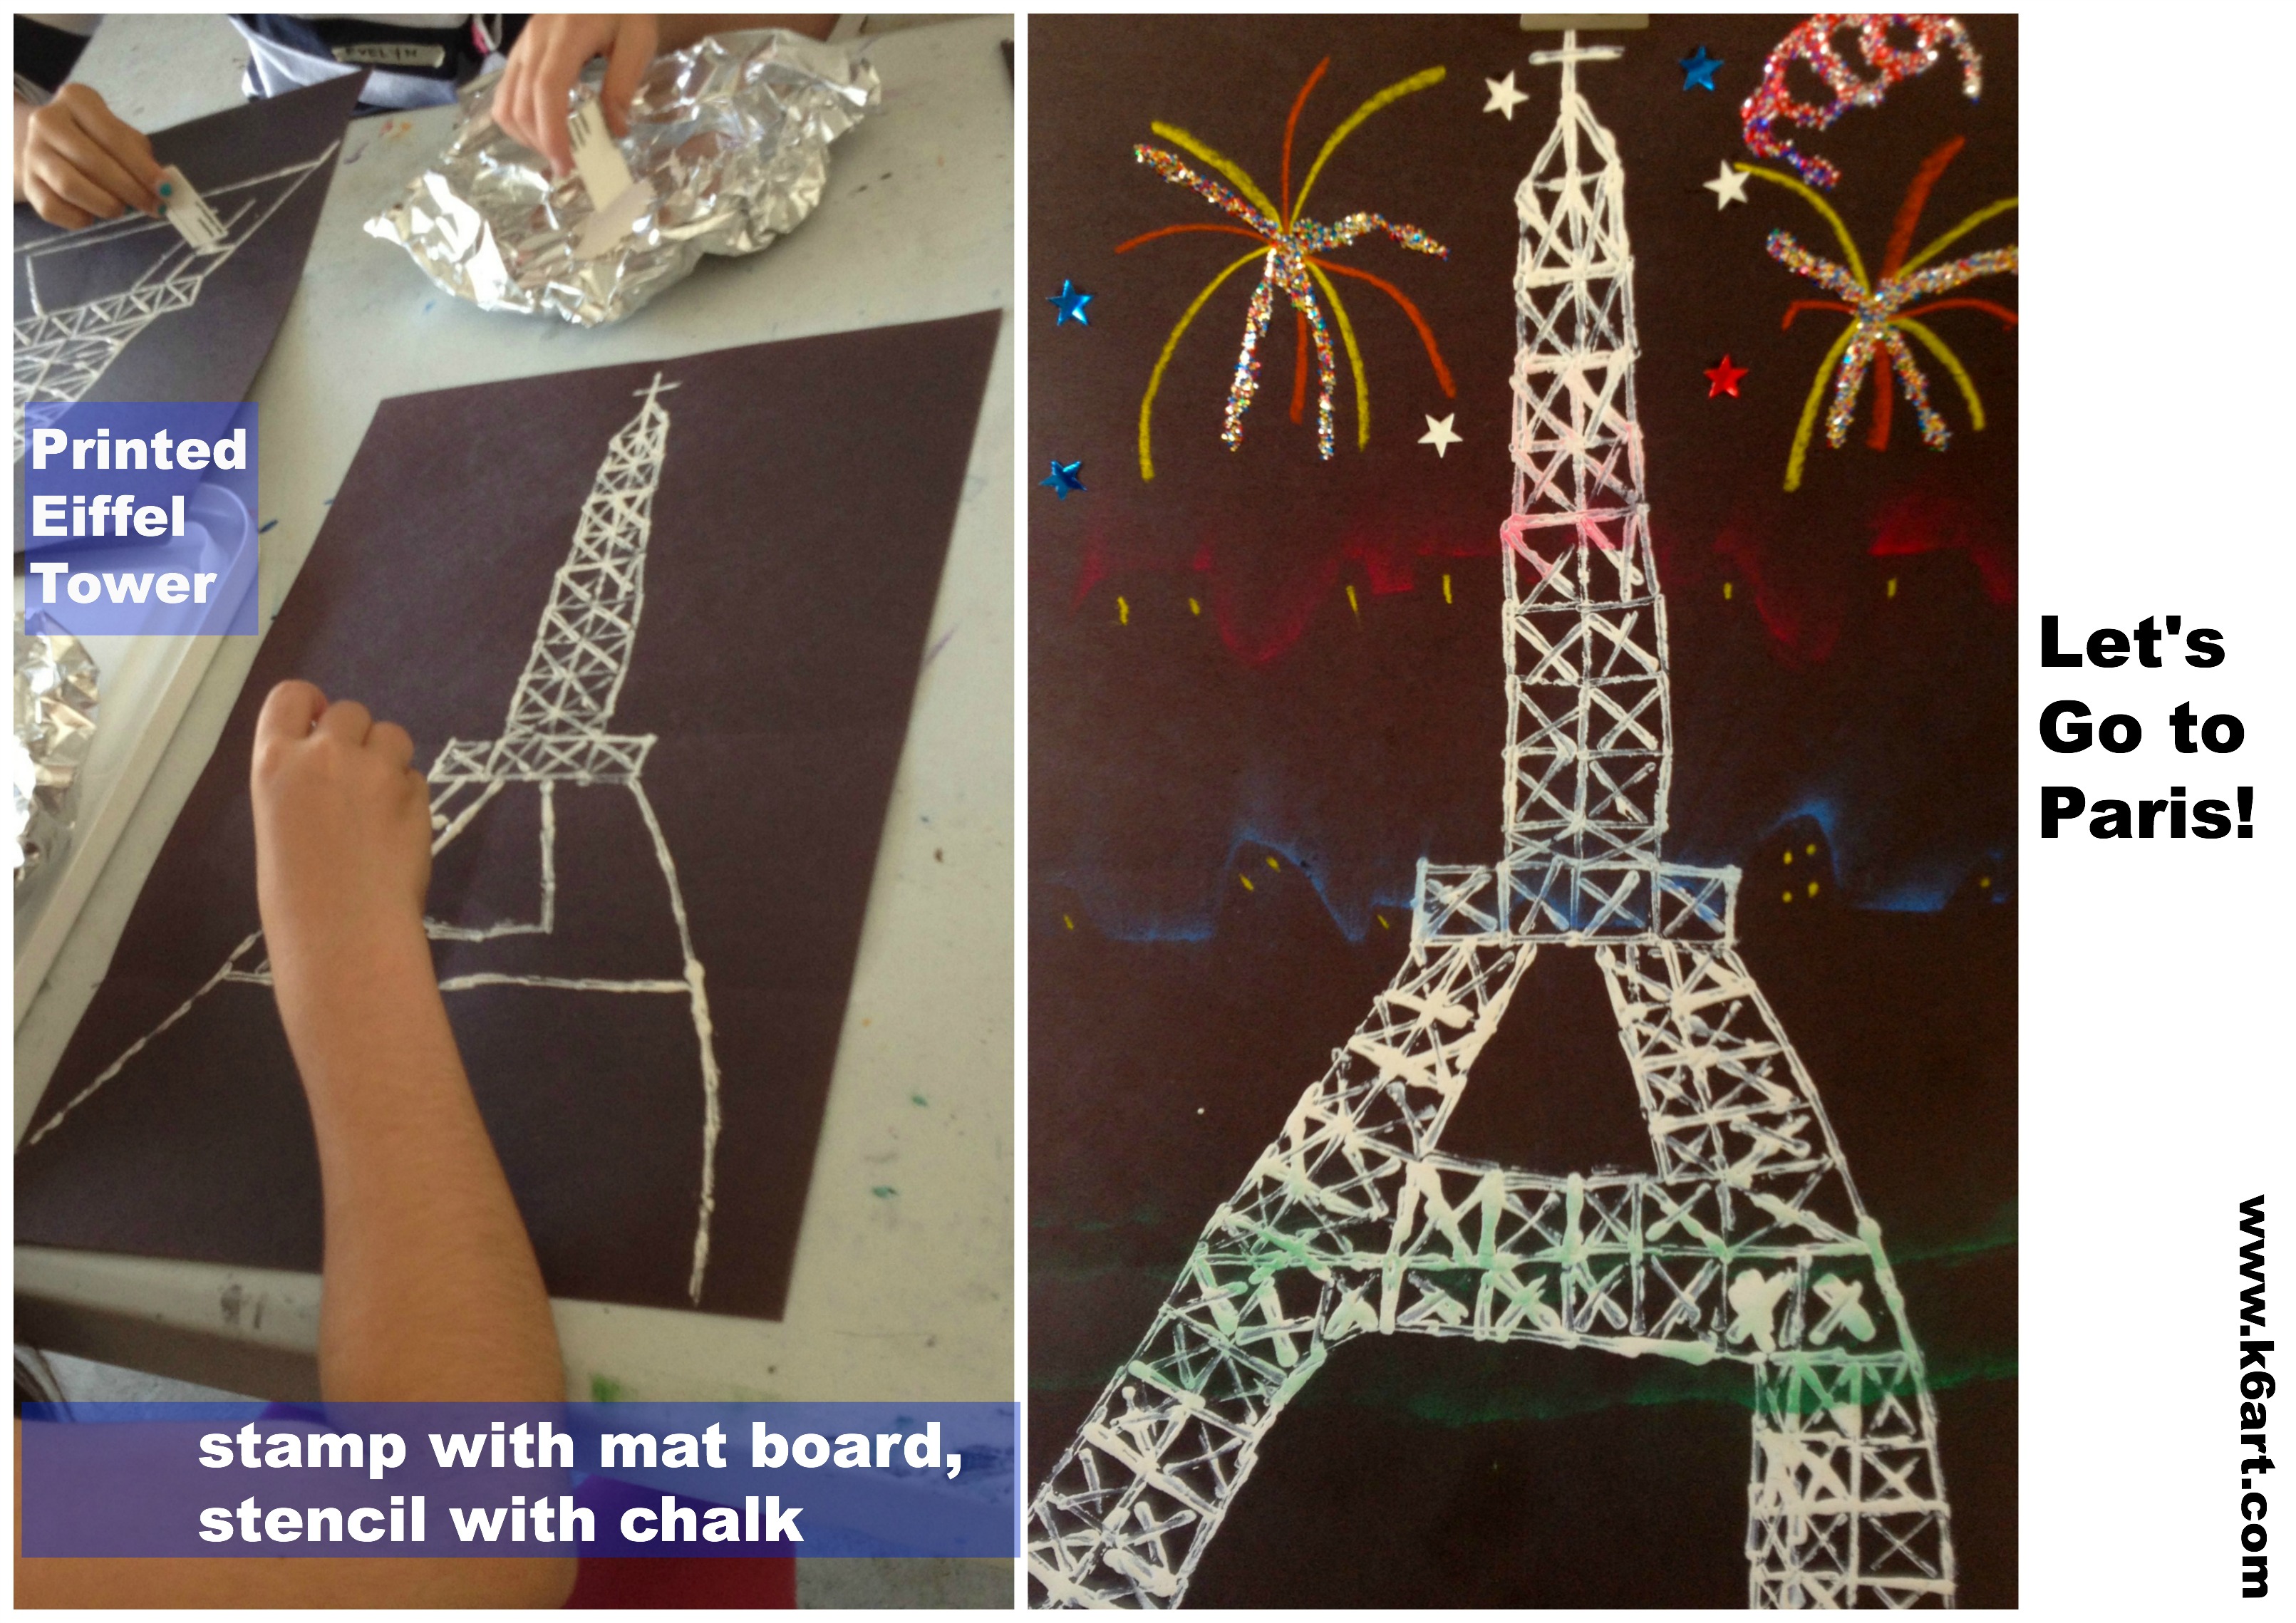
I just finished my Paris-themed art and cooking camp. The kids loved to make these printed Eiffel Towers. The project is inspired by this fabulous post at the Cassie Stephens blog (please check out the post – it has excellent directions!).
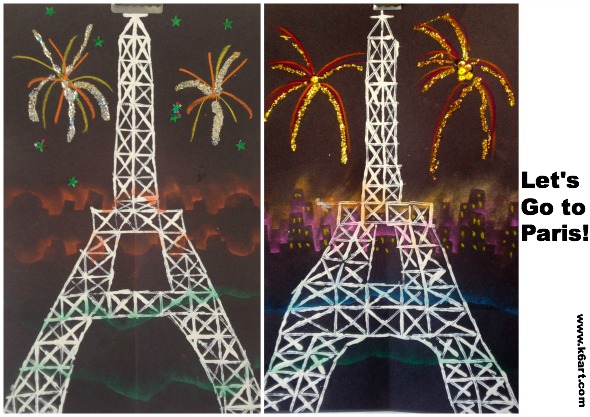
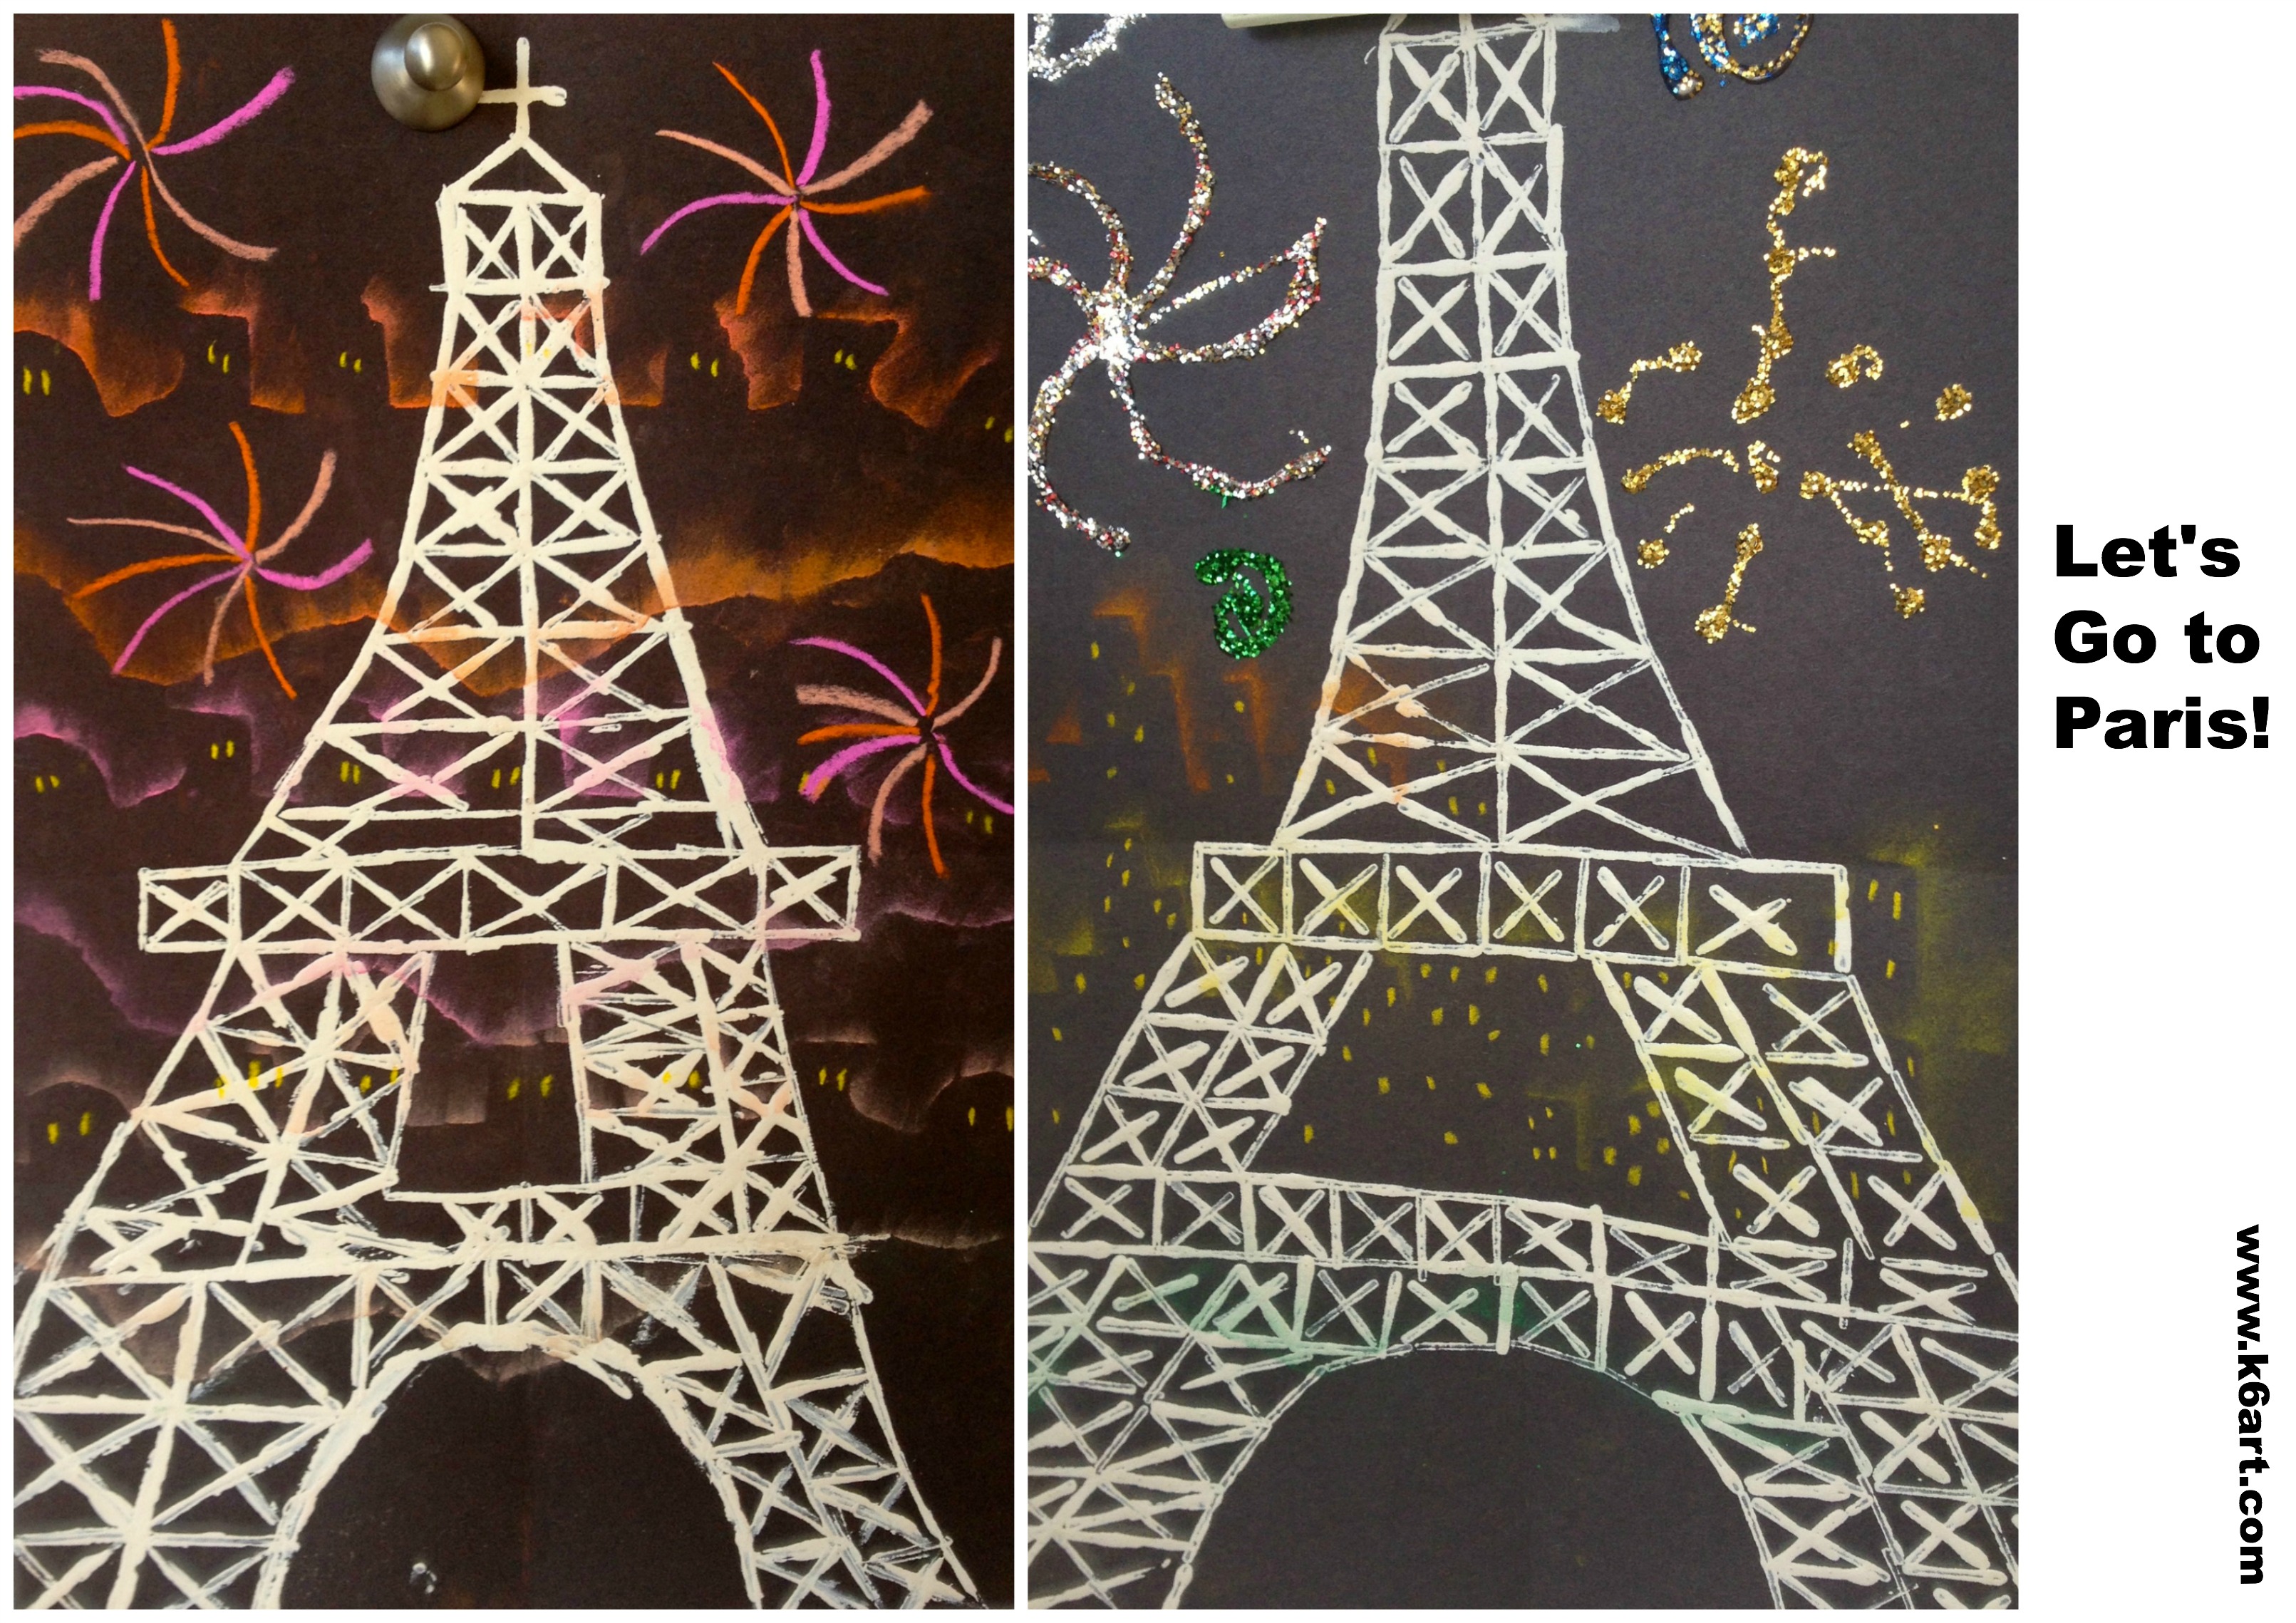
We used white craft paint and 1″x2″ pieces of mat board to print our Eiffel Towers. When dry, we added detail with chalk pastels and hand-made stencils. Finally we added pastel fireworks outlined with glue and glitter. Some kids stuck on gummed stars to make the Parisian night sparkle.
The kids loved this brief video of fireworks at the Eiffel Tower.
In my one week Paris-themed art + cooking camp, we made crepes, meringues and madeleines! Click here, here and here to see our other art and food projects (with recipes).
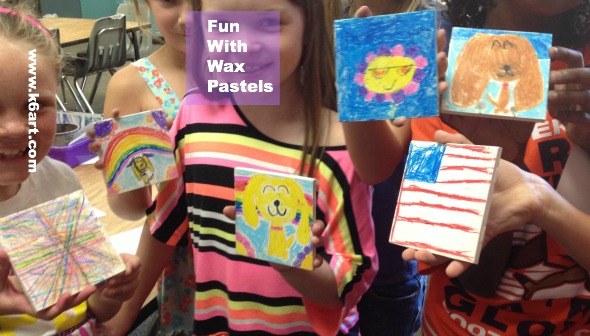
Isn’t it exciting to try out a new art supply? I received a big pack of Reeves Water Soluble Wax Pastels in a gift bag from Col Art. Today I tested them out with a group of second graders.
I really wanted to try printing with the wax pastels. Here are some of our experiments:
E. drew wax pastel fireworks on aluminum foil. She placed a dampened piece of copy paper on the foil and rubbed. She was very pleased with her wax pastel mono print!
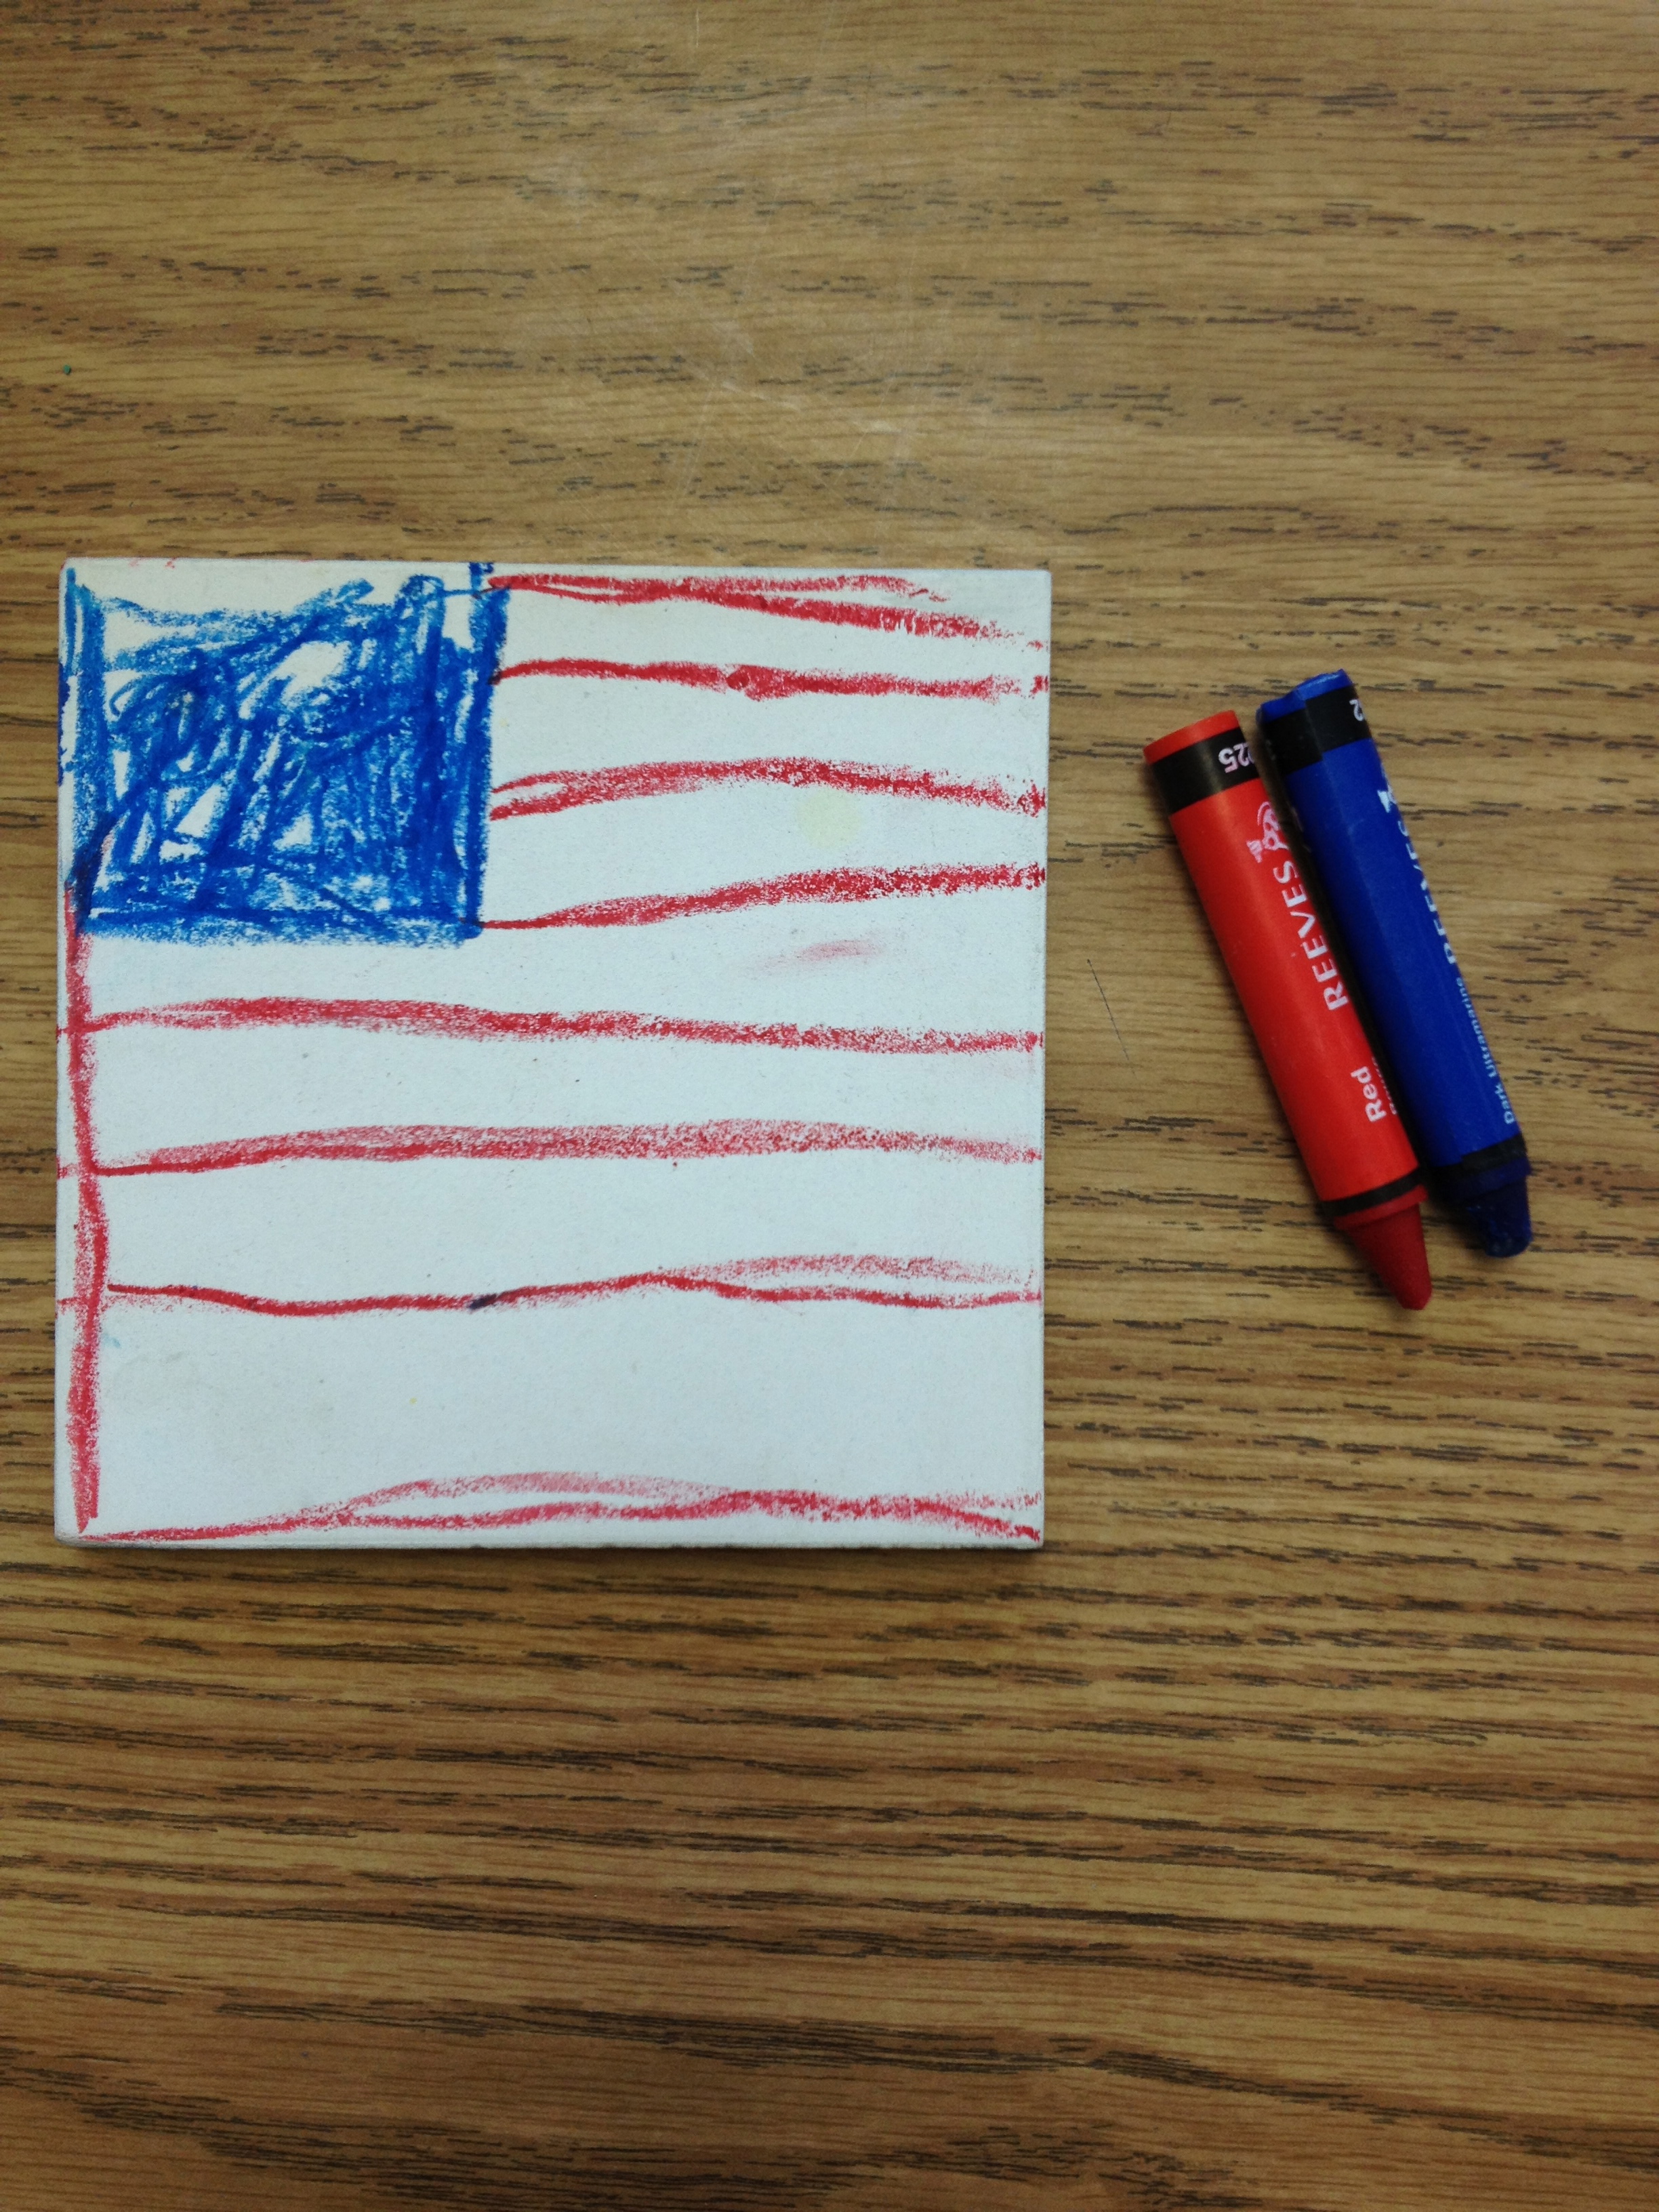
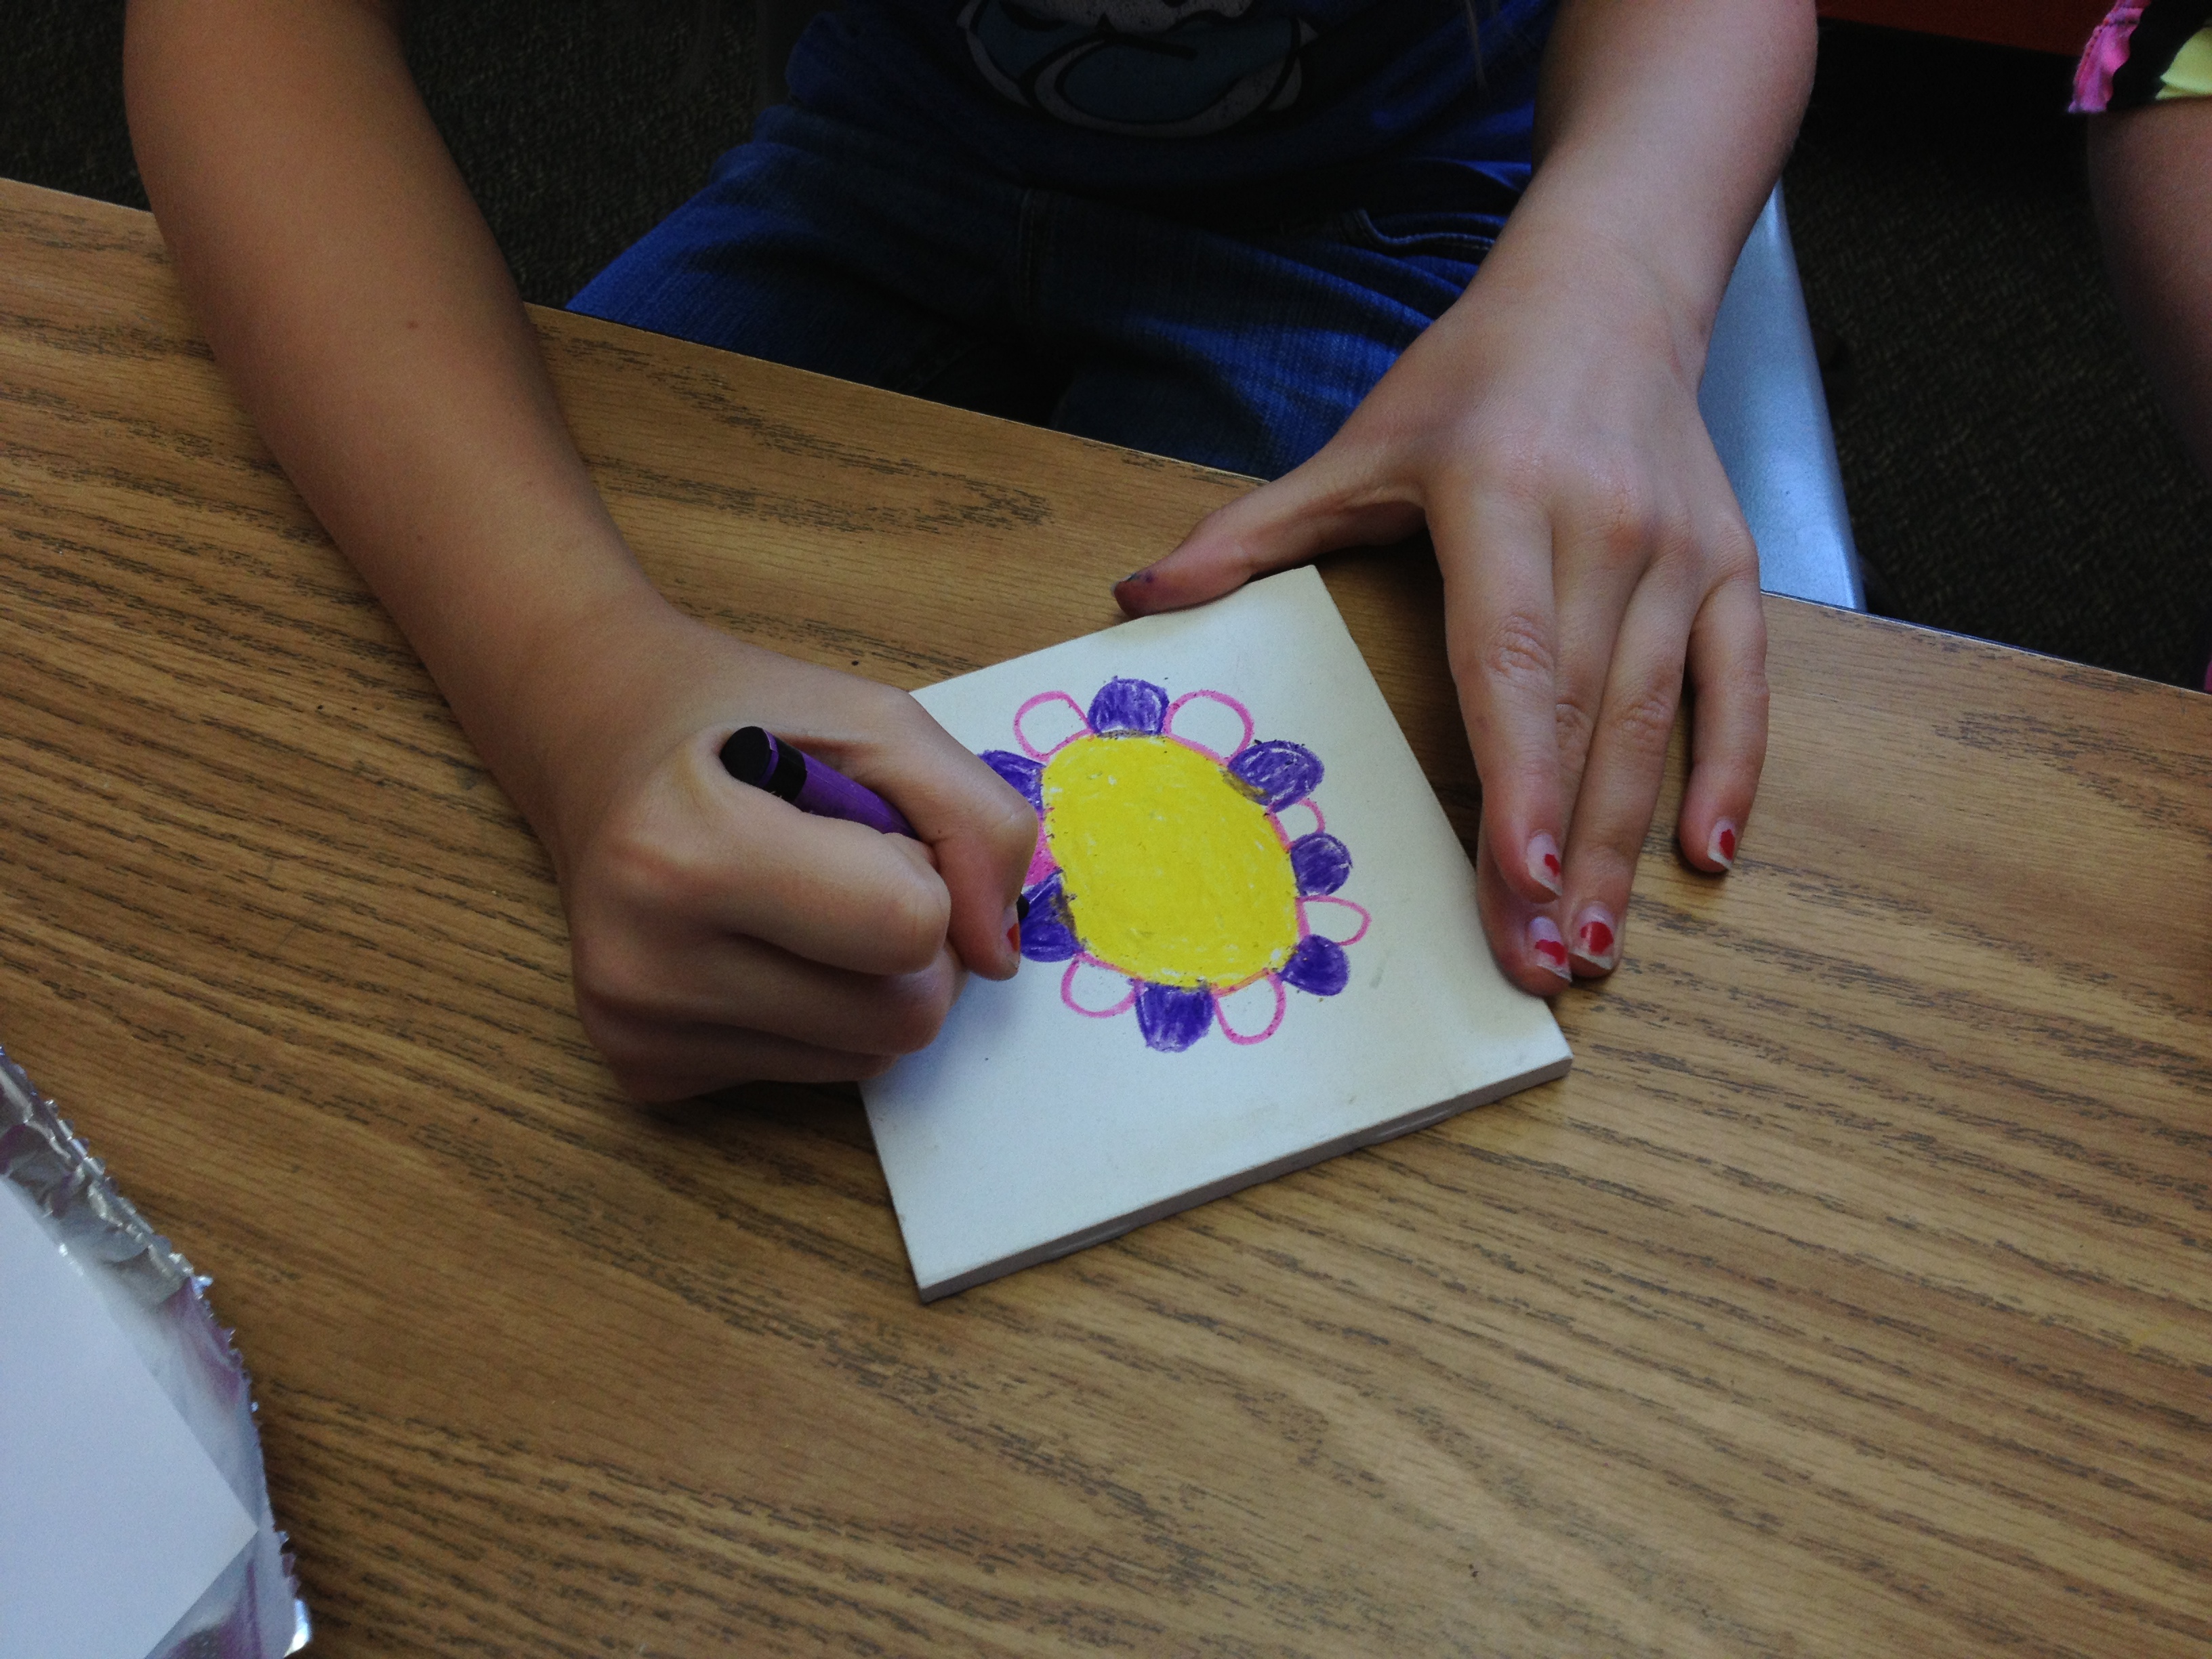
Wax pastel on unglazed tile
I was curious to see how the wax pastels worked on different surfaces. Next we drew on unglazed white tile.
Wax pastel on unglazed tile
The pastels glided on the unglazed tile. They didn’t smear like oil pastels. But could we print with them?
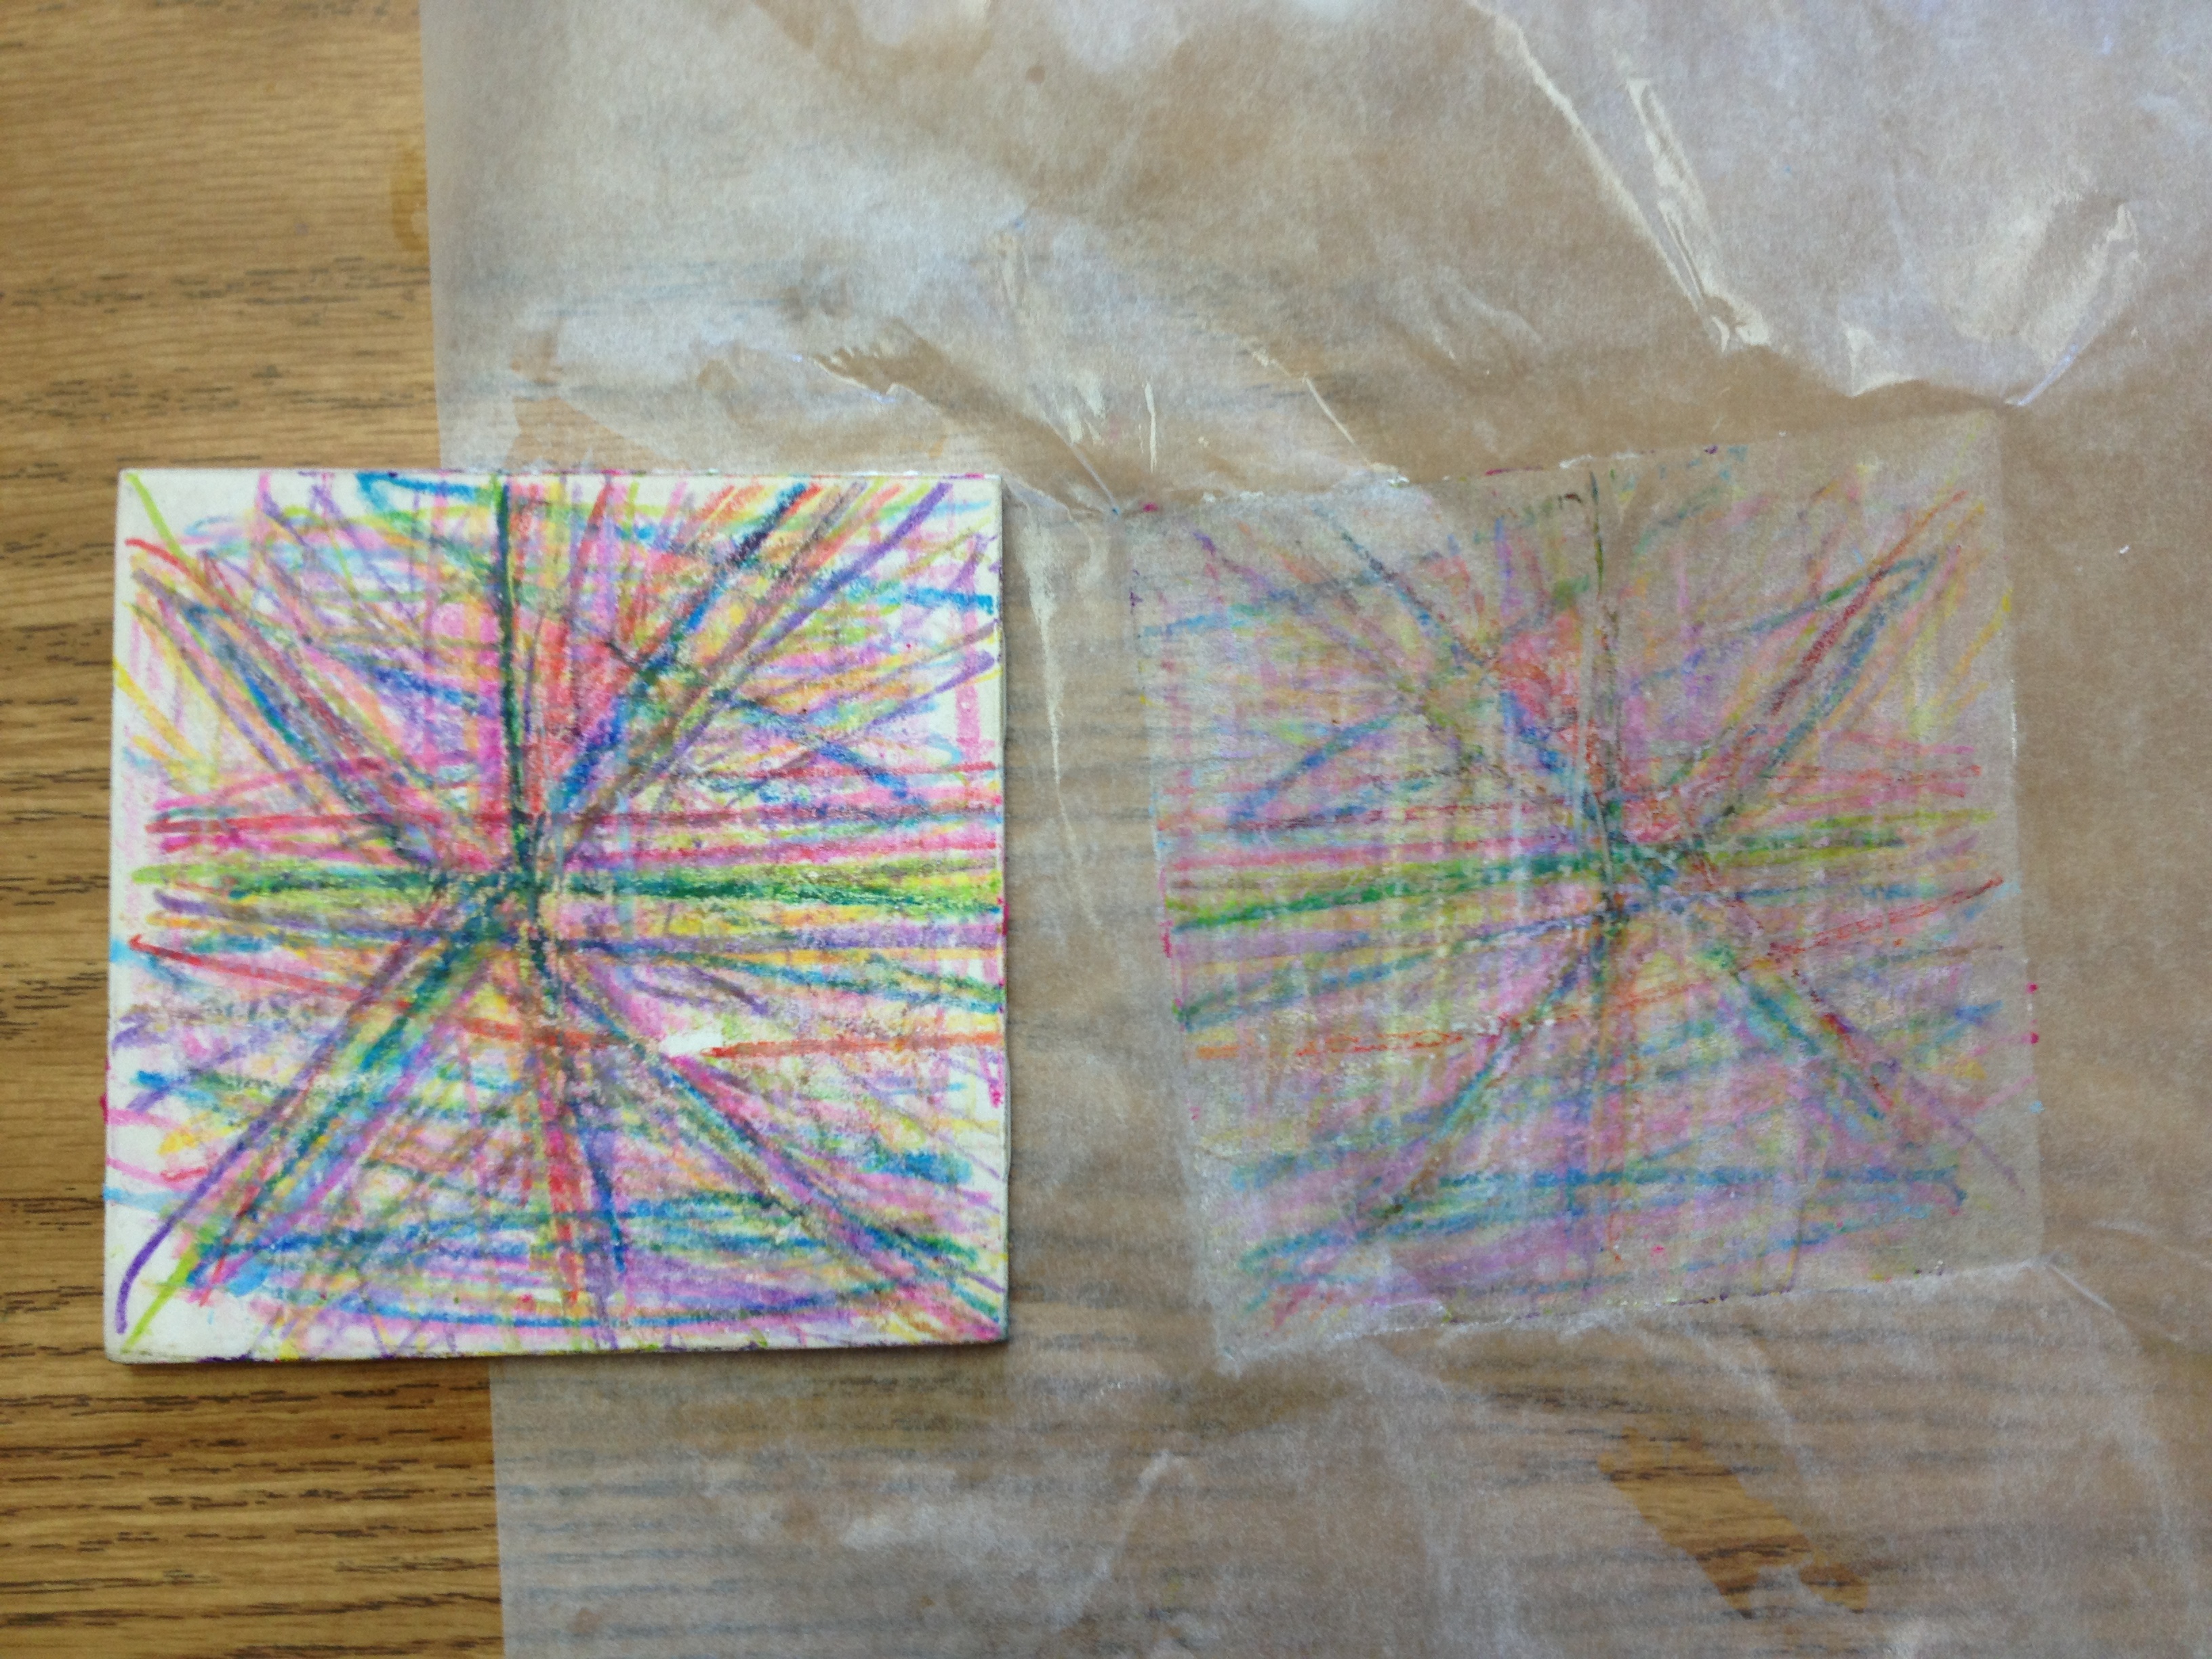
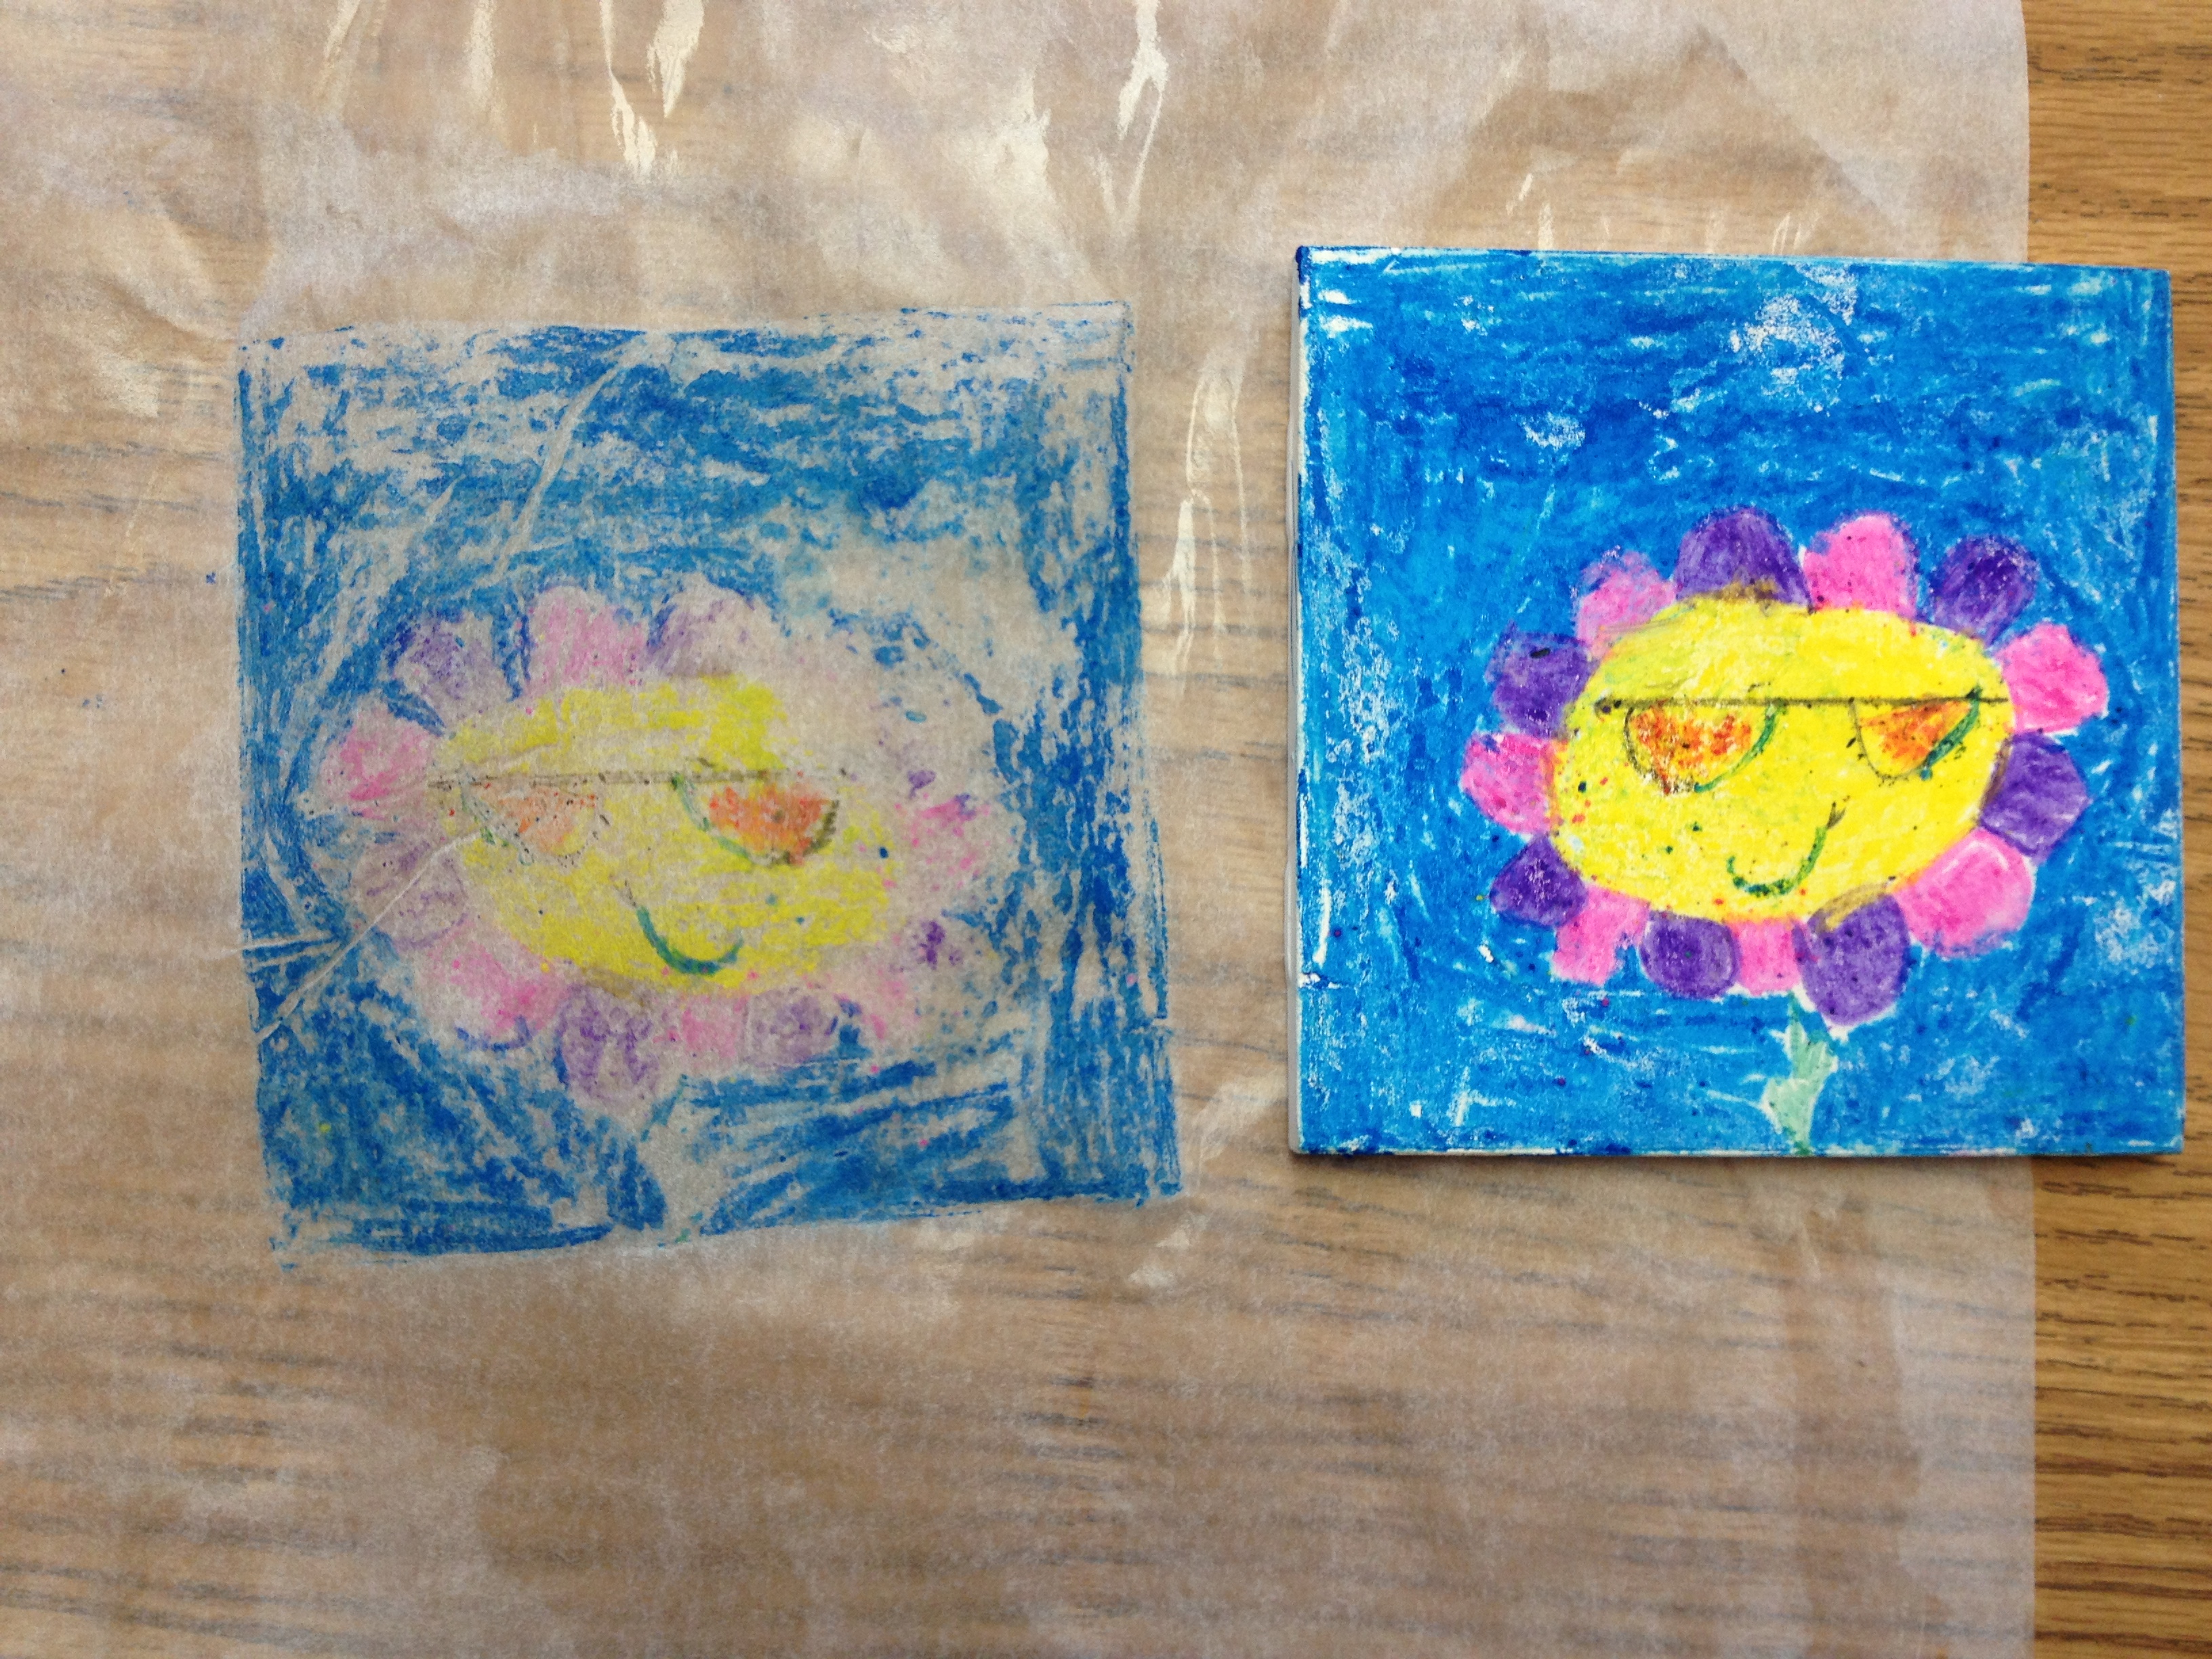
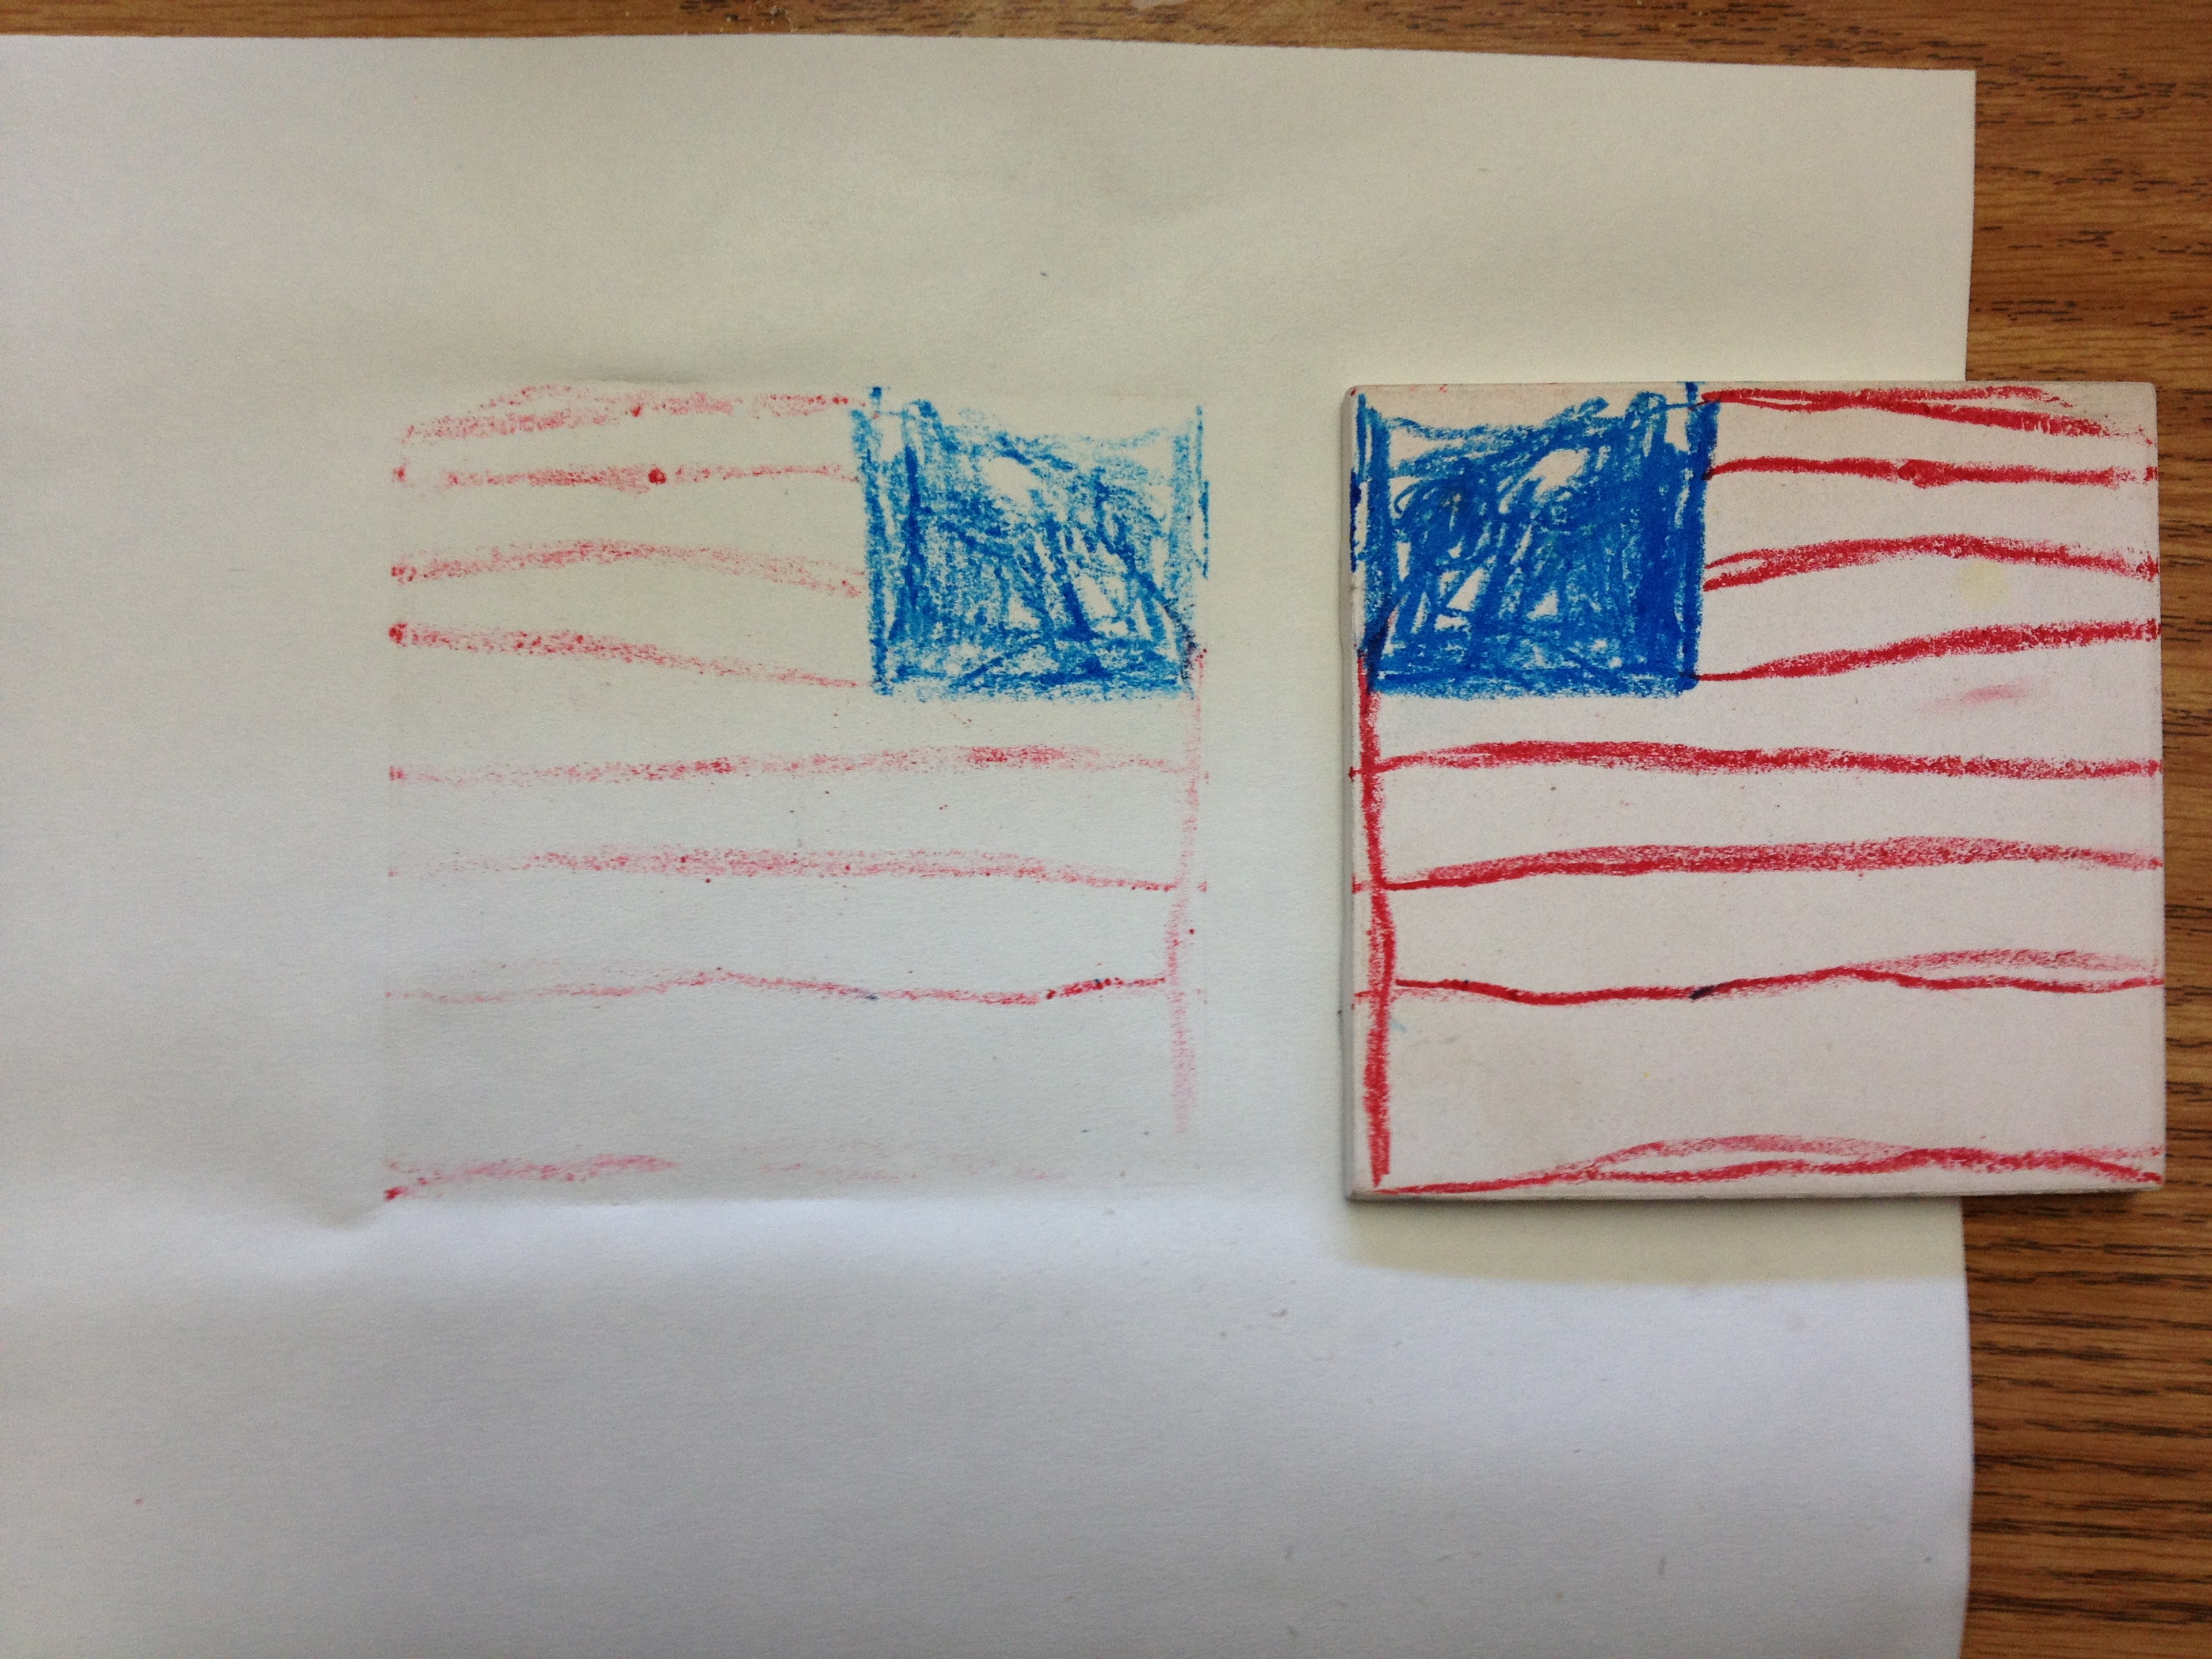
Wax pastel print
I had some thin white paper on a roll that I use for gyotaku prints. We dampened the paper with a sponge, placed it on the tile and rubbed. The wax pastels printed nicely.
wax pastel print
I tried printing with heavier sulfite drawing paper as well.
I noticed that students used up more pastels when drawing on tile than when drawing on foil. I will try printing with different papers before teaching the lesson to an entire grade.
Overall, the wax pastel printing experiments were successful. There was no clean up – the students didn’t even need to wash their hands after printing. The students went home happy with a tile and prints. So much fun!
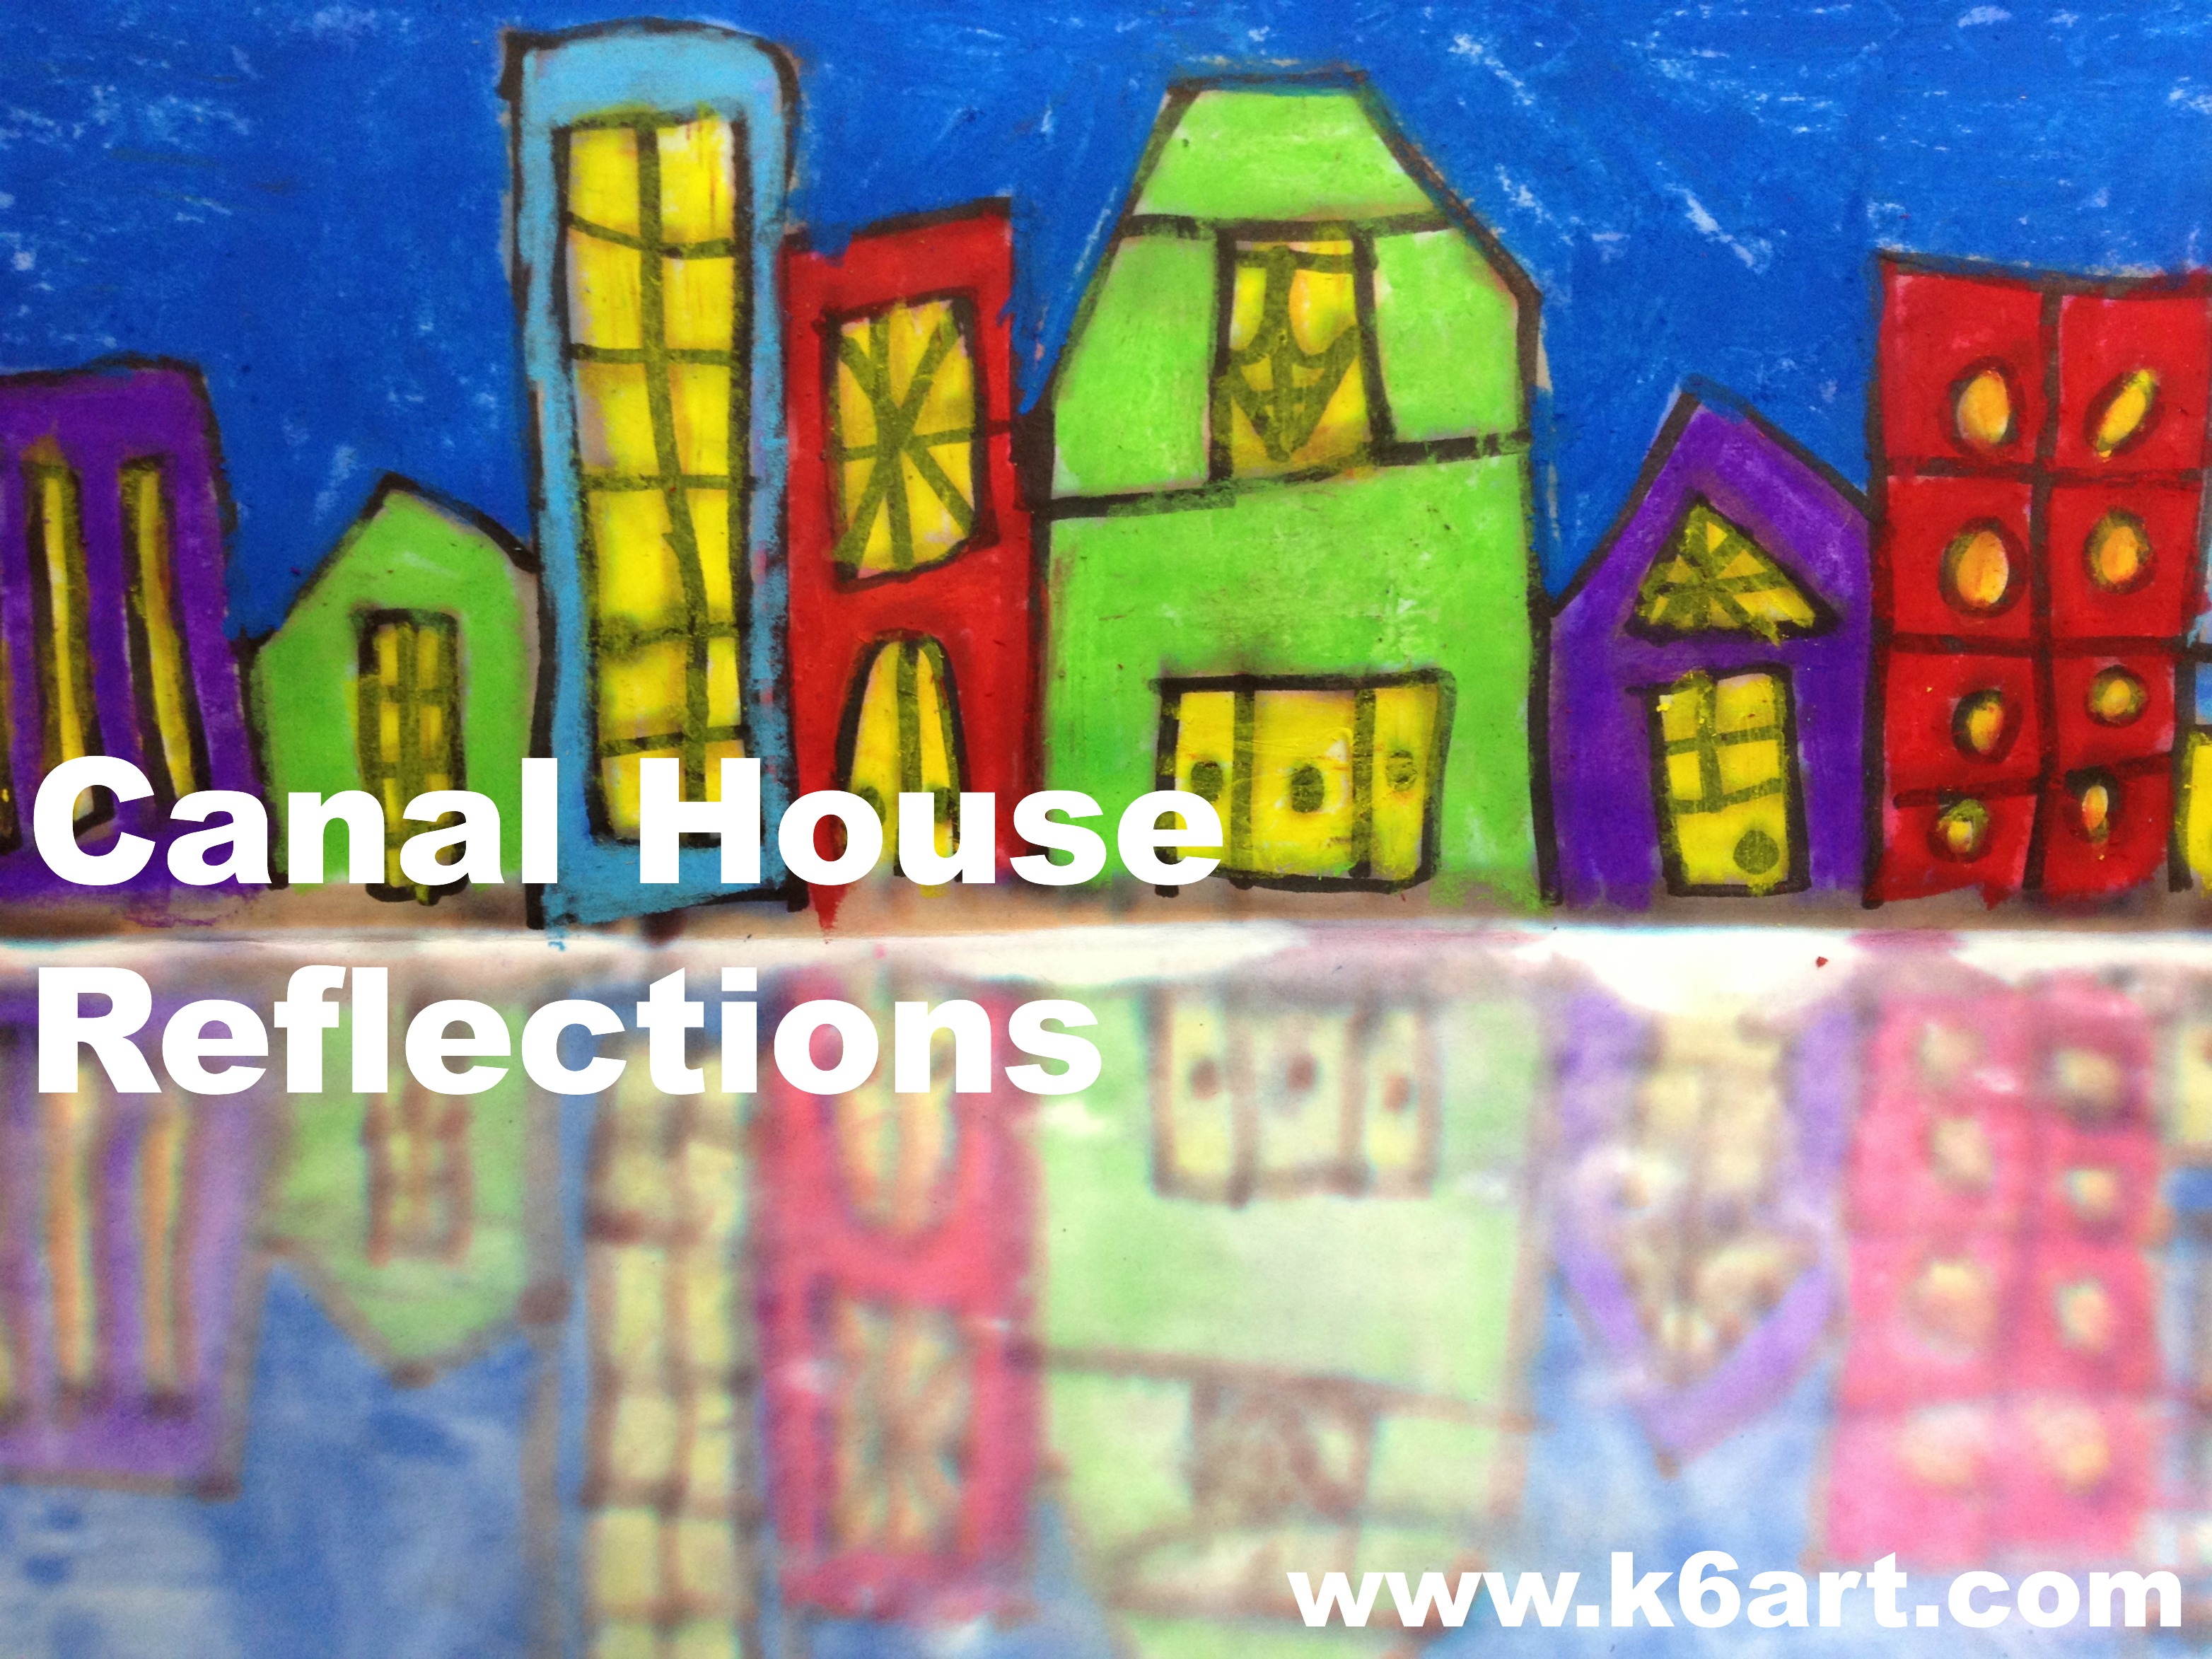
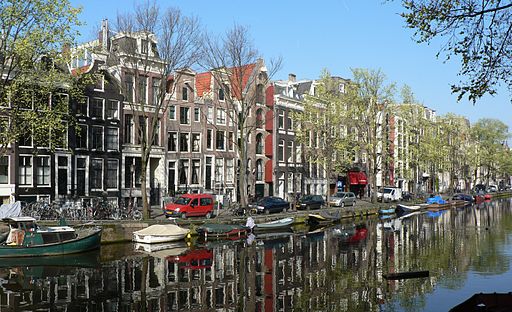
We looked at photos of canal homes in Venice, Italy and Amsterdam. The third graders were excited to see houses that had canals out front instead of streets! We looked at this photo of Amsterdam canal houses, and paid special attention to the reflection of the houses in the water.
Houses in Amsterdam reflected in canal. Photo source:
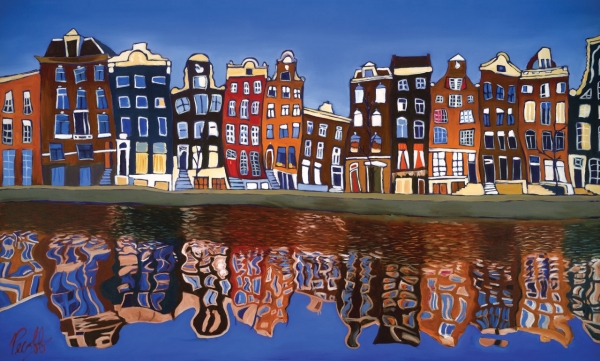
Then we looked at this beautiful artwork, ‘Canal Homes of Amsterdam’ by San Diego artist Grant Pecoff. Students noticed how the reflection was wavy, probably because of waves on the canal. They also noticed the roof tops were a little wavy as well!
Canal Homes of Amsterdam by San Diego artist Grant Pecoff.
Time for the art project!
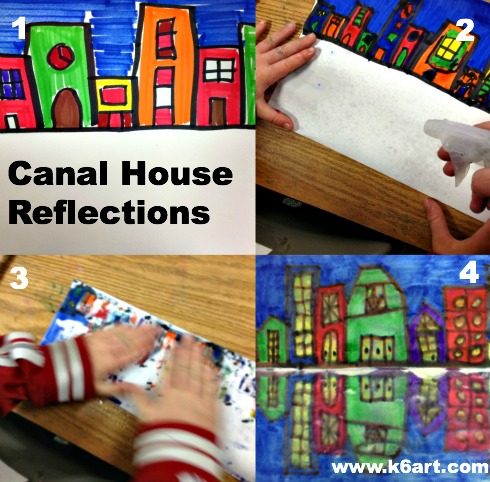
1. Fold paper ‘hot dog style’. On the upper half, make canal houses. Color the sky completely.
2. Take artwork to the printing station. Spray the lower half of their artwork with water.
3. Fold the colored half down and rub.
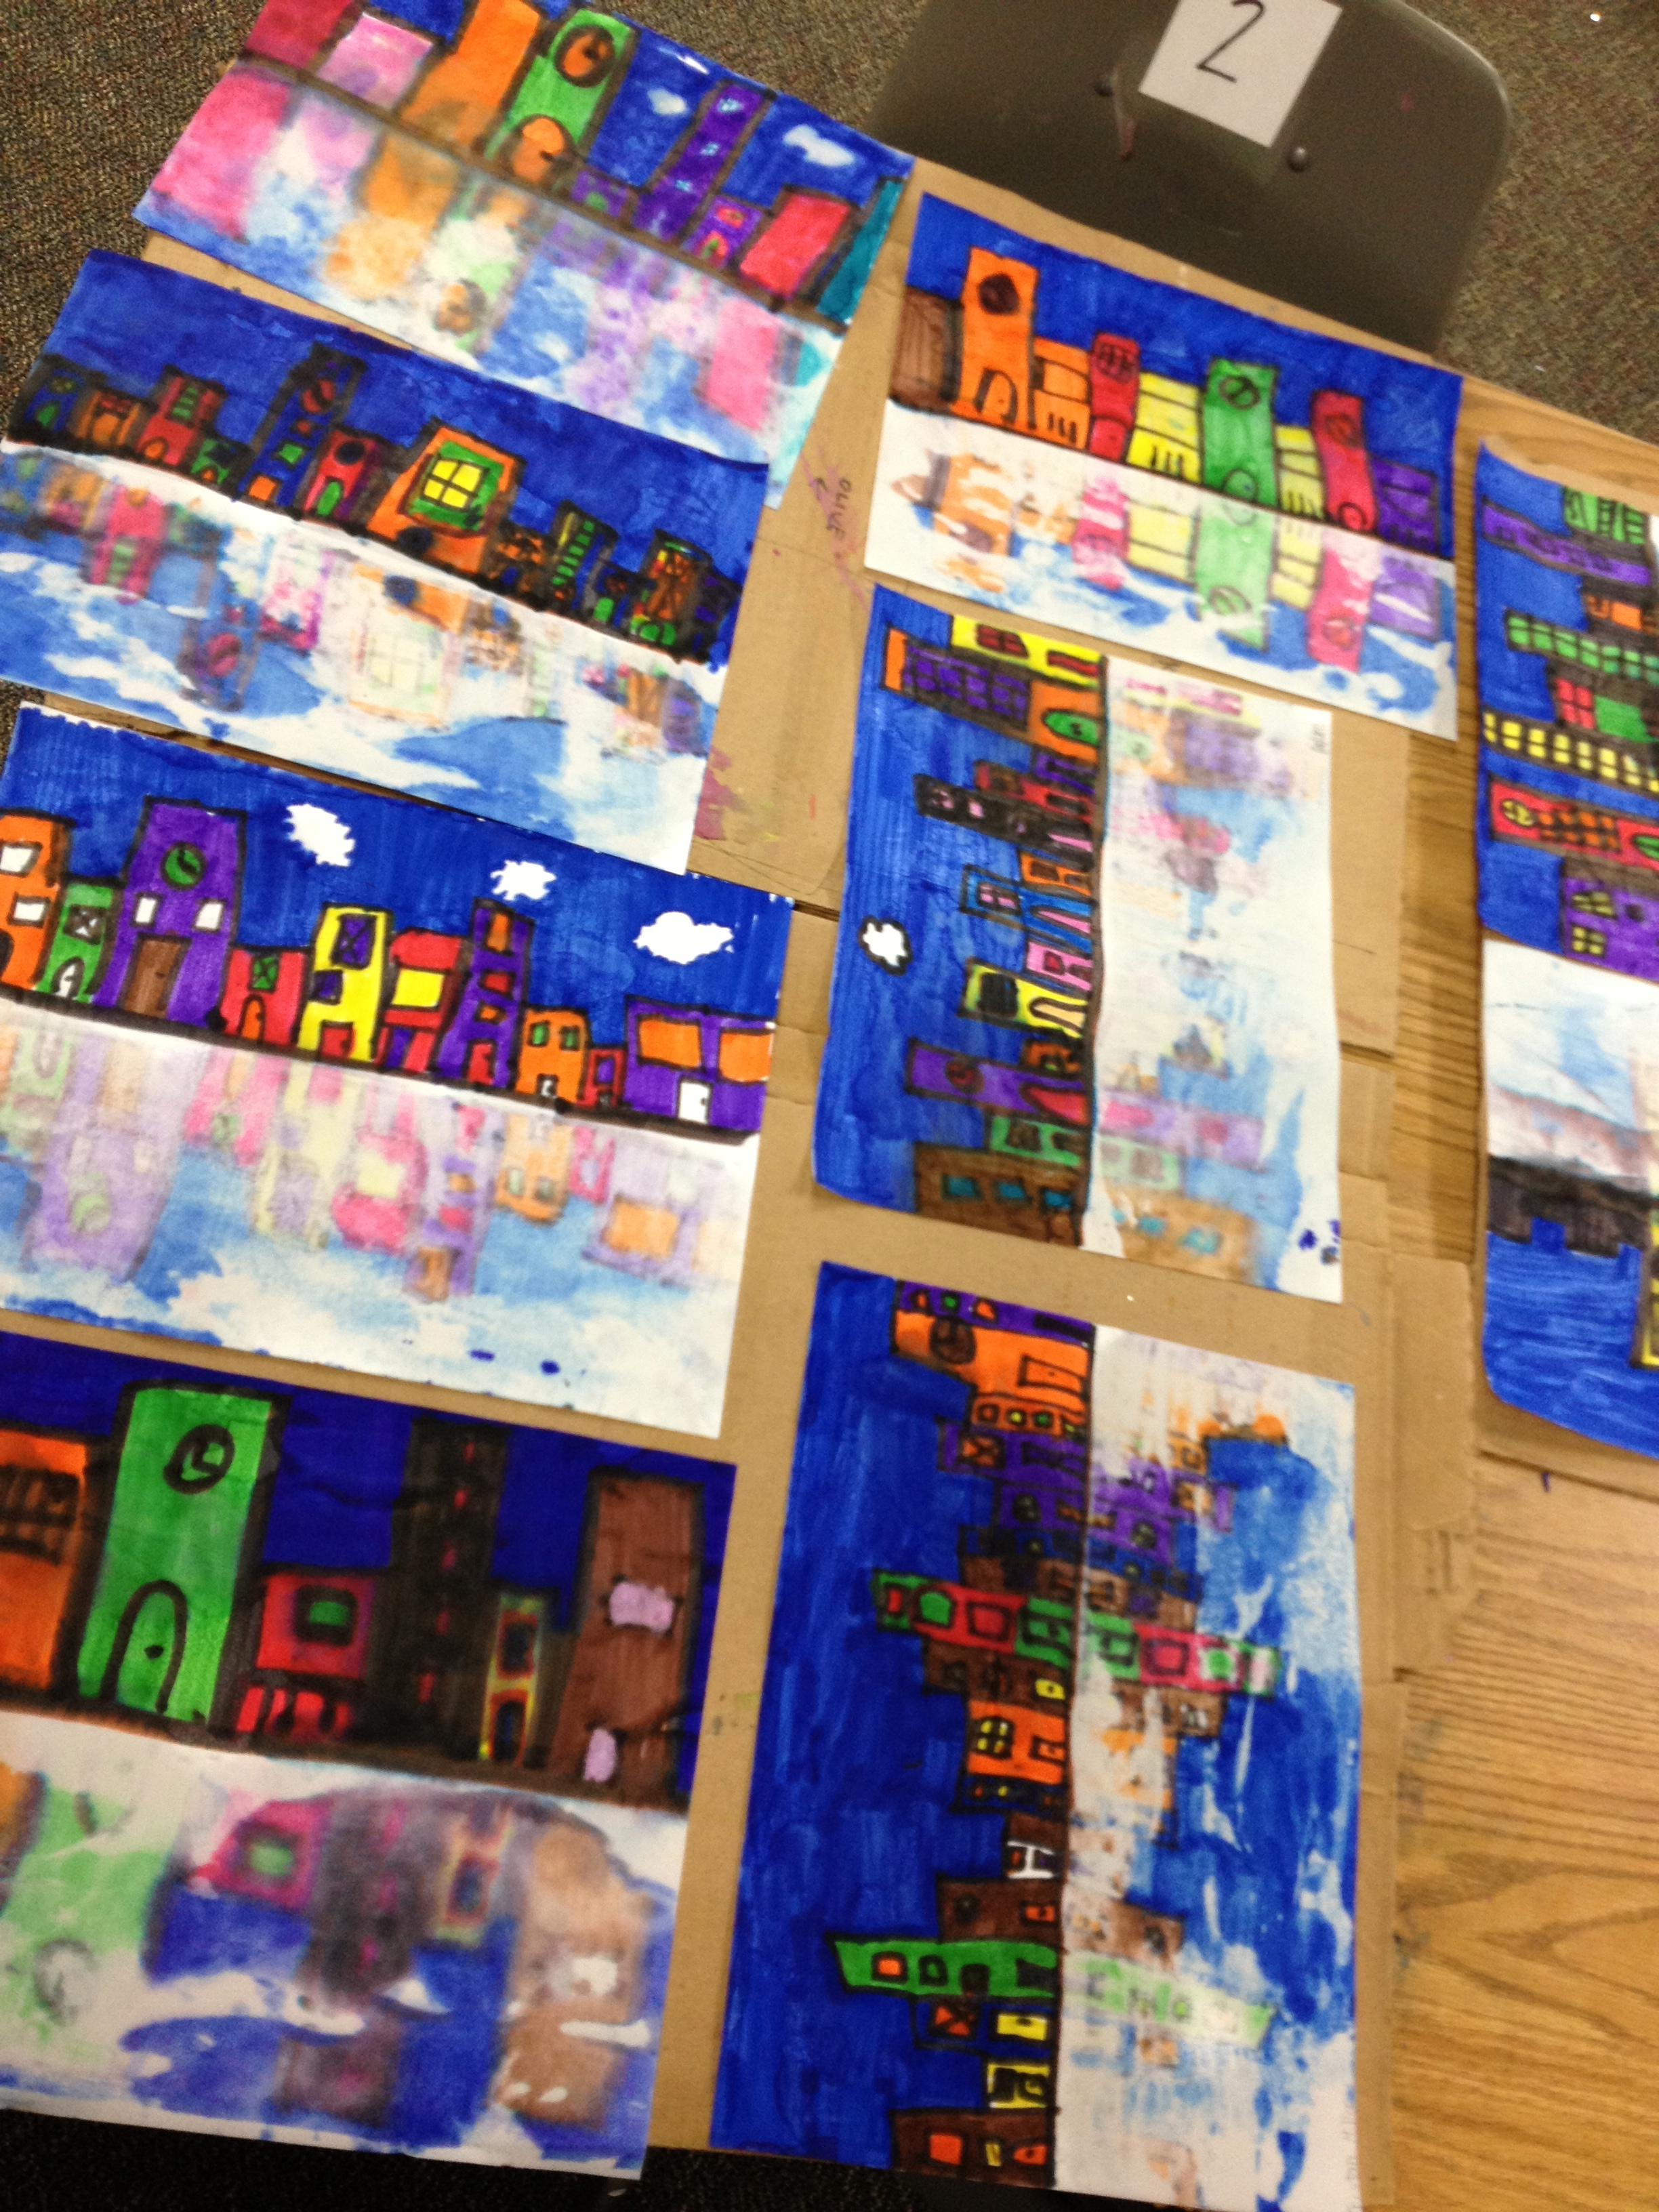
4. Open carefully. If the color didn’t transfer to the bottom half, spray a little more water and try again.
Let dry.
Day 2:
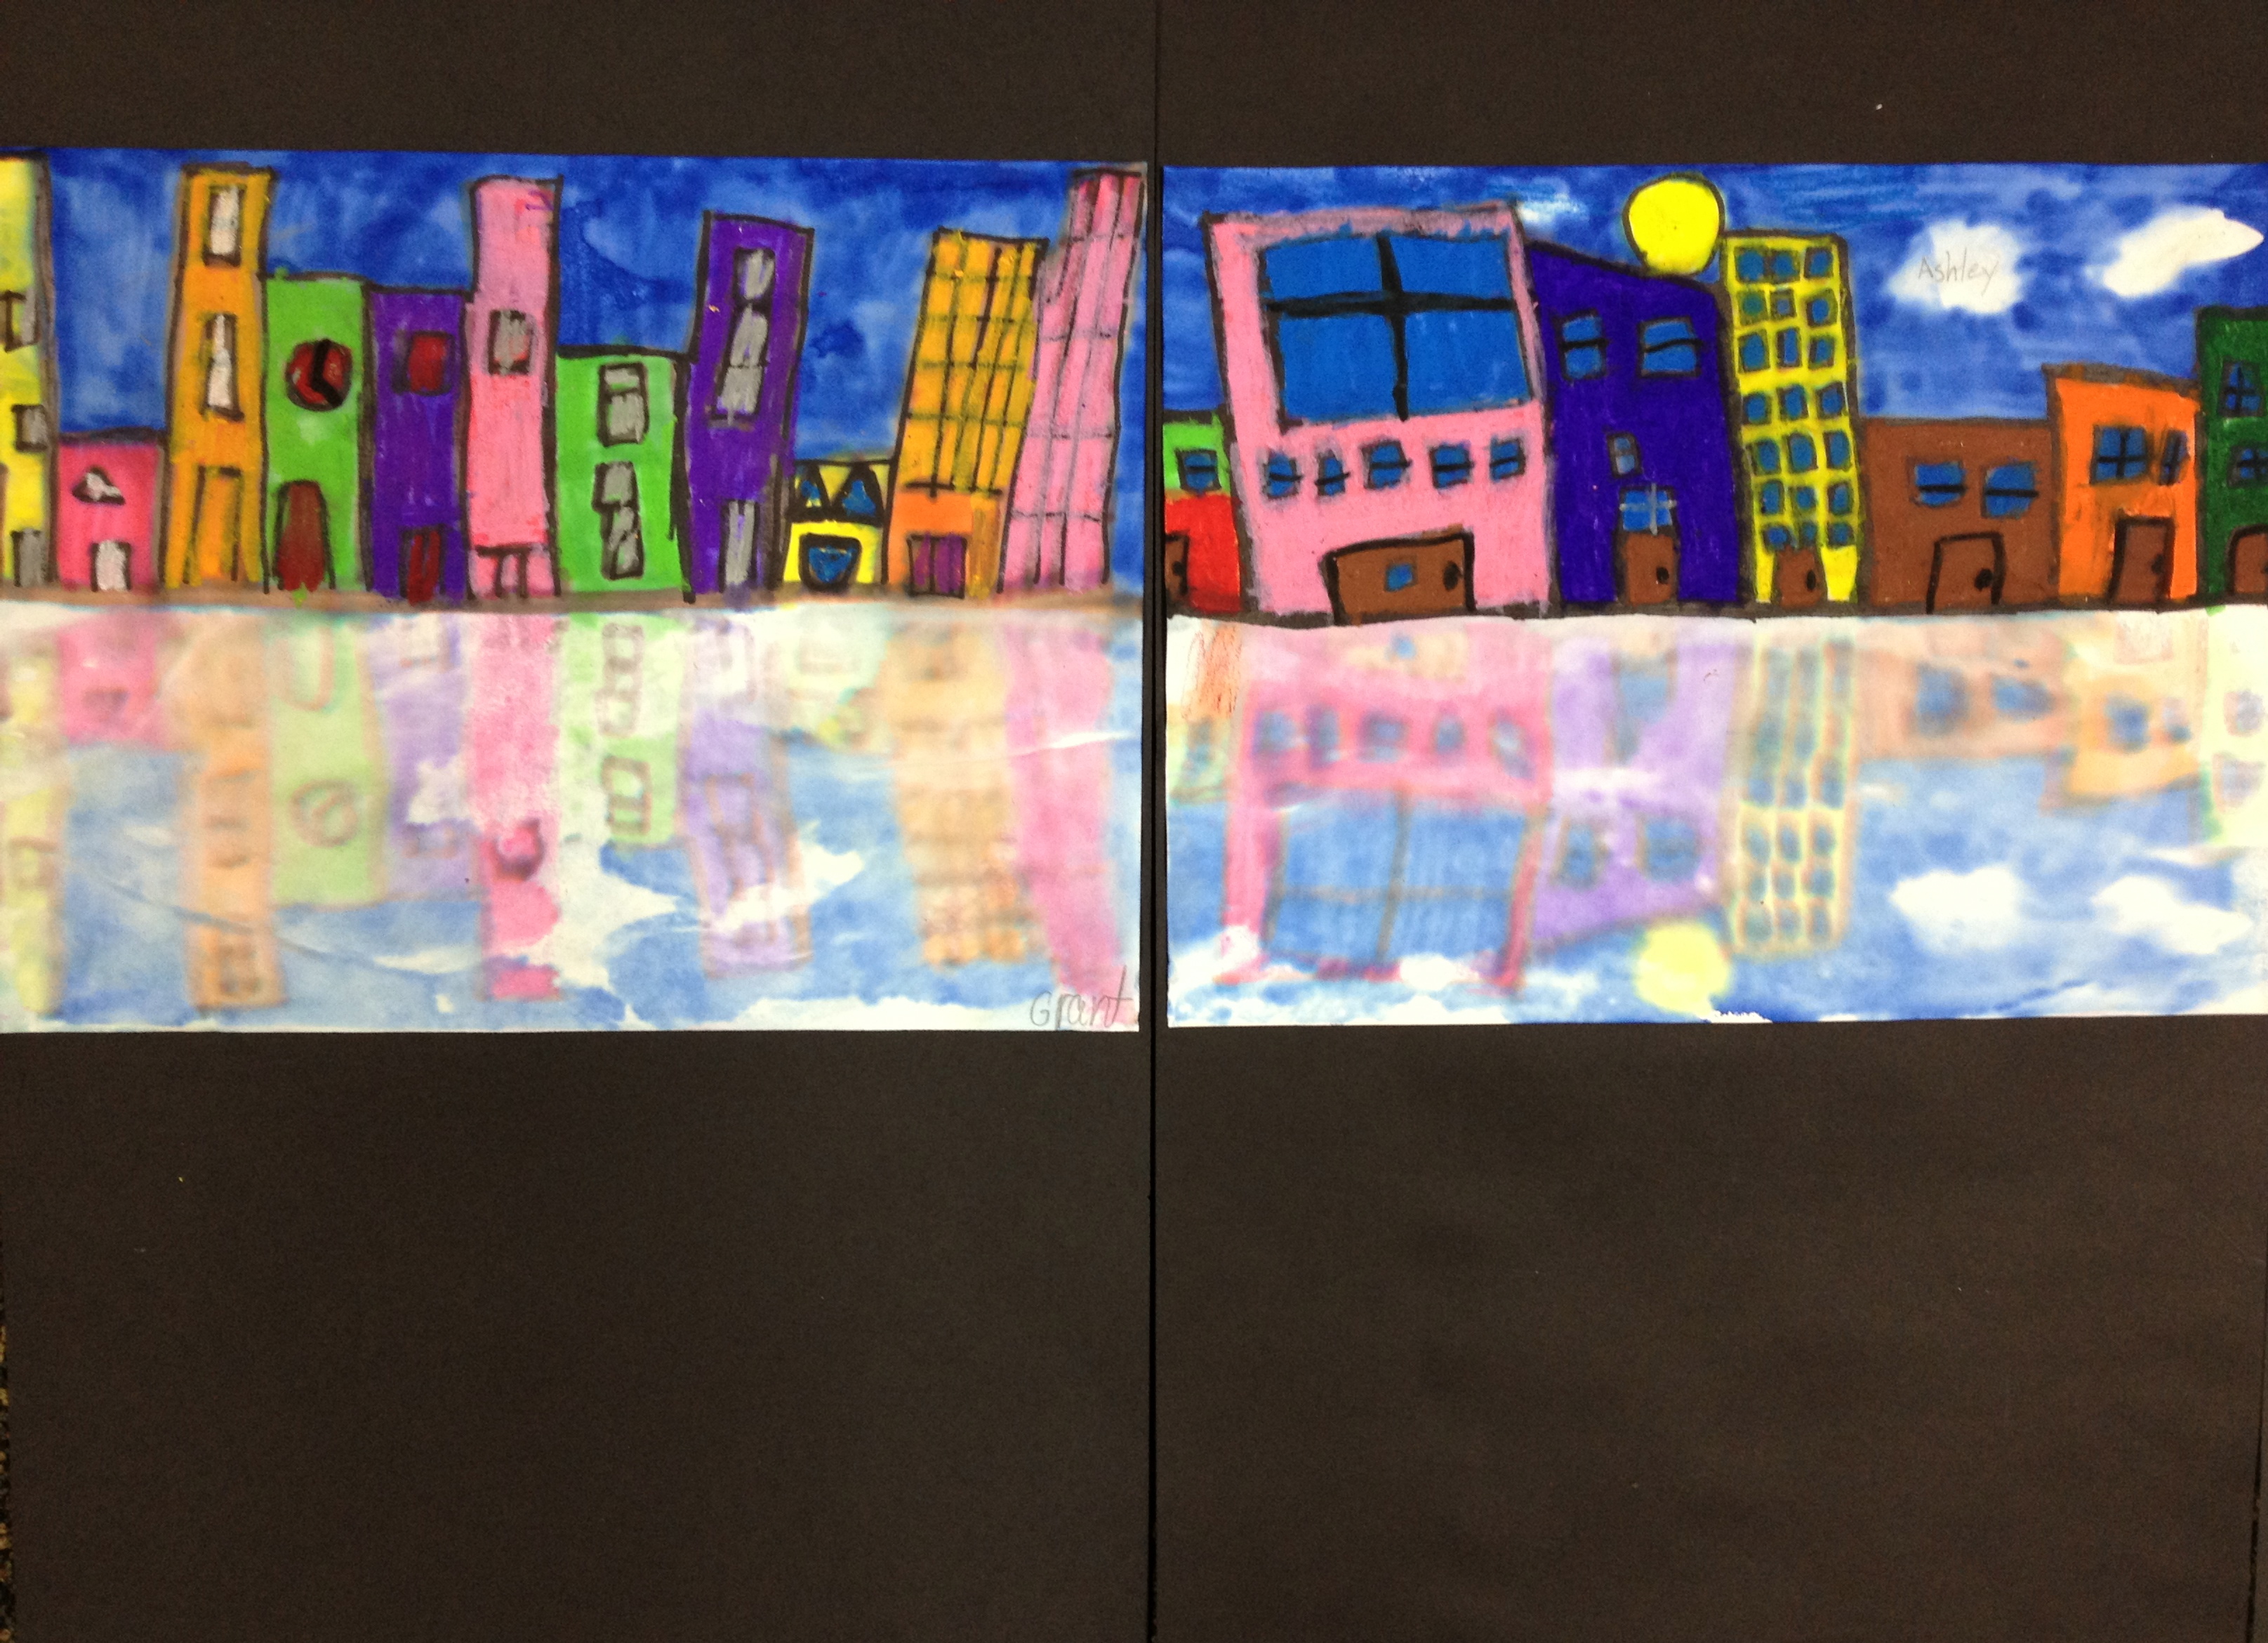
The dry artworks looked great. However, we noticed the top half was a little blurry after printing. The students re-outlined the buildings on the top half of their reflections. Then they re-colored the top half with matching oil pastels.
After the reflection has dried, re-outline top half and color in with matching oil pastels.
We mounted these without left and right borders so they can be displayed side by side, just like real canal houses!
This lesson was adapted from this fun lesson on the Fine Lines blog. To learn more about San Diego artist Grant Pecoff, and see more of his colorful artworks, please visit his website .
Would you like to try a creative printmaking project? Something inexpensive, that can be done quickly and easily with no fancy tools or equipment? Try printing with modeling clay. This brilliant lesson from the Filth Wizardry blog was a huge hit with our fourth graders.
Students created printed suns or sunflowers using modeling clay and stamp pads. Allow 2-3 40-minutes sessions.
Materials:
Modeling Clay, AKA plasticine clay (note: I got a pack of 24 sticks of modeling clay at my local dollar store)
black stamp pads
bamboo skewers
paper
colored pencils
pencil and eraser
circle template
paper to cover table
Class 1: Experiment with modeling clay stamp printing
Our fourth graders began their printmaking project by experimenting with the clay stamp printing. They made a variety of marks on the clay, pressed the clay onto a black stamp pad, and printed on a piece of copy paper.
They printed clay coils and spirals. One boy took an imprint of the sole of his shoe and printed that! Another created a clay pretzel. They created clay hearts and alphabet letters. After a few prints, they smooshed the clay and started again. It was fabulously fun.
Clean up is easy. Since modeling clay never dries out and is reusable, we just placed the stamp pads, clay balls and skewers in our table bins until next class. We used baby wipes to clean the clay (but not all the ink!) off hands after class, then used the wipes to scrub any clay that might have got on the table.
Class 2: Print a sun or sunflower
We began the session by viewing a brief video of sun art from CBS-TV Sunday Morning.
Student used the templates to trace a circle in the center of the paper. Then the fun began!
Begin by tracing a circle template. Then use the modeling clay to create individual facial feature stamps.
The fourth graders used the modeling clay to create facial feature stamps, sun beam stamps, petal and leaf stamps.
Fourth grade sun, printed and ready to color.
After printing, they colored their prints with colored pencils.
Coloring in a sunflower print with colored pencils.
Printed sun with colored pencil
Optional finishes:
Class 3:
Paint completed print with tempera cake:
Completed prints can be painted immediately with cake tempera.
This example is printed with ink pad, colored with colored pencil, then immediately painted with tempera cake. The sheer paint looked great over the print but did not cover stray ink fingerprints. And some had A LOT of stray fingerprints.
If you want a clean look to ALL the finished artworks, you may want to have students cut out their colored work and mount to colored paper.
Have fun! Your students are guaranteed to love printing with modeling clay!
Thanks for visiting! Don’t forget to please vote for 2012 Art Ed Blog of the Year, which you can do by clicking this link and voting for K-6 Art! Voting open through December 14, 2012.
Love printmaking? Try making your own stamps with self-adhesive fun foam stickers. It’s quick, easy, NEAT, inexpensive and 100% successful.
Materials:
cardboard squares, 3″x3″
self-adhesive foam stickers in various shapes such as these
scissors
hole punches
water-based markers (we used Crayola)
water-based stamp pads
paper for printing (we used copy paper)
Design the stamp:
Students began by tracing their cardboard square three times on a sheet of copy paper. Then they arranged their foam pieces within the squares until they found a pleasing composition.
Students rearrange cut-up craft foam stickers until they find an arrangement they like. Don’t peel the stickers yet!
I had a random assortment of stickers on hand – letters, animals, stars, ovals….I encouraged the students to cut up/hole punch their stickers so that the stickers no longer resembled their original shapes. No letters or numbers allowed! Once they found a good arrangement, they peeled their stickers and stuck them on the cardboard squares.
Assignment 1: print with colored markers
Next students inked their stamps with Crayola markers and printed on a clean piece of paper.
Ink the foam with markers. Use a variety of colors.
Print! Then re-ink and print again. You go over the stamp with another color of ink for subsequent printings.
Inking plate with multiple colored markers allows students to make some beautiful color combinations.
Triceratops print.
Assignment 2: Radial design print
Place on dot in the center of a clean piece of paper. Flip stamp over to back and draw arrow on cardboard pointing to one corner.
Ink stamp with stamp pad. Print so arrow points to the center dot. Re-ink and print again, rotating stamp so arrow always points towards center dot.
Pac Man
Thumbs up!
Color radial print.
The galaxy.
So much fun! 100% of sixth graders had success with this project. I think third graders and older could succeed with this project.