Helen Shirk is a San Diego artist and Professor of Art known for her metalwork and jewelry. I recently had the pleasure of viewing necklaces from Shirk’s Traces series on exhibit at San Diego’s Mingei International Museum. Even better – I got to participate in a Shirk-inspired paper jewelry activity taught by the Museum’s Education Department. The art project is so much fun – I just have to share their lesson!
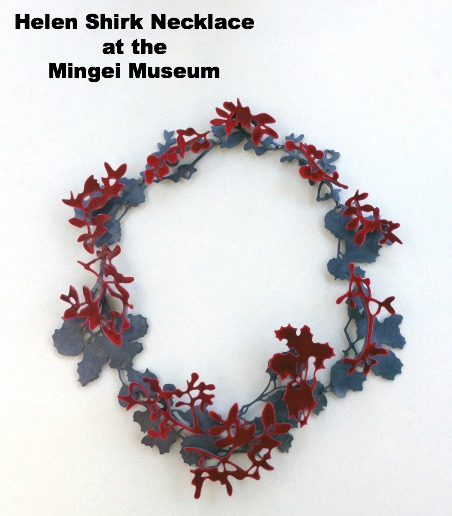
‘Crimson Glory’ necklace by Helen Shirk, 2011. Steel, oxidized silver and china paint.
We had two options for our silhouette necklace project: 1) a quick, 30-minute project using paper punches or 2) an hour-long project using real traced leaves. Both options focus on organic shapes and repetition.
Materials for both projects
- black construction paper
- card stock
- glue sticks
- yarn
- scissors
- tape
Project 1: 30-minute Punched Paper Silhouette Necklace
Additional material – paper punches in organic shapes (like these leaf , branch, butterfly, and dove punches).
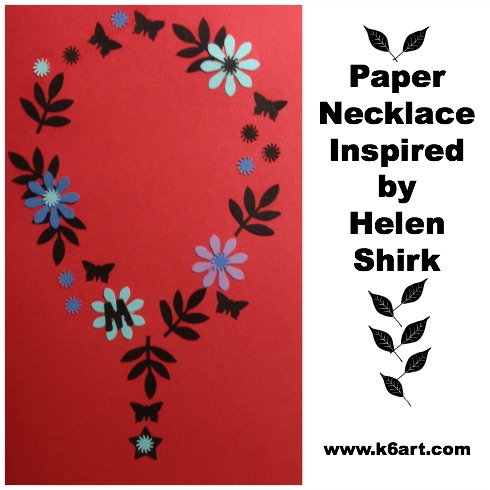
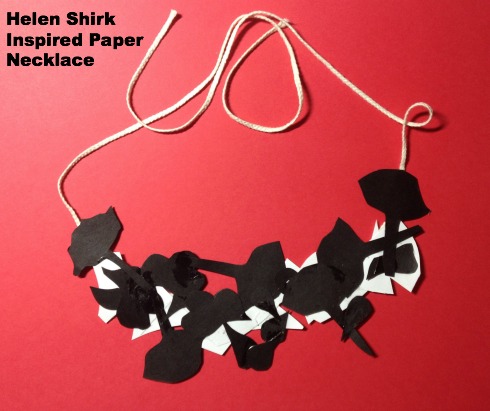
We punched paper shapes from black and colored papers, then glued them to a background and added yarn to form a necklace. Click here and here for the lesson plan, written by the excellent Education Department of the Mingei International Museum.
Shirk-inspired necklace made with craft punches and card stock. Teacher example.
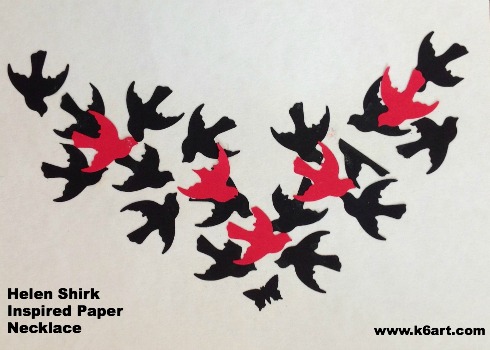
Here is my Shirk inspired design!
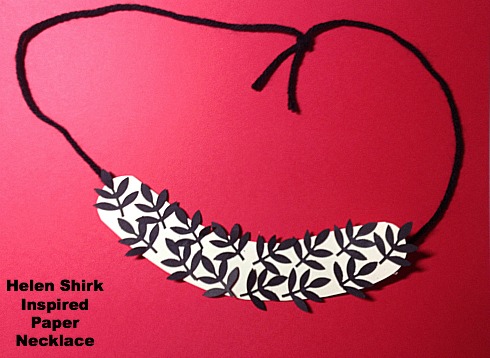
Project 2: Traced Silhouette Necklace
Additional material: natural materials such as leaves, twigs and flowers.
Students make tracings of each onto construction paper, then cut out and arrange into a necklace. Click here for the Mingei’s curriculum guide including this project.
Shirk-inspired paper necklace made by tracing leaves onto black and white paper. Teacher example.
Helen Shirk’s Trace necklaces are on display at the Mingei Museum through January 5, 2014 as part of the Allied Craftsmen Today exhibit. For more examples of Helen Shirk’s jewelry, click here.
I wrote about the Mingei’s Chihuly chandelier – click here to see their fabulous 30-Minute Chihuly Chandelier project.
Special Notice for San Diego Teachers and Parents:
- Teachers: Do you want to take your class to the Mingei Museum? The Mingei provides free admission for all K-12th grade tours as long as they’re scheduled in advance.
- Parents: The Mingei is free to San Diego county residents and military the third Tuesday of the month. Monthly Family Sundays offer admission and fun activities for just $5/family. Go to www.mingei.org for more details.
Enjoy!