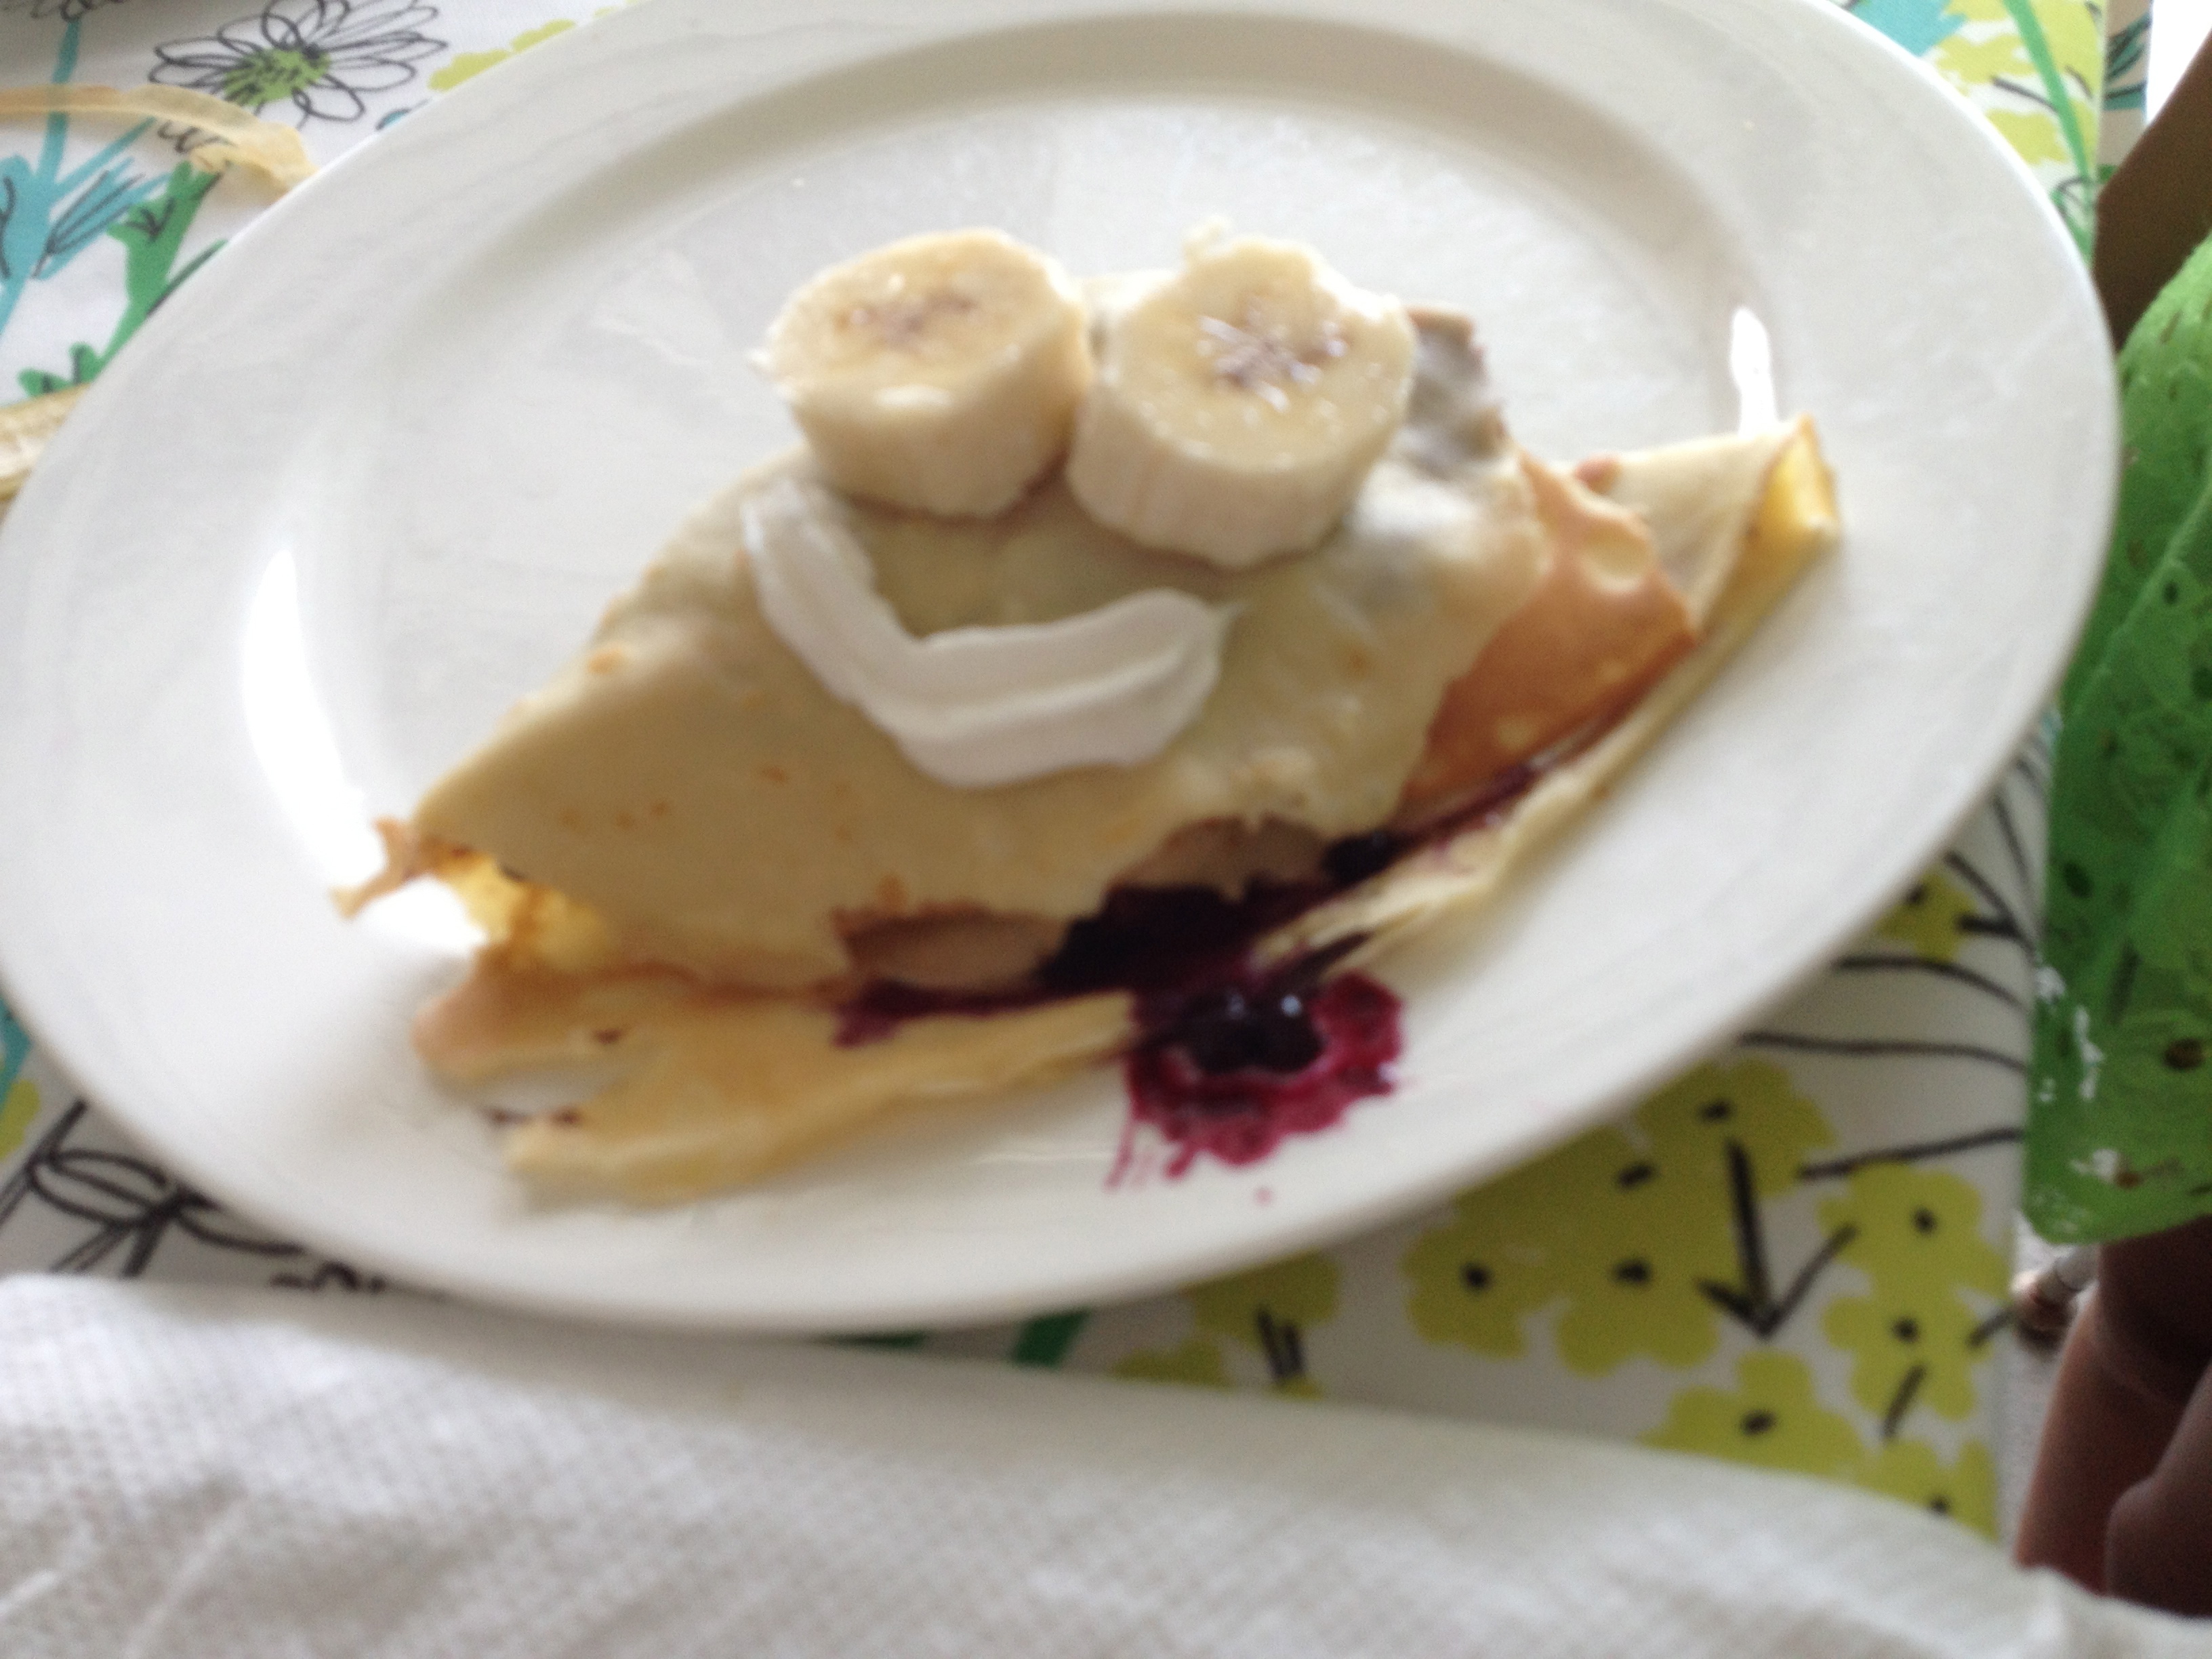
What fun! I just finished Day One of my Paris-themed art and cooking camp. Today we made Banana-Nutella crepes on a real Parisian crepe griddle. We ended the morning with Impressionistic ‘mini-Monets’, created with chalk pastels and Shrinky Dinks shrinkable plastic.
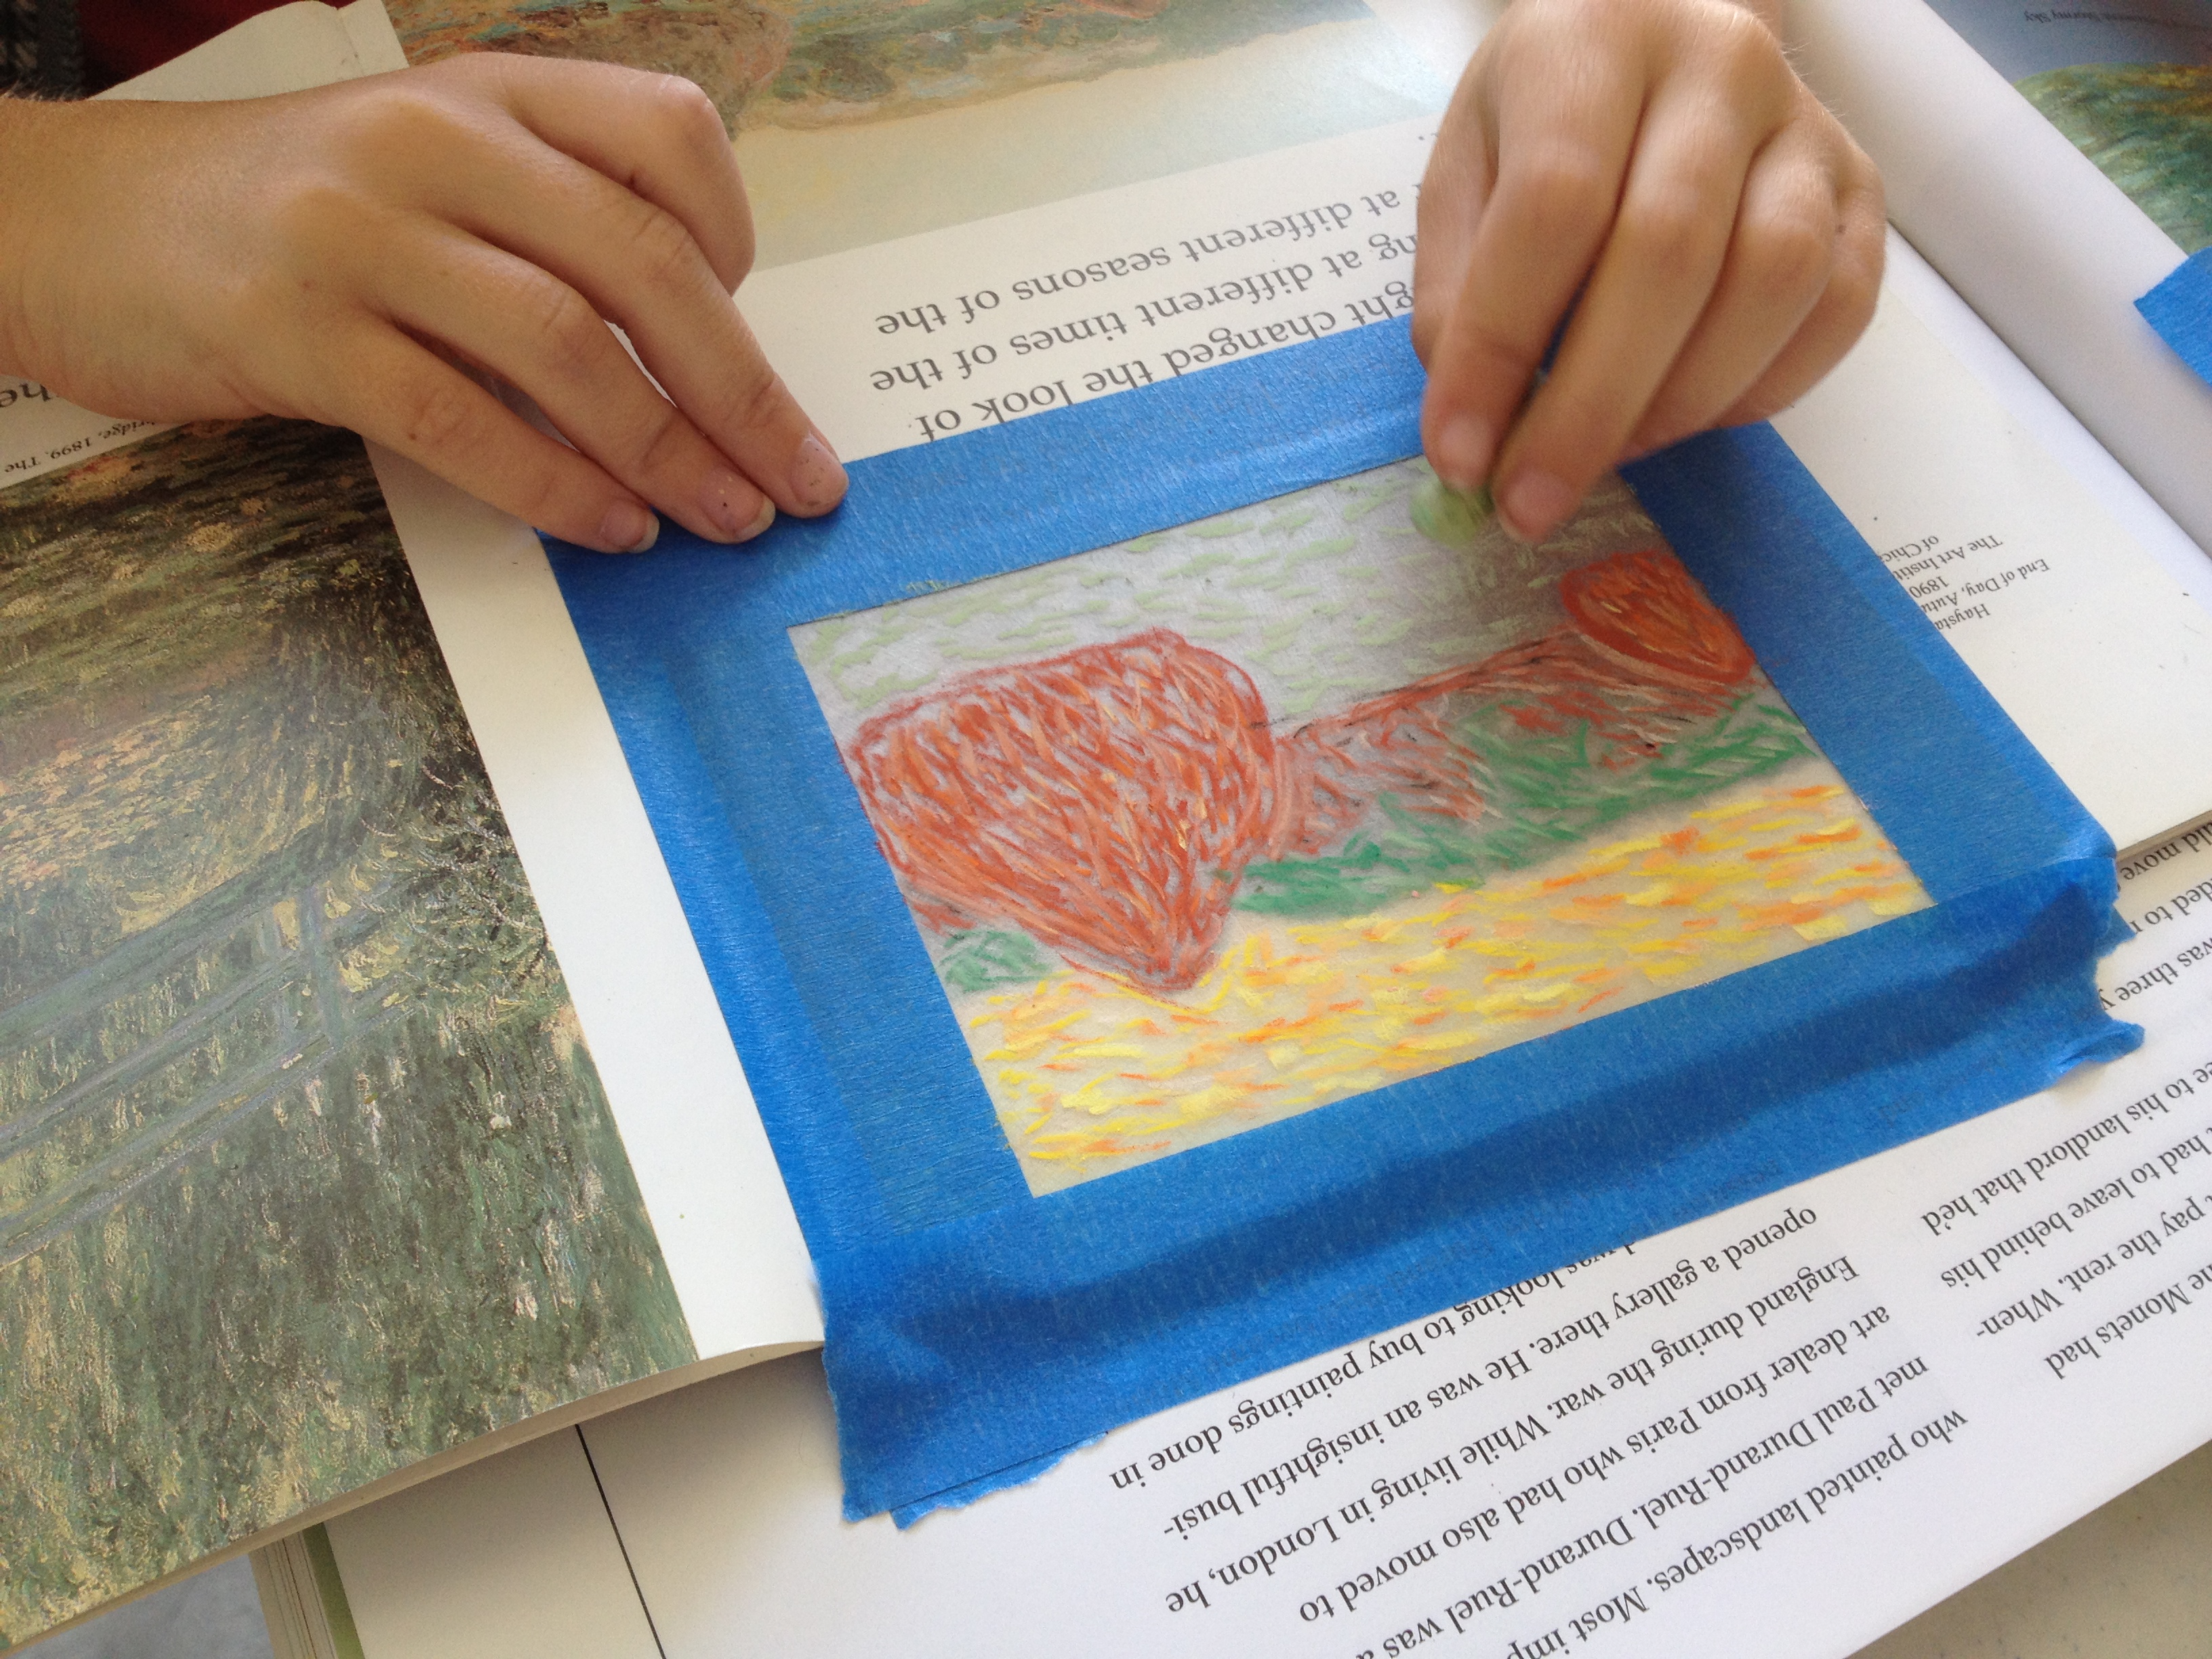
The ‘mini-Monet’ lesson from Blick is really fun and successful. You tape frosted Shrinky Dinks over an Impressionistic artwork, then trace over the brushwork using short strokes of chalk pastel. Shrink in a toaster oven and Voila!. We had 45 minutes for art – some kids made two pieces during that short time. Click here to see more examples.
P. recreates Monet’s haystacks in chalk pastel.
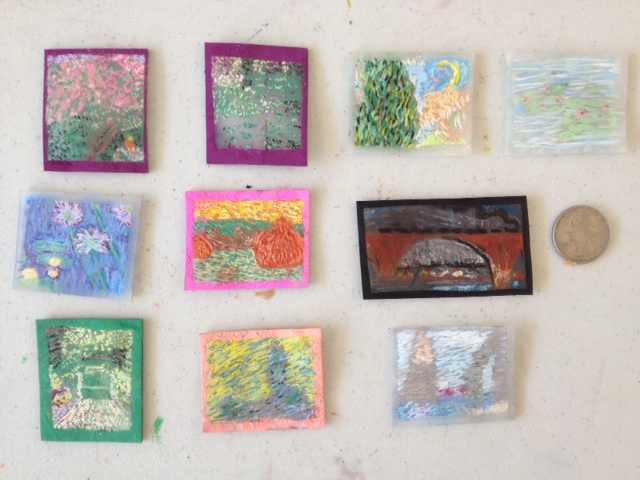
Completed ‘mini-Monets’. Not much taller than a quarter!
Tomorrow is Eiffel Tower day. Stay tuned for more photos later this week.
Enjoy!
(Note: this post contains compensated affiliate links)
Looking for new art project ideas? Here are four new (to me) art project ideas from my fabulous creative colleagues, Kelly and Nancy.
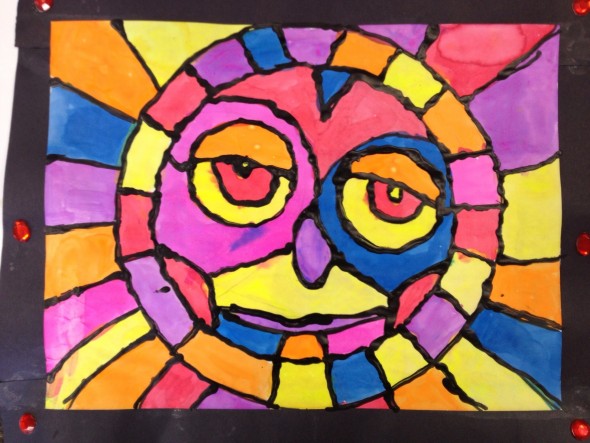
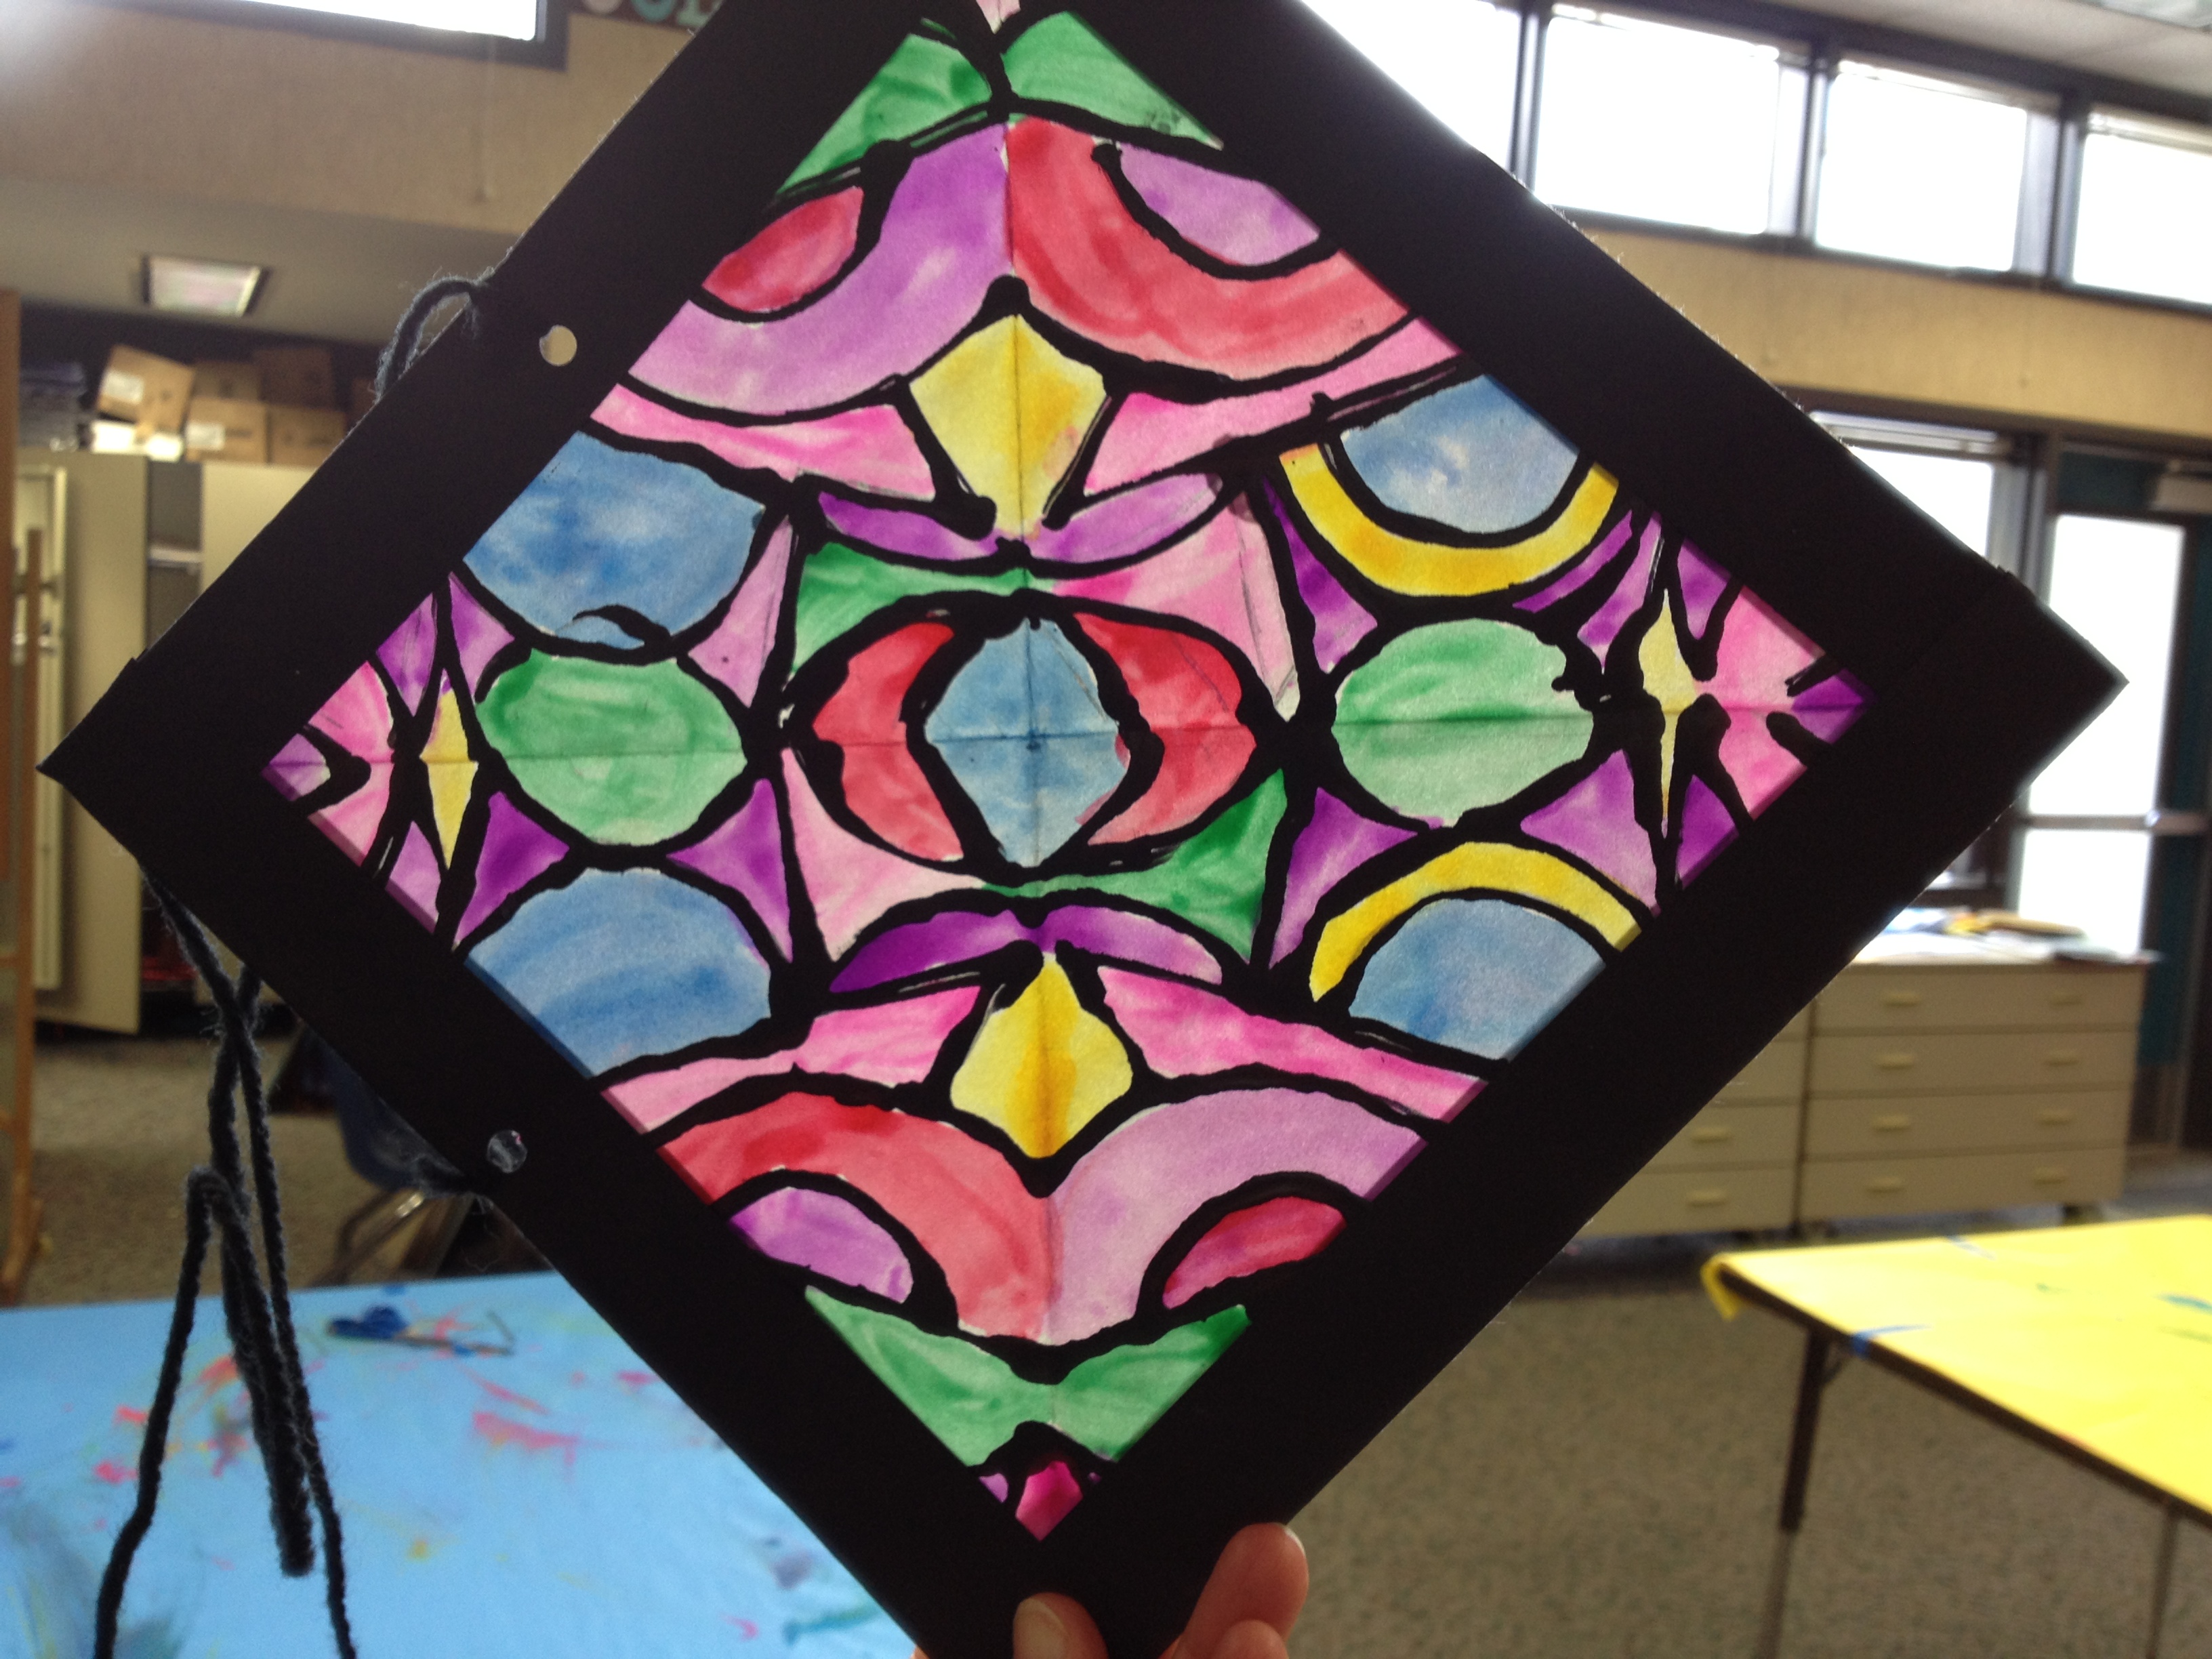
Kelly’s ‘Stained Glass’
Kelly’s ‘stained glass’ sun made with watercolors and black glue.
Kelly from Skyline School brought these beautiful ‘stained glass windows’ made with fluorescent liquid watercolor and black glue. As a final step, her students rubbed their artwork with baby oil and a cotton ball to make the paper translucent. Primary grades used a paper plate tracer to make the sun. Upper elementary made the geometric window (note: upper grade students used carbon paper to transfer their symmetric designs).
Kelly’s ‘Stained Glass Window’ made with watercolor and black glue.
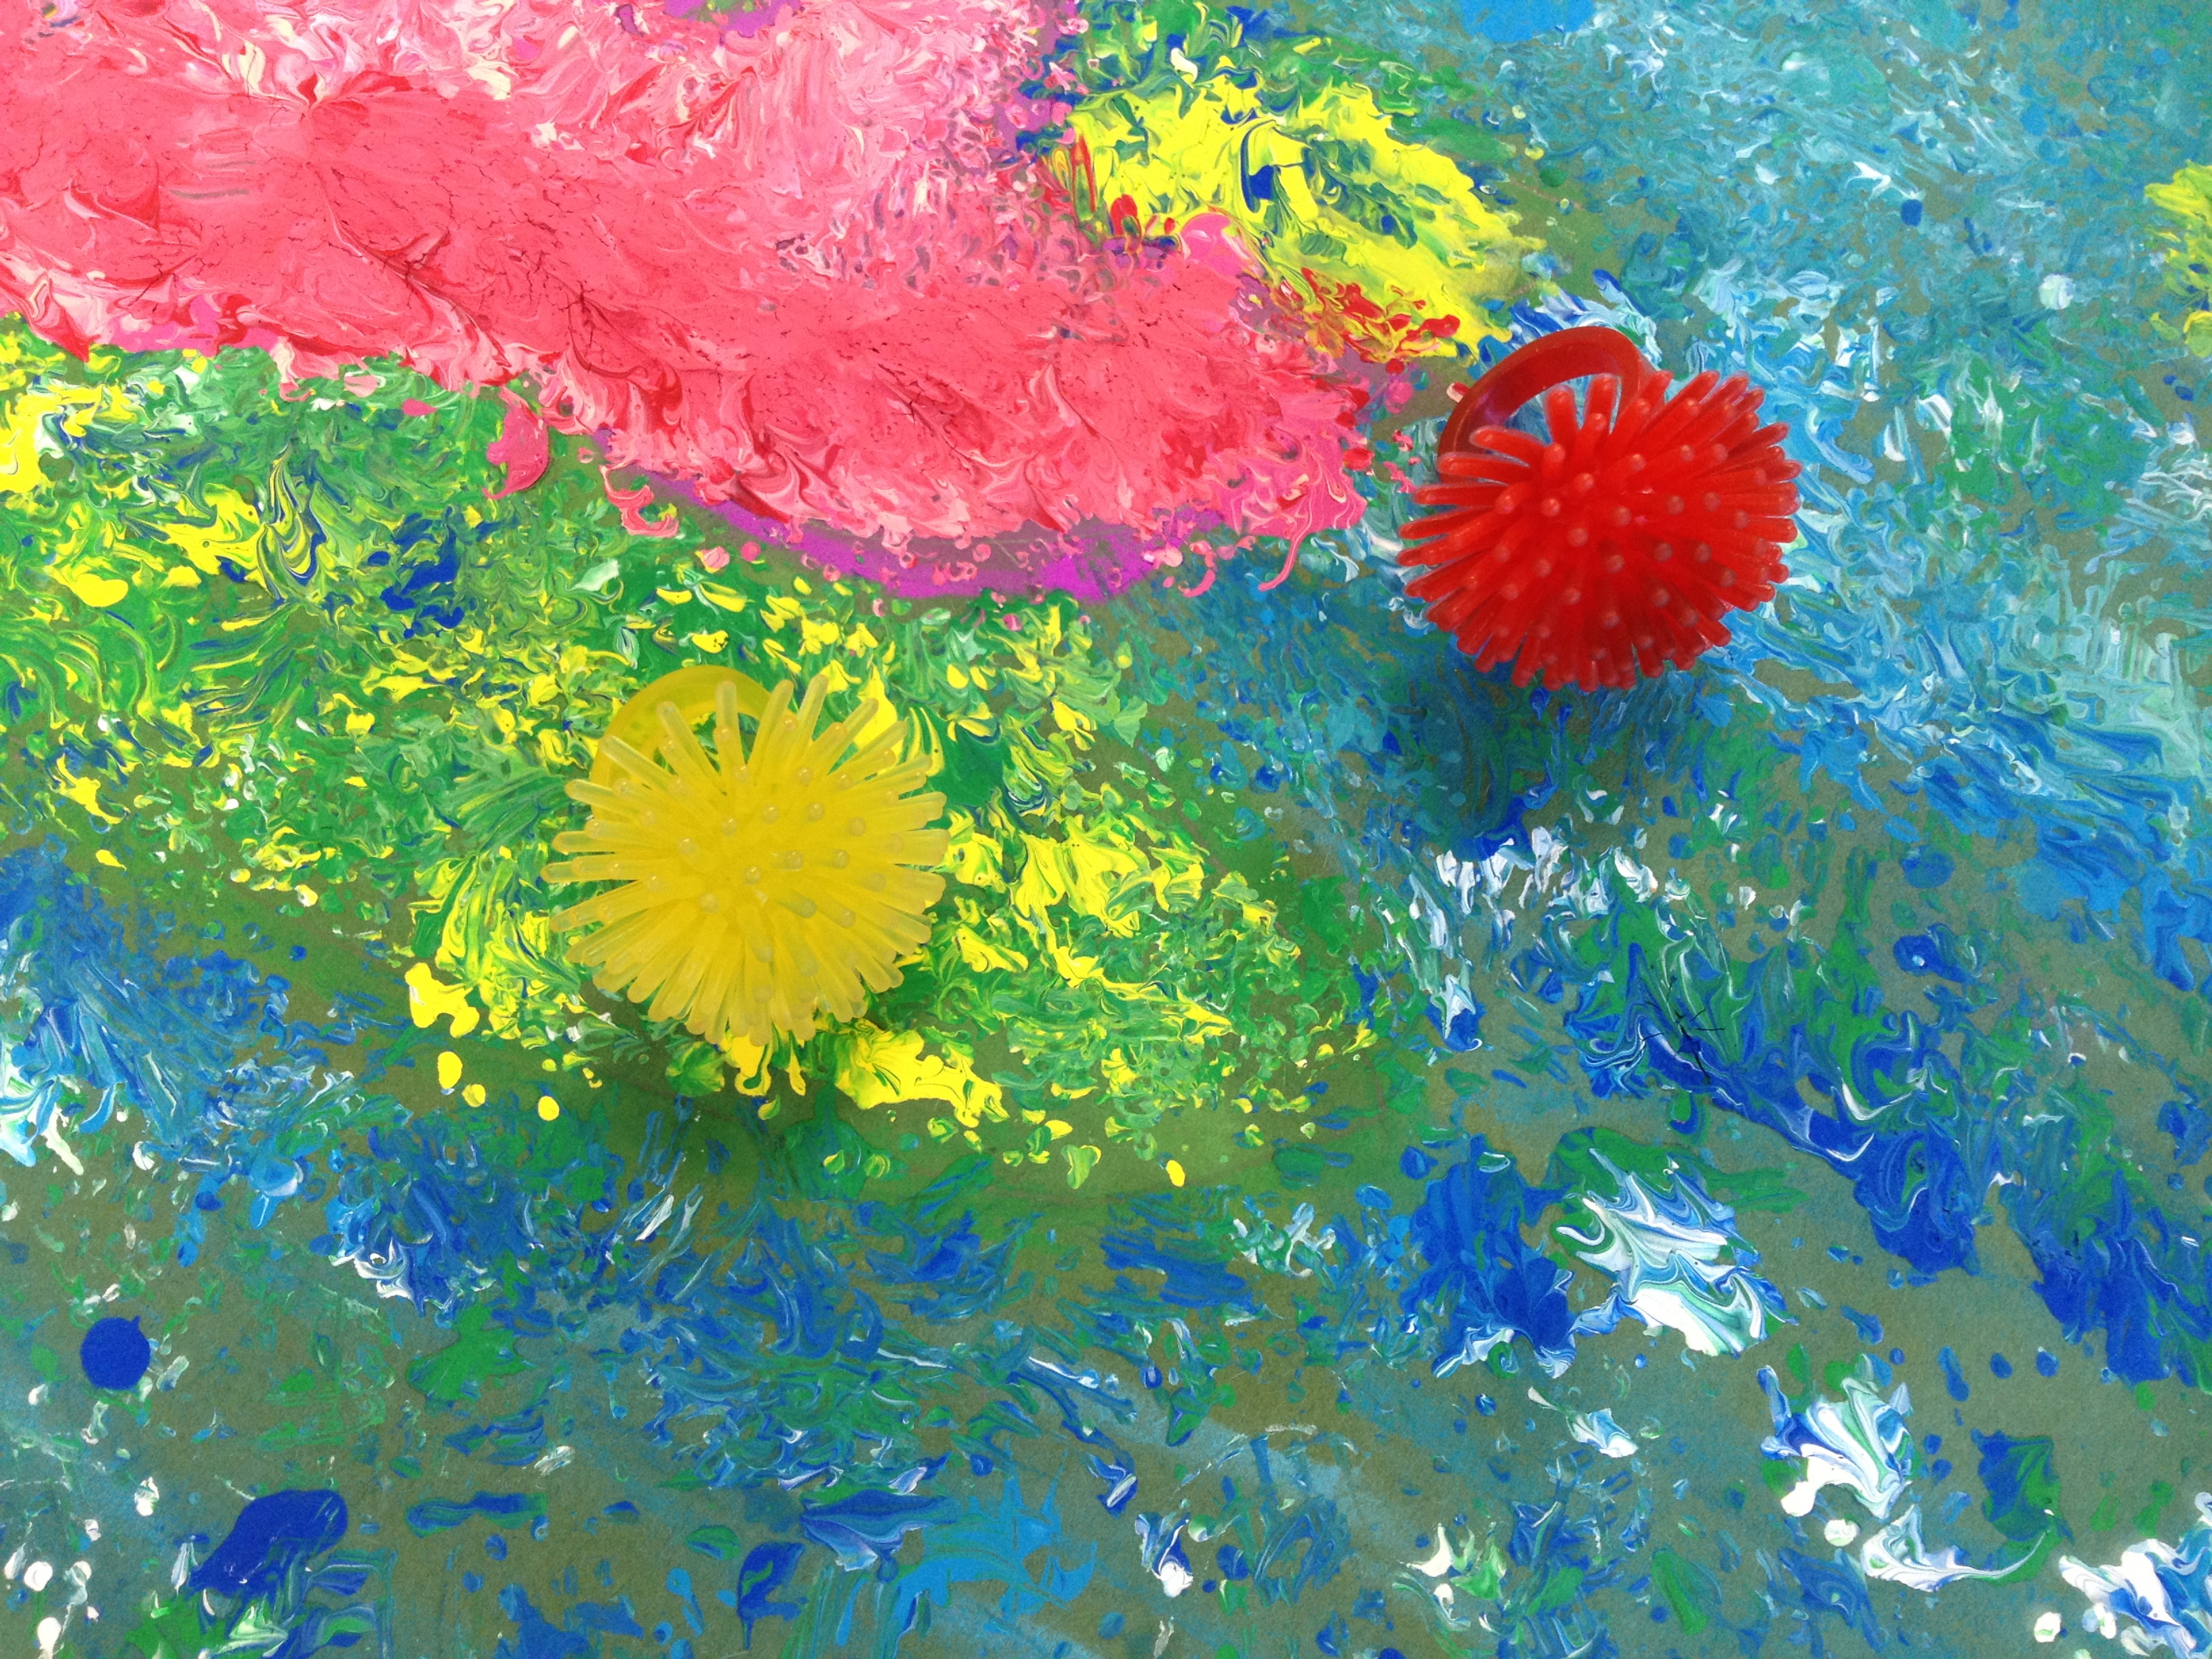
A New Twist on Monet
Kelly also brought these Monet water-lily paintings. Please zoom in on this painting – the paint texture is so interesting. Kelly didn’t offer a brush – her students applied paint with novelty rings purchased at Oriental Trading. These rings look like little sea urchins. If you try this, Kelly recommends pinching the ring instead of wearing it on her finger. Needless to say, her students LOVED this project!
Kelly’ s students painted their Monet-inspired art with a ring from Oriental Trading.
30-Minute Color Mixing
Nancy teaches art at Solana Highlands School. She brought a color mixing project. Students used two colors plus black and white. After tinting, shading and creating a neutral, they drizzled black glue over the top. I love how much variety her students achieved. Some of these abstract compositions look like animal patterns. LOVE! Even more impressive: Nancy only has 30 minutes with her students. She does a lot of stations and table rotations to fit her projects in the tight time frame.
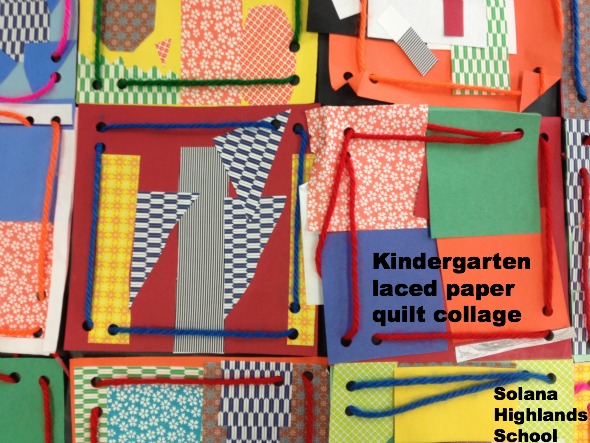
Kindergarten Paper Quilts
Nancy did these paper quilt squares with the kindergarten. The kindergarteners start with a 6″ square of paper. They collage first, then Nancy adds holes with a three-hole punch. Next class, the kindergartener lace the holes. Nancy glues the squares together into a quilt.
As always, I am FLOORED by my colleagues creativity. They always have interesting, challenging, beautiful projects – and they teach them so well. Thanks to Nancy and Kelly for sharing your ideas.
Do you love impressionism? Want to create memorable artworks? Try this Mini-Monet lesson plan from the Blick website. It even has an instructional video!
I adjusted the materials list from the Blick website. Here is what I used:
Shrinky Dinks shrink plastic, Frosted Ruff ‘n’ Ready, size 8″x10″, cut into quarters (tip: cut it on the paper cutter)
chalk pastels and spray fixative OR
colored pencils
easily removable masking tape, such as artists tape
color photos of impressionist art from books, notecards and calendars
Tape the Shrinky Dink, rough side up, over a section of the impressionist book or note card. Trace image onto Shrinky Dink. Use short strokes to mimic Monet’s and other impressionists’ style.
Students tape shrink film over impressionist art, then trace with pastel or colored pencil.
Bake in the oven according to directions on the Shrinky Dink package. Shrinky Dinks shrink when baked, starting at 4″x5″ before baking and about 2″x1.5″ after. When baking Shrinky Dinks, do not remove from oven until the plastic ‘comes up’ (folds and shrinks) and ‘comes down’ (flattens). Count to 30, then remove.
After tracing, remove tape and bake plastic in oven. Here is one after shrinking.
Kids are going to want to watch this! If you are doing this in a small group setting, let them watch the shrinking process through the oven window.
Completed Mini Monets
If you use chalk pastels, you will need to spray them with a fixative AFTER BAKING (hair spray is fine). If you don’t, they more likely to smear. You do not need to spray if you used colored pencil.
As a finishing touch, color the thickened edges of the shrunken artwork with gold marker.
Add a magnet, pin back, display as a group or on mini-easels.
This project would look great with Van Gogh’s artwork. Students will like tracing his short brushstrokes with pastel or colored pencil.
Do you have a favorite impressionism project? Leave a comment!
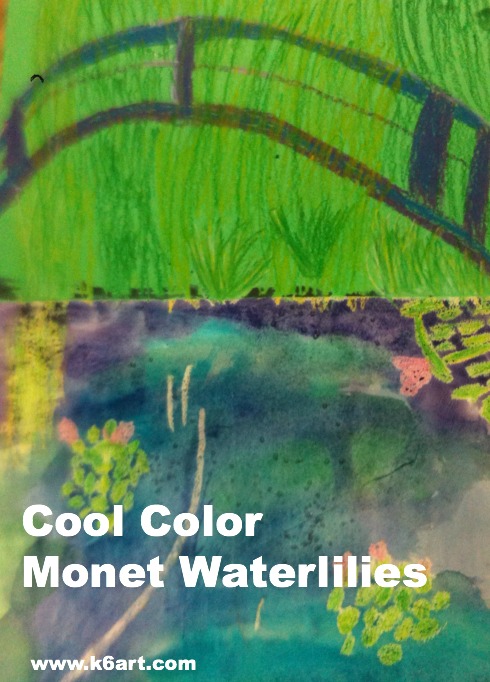
Second grade is studying the cool colors. After watching the excellent elementary color theory DVD Getting to Know Color in Art we looked at photos of Monet’s beautiful garden and pond in Giverny, France. Students could imagine themselves at the pond on a summer day, feeling the willows sway, listening to frogs as they rested on the lily pads, resting in the cool shade, even floating in Monsieur Monet’s ‘art boat’ as it passed under the Japanese bridge.
“Le Bassin aux nymphéas” 1899. One Monet’s many water-lily paintings.
We looked at several of Monet’s waterlily paintings, focusing on his use of cool colors and short, quick strokes of paint. You can download my Powerpoint of Monet’s garden here.
We then created an oil pastel and watercolor art work.
Allow three 40-minute sessions for this project.
Materials:
12×18 construction green construction paper
9×12 watercolor paper
glue sticks
oil pastels in blues, greens, and purples plus white, yellow and pink
watercolors in blue, green and purple
kosher salt (optional)
Discuss Monet’s art, his pond and garden. Review cool colors. View powerpoint or photos of Monet’s garden.
Fold green construction paper ‘hamburger’ (the short way). Glue watercolor paper to lower half of green paper.
Students use oil pastel to draw bridge, water lilies and foliage.
Review painting of pond and Japanese bridge.
Oil Pastel:
Using oil purple and blue oil pastels, draw three arcs (‘rainbows’) for the Japanese bridge. Add some vertical lines to the bridge to finish. Blend and highlight with white oil pastels.
Review photos of water lilies.
Using various green and yellow oil pastels, draw clusters of lily pads on the watercolor paper. The lily pads don’t have to be perfect – just ovals or quick strokes of pastel. They should overlap a bit. Add a few pink lily flowers, highlight with white.
Fill the entire top half of the green paper with foliage in greens and yellow. Use short strokes. Add a downward cascade of short lines for the weeping willow. Tell kids to ‘go behind’ the Japanese bridge.
Use short strokes of oil pastel to completely fill the green paper with foliage.
Painting:
Using the cool colors (blue, green and purple), paint the watercolor paper using long horizontal strokes. Colors can overlap and blend. Go right over the oil pastel lily pads.
Use purple, blue and green watercolors on the lower half of artwork
Students may add a small pinch of Kosher salt to the wet watercolor. The salt absorbs a bit of color and an additional dimension to the pond. Brush off salt when dry.
Wow!!! This project was a hit! We learned about a famous artist, reinforced color theory, experienced the joy of painting on watercolor paper and blending pastels. All kids were very proud of their artwork. Success!