Art Room Organization: The Best Things I Ever Bought


Its January.  That means you want to get more organized, right? Here are a few products that make my art room life a little (or a lot!) easier.


Elmer’s triple-size glue sticks. Glue sticks – so much to love, so much to hate. Hate #1: the standard size sticks (.21 oz. each) run out so quickly! Solution: big fat glue sticks.

  1. Elmer’s glue sticks: .77 oz. vs. .21 oz.

    These are more expensive that regular sticks, but they are over 3x larger. Available in 12 packs of white and Goes on Purple/Dries Clear.
    at office supply stores and Amazon (and maybe even your school district’s supplier!).

3M Command removable hooks

I used 3M Command removable hooks on my laminate cabinets. Instant rack!

Do you have laminate cabinets? Or some other vertical surface deemed off-limits to drilling/nailing by school officials? Try 3M Command removable hooks. These hooks have been in use for 3 years and none have fallen off.

2 oz. ‘salsa’ cups and lids

Glaze in 2 oz. 'salsa' cups

You will find many uses for these: glaze, leftover paint, glue, slip….made by Dixie and available at Costco , Smart & Final and Amazon (lids may be sold separately).
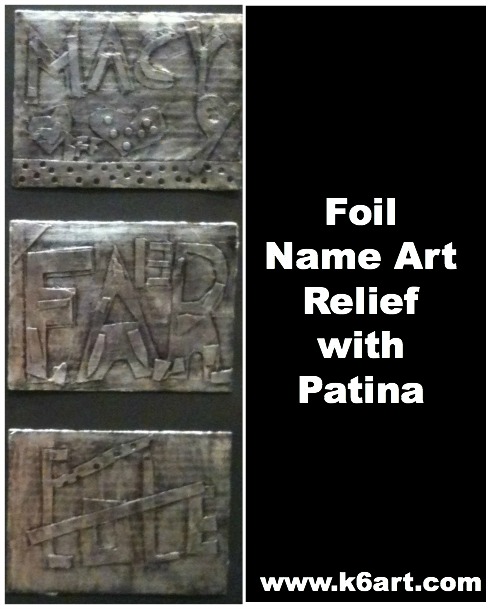
Pre-Cut Foil

Friends don’t let friends waste time cutting foil. Pre-cut foil comes in a pop-up box allowing you to distribute it as if it were Kleenex. Small boxes of 25 sheets are often (but not always) available at Dollar Tree and 99 Cents Only. 500 sheet boxes of Foil Popup Sheets are available at Amazon. Costco has its own brand in 500 sheet boxes. I use pre-cut foil for this sculpture project and this name art project.

I read art room blogs for two years before starting my own….your organizational tips have been so helpful to me!!!  Is there another tip you’d like to share? Leave a comment.

Happy January!

5th Grade Plaster Masks Update

The 5th grade is just about finished with the annual mask project.  I wrote about it earlier in this post.

Some students used sculpted foil under the plaster.  Wow! The effect is fabulous and rock hard.

This mask uses foil as an armature. Student also added wire antennae.

After completing the sculpture, we sealed the masks with matte medium and painted them with tempera.

Here are some more 5th grade masks:

Pineapple 'hair' made of sculpted foil covered in plaster wrap.


Student separated strands of roving yarn to make fur.


Elmer's Glue works great for adding yarn hair.


Glitter looks great on this fish.


Snowman's hat is made from a yogurt cup.

Angry birds are popular this year. Beak and antenna made of foil and plaster wrap.


Can’t wait till all 75 are up on the wall….

Update: Do you love plaster sculpture? New project now online! Click here and here for our plaster sport trophy posts.

Foil Name Art Relief with Patina

foil name art relief with patinaName art: what a great idea for the first art project of the school year. The sixth grade recently finished their foil name art reliefs. You can download my foil relief Powerpoint here.

Materials:

  • sturdy cardboard for background
  • foil (I used pre-cut foil Pop-up Sheets and cut my background cardboard a bit smaller than the foil)
  • light cardboard or tagboard  in two colors (I used red and gold)
  • pencils and erasers
  • scissors
  • hole punch
  • glue stick
  • spray glue
  • permanent black marker (I use Marks-A-Lot Large Chisel Tip Permanent Marker)
  • fine steel wool

Days 1-2: Design a two-color relief

We started by layering two colors of light cardboard to create a name art collage. Students could use their name, initials, or nickname. Students used hole punches to add interest to their designs.

It really helps to work with two colors of light cardboard when creating the relief.

Day 3: Cover relief with foil and black marker, buff with steel wool

I had students bring their reliefs outside. I sprayed the cardboard with spray glue, then slapped on a sheet of pre-cut foil. Alternately, you could glue foil to a whole stack of reliefs during your prep time. Or you could let kids cover the relief with glue stick and lay on the foil themselves.

Next, we covered the foil completely with black permanent marker.

Students covered the foil with permanent black marker.

Finally we rubbed off the marker with steel wool to create an attractive patina.

Use fine steel wool.


All the students loved this project!  They felt the resulting patina looked like old metal.

Sixth grade examples:

Biana added a basketball, hoop, and her jersey number to her name art relief.

Grace used a heart shape hole punch to add interest to her design. Jonah added layered geometric shapes.

Extensions:

After their reliefs were complete, students did crayon rubbings of their name art. Some did rubbings of their friends’ art on large tag board and used it to create their portfolios.

Want more name art ideas? Check out my other name art posts:

Enjoy!

Do you have a favorite name art project for the beginning of the year?

 NOTE: Post update 1/3/14

This post contains affiliate links.


Related Posts Plugin for WordPress, Blogger...