Modigliani Portraits of Mom


Modigliani portraits of mom

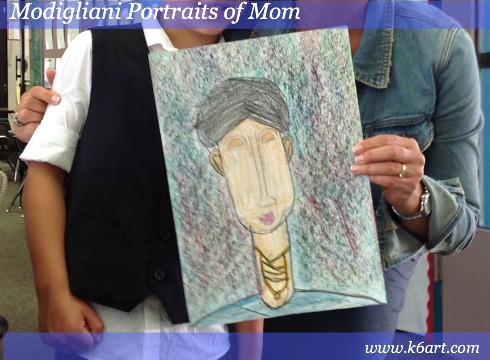
Our first graders just completed their Mother’s Day project – portraits of their Moms in the style of Amadeo Modigliani.

Day 1: Learn about Modigliani’s style; practice drawing.

We talked about how the artist’s style included almond-shaped eyes, long skinny noses, tiny lips, and long thin necks. Click here for my Modigliani powerpoint. Students did a practice drawing of Mom on copy paper.

I didn’t focus on Modigliani’s life as much of it was tragic. Click here to learn a bit more about Modigliani’s life.

Day 2: Draw portrait, color with oil pastel

We drew our portraits on watercolor paper using pencil. We colored with oil pastels. I offered several skin color options.  Students were encouraged to rub two colors of oil pastel in the background.

First grade results:

IMG_1796


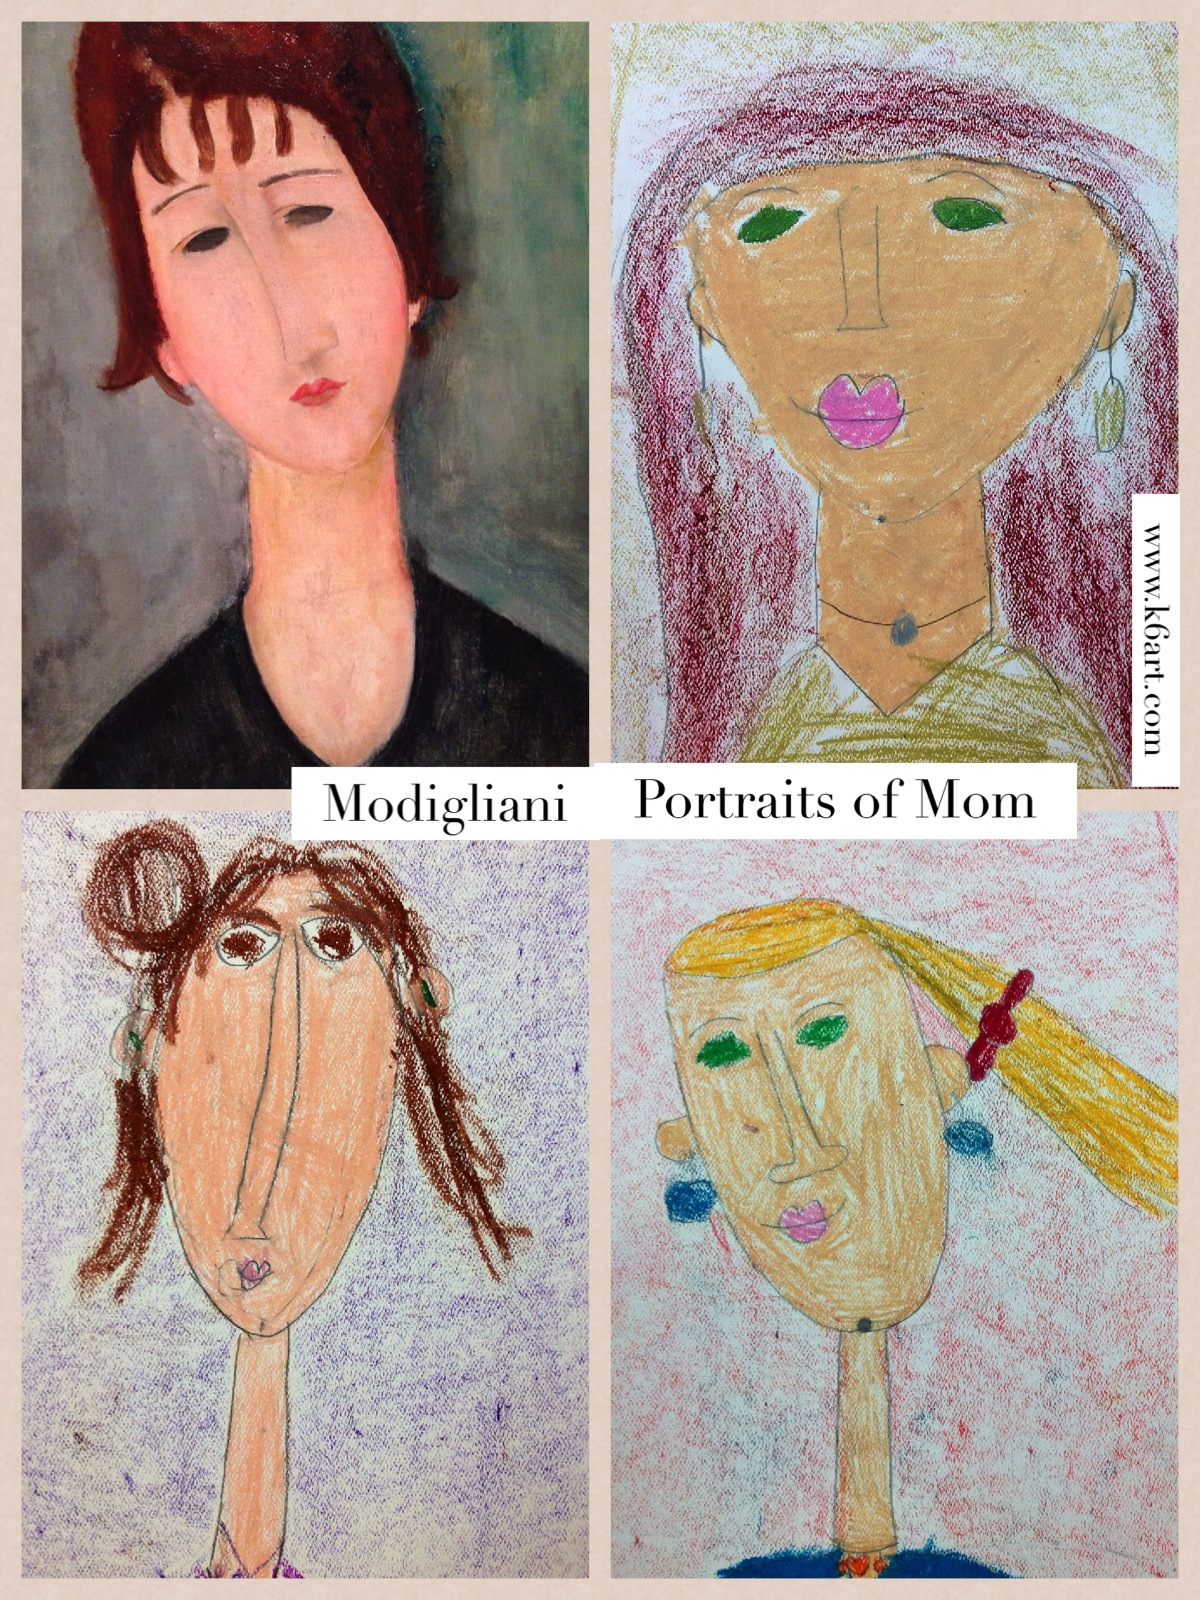
I taught this project before – click here to see more examples of student work. This project would work really well for Father’s Day – Modigliani made many portraits of men.

Educate the parents

This year I sent the classroom teachers an explanatory email with images of Modigliani’s work and a link to his biography. The email will go home in the weekly classroom newsletter. (Why? Last year a mother commented she didn’t understand her gift – when I explained she said she had never heard of Modigliani).

Here is a 2-minute video of Modigliani’s portraits of women.

Enjoy!

CD Case Portraits

CD case portraits

Do you remember those old-fashioned lockets with little portraits inside? Our fourth graders made modern-day double portraits using recycled CD cases, Sharpies and oil pastels.

Materials:

  • Clear plastic CD ‘jewel’ cases, with trays removed
  • Sharpies
  • pencils/erasers
  • oil pastels (we used Crayola Oil Pastel Sticks plus a few Pentel Oil Pastels for the skin tone)
  • paper for sketching
  • baby oil + q-tip (for correcting oil pastel mistakes)
  • rubbing alcohol + q-tip (for correcting Sharpie mistakes)

We began by looking a pictures of lockets from Google images.

lockets

We talked about how you could only put a couple of photos into your locket.  You had to choose carefully. Our students then sketched two portraits to fit their CD ‘lockets’: one self-portrait, plus one portraits of someone very special.

tracing the portrait in sharpie

  1. Trace around CD case with Sharpie, then sketch a portrait in pencil.
  2. Place sketch under CD case. Trace lines in Sharpie on OUTSIDE OF CASE.
  3. Completed line drawing of single portrait.
  4. Completed line drawing of double portraits.

It was really wonderful to see who the students drew for the second portrait. Most drew a parent or a sibling. Several drew their current or late pet. A couple of students drew religious portraits. My intention was to do an identity project, and I do believe we got a better idea of the student based on who he or she selected for that second portrait.

The last step was coloring with oil pastel INSIDE OF THE CASE . The oil pastel is messy and can smear – by putting the pastel on the inside we can trap that mess for tidy storage.

Tips for success:

Sharpie on the outside of the case, oil pastel on the inside of the case. Erase Sharpie mistakes with a little alcohol and a cotton ball; erase oil pastel mistakes with baby oil and a cotton ball or q-Tip.

color with oil pastel on the inside


The project took three 40-minute classes, including writing an artist statement. It was lots of fun and extremely successful. These look great displayed accordion style on a table, especially with a light coming through from behind. I think the 4th graders will be very proud to show their families their very special double-portrait ‘lockets’.

This would also be a great recycled art or Earth Day project. It would also be a GREAT Mother’s or Father’s Day gift!

P.S. I got double duty out of my 250 donated CD cases! Here is a Kandinsky circles project made from the discarded CD trays.


Related Posts Plugin for WordPress, Blogger...