Warm and Cool Color Clay Rattles: 100% Success!

Warm and Cool Clay Rattles

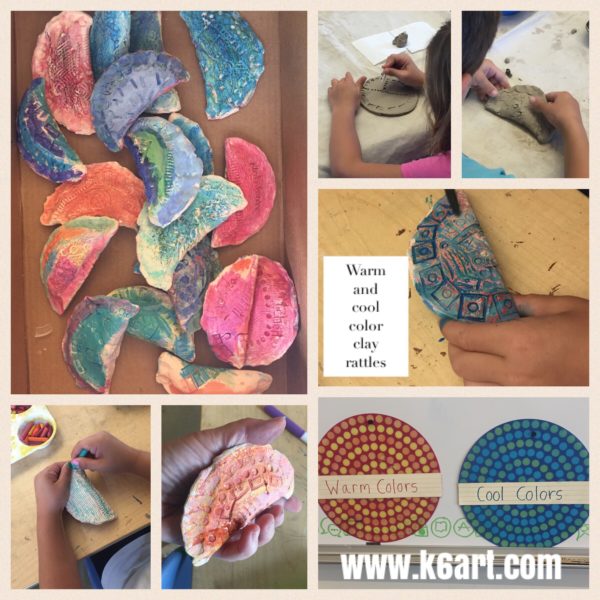
If you are looking for a super-successful clay lesson for Kindergarteners-second grade, you’ve come to the right place. These functional clay rattles only requires a single bisque firing, and are finished with a fast and easy warm and cool color process. Students, parents and teachers loved them. I’ve included an instructional video at the end of this post – all my kindergarten students watched it and created the rattles independently.

Materials:

To create the rattles:

  • Clay
  • Rolling pin and slats (or slab roller)
  • Circle template or bowl to trace
  • Pin tool
  • Texture tools (we used LEGO)
  • Toilet Paper
  • Toothbrushes and water bowls

Prep:

Roll the slab and cut the circles. Cover the tables. Each table should have a tray of LEGO, one toothbrush for every two students, and small water dish. They also need a couple of squares of toilet paper and a little scrap clay.
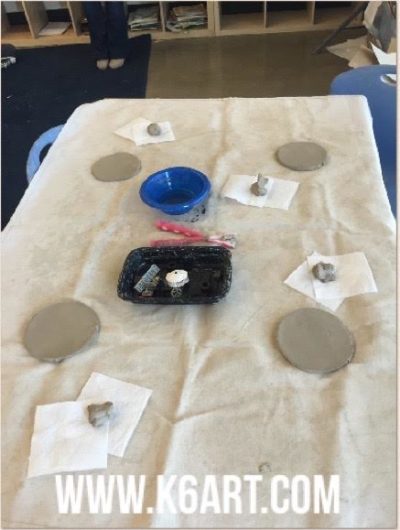
table set up

Process is in my instructional video. This was a very effective video: 100% of KINDERGARTENERS did this project correctly and independently the first time. I strongly recommend showing this.

Coloring the rattles:

Materials:

  • crayons/construction paper crayons, sorted into warm and cool colors
  • individual pans of water color
  • brushes and water cups

Process:

Students scribble on the textured ceramic with their crayons. Ideally, one side could be cool color crayons and the other warm. Then they paint over the crayons with (ideally), the opposite color scheme. This was kindergarten….some did it, some didn’t, but they all looked great.

This was a great end of year project: all my water colors had just about run out. Yet we had enough for this project. I sure look tired in this video, though. Typical for end of year…
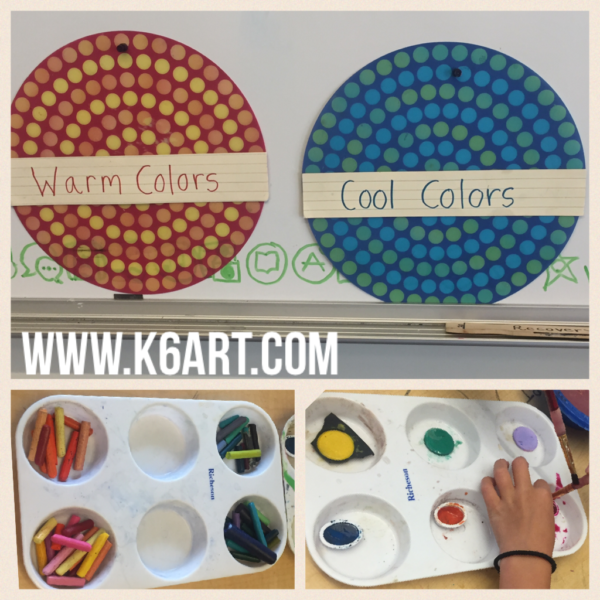
Set-up for coloring the rattles

Enjoy!

Do you have a sure-fire clay project for kindergarten?

Have you tried creating instructional videos?

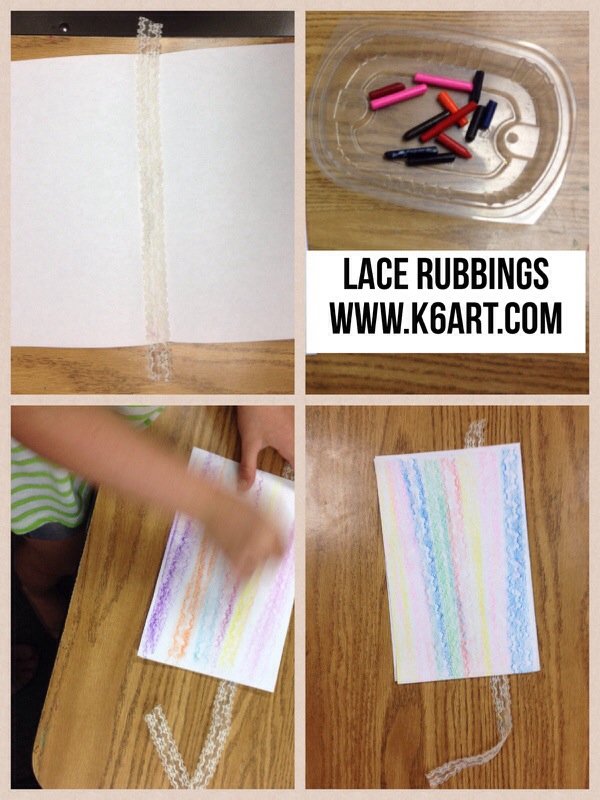
Lace Texture Rubbings

20140613-102034.jpg
Here’s an easy end-of-year art project that has no clean up yet teaches about texture.

Materials:
Copy paper
Pieces of lace, approx. 14″ long
Peeled crayons – variety of colors

First we talk about physical texture. Students run their fingers along the lace. They described the lace as ‘bumpy’ or ‘rough’. Next we folded the copy paper horizontally (‘hamburger’) and sandwiched the lace inside, parallel to the crease. Students closed their papers and rubbed the covered lace with a peeled crayon.
The kindergarteners and first graders were AMAZED when the lace texture appeared on the paper. We opened the papers, scooted the lace over an inch or so, and repeated the process with a variety of peeled crayons. Within a few minutes, students had a lovely striped lace paper.
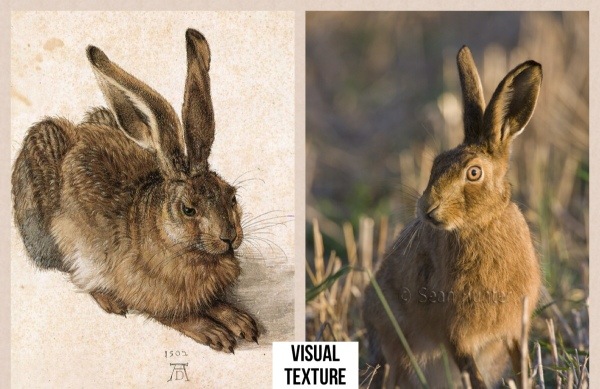
Physical vs Visual Texture
We had a quick discussion about physical and visual texture. Students ran their hands over their crayon art. How did the paper feel? Did it feel the same as the lace? The bumpy lace has texture you can feel. This is physical (tactile) texture. The rubbing has texture we can see but not feel. .This illusion of texture is called visual texture.

20140614-105355.jpg
I showed students a laminated poster of Durer’s hare. I instructed them to close their eyes and imagine petting the rabbit’s soft fur. They agreed the artists had done a great job painting the hare so that the fur looked real (visual texture). I let them touch the laminated card – it just felt like smooth plastic. The art just had visual, but not physical texture.
We went on to create crayon rubbings of other textured items such as cardboard coffee sleeves and pennies. They loved rubbings – one student said it was the best thing we did all year.

Enjoy!

What’s your best end-of-year art project?

60-Minute Holiday Collagraph Crayon Rubbings

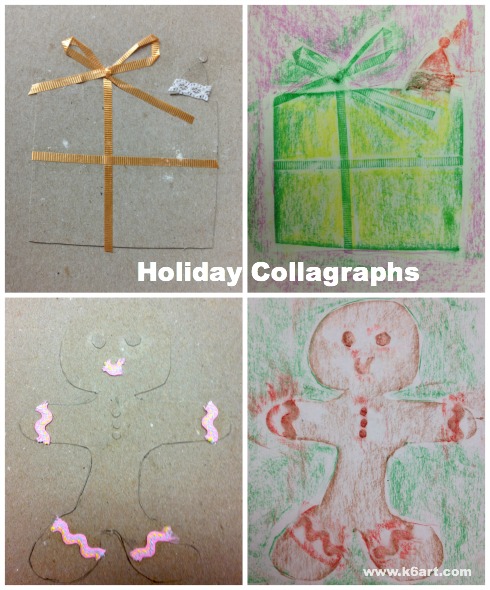
Textured curling ribbon tied in a bow looks great on this wrapped gift. The gingerbread man is trimmed in rick rack.

Textured curling ribbon tied in a bow looks great on this wrapped gift. The gingerbread man is trimmed in rick rack.

Need a fun and flexible holiday project? Try making you own collagraph crayon rubbings, using cardboard and scraps. The project takes about one hour and is adaptable to all sorts of holidays like Valentine’s Day and birthdays.

Materials:

  • light cardboard, 8.5×11″, two per student
  • scissors
  • pencil
  • glue stick
  • textured fabric trim such as ribbons, rick rack and lace
  • optional: hole punch
  • optional: ‘wavy’ craft scissors (like these scallop Fiskars Paper Edgers)
  • copy paper 8.5×11″ or other thin paper
  • peeled crayons

Create the collagraph rubbing plate

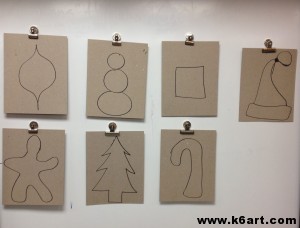
Students drew one holiday shape on cardboard, then cut it out.

Students drew one holiday shape on cardboard, then cut it out.

Select one holiday shape for the main part of the collagraph. Draw the shape on the first piece of cardboard and cut it out (note: for those students creating their own designs, emphasize that the design needs to be simple and stretched to the top and bottom of the page).

Glue the cut-out shapes to the second piece of cardboard using glue stick. You have now created a collagraph rubbing plate.

Now for the fun!

Cut decorations for your collagraph plate from your cardboard scraps and from fabric trim. Experiment with the craft scissors and the hole punch. Glue these decorations on top of and around your main shape. LAYERING IS GOOD! TEXTURE IS GOOD!

Now flip over the collagraph plate and place it face down on your chair. SIT ON THE CARDBOARD AND COUNT TO 30.  (It is so fun to do this step!) Now all the pieces are glued down are we are ready to rub.

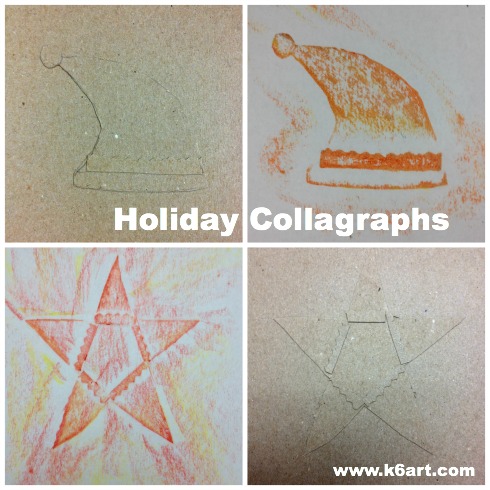
Santa hat and star, decorated with cardboard cut with Fiskar paper edgers.

Santa hat and star, decorated with cardboard cut with Fiskar paper edgers.

Creating the crayon rubbing

Place your collagraph face up on the table. Cover with the copy paper. Rub with a peeled crayon (note: it is helpful to have a partner hold the plate while the student rubs). Repeat with another crayon color.

Now trade collagraph rubbing plates with your neighbor. Or rotate tables so everyone comes away with a set of holiday cards.

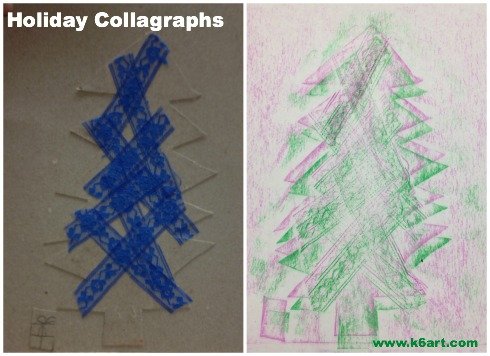
This students glued lace to her tree for texture. She did two rubbings with green and magenta crayons.

This students glued lace to her tree for texture. She did two rubbings with green and magenta crayons.

This technique would make awesome cards for birthdays – imagine a collagraph layer cake with rick rack candles. Imagine a textured doily rubbing plate for Valentine’s Day cards.

If you want to take this project a step further, you can roll printer’s ink on the collagraph and pull some prints. You can also color or paint the collagraph plate so it become an artwork.

Want more ideas? Check out my previous post on 30-minute collagraph printmaking.

Enjoy!


Do you have a fun way of making holiday cards?

Related Posts Plugin for WordPress, Blogger...