Texture Collage

Want to introduce your students to texture? Try a texture collage project.

20140120-102329.jpg

Collage and Construction in Grades 1-4 by Lois Lord, 1970 edition.

I found great instructions in the book Collage and Construction in Grades 1-4 by master art teacher/author Lois Lord. You’ll need large paper for the background format, glue, stapler and scissors, plus ‘materials of contrasting texture’:

Rough textured materials include corrugated cardboard, burlap…used sandpaper, wood shavings, egg-crate dividers, excelsior, and orange, onion and potato sacks.

Contrasting soft -textured material include pieces of fabric such as velvet; scraps of fur; cotton; bits of sponge; and feathers…

Materials with smooth textures include shiny metallic papers bought or salvaged from Christmas wrappings, chewing gum, and other packets. 

Collage and Construction in Grades 1-4, p.10.

Lucky you – you get to actually watch Ms. Lord teach this collage lesson. Please enjoy ‘Collage: Exploring Texture’, filmed back in 1961.

http://vimeo.com/33304500

Not only to I love Ms. Lord’s teaching style, I love how she organized her collage supplies by texture and how she distributed the supplies. I wish she had been my teacher! Although this film was produced back in 1961, it is still inspiring.

You may have noticed Ms. Lord’s students used jars of liquid paste applied with a brush. It reminded me of this no-spill paint cup filled with glue at the collage station at San Diego’s New Children’s Museum.  The cups come with lids so you can cap them up at night. You will need to soak the brushes in water after use. (note: this may be a good use for the brushes that come with your pan watercolor sets). Want more glue options? Click here and here to see other glue cups in the classroom.

White glue in spill-proof paint cup at San Diego's New Children's Museum

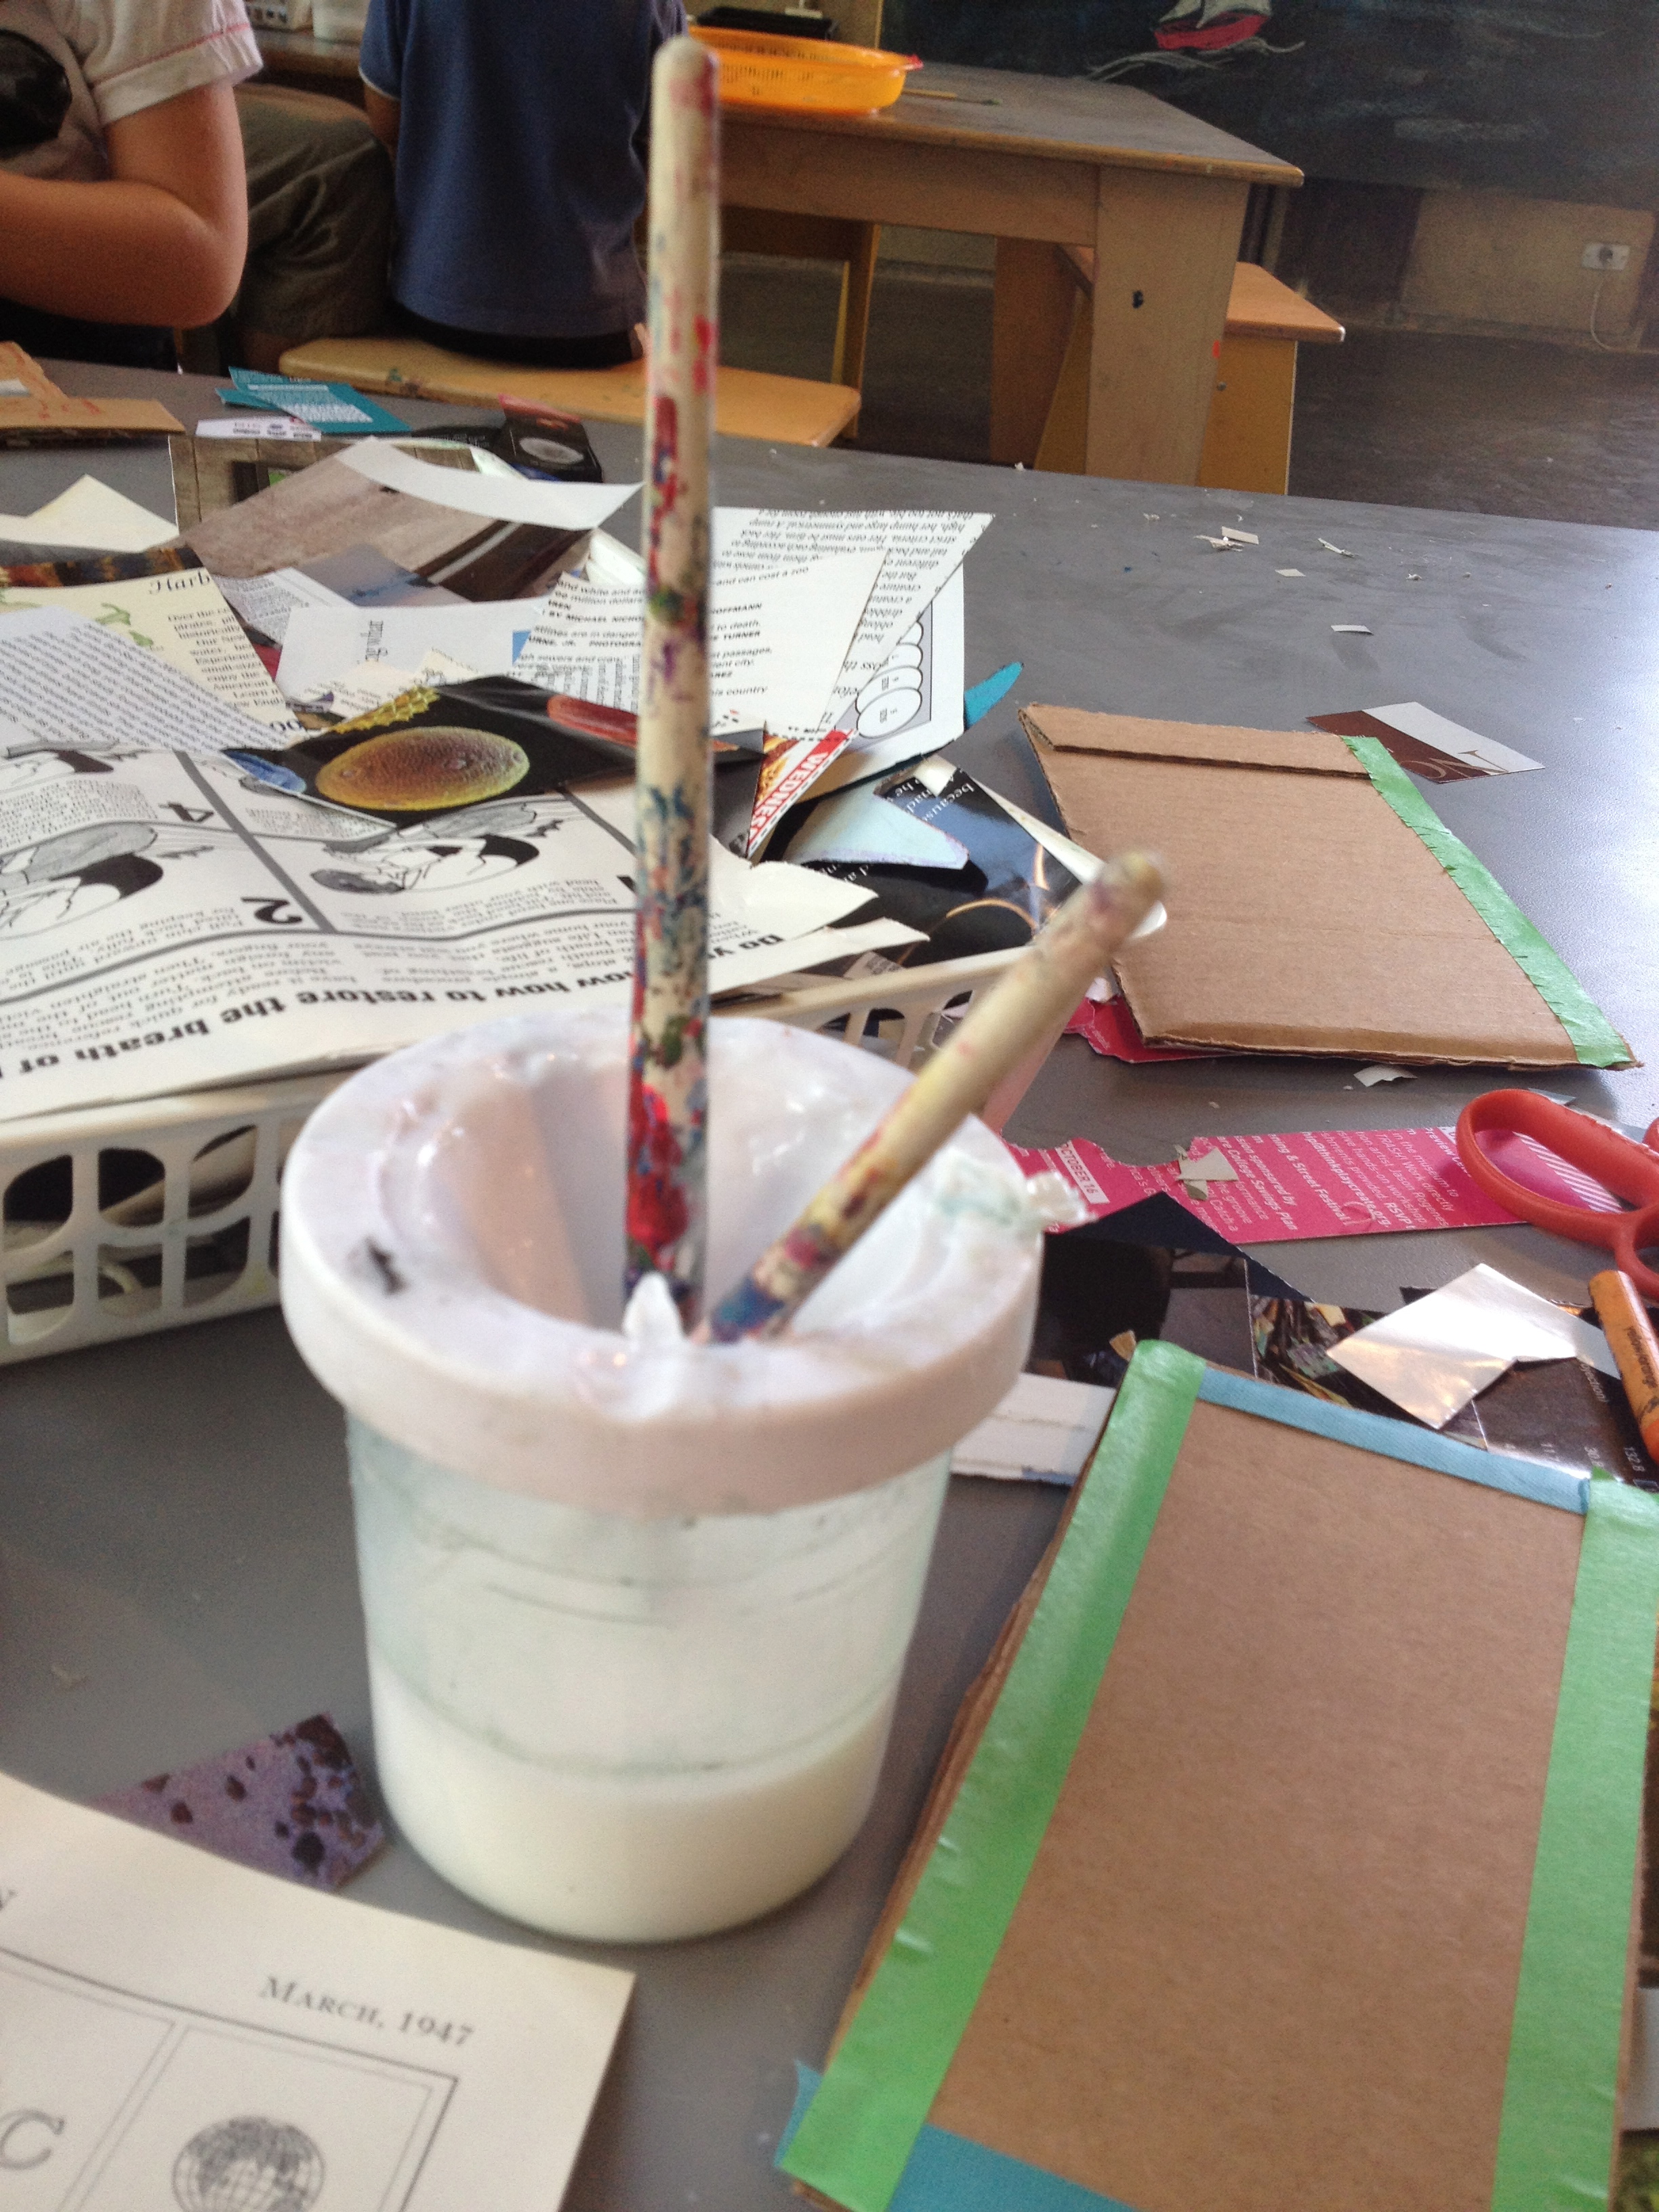
White glue in spill-proof paint cup at San Diego’s New Children’s Museum.

Thanks to Wendy Apfel for sharing this excellent video on Vimeo.

Enjoy!


Happy Throwback Thursday! Stop by next Thursday to see what I’ve discovered in my vintage art education collection.

Kindergarten Cookie Collage

kindergarten cookie collage

Our kindergarteners just finished a fun paper cookie collage project. We used real cookie cutters as tracers to create our own paper cookies. Here’s one ‘cookie cutter art project’ you and your students will really enjoy.

Materials:

  • large colorful paper plates, one per person
  • paper doilies, one per person
  • manila paper, 9″x12″
  • construction paper, light brown and dark brown, 9″x12″
  • cookie cutters in simple shapes (star, heart, bell, gingerbread men)
  • circle tracers (old lids)
  • pencil
  • construction paper crayons
  • optional: metallic crayons
  • glue stick
  • scissors

Kindergarteners trace real cookie cutters onto brown paper, decorate with construction paper crayons, and glue onto a paper plate. Allow 60 minutes.

The Art Project

Pass out brown papers and a variety of cutters for each table. Students trace a cutter, then swap cutters with their neighbors. We were able to fit about five large ‘cookies’ on each sheet of paper.

Decorate with ‘frosting’ (color with construction paper crayons).

Now get the paper plate ready. Rub glue stick all over the front of the plate, place doily on glue and pat down. Cut out the cookies and use glue sick to attach them to the doily. Overlapping is fine.

We added a few final decorations with metallic crayons.

The project was inspired by this post from ARTASTIC!

Connections to literature:

Mr. Cookie Baker by Monica Wellington is a nice book to read as an intro to the project.

What’ll I do differently next time:

  • Use embellishments (glitter, beads, yarn, etc.)
  • Have a ‘cookie exchange’ so kids can swap with a friend
  • Use a variety of colored paper plates and doilies
  • Adjust the project for Valentine’s Day (heart cutters, red plate) or Mother’s Day.

Enjoy!

P.S. Want to see more food-related projects for kindergarten? Check out these Common Core-aligned lesson plans from San Diego’s New Children’s Museum.

Helen Shirk Silhouette Necklace

helen shirk pinable

Helen Shirk is a San Diego artist and Professor of Art known for her metalwork and jewelry. I recently had the pleasure of viewing necklaces from Shirk’s Traces series on exhibit at San Diego’s Mingei International Museum. Even better – I got to participate in a Shirk-inspired paper jewelry activity taught by the Museum’s Education Department. The art project is so much fun – I just have to share their lesson!


'Crimson Glory' necklace by Helen Shirk, 2011. Steel, oxidized silver and china paint.

‘Crimson Glory’ necklace by Helen Shirk, 2011. Steel, oxidized silver and china paint.

We had two options for our silhouette necklace project: 1) a quick, 30-minute project using paper punches or 2) an hour-long project using real traced leaves. Both options focus on organic shapes and repetition.

Materials for both projects

  • black construction paper
  • card stock
  • glue sticks
  • yarn
  • scissors
  • tape

Project 1: 30-minute Punched Paper Silhouette Necklace

Additional material – paper punches in organic shapes (like these leaf , branchbutterfly, and dove  punches).

We punched paper shapes from black and colored papers, then glued them to a background and added yarn to form a necklace. Click here and here for the lesson plan, written by the excellent Education Department of the Mingei International Museum.

Shirk inspired necklace made with craft punches and card stock.

Shirk-inspired necklace made with craft punches and card stock. Teacher example.

Here is my Shirk inspired design!

Here is my Shirk inspired design!


Project 2: Traced Silhouette Necklace

Additional material: natural materials such as leaves, twigs and flowers.

Students make tracings of each onto construction paper, then cut out and arrange into a necklace.  Click here for the Mingei’s curriculum guide including this project.

Hand cut paper necklace inspired by Helen Shirk's jewelry.

Shirk-inspired paper necklace made by tracing leaves onto black and white paper.  Teacher example.

Helen Shirk’s Trace necklaces are on display at the Mingei Museum through January 5, 2014 as part of the Allied Craftsmen Today exhibit. For more examples of Helen Shirk’s jewelry, click here.

I wrote about the Mingei’s Chihuly chandelier – click here to see their fabulous 30-Minute Chihuly Chandelier project.

Special Notice for San Diego Teachers and Parents:

  • Teachers: Do you want to take your class to the Mingei Museum? The Mingei provides free admission for all K-12th grade tours as long as they’re scheduled in advance.
  • Parents: The Mingei is free to San Diego county residents and military the third Tuesday of the month. Monthly Family Sundays offer admission and fun activities for just $5/family. Go to www.mingei.org for more details.

Enjoy!

40-Minute Poinsettia Tear Art Collage

40-minute poinsettia tear art collage

Do you want to create a poinsettia art project with little prep or clean up, in less than one hour? Try this fun tear art collage project.

Materials:

  • colored construction paper, 9″x12″, one per student
  • red paper,  6″x9″, one per student
  • green paper, 6″x9″, one per student
  • yellow paper, 6″x9″, one per table
  • glue sticks

If possible, get some live poinsettias. I borrowed some from my colleagues and returned them at the end of the day.

Discussion:

We started off with a few poinsettia facts: the red ‘flower’ is called a bract. The bract is made of red leaves, NOT petals. Poinsettias are native to Mexico, where they are known as Noche Buena (‘Christmas Eve’).

Next students looked carefully at the poinsettias. We noticed the shape of the leaves, and had a quick review of organic vs. geometric shapes. We also noticed the red leaves were centered around a cluster of yellow dots. The red bract overlapped the green leaves. I pointed out that green and red are complementary colors.

Students observe poinsettias and create a collage using red and green paper.  Allow one 40-minute class.

Students observe poinsettias and create a collage using red and green paper. Allow one 40-minute class.

Creating the collage:

I modeled tearing. Students created odd numbers of red and green leaves, arranged them, then glued them to the 9″x12″ construction paper using a glue stick. We found out it was easier to glue the green leaves first. Students could place the red leaves over or in-between the green leaves. As a final touch, students could tear a few dots of yellow paper and glue them to the center of their paper poinsettias.

Second grade results:

Poinsettia tear art gallery - 2nd grade

Because we had live poinsettias on the tables, I encouraged students to hold up their torn shapes to the real leaves for comparison. They really enjoyed observing real plants, much more than working from a picture or from my example.

If you look carefully at our collages, you will see a white torn edge on the red and green papers. We used Fadeless Art Paper– it is colored on one side and white on the other.

I would love to use this technique to create a Van Gogh-inspired vase of sunflowers!

Enjoy!

Do you have a favorite tear art project?

Story Stones: Art and Writing

story stones pin able

What are story stones? Story stones are smooth rocks decorated with an image of a person, animal or thing. They are used with children for play, therapy, and just to spark imaginative conversation and story telling.

I recently attended a professional development workshop on the expressive arts. We learned how to make collage story stones, and then to use them in creative writing. The project was inspired by a project in ‘Show Me a Story: 40 Craft Projects and Activities to Spark Children’s Storytelling by Emily Neuburger. If you are being ‘encouraged’ to incorporate literacy activities in the art room (or vice versa, want to do arts integration in the general ed classroom), story stones may be right for you.

show me a story by Emily K. Neuberger

Materials:

  • river rocks, or other smooth stones with flat surfaces, large enough for collage
  • scissors
  • colored paper scraps
  • fabric scraps
  • embellishments such as ribbons and lace
  • Mod Podge (we used gloss finish)
  • brushes
  • Sharpies
Teacher-created story stones.

Teacher-created story stones. Allow one hour to create stones.

Create the story stone:

Wash and dry the stones. Let each child select a stone. Create a collage of a person or animal, real or imagined, on the stone. Use brushed Mod Podge as glue. When the collage is glued down, brush on another coat of Mod Podge as sealer.

After the story stone as dried, add eyes and other facial features with Sharpie.

Optional: after the collage has dried, flip over the rock and create another character on the back.

I created a story stone with main character Mae on the front and her cat on the back.

I created a story stone with main character Mae on the front and her cat on the back.

Activities: Art and Writing

Discuss elements of art in your story stone. For example, here are the elements in the Mae/cat stone:

  • Line: Spirals in the dress, belt is a horizontal line
  • Shape: body is made of geometric shapes
  • Color: neutral skin and rocks ; warm color belt pops out from cool color dress
  • Texture: hair is made of lace, stone is smooth
  • Form: rock is organic form, figure wraps around rock; art on both sides

Writing:

Exercise #1: Stone Story Starters. Look at your story stone and answer the following:

  • Who am I?
  • Where do I come from?
  • What do I like to do?
  • What do I like to eat?
  • How did I get here?
  • What is my name?
  • If I could speak, what would I say?

Here is my story, based on my stone:

I am an old lady from New York City. I like to sit on the steps, in the sun, with my cat in my lap.  I don’t like to shovel snow from my steps. I walk slowlyMy favorite things to eat are eggs and toast (my cat likes turkey cat food). I was born in the city and have lived here my whole life. My children moved away. I live in a brownstone in Brooklyn. My name is Mae. I like to be alone. I am not lonely.

Exercise #2: circle (or bold) words in your story that suggest feelings or appeal to the senses. Use them to create a poem. Add extra words if necessary.

I created a super-simple haiku:

Mae sits in the sun

Her cat purring in her lap

Snow long forgotten

Common Core Standard: CCSS.ELA – Literacy RL 1.7 Use illustrations and details in a story to describe its characters, setting or events.

There are so many ways to create story stones. A little research turned up hand painted stones on Etsy and stones made with paint, marker or stickers on Pinterest. You can collage illustrations or photos cut from a magazine or catalog.

I would love to create story stones with art club or at  summer camp. For those art teachers pressed for time (like me!) it would be interesting to create the story stones in the art room and let the students do the storytelling in the classroom.

Thanks to Amy Andrews and Talia Morales from Coast Music Therapy for presenting our professional development workshop, Expressive Arts in Special Education.

Enjoy!

Related Posts Plugin for WordPress, Blogger...