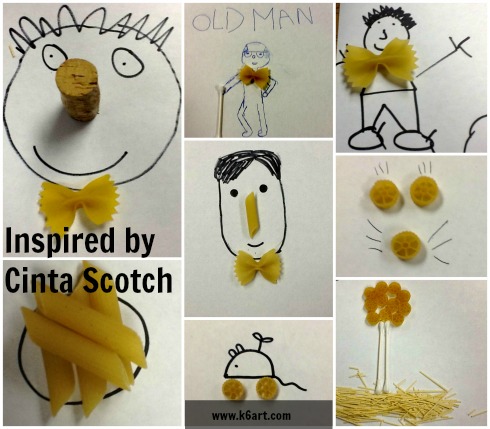
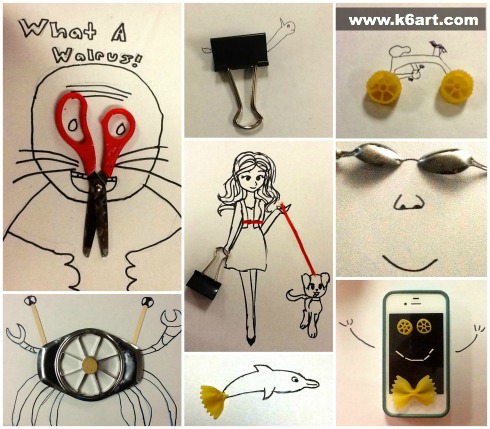
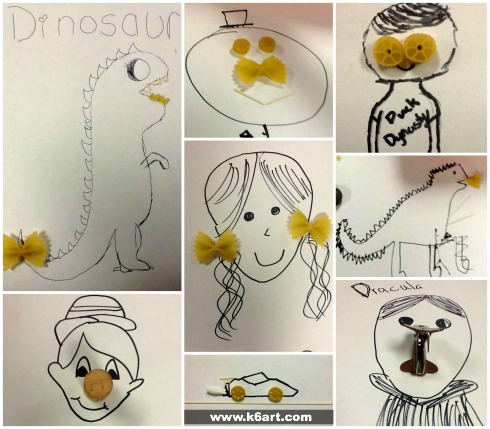
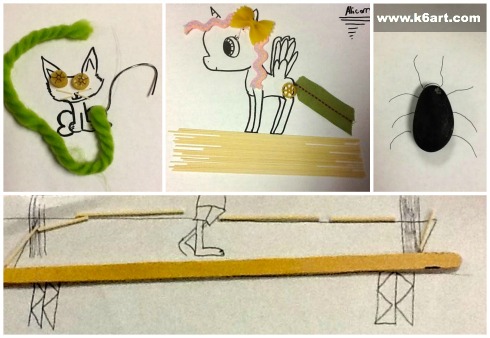
Our sixth graders just finished a quick, highly engaging photography/drawing project.
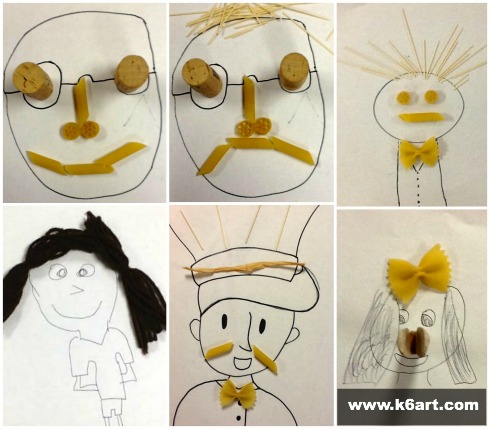
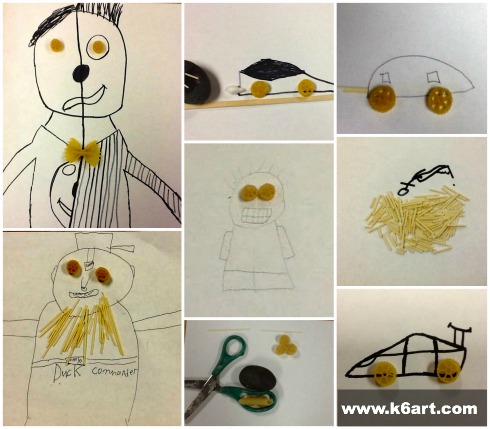
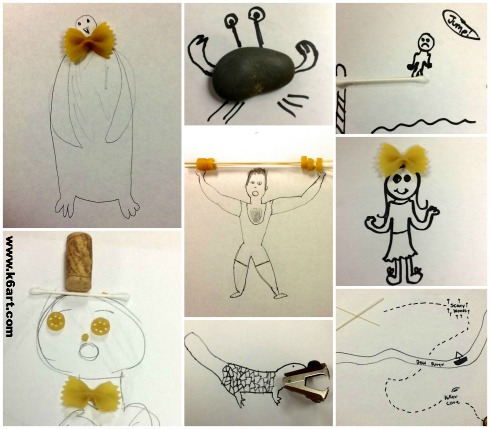
This project was inspired by the work of Ecuadorian artist/art director Javier Perez , also known by the nickname ‘Cinta Scotch’. He uses found objects plus ink to create simple, witty illustrations which he shares with his followers on social media.
I gave each table copy paper, sharpies, and a bin containing a bunch of random objects (office supplies, pasta, some kitchen tools, corks and other odds and ends). They created these artworks, and photographed them with iPads. Each kid was able to create at least two during a single 40-minute class.
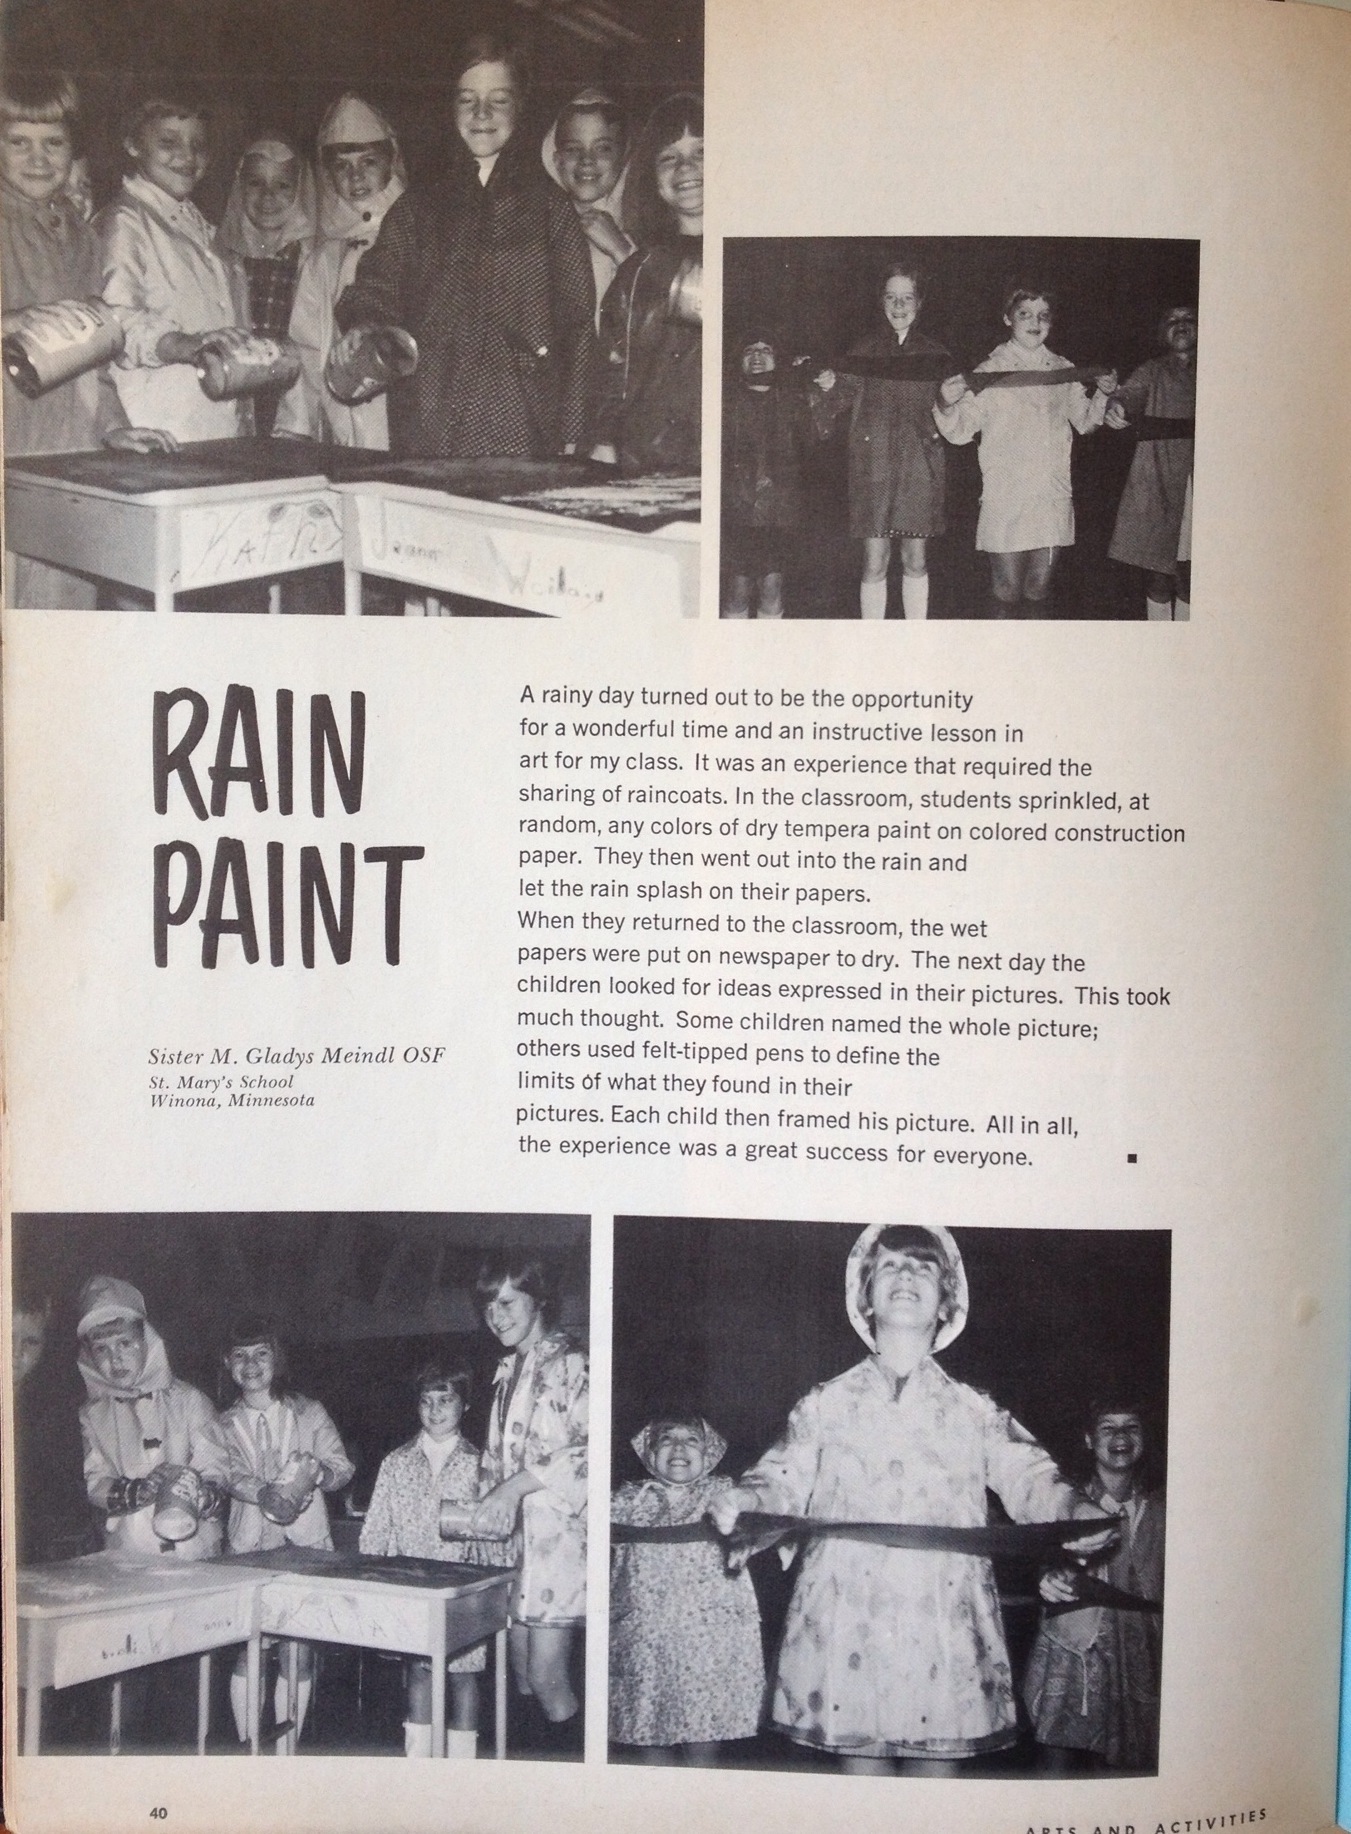
Heavy rain is forecast for tomorrow. If I happened to have some powdered tempera around, I might try this charming rainy day art project from Arts and Activities magazine, September 1969.
Enjoy! Happy Throwback Thursday! Stop by on Thursdays to see what I’ve found in my vintage art education collection.
Yesterday I had the pleasure of attending the annual San Diego Youth Art Month (YAM) show. I saw some gorgeous artworks – here are a few that caught my eye.
Elementary school:
Collage:
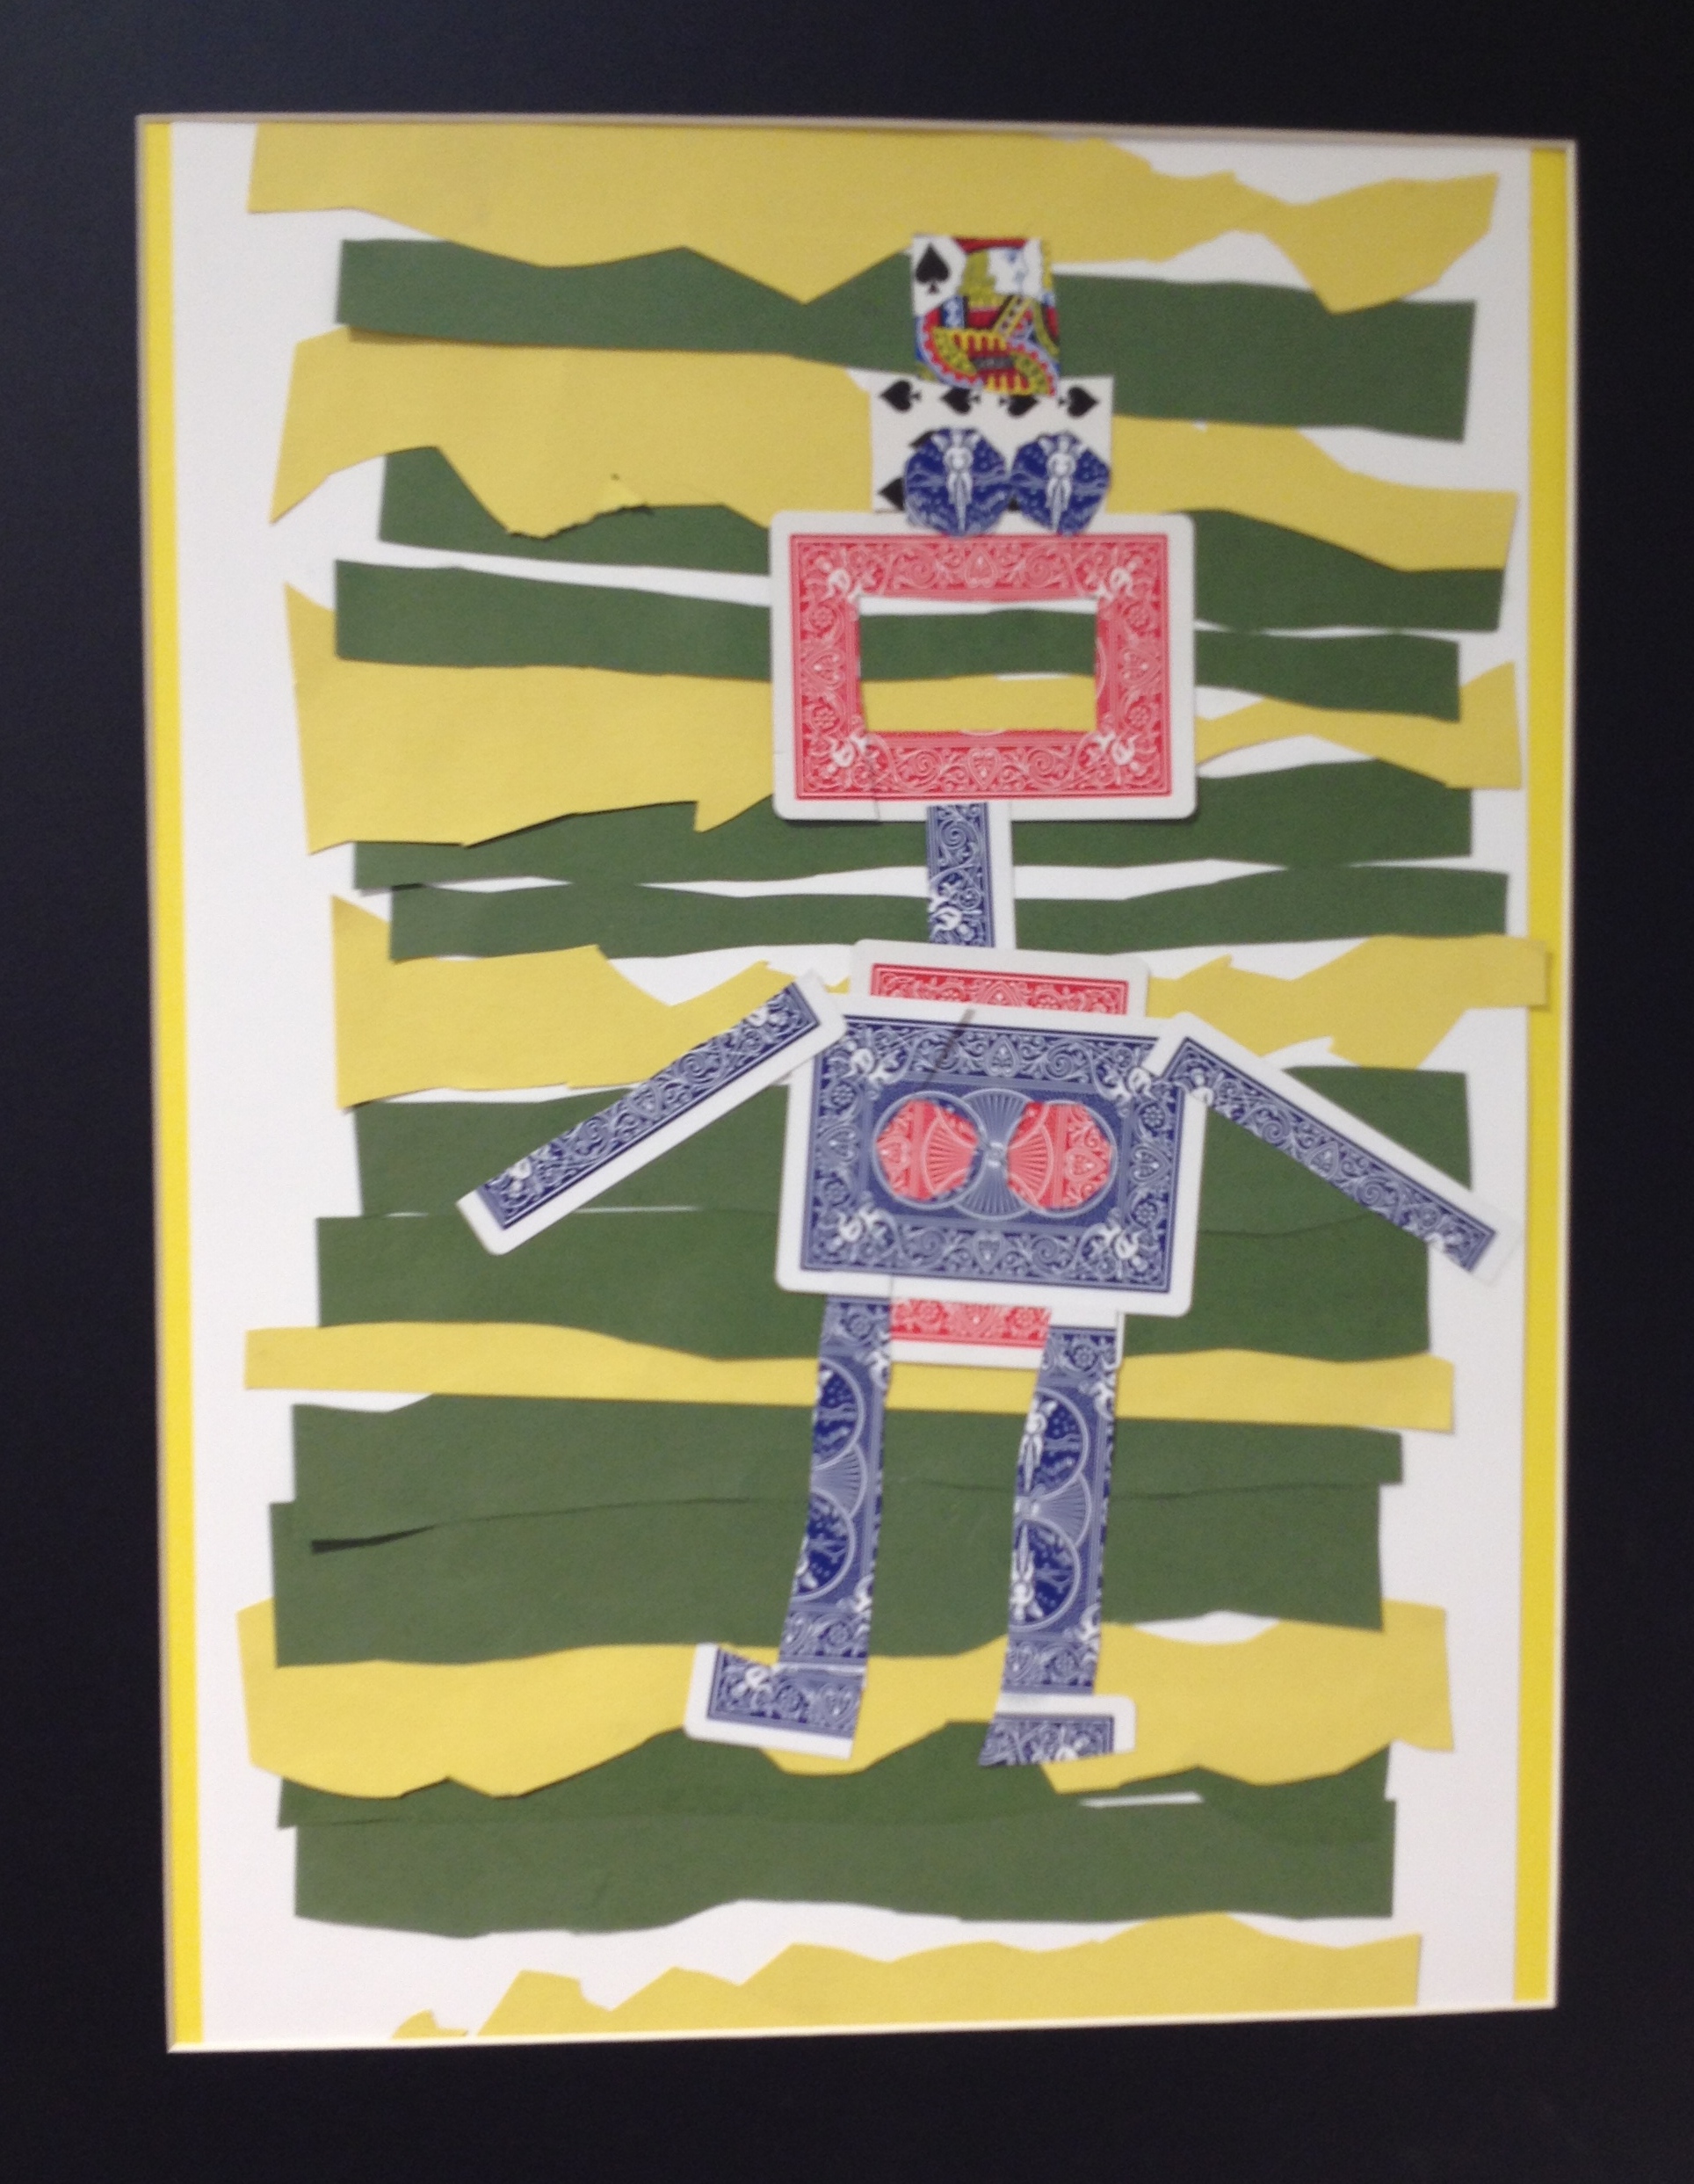
Playing card collage
Playing card collage, elementary level.
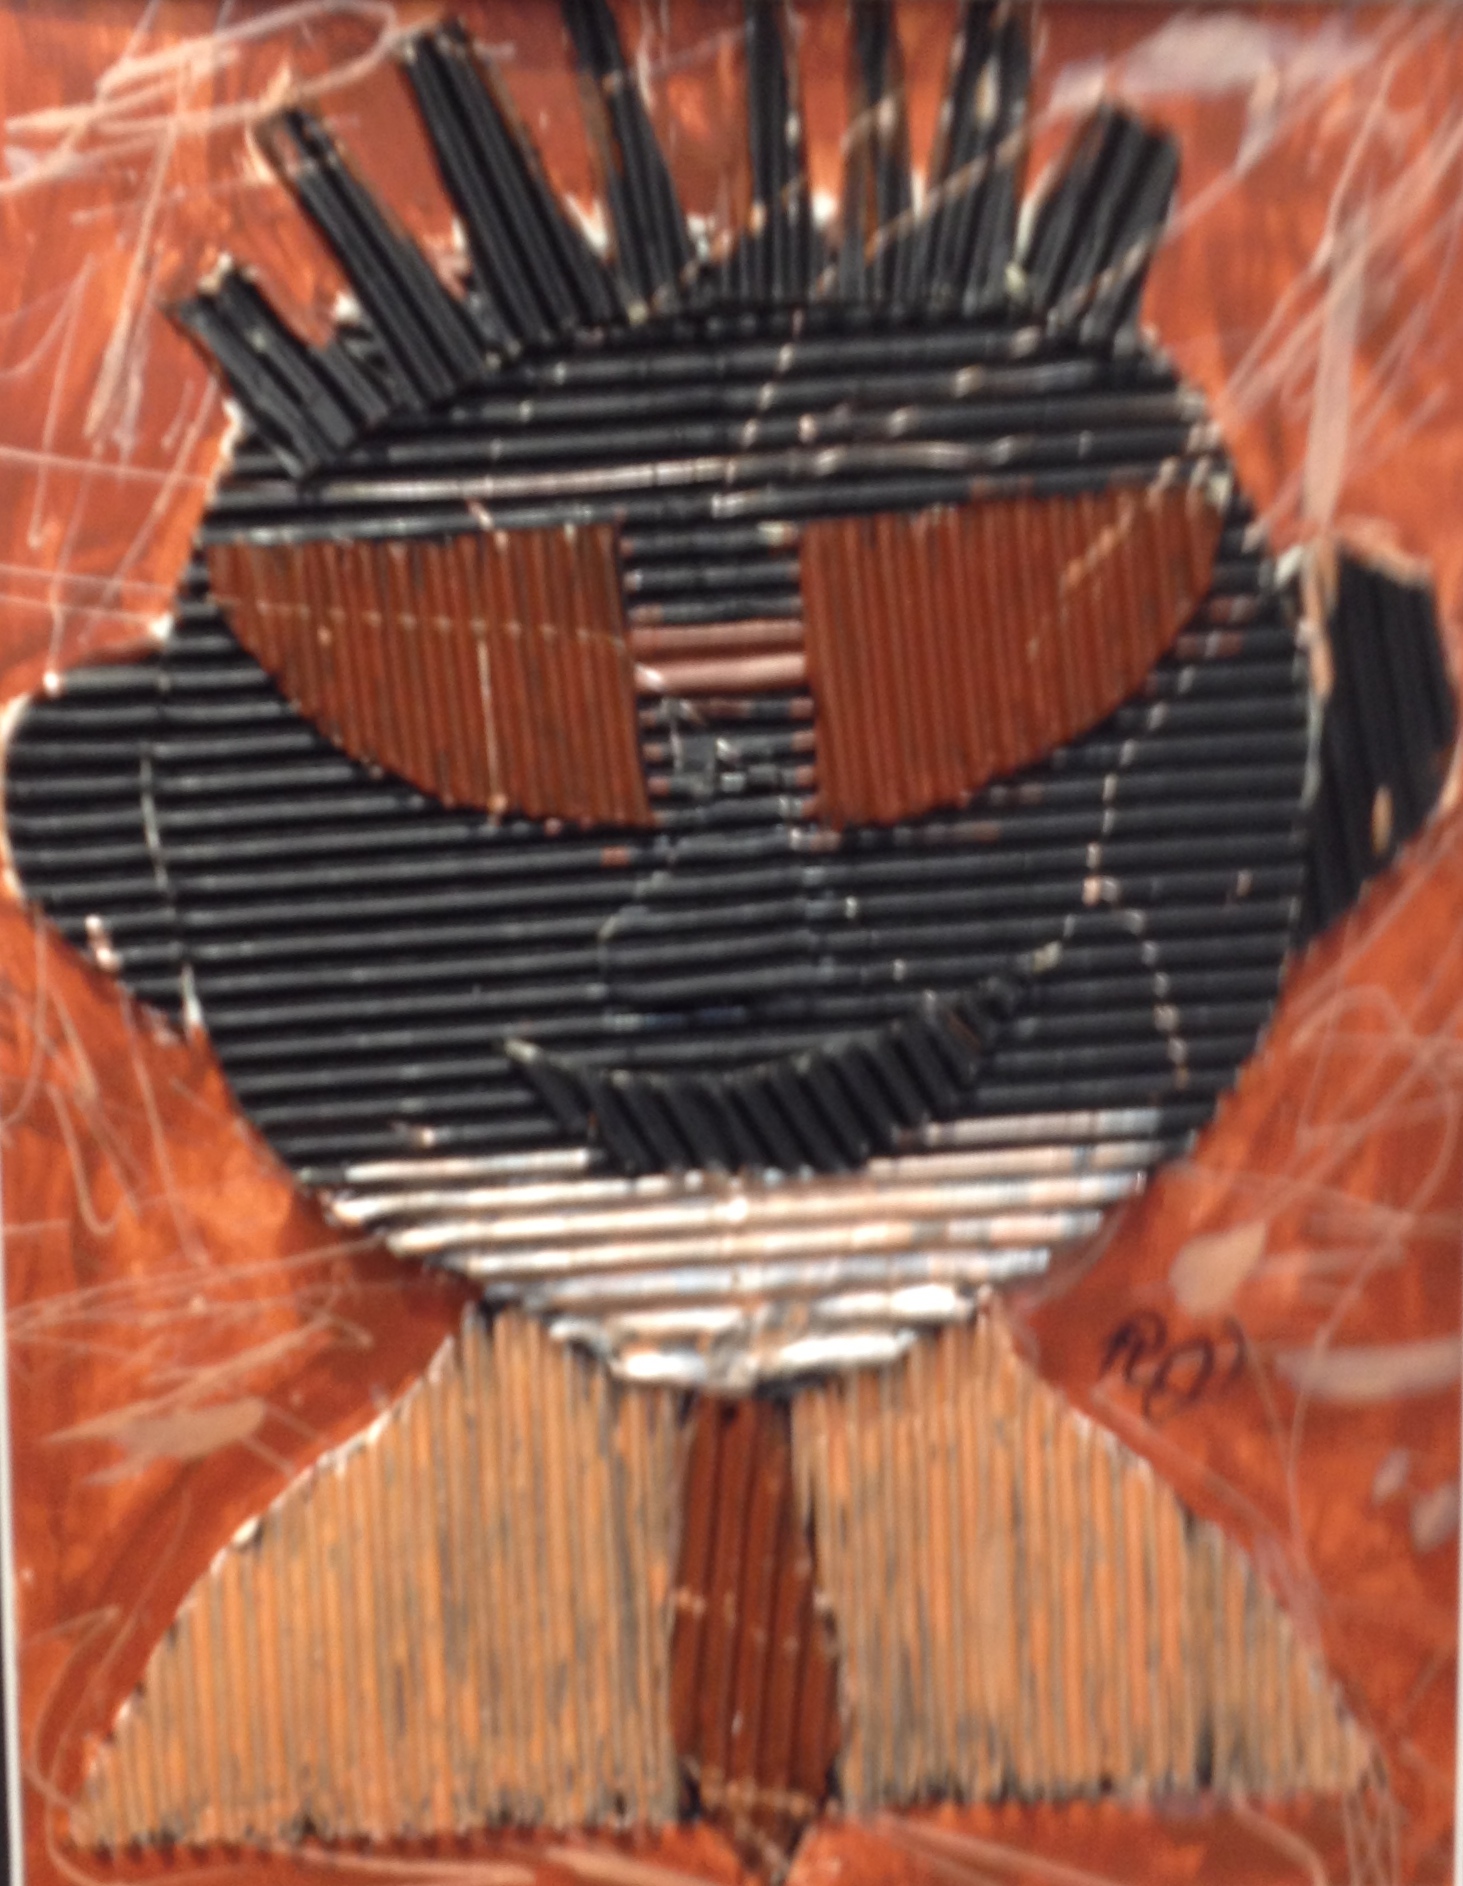
Corrugated Cardboard portrait collage
Elementary corrugated cardboard portrait.
Printmaking:
Clipper ship watercolor and print
Clipper ship watercolor and print from Ocean Air elementary school.
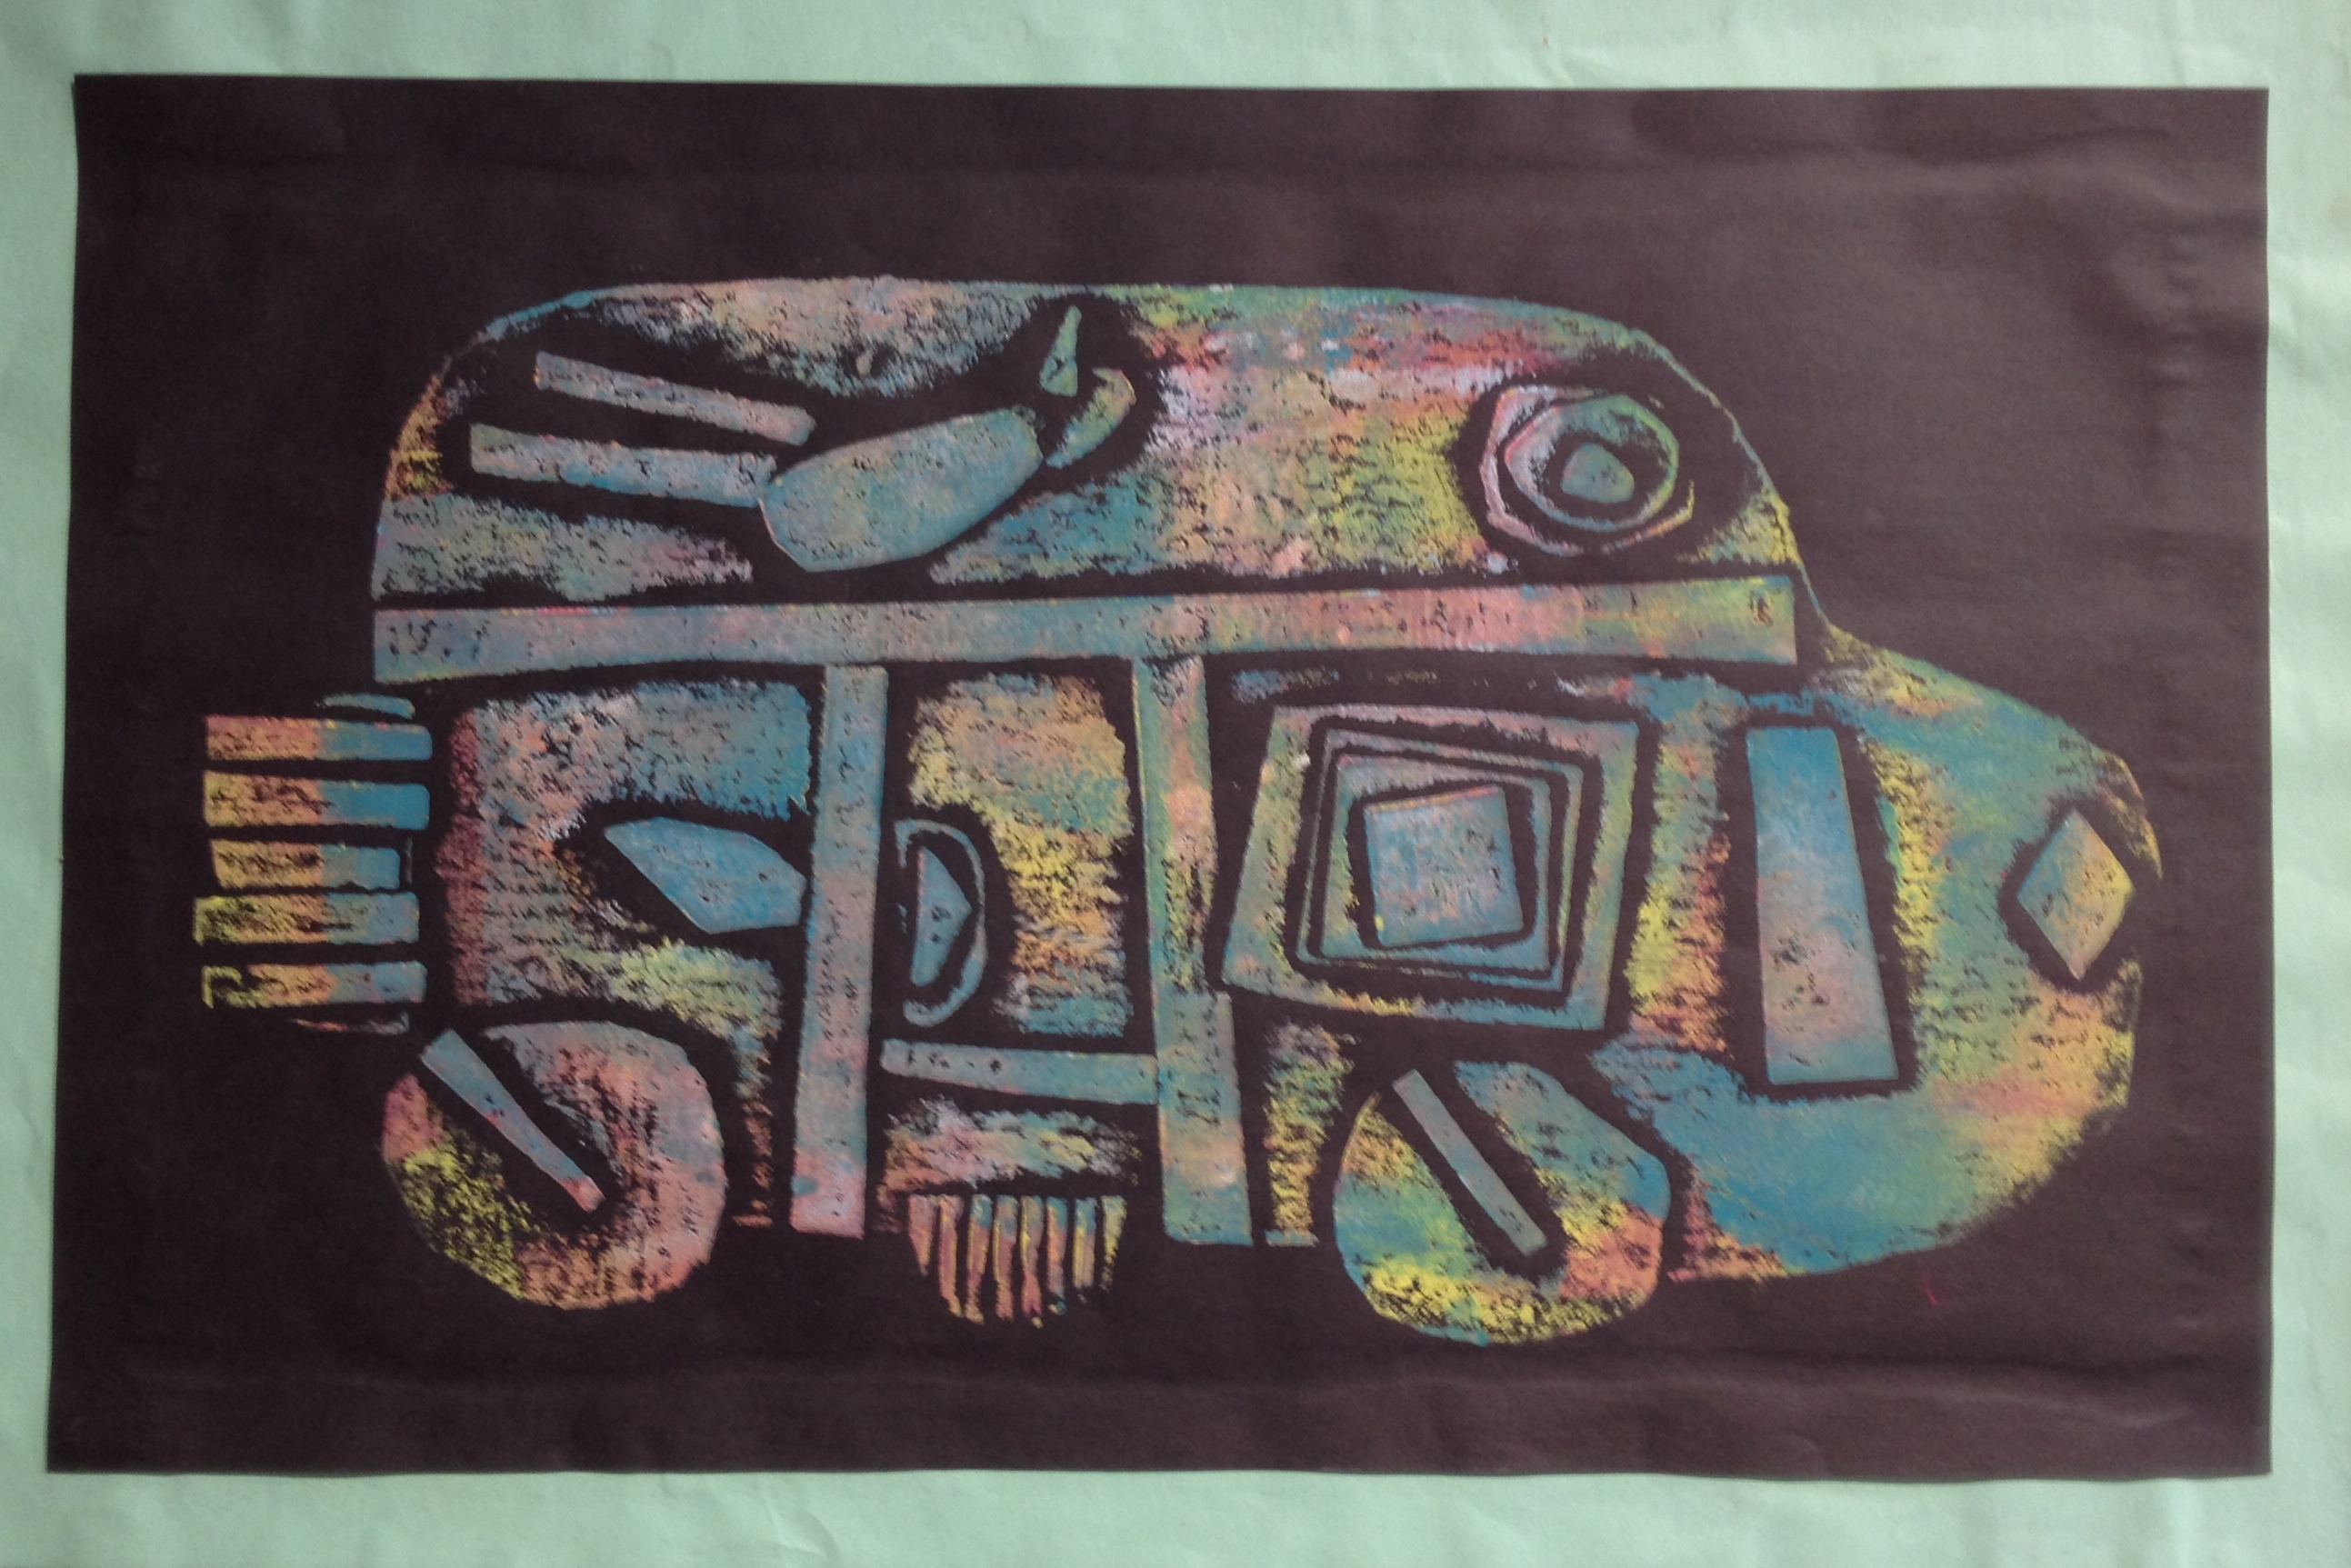
Collagraph printed in rainbow ink
Collagraph print in rainbow ink, from Ocean Air elementary school.
Sculpture
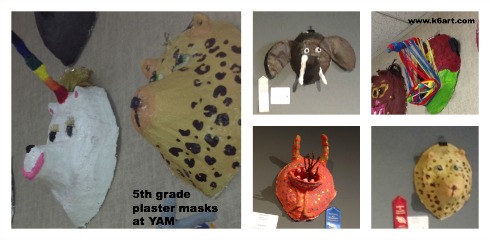
These plaster masks are from our school! Congrats to Camille (1st place elementary 3D), Olive (2nd place), Morgan (3rd place), Caroline and Santiago.
Solana Santa Fe elementary school masks at YAM.
High School
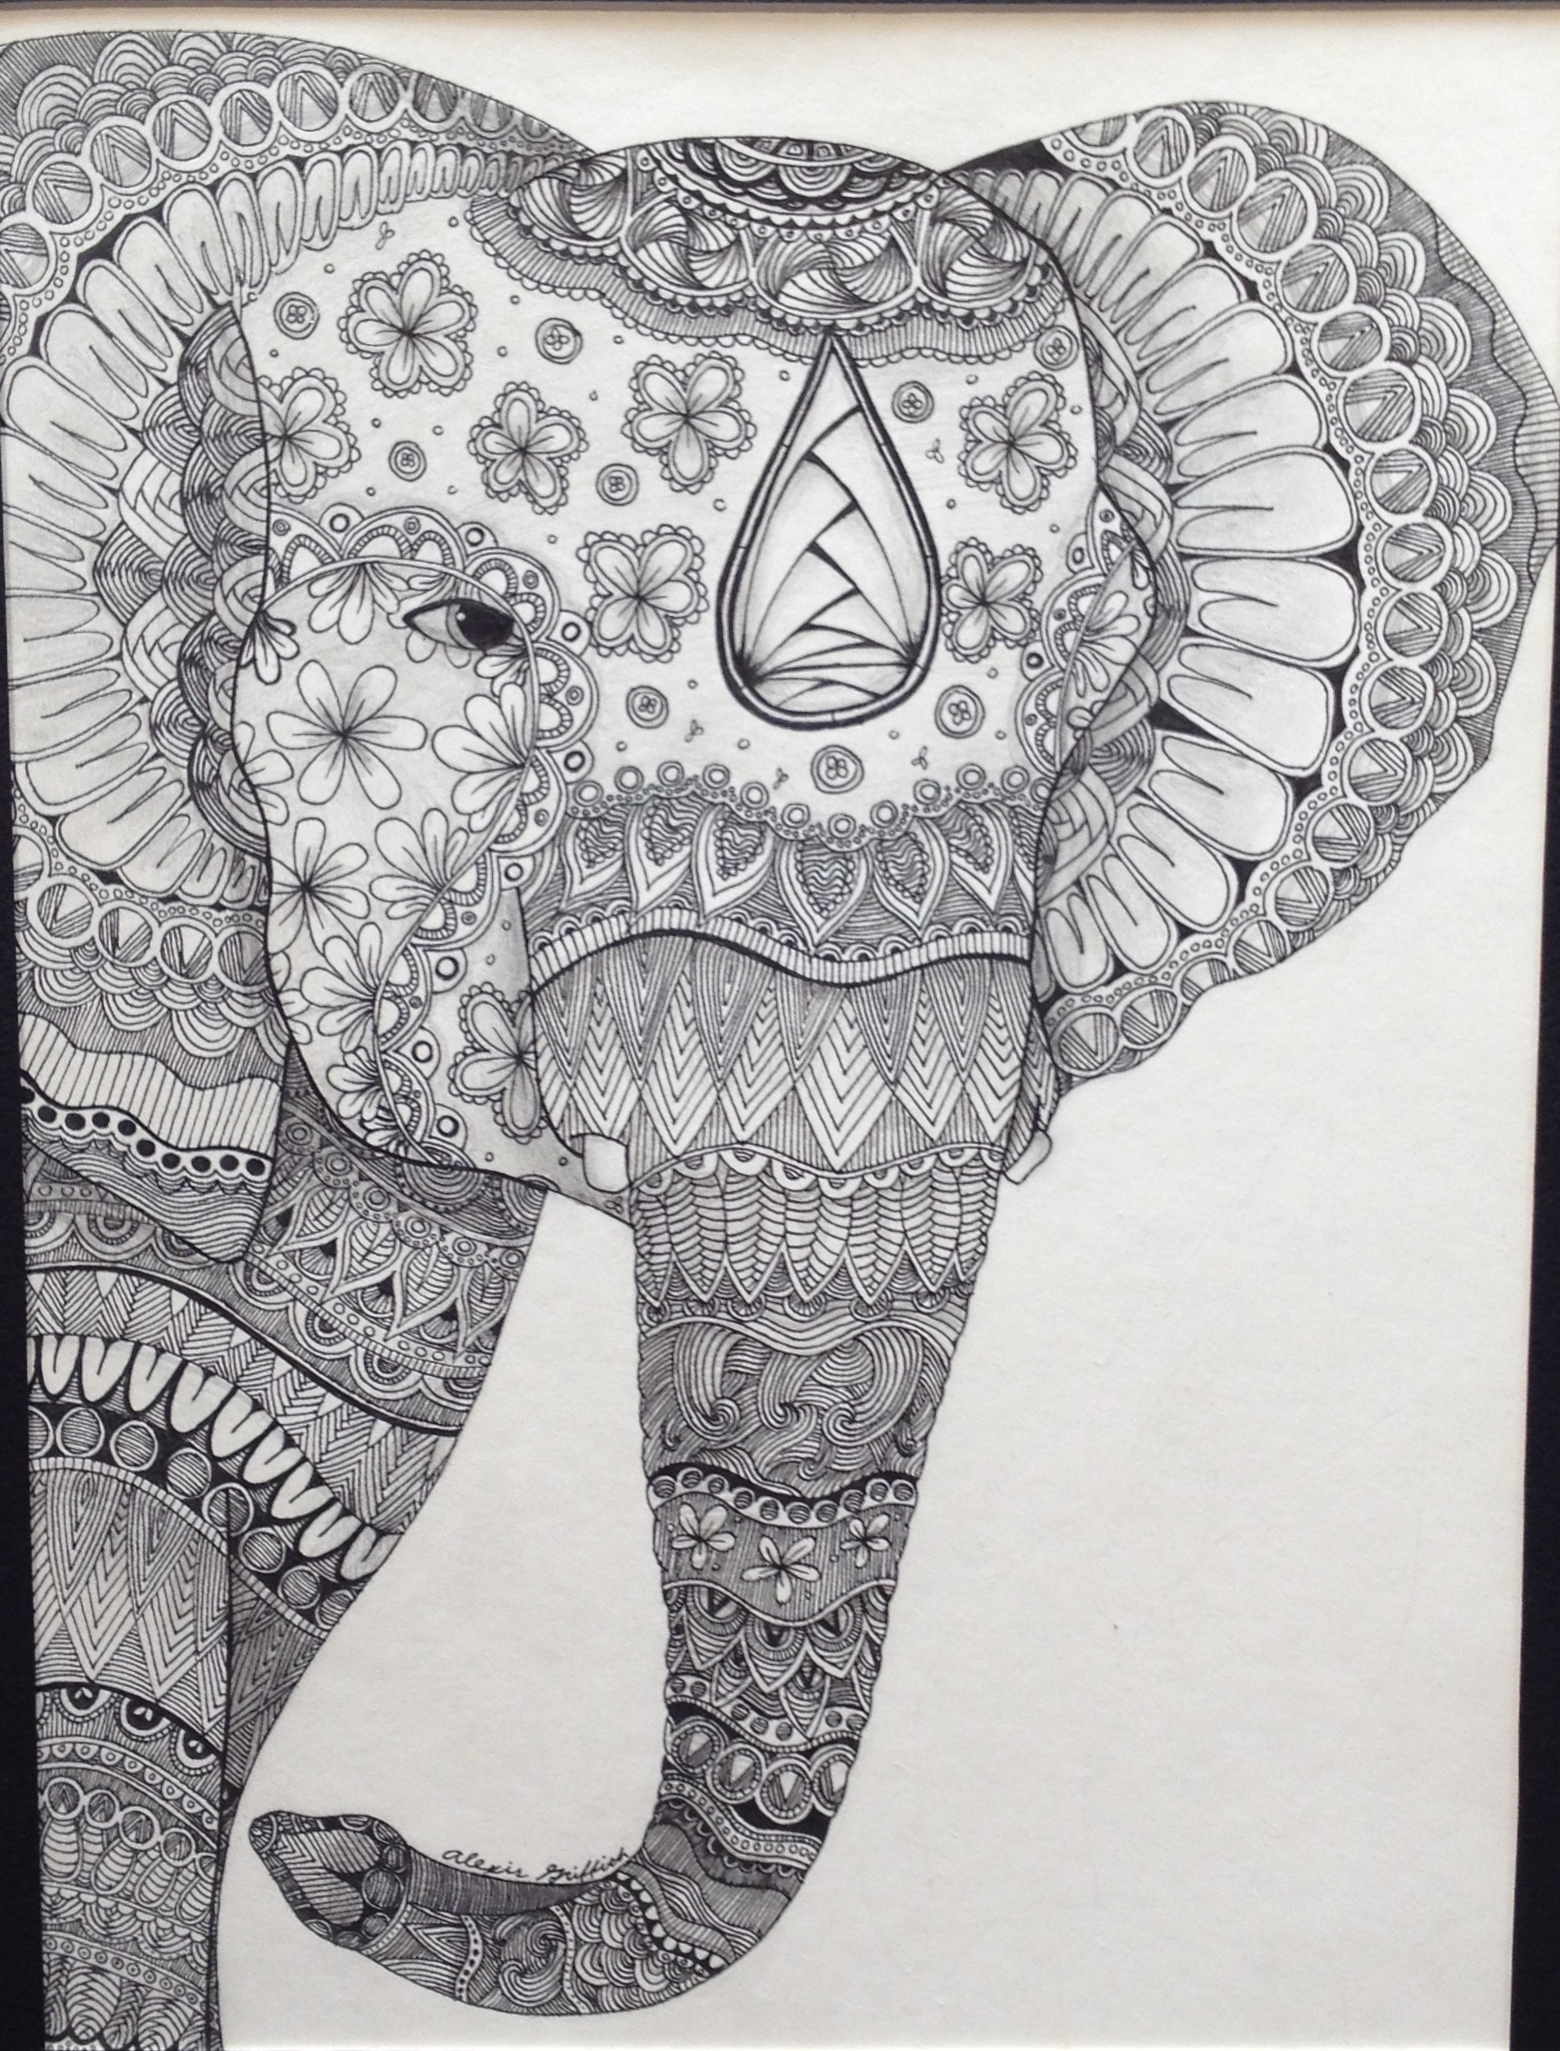
Zentangle elephant
Zentangle Elephant by Alexis Griffith, Guajome Park Academy High School.
This is exquisite. In the art room, this could be adapted as an early finisher activity if you hand out an elephant line drawing as a coloring page.
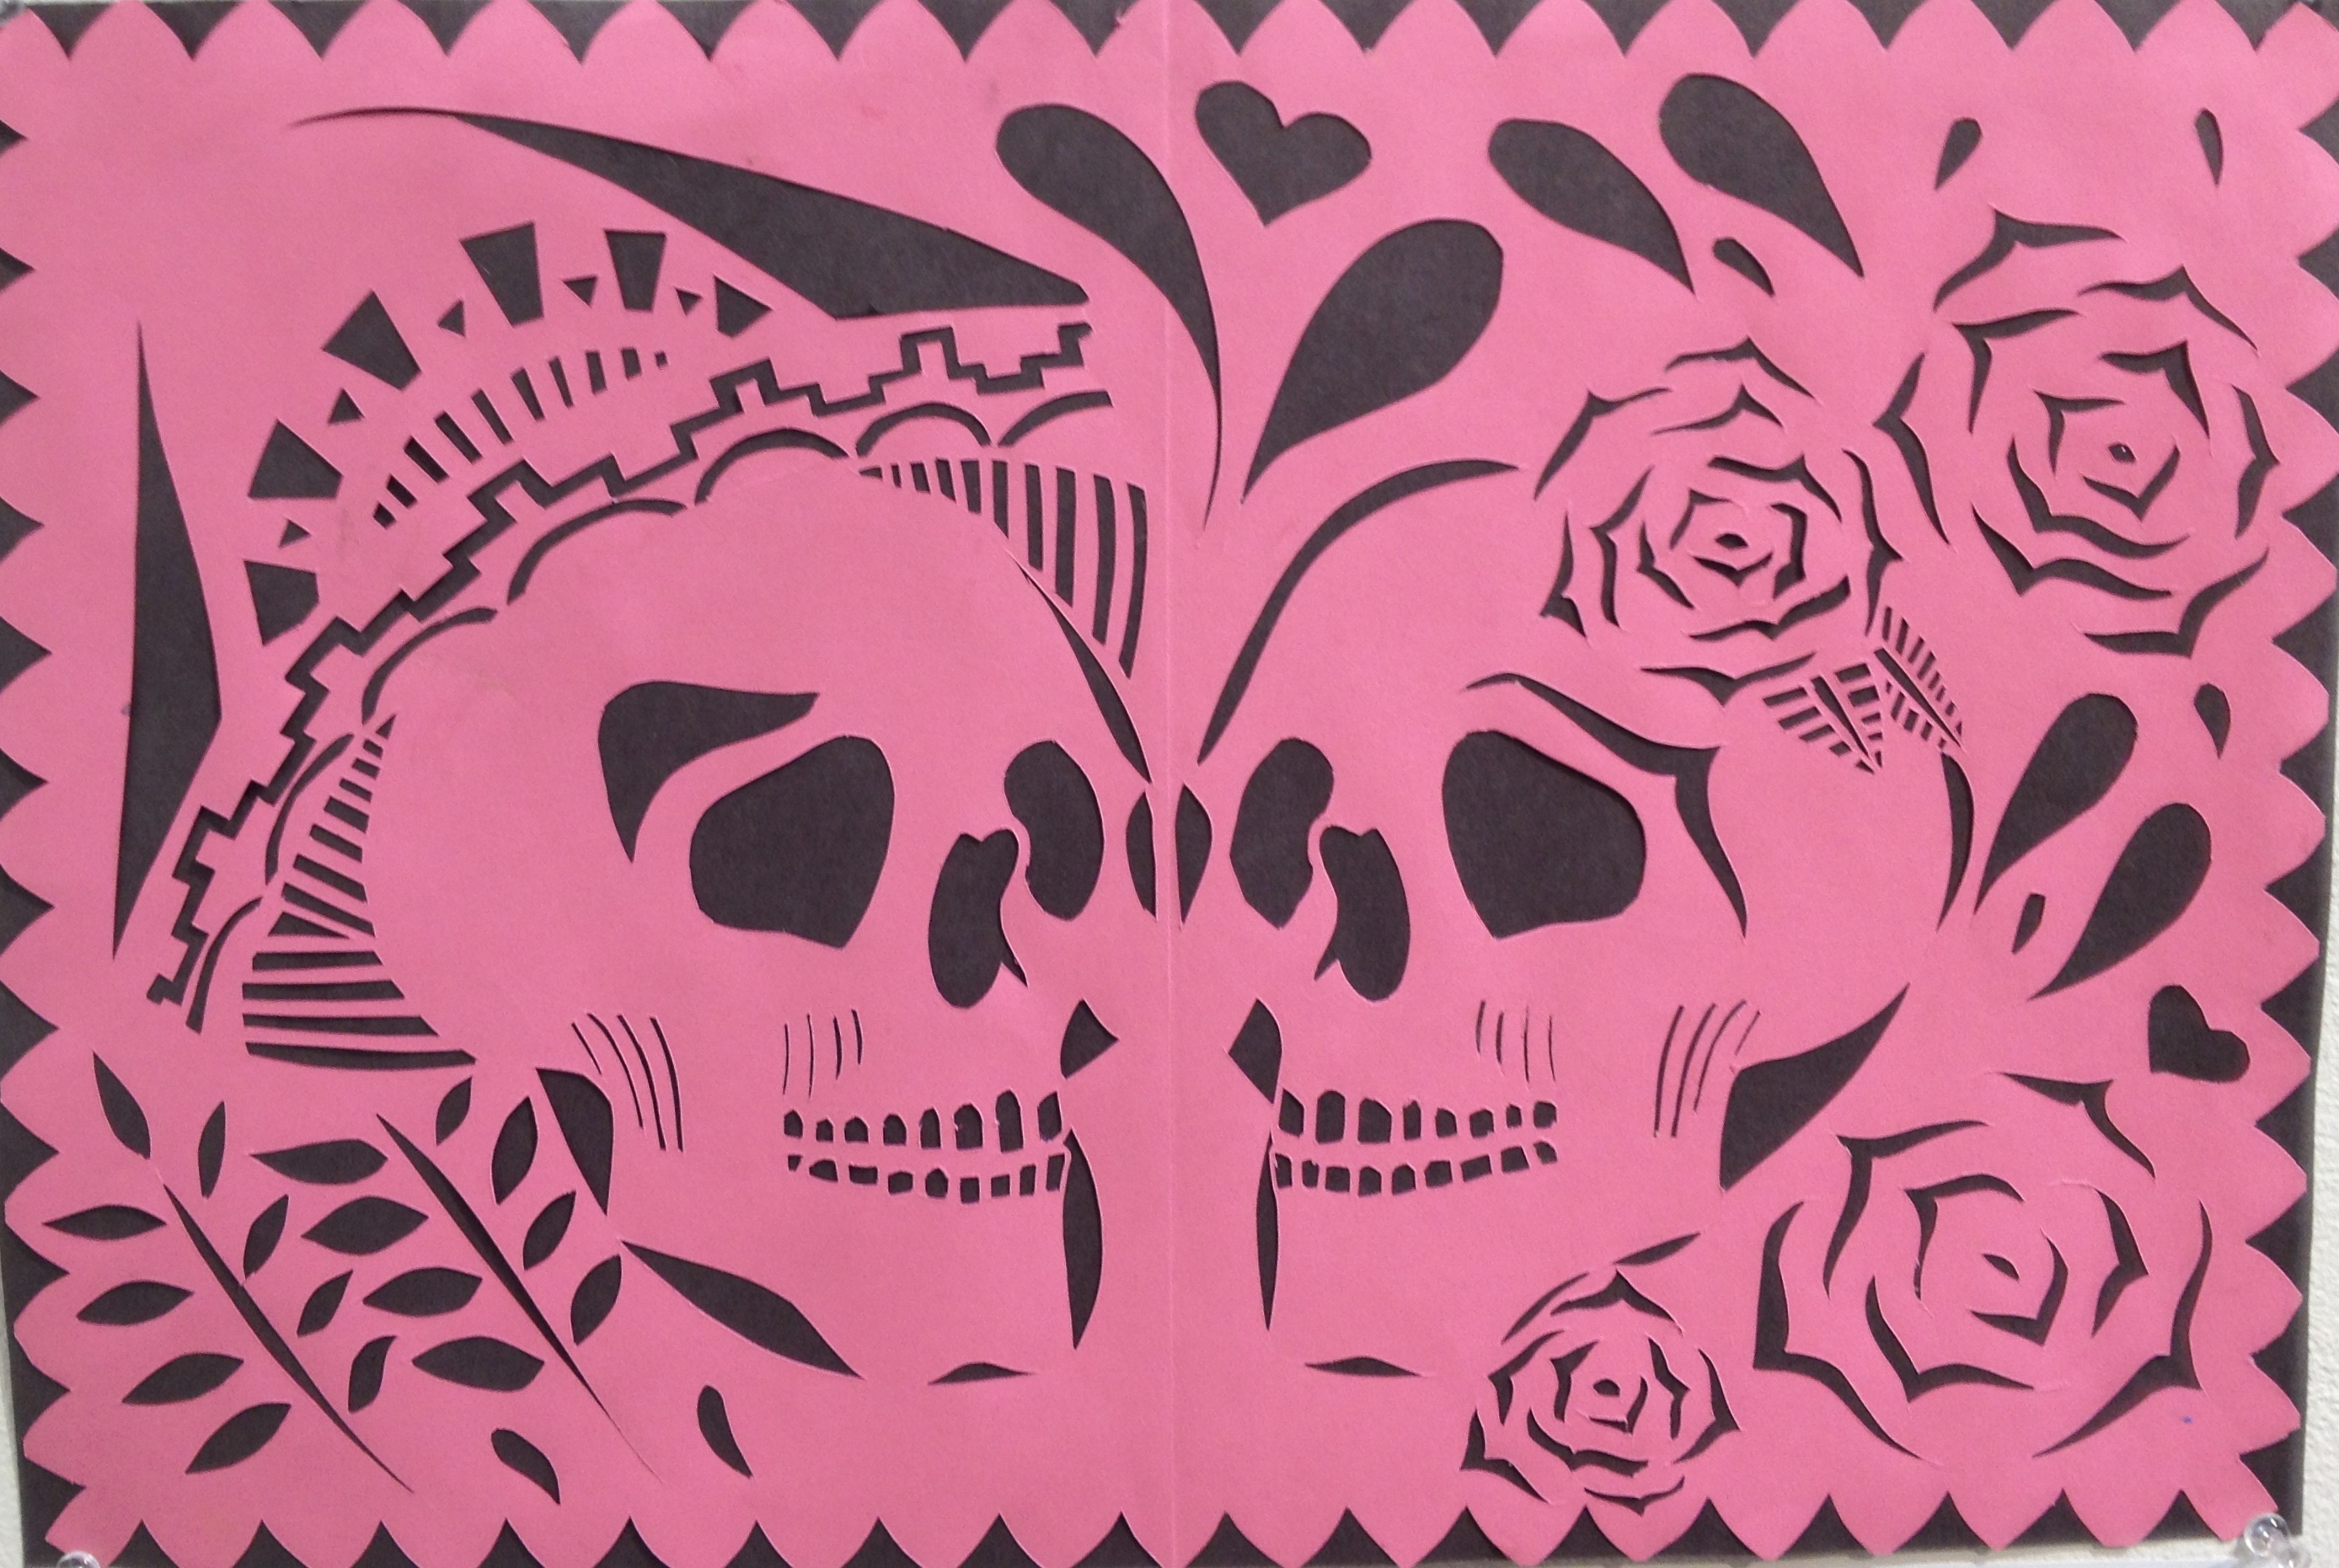
Dia de Los Muertos cut paper art
Dia de Los Muertos Cut Paper design by Lizeth Garcia, Torrey Pines High School.
This piece is by a former student, now in high school! So glad she is still enjoying art.
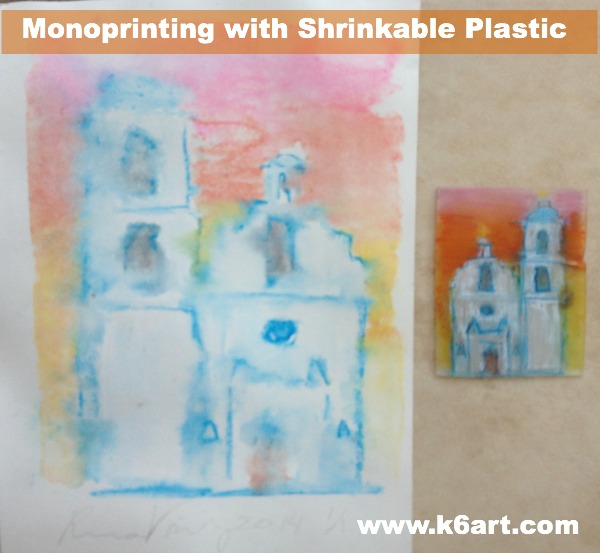
Isn’t it wonderful when you have time to make your own art? I experimented with mono printing this week as part of my homework for the Artsy Book Club. I used Shrinky Dink shrinkable plastic for my printing plate. It worked beautifully as a plate, plus I got to shrink it in the oven after I was done!
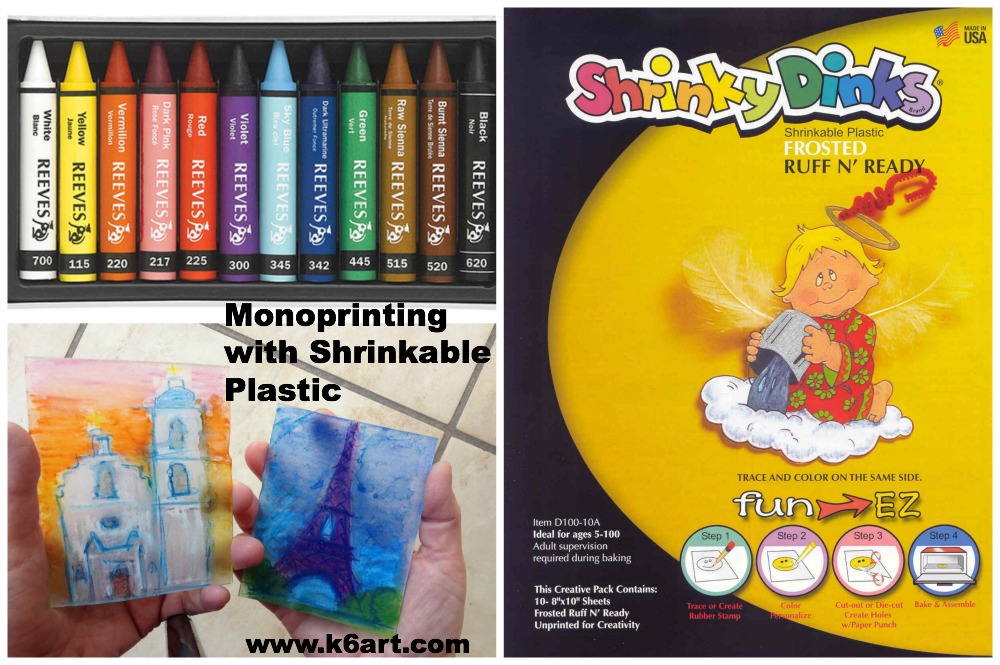
You’ll need wax pastels, frosted Shrinky Dinks, watercolor paper, and an oven.
Directions:
Make a sketch on copy paper
Place the shrinkable plastic (AKA the printing plate) on top of the sketch
Trace sketch with wax pastel, then color background/negative space
Brush plastic with wet paintbrush to blend colors
Dampen paper in dish pan of water, blot in towel
Place dampened watercolor paper on plastic
Rub
Pull the print
Add more wax pastel (in select areas) to the wet print.
You can re-use the full size shrinkable plastic plate over and over; just re-color for every new mono print.
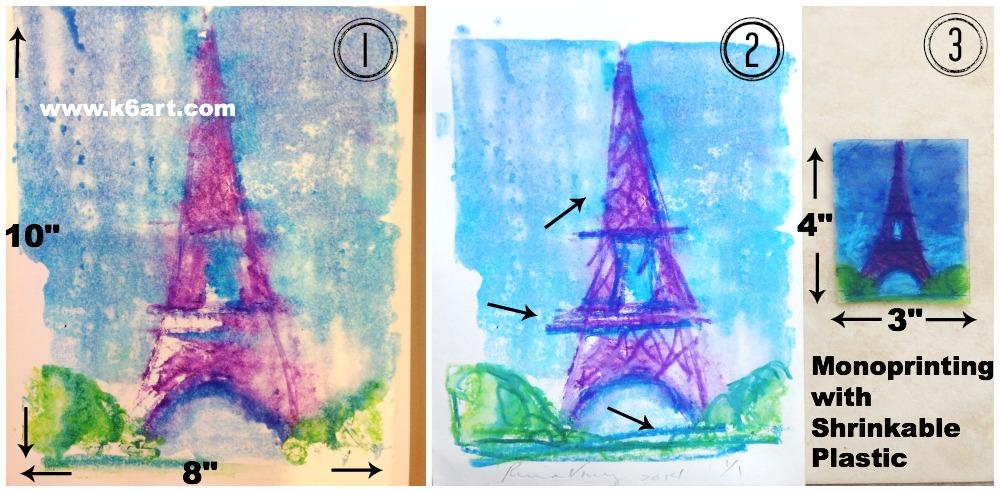
1. Monoprint onto watercolor paper. 2. Rework wet print with wax pastels 3. Rework plastic plate and shrink in oven.
Shrink the printing plate
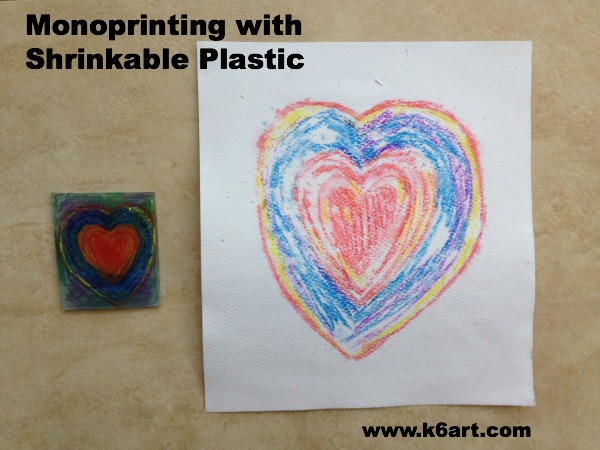
Ready for even more fun? When you are done printing, re-color the Shrinky Dink printing plate and shrunk it in the oven.
Yes, that’s right: I shrunk my printing plate in the oven. It’s beautiful! The colors are concentrated and rich. Just follow the directions on the Shrinky Dink package.
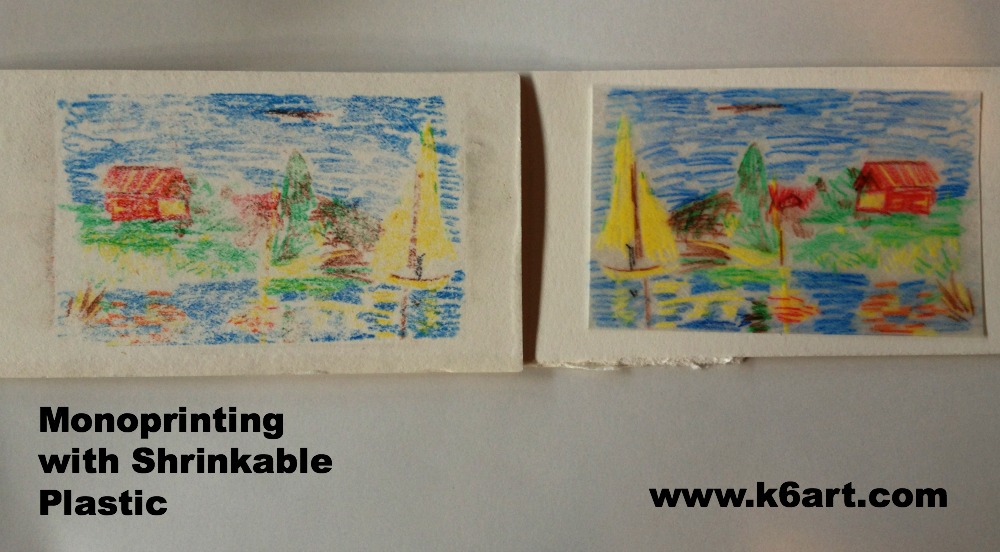
This mono print was made with watercolor pencils onto a scrap of dampened mat board. Time to shrink the printing plate!
Monoprinting with watercolor pencils
I used Reeves Watercolor Pencils to trace an impressionist painting onto my frosted Shrinky Dink plate. Then I printed onto a scrap of dampened mat board.
The printing plate started as a 1/4 sheet (4″x5″) of Shrinky Dink plastic. After printing, the plate shrunk to 1.5″x2″ Student work.
Try a mini monoprint with the kids
I used a full 8″x10″ sheet of Shrinky Dink plastic for my architectural mono prints, and I had to shrink each plate individually. This is not practical at school. Instead, try a 1/4 sheet of shrinkable plastic for the printing plate. I can shrink about 7 at a time on a full size cookie sheet. This is also a great way to use up scraps of watercolor paper.
Relax and enjoy the process…
These mono prints are somewhat experimental. You never know exactly what you’ll get. Try not to get caught up in perfectionism. If a print is less than perfect, rework it.
Thanks to Col Art for the samples of Reeves Watercolor Pencils and Reeves Wax Pastels. Thanks to awesome art teacher/blogger Cassie Stevens for creating our Artsy Book Club!
Enjoy!
What is the weirdest printing project you’ve ever tried?
MoMA’s free online course ‘Art and Inquiry: Museum Teaching Strategies for Your Classroom’ will begin Monday, March 3, 2014. Four week course, begins 3/3/14. Workload: 1-2 hours/week
Course is offered through Coursera. Click here to find out more.
Art and Inquiry: Museum Teaching Strategies For Your Classroom
taught by Lisa Mazzola
Explore how to integrate works of art into your classroom with inquiry-based teaching methods originally developed for in-gallery museum education.
About the Course
Intended for teachers (Grades 4-12) from all disciplines, this course will introduce ways to integrate works of art into your classroom by using inquiry-based teaching methods commonly used in museum settings. This course is designed to give teachers the tools to create meaningful object-based learning activities that can be integrated into a wide variety of curricula. We’ll explore strategies that emphasize literacy, critical thinking skills and that connect across disciplines. The strategies and content that you will learn in this course parallels the proficiencies outlined in the Common Core State Standards as they relate to literacy, speaking and listening, critical thinking, analyzing informational text, and citing evidence to support arguments.
What to Expect:
I took the class during summer 2013. Each week I viewed the MoMA teaching videos and read excerpts. In addition, we had a weekly homework assignment we had to post in the online forums. I took the course with 13,000 other folks from all over the world – naturally there were interesting and diverse points of view in the forums.
Our final assignment was to design an inquiry-based lesson plan based on an artwork in the MoMA collection, and tie it to educational standards. The final project was peer assessed. I absolutely loved assessing final projects – I got to read some terrific inquiry-based lesson plans from other countries.