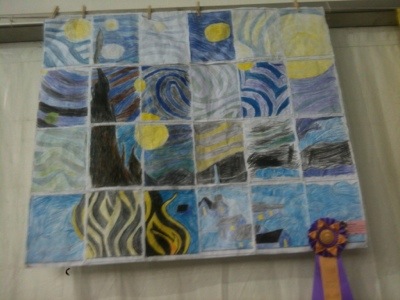
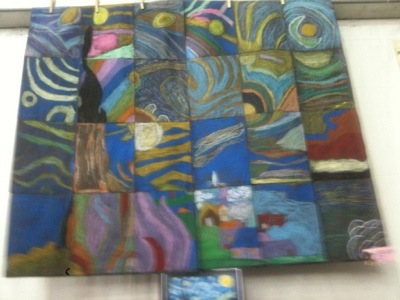
Happy summer! I just visited the youth art display at the San Diego County Fair. I saw three fabulous murals you might want to try with your students. All the artworks were made using the downloadable materials available at Art Projects for Kids.
The Van Gogh-inspired murals look completely different from one another. Each used different media. The bottom mural was made using oil pastel.
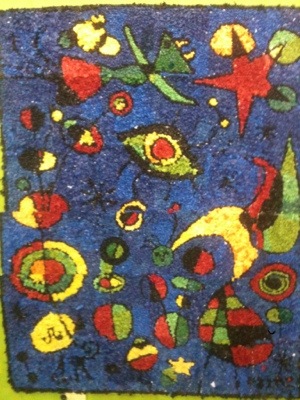
The assembled Miro-inspired mural was entirely covered in little balls of colored tissue paper. I have never seen anything like it! It looked like a carpet.
Unfortunately, I did not see the names of the teachers who made these wonderful projects with their students. If you know who did – please leave a comment!
P.S. – I am a big fan of the APFK downloadable murals. I did the Seurat mural with two 4th grade classes, and wrote about it in this post.
On Day 3, students brought iPads to the art room (note: make sure your tables are super clean!). Students partnered up to help each other during the photo selection and editing process. First they selected their single best photo. Using the basic photo edit in the device, the students cropped their photos, changed them to black and white, then saved to the device’s camera roll.
Next, students emailed me their best single b&w photos.
I used a Mac computer equipped with iPhoto to sort the photos. Whatever photo editing application you use, I highly suggest creating a folder for each letter.
To create the group collages, I used the free website Pic Monkey. It was easy to create a grid and upload the 26 letter photos for each collage. I even added a frame and text before saving the photo. Note: Pic Monkey requires Flash and cannot be used on an iPad. Also, if you use Pic Monkey, plan on filling that grid in one sitting as you cannot save work to the site.
I’m not going to lie – the whole process took a lot of time. I did the collages at home after hours. I am not a photographer, and there was a lot of trial and error.
I will teach it differently next time, specifically:
Model cropping,
Model saving as a black and white image,
Model emailing photos to me with a correct email address, and subject line including name, teacher and letter.
I will also seek alternate iPad apps for the students, and photo collage apps for me.
Have you taught a photo project using iPads? Please share!
UPDATE: DONE! I finished the iBook for this lesson plan. It contains all the alphabet photos and collages.
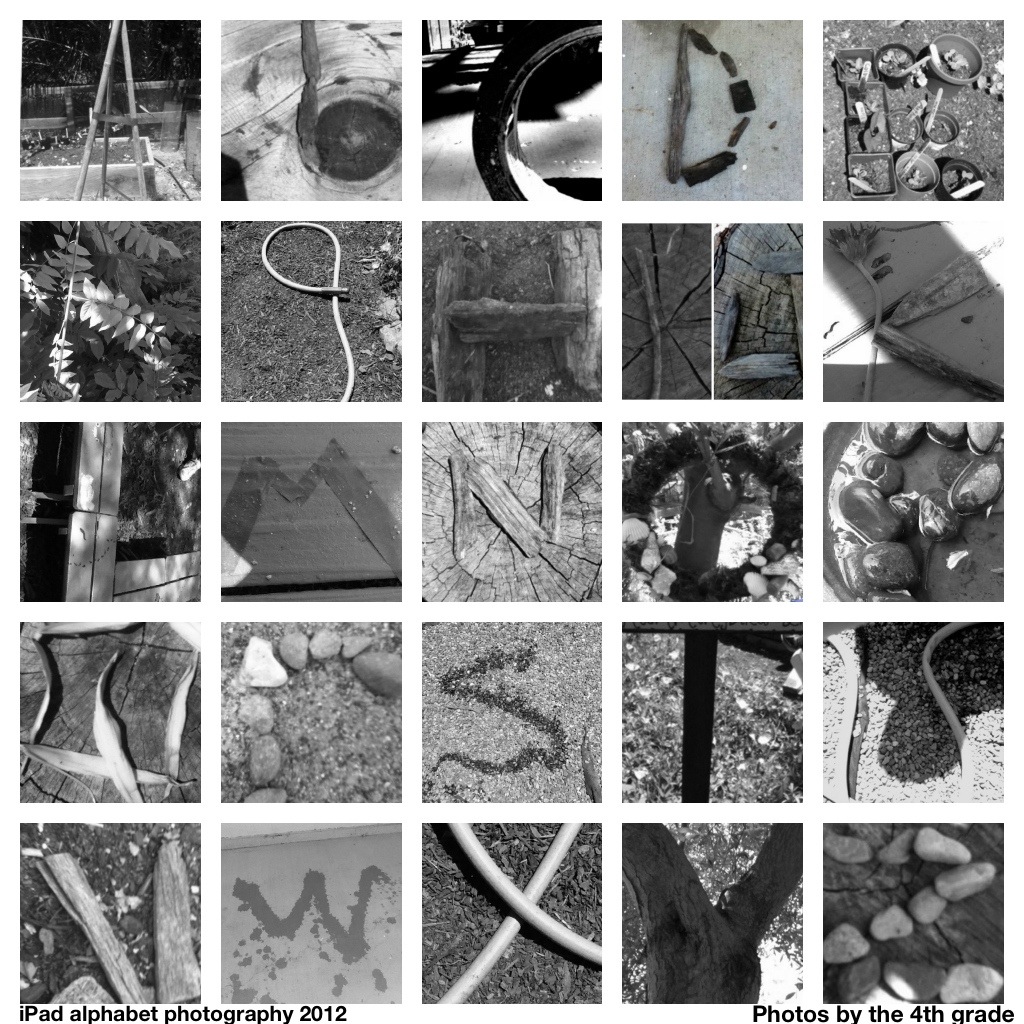
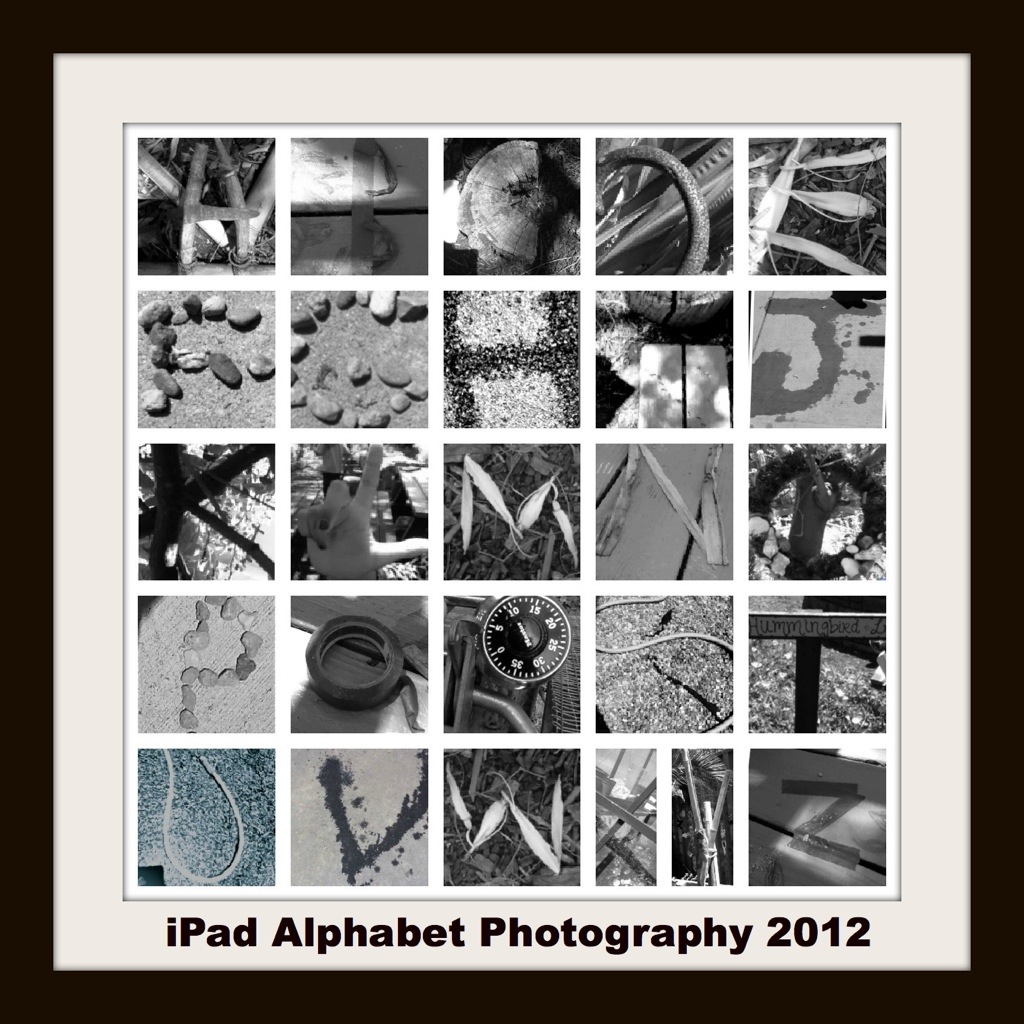
Armed with camera-equipped iPads and iPods, our fourth graders spread out in our school garden in search of alphabet letters. Each student was assigned a letter to photograph.
Letter O
It was interesting to see how they completed the assignment: some students found letters in the branches of trees, some created letters from stones and twigs. Some poured water on the pavement to draw their letter. If they were absolutely stumped (get it?) , I let them use a letter from the garden signs. I asked students to take 5-10 photos of their letter.
I am happy to report the fourth graders LOVED looking for letters. They were completely engaged, and helped each other. I heard a lot of shouts of “I found a T! Who has T?”
This week, students used their devices and the Pic Collage app to turn their best photos into a photo collage. I asked them to zoom in so that we could really see the letter – aim for making a letter so clear a kindergartener could recognize it. They emailed me their files and we reviewed them as a class.
Great work fourth graders!
Our fourth graders are in a pilot 1:1 iPad program, and it is a huge success. The goal is to turn all the photos into a free digital book downloadable through Apple’s iBooks store.
Inspiration for this project came from www.alphabetphotography.com.
UPDATE: see the completed whole-alphabet collages in this post.
This is a universal truth: kids love dessert. Second grade recently completed their Wayne Thiebaud group art mural based on Thiebaud’s famous artwork, “Cakes”.
We began with my Wayne Thiebaud Powerpoint. We discussed repetition of simple shapes, variety, use of thick paint, horizon line and shadow. This year we also discussed halation – the vibrant lines of color Thiebaud uses to outline his work. If you are unfamiliar with halation read this excellent Thiebaud post on Art for Small Hands.
Next we watched a great 7-minute long Thiebaud video from CBS this Morning. Here is the link.
Materials:
Drawing paper, 9″x12″
pencil and eraser
oil pastels
scissors
glue stick
bulletin board paper (allow 5 foot length for 22 students)
tempera
Students drew the basic cylinder cake first in pencil, then in oil pastel. We outlined in bright colors. Because we were making a mural, for consistency students added purple shadows on the right side of their art.
The kids had a fabulous time ‘decorating’ their cakes, again with oil pastel. We had a ‘no words’ rule, but numbers were OK.
Students outline their cakes with vibrant colors
Students cut out their cakes and covered the backs with glue stick. I arranged the cakes on painted bulletin board roll paper.
Assembling the mural
I made two murals: a 9 foot mural for 45 cakes, and a 5 foot mural for 22 cakes. Next year I will make one 5-foot mural per class as the big one was beautiful but too unwieldy.
After the art show I will cut apart the mural. The second graders will trim and mount their cakes onto 12″x18″construction paper.
The perfect jewelry for any Thiebaud lesson 🙂
Have fun!
P.S. Want to try a digital Thibaud art activity? Try the National Gallery of Art’s