Clay Project Ideas from Prague

I just came back from Prague. WOW. In addition to castles, cathedrals and pastry, I had the joy of checking out hand-made crafts in small shops throughout the city. These clay sheep and owls were so adorable I just had to try them myself!!!

czech clay sheep

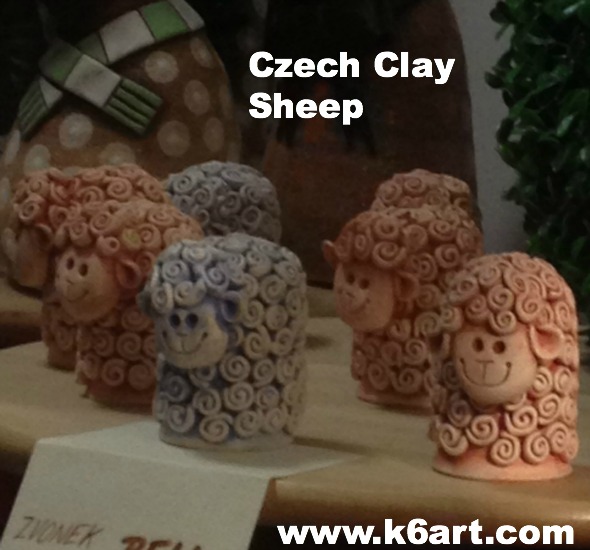
I saw these charming clay sheep tiny gift shop on the Charles Bridge. The shop was so tiny only two people could enter at a time! The ceramic sheep are wheel-thrown clay bells, covered in clay spiral ‘wool’. They are unglazed.

My version of the Czech sheep:
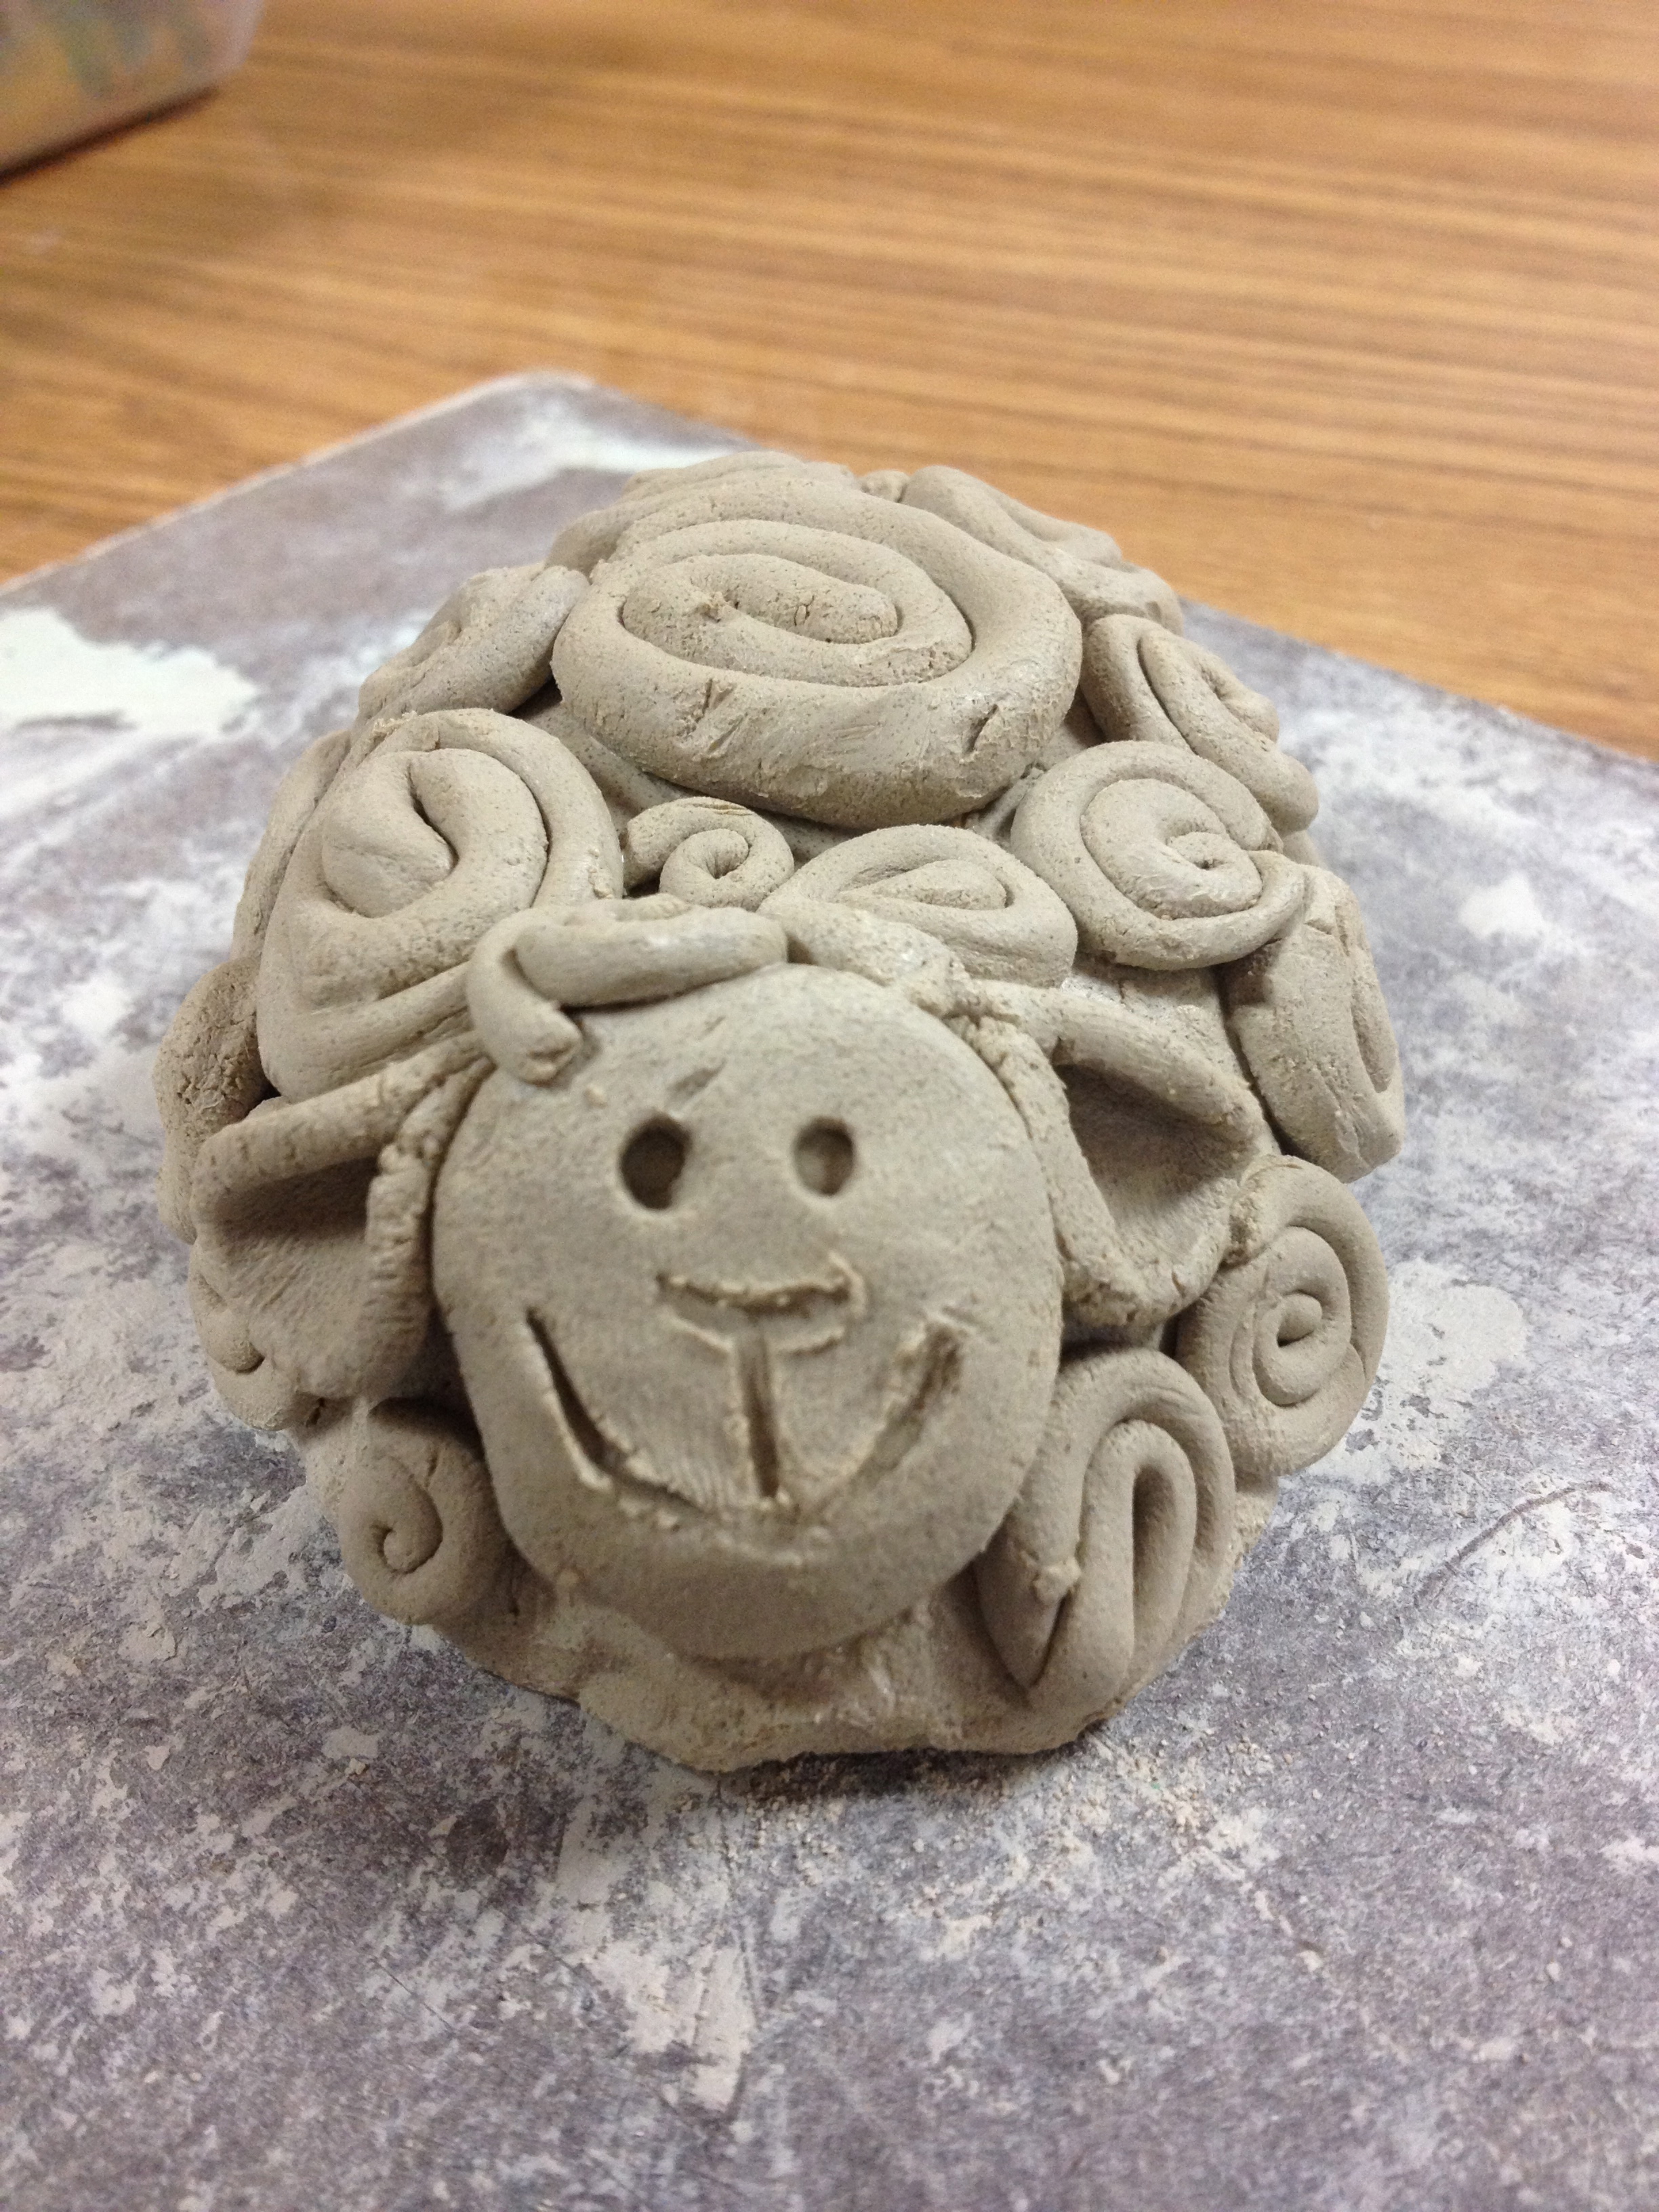
spiral clay sheep

Top view

Top view

I started with an inverted pinch pot, stuffed it with newspaper, and added face, ears, and spirals. I will let them dry, bisque fire, then do a cold finish by painting with tempera or watercolors, then rinsing off in the sink.

I think this would work for grades 4-6, and take around 45 minutes -1 hour to teach.

Verdict: I showed my sample to my 6th grade helpers: they LOVED it.
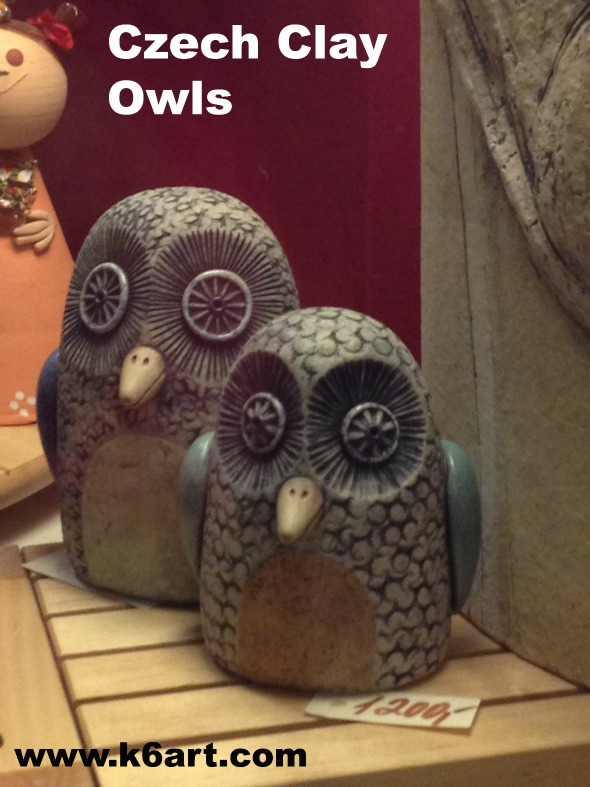
 

czech clay owls

The Czech Owls:

These beautiful, textured clay owls were hollow clay cylinders with closed bases. A hole was poked in the base to keep the owl from exploding in the kiln.

My version of the Czech owl:

I started with two pinch pots, stuffed them with newspaper, and sealed together to form a cylinder. I smoothed the cylinder by rolling it back and forth on a board. Next I tapped the bottom on the board to flatten. Finally I wiped the cylinder with a damp sponge to smooth it out.

I textured the clay, and added wings and a beak. I would have liked to have some different texture stamps for the eyes….still, they turned out OK.

I poked a skewer through the bottom to let air escape when firing.

I will let dry, and bisque fire. These owls could be glazed, or just painted with watercolor and sprayed with clear gloss.

clay owl 1

IMG_3517

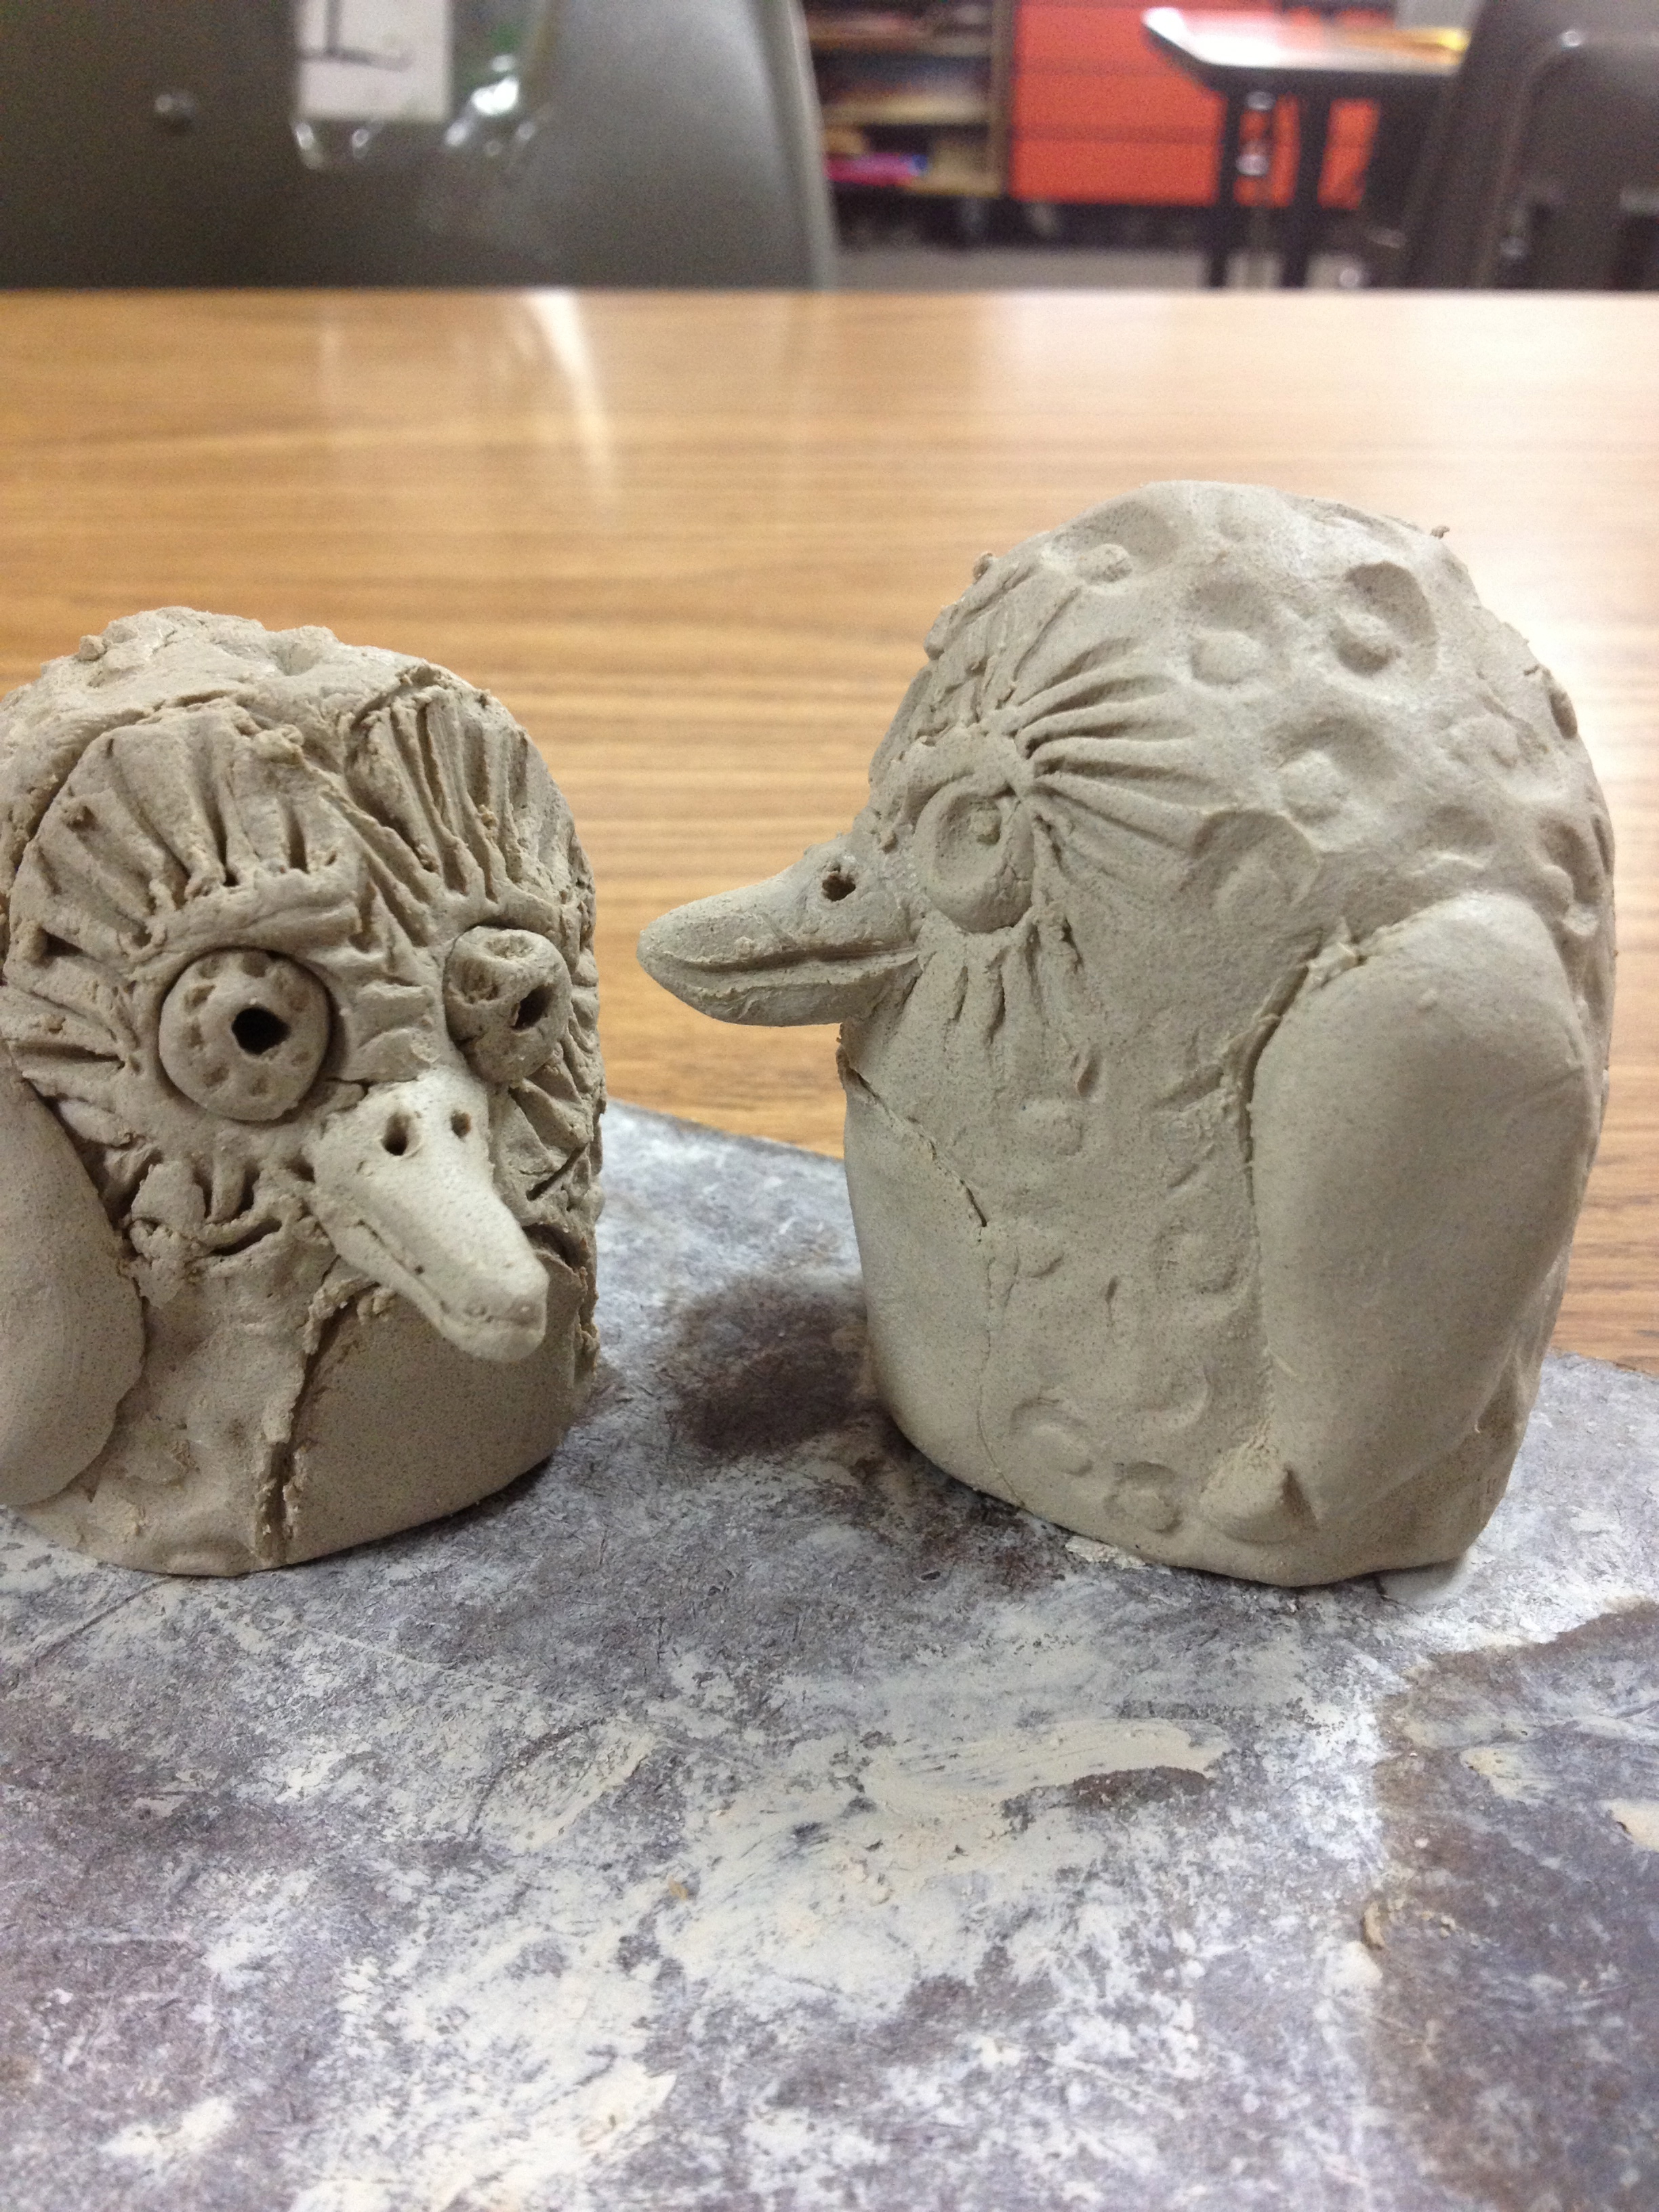
These would take about an hour to make. Sixth grade and middle school.

You could also simplify this by using a single inverted pinch pot for the owl body. Be sure to stuff with crumpled newspaper before adding texture. This could work for grades 4-6.

Verdict: my 6th grade helpers thought my owls looked like penguins!!! They recommended making smaller eyes and bigger wings. They definitely preferred the sheep.

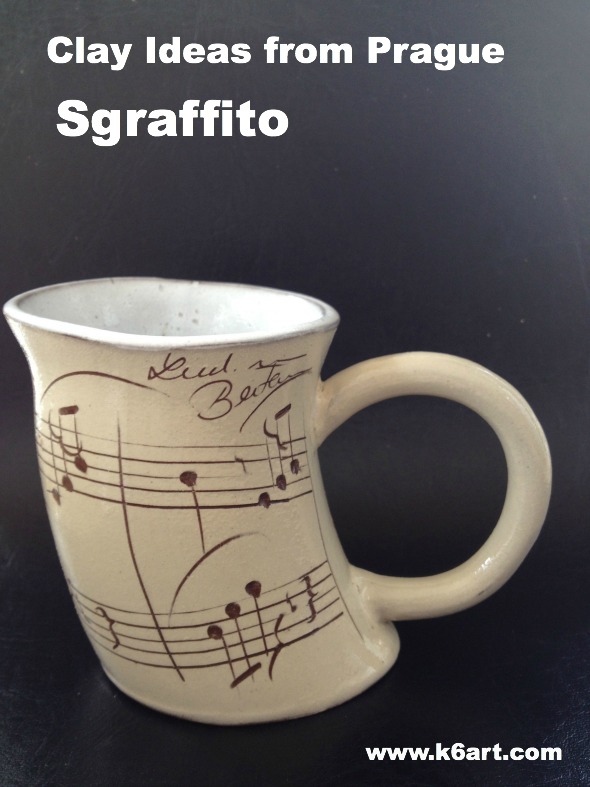
Although I did not bring home the Czech clay sheep or owls, I couldn’t leave that awesome gift shop empty-handed! I left with this fabulous Beethoven sgraffito mug as a gift for my husband.

sgraffito mug


Well, spring break was awesome but it’s over. Back to work!

Enjoy!


Rainbow Fish: Glazed Clay Fish

rainbow glaze clay fish

So many fish in the sea!

Our sixth grade finished the slab clay fish project. Although I provided a choice of  just three templates, students were able to customize them through re-shaping, texture, and glaze. We ended up with a wide variety of fish.

These three rainbow fish started from the same template. Artists scratched lines into the wet clay to make stripes. Later they painted these defined areas. Students who did this technique ended up with neatly glazed fish. Caution: avoid scratching a line across the narrowest part of the tail – it will be more likely to break.

mariel's fish

Want to make a rainbow fish? Make shallow lines in wet clay with a skewer. Glaze fired clay – try to stay inside the lines!


Morgan's fish

Here is a different rainbow fish.  The artist used a different template, then created texture with tiny balls of clay and the eraser tip of pencil. The fish is trimmed with a thin clay coil, which the artist later glazed shiny black.

NICE WORK SIXTH GRADERS!!!

I wrote how to roll and cut the fish here and here. More glazing examples here. More examples next week!

The Jackson ‘Pollocks’: Glazed Clay Fish

Jackson Pollock glazed clay fishSixth grade just finished the clay fish project. The students had open use of my glazes – some chose to do an ‘Action Jackson’ Pollock-inspired pollock.  The fish were base coated with a solid coat of underglaze, then splattered with a variety of underglazes. No clear top coat necessary.

This technique worked best on untextured clay.

The entire project took three class periods. You can read about the entire clay fish process here and here.

More glazing techniques next week!

Glazing Made Easier

I saw a great post on glazing over at The Art of Education. I tried some of their tips today on our second grader’s melted marble pinch pots. They worked so well I just had to share.

glazing made easier


In a nutshell:

  • Put one color of glaze on each table
  • Match the glaze color to your table color if possible
  • Put brushes directly into the glaze (genius!!!)
  • Keep a piece of paper under your pot at all times – even when switching tables. This keeps your hands cleaner.
  • Carry pot from table to table to change colors
  • Brushes stay at their tables

In addition to the brushes, I put skewers directly into the glaze bottles. The students used the skewers to dot eyes or spots onto their animal pots.  Skewers allow more control than my brushes. I have also used the skewers to scratch lines into the glaze.

use skewers to dot on eyes


The result?

  • Easy set up – no water! No little cups of glaze.
  • Easy clean up – wipe the glaze bottle rims and recap.
  • No color contamination (note – I was anxious and kept a sharp eye on the white glaze. It stayed clean through three classes!)
  • No waste!!!!

Thanks so much to The Art of Education for sharing all your tips!

Enjoy!

Do you have a glazing tip to share?

Related Posts Plugin for WordPress, Blogger...