
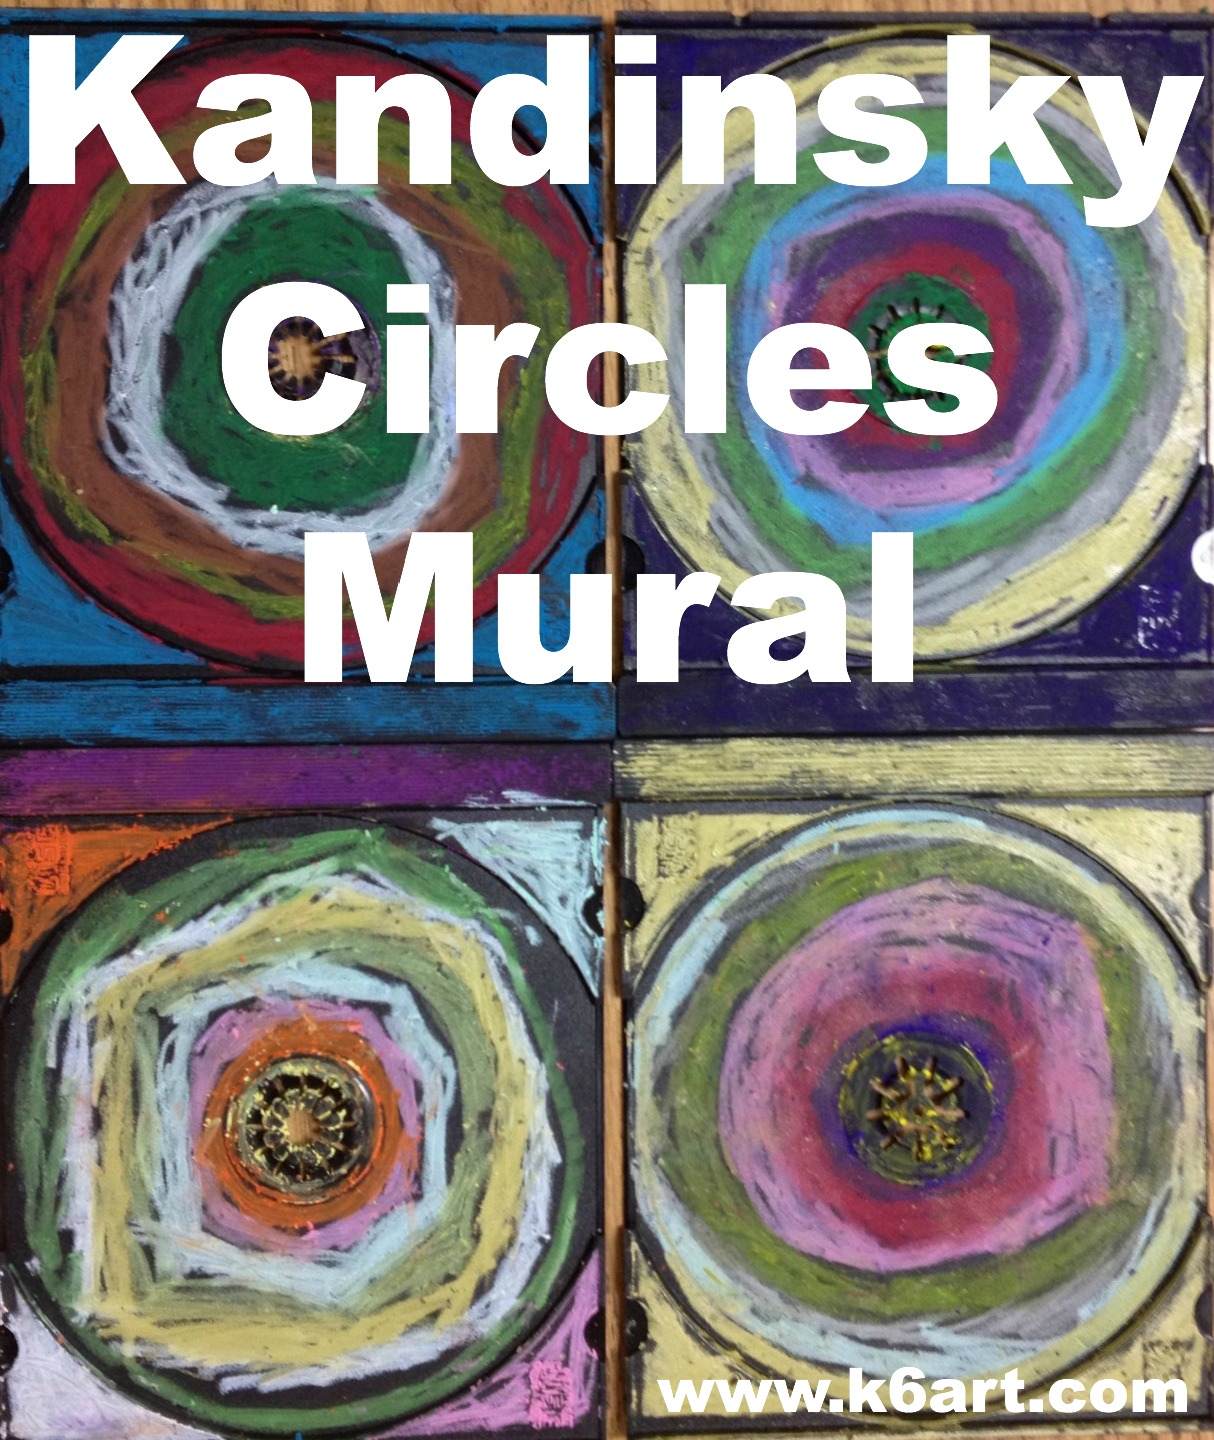
Here is a twist on the popular Wassily Kandinsky circles project: a group art mural made from recycled CD case trays. This project is perfect for Earth Day, but it does require advance planning.
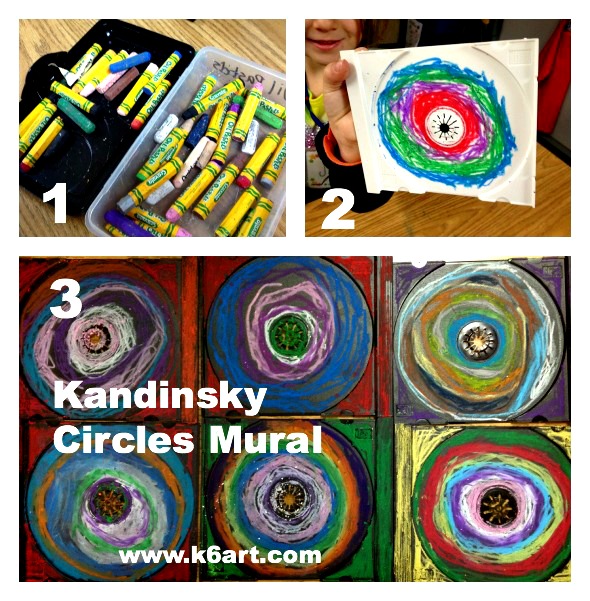
Kindergarteners use oil pastels to draw concentric circles in CD trays. Allow one 40 minute class, plus time to assemble mural.
Materials:
- CD Jewel Case insert trays, preferably donated, one per student
- Oil Pastels
(we used Crayola)
- glue and backing for mounting (see below)
Prep:
- Source CD jewel cases. I got 250 CD jewel cases via the ‘for sale – free’ section on Craigslist. Like many others, the donor had switched from CDs to MP3s and didn’t want the old CD cases going to a landfill. Score!!!! Free art materials AND trash kept out of the landfill.
- Pry off the colored plastic CD trays from the clear jewel cases (a parent volunteer helped me with this step). Save the clear cases for another project.
The Art Lesson:
I introduced Wassily Kandinsky to the kindergarteners. We looked at several of his famous artwork including Color Study: Squares with Concentric Circles. We noticed Kandinsky liked to make paintings with bright colors and shapes – not landscapes or paintings of people. Here are two brief YouTube videos I showed the kinders.
http://www.youtube.com/watch?v=Pa6WK6IWrkU
The Art Project
The art project couldn’t be easier:
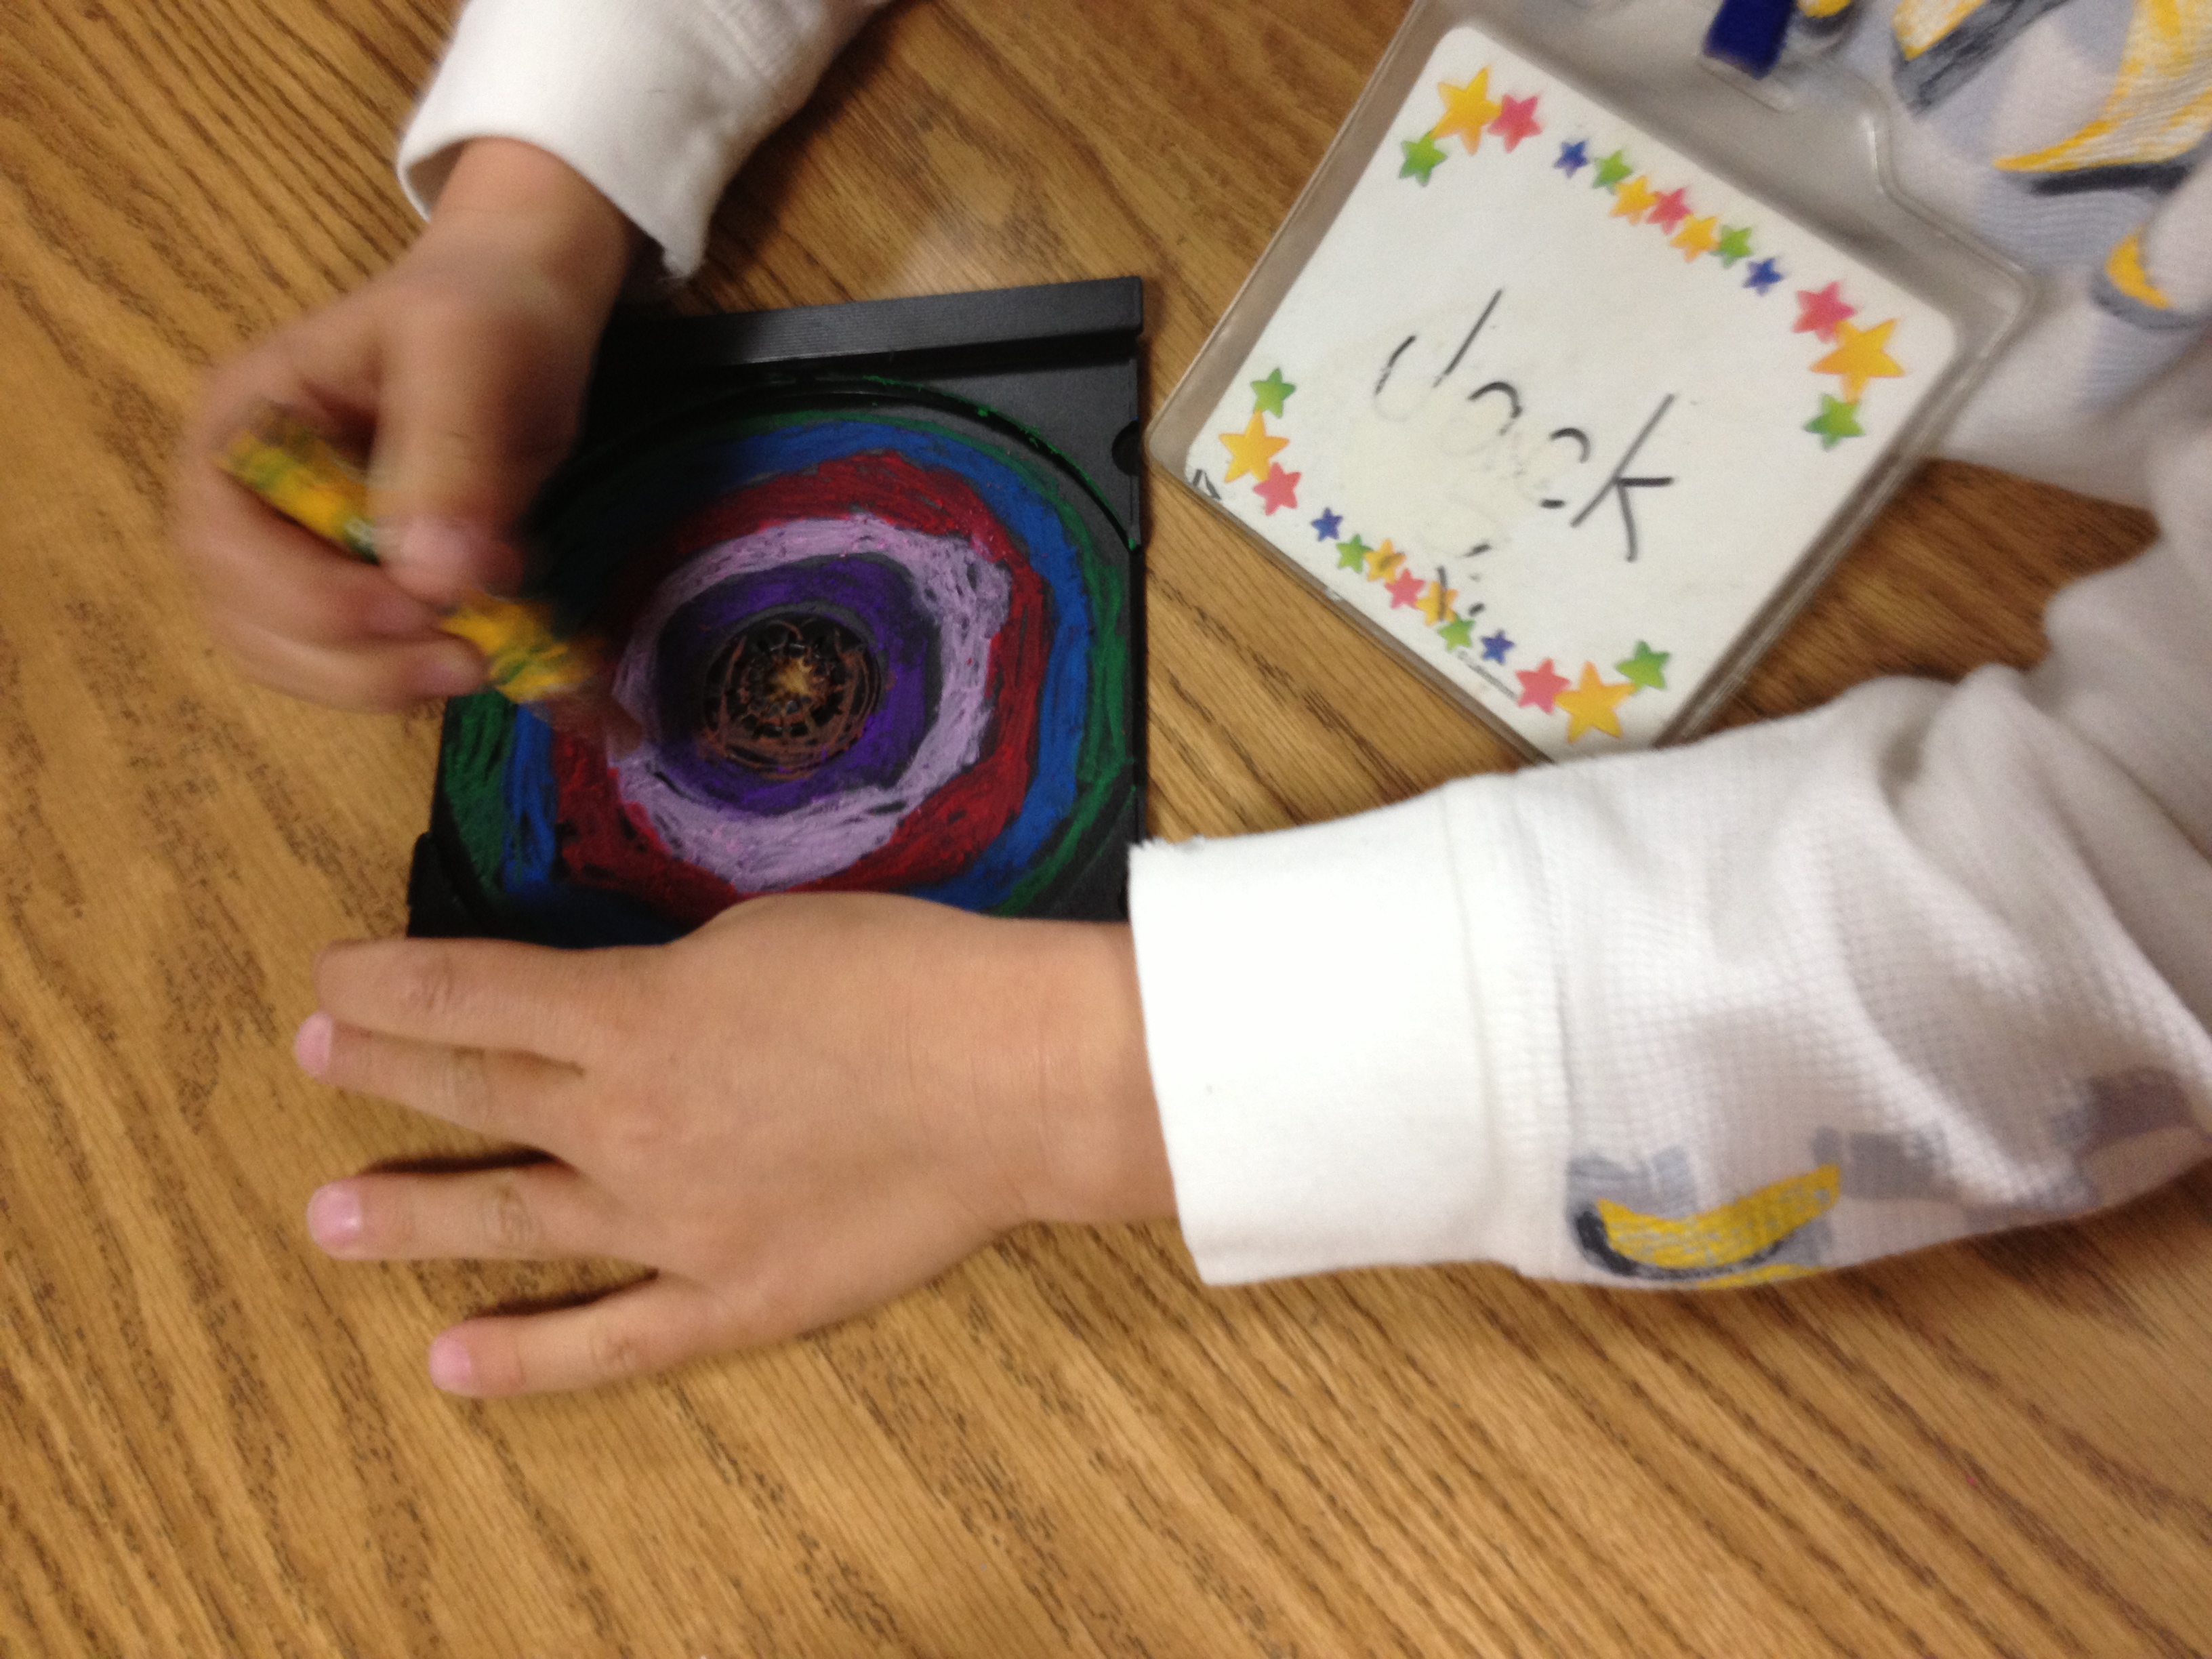
1. Pass out oil pastels and CD case insert trays. Flip trays so central ‘bump’ is up.
2. Students start by coloring a fat ring around the center bump. They trade colors with a neighbor, then color another concentric circle. Repeat until the entire plastic circle is colored. Finally, they color the edges.
3. Group completed insert trays and mount
So easy and fun! 100% of kindergarteners had success with this project.
Mounting:
I plan on using four glue dots per CD tray and mounting on foam core.
UPDATE: The glue dots failed immediately. I had better luck with strong spray glue (3M Super 77 Spray Adhesive – use it outside or in a well-ventilated area). One week after the art show, I was able to remove the plastic circles to hand back to the kids.
However, you may choose to use a different adhesive and base depending on the number of circles you have, and the length of time you want the mural on display. Because I have 45 circles and only want the mural on display for one week, I am creating a display that can be easily dissembled.
UPDATE: If you want to a more powerful adhesive for long-term mounting, try 3M Scotch Heavy Duty Mounting Tape. I created CD case mural using the mounting tape, and sent it off to a museum show. The mounting tape worked beautifully.
Another option: keep the plastic insert inside the jewel case. Color, then close and mount each case to display surface (I separated the insert tray from the jewel case because I needed the clear cases for another project).
This would be a great activity for an Earth Day event – each participant can make a square for the mural. The entire activity, including the videos and clean up, took only 40 minutes. I also see this as a fun art activity booth at an art fair or school carnival.
Enjoy!

Do you have a great resource for free art supplies?
Do you have a favorite recycled art project?
I really loved it! Thanks for sharing.
Glad you like it, Andy!I think students of all ages could have fun with this.