‘Tie-Dye’ Butterfly

It’s spring! Time for a butterfly art project. How about a lesson that delivers perfect symmetry, color and fun in only one 40-minute session?

Materials:

  • round (basket) coffee filter paper, white (available at the dollar store)
  • Sharpies
  • watercolor markers (we used Crayolas)
  • pencils
  • spray bottle of water

Instructions:

  1. flatten coffee filter
  2. fold filter in half.
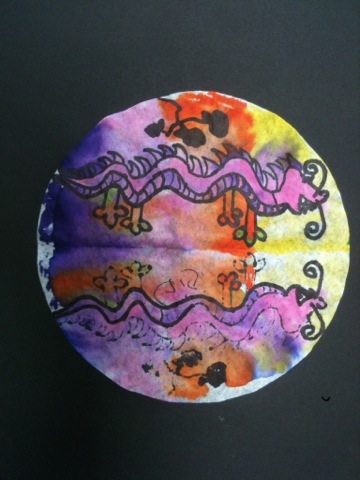
  3. use sharpie to draw 1/2 a butterfly on the folded paper.
  4. Trace over all the Sharpie lines again (this helps transfer ink to the other half of the filter paper).
  5. Open the paper. 
  6. Retrace all the faint lines with Sharpie.
  7. Re-fold the paper into its original position.
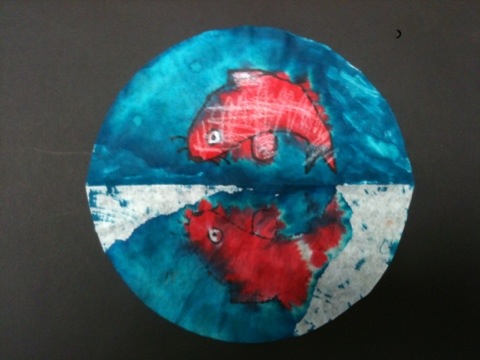
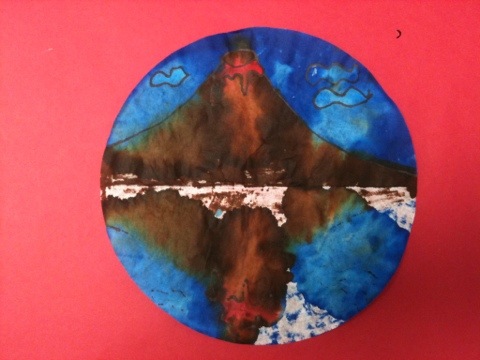
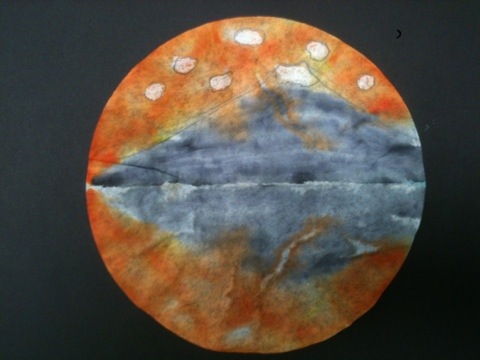
  8. Color the folded paper using watercolor markers. We used warm and neutral colors for the butterfly, and cool colors for a band around the edge of the paper.
  9. Place folded filter paper on drying rack, colored side facing up.
  10. Spray with water. I try to saturate the paper (note: put some newspaper on the floor under your drying rack to catch the colored drips).
  11. Let dry before removing from rack.

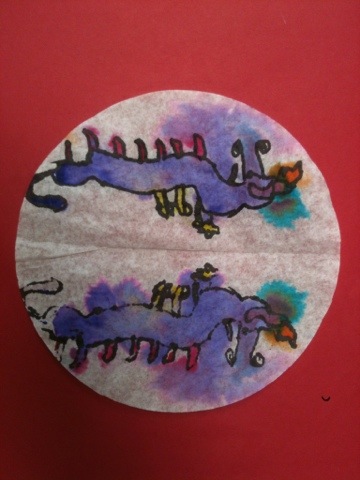
I love the faux tie-dye effect created by the diffused color. I also love the round format. Bonus: coffee filters are available at the dollar store! So this project costs a couple of cents.

Second graders use Sharpie and crayola marker to make symmetric butterflies. Allow one 40 minute session.

Inspiration for the Sharpie/coffee filter/watercolor marker method goes to Kati Oetken at ARTASTIC!

More coffee filter art experiments on this post.

Japanese Design Surprise

Don’t you just love a beautiful surprise? The third grade made Japanese fans from this post on ARTASTIC! . So much fun! After they dried, I opened the folded paper and discovered these:

20120412-164051.jpg

20120412-164232.jpg

20120412-164248.jpg

20120412-164302.jpg

20120412-164331.jpg

This happy accident occurred because the students
1) completely colored 1/2 the round with watercolor marker
2) probably sprayed a lot of water on the folded filter paper (I let the kids spray their own papers. Not only that – I had a 3rd grader supervise the spraying process!)
3) used white crayon selectively as a resist for clouds, snow and fish scales
4) used new (wet!) sharpies for the black lines

I’m thinking symmetry or reflection project for next year.

Check out all the instructions on Kati Oetken’s ARTASTIC! Blog.

Have you had a beautiful surprise result? Do tell!

Thiebaud “Cakes” Mural (and more!)

This is a universal truth:  kids love dessert.  Second grade recently completed their Wayne Thiebaud group art mural based on Thiebaud’s famous artwork, “Cakes”.

We began with my Wayne Thiebaud Powerpoint. We discussed repetition of simple shapes, variety, use of thick paint, horizon line and shadow. This year we also discussed halation – the vibrant lines of color Thiebaud uses to outline his work. If you are unfamiliar with halation read this excellent Thiebaud post on Art for Small Hands.

Next we watched a great 7-minute long Thiebaud video from CBS this Morning.  Here is the link.

Materials:

  • Drawing paper, 9″x12″
  • pencil and eraser
  • oil pastels
  • scissors
  • glue stick
  • bulletin board paper (allow 5 foot length for 22 students)
  • tempera

Students drew the basic cylinder cake first in pencil, then in oil pastel. We outlined in bright colors.  Because we were making a mural, for consistency students added purple shadows on the right side of their art.

The kids had a fabulous time ‘decorating’ their cakes, again with oil pastel. We had a ‘no words’ rule, but numbers were OK.

Students outline their cakes with vibrant colors

Students cut out their cakes and covered the backs with glue stick.  I arranged the cakes on painted bulletin board roll paper.

Assembling the mural

I made two murals: a 9 foot mural for 45 cakes, and a 5 foot mural for 22 cakes.  Next year I will make one 5-foot mural per class as the big one was beautiful but too unwieldy.

After the art show I will cut apart the mural. The second graders will trim and mount their cakes onto 12″x18″construction paper.

The perfect jewelry for any Thiebaud lesson 🙂

Have fun!

P.S. Want to try a digital Thibaud art activity? Try the National Gallery of Art’s

Thiebaud ‘cake maker’ interactive

UPDATE: NEW! Click here for my new lesson, Wayne Thiebaud Geometric Desserts. New video and Common Core connections.


Do the Mini! Op-Art Line Shading Lesson on a Smaller Scale

do the mini! op art shading

This Bridget Riley-inspired colored pencil op-art line shading lesson is extremely popular. I first saw it on Art With Mr. E., then on Teach Kids Art, and finally a post on Artisan Des Arts with a teaching video (wow!). If you are unfamiliar with this project please start out by visiting these excellent blog posts.

My small contribution to all this awesomeness is …small. Last year I tried this project with 5th grade using 9″x12″ white paper. Well, it took a long time…too long. The full size project took at least 4 classes and many students lost interest.

I decided to try a smaller format. At Mr. E’s suggestion I went down to a 6″x6″ square. SUCCESS! The 4th graders were able to complete the 6″x6″ project in 2-3 40-minute sessions. They were very proud of their artworks.

For detailed instructions, please view the teaching video in the link above. However, for the mini 6″ version of this project, start with 4 dots on the wavy line

Give it a try in any format.

More Bridget Riley op-art resources

Bridget Riley 6 Op Art Shading project

Enjoy!

Related Posts Plugin for WordPress, Blogger...